Ellery Designs

Decor, Design & DIY

  • Email
  • Facebook
  • Instagram
  • Pinterest
  • Home
  • Shop
  • Blog
  • Home Projects
    • New Home: Before + Afters
    • New Home: Organized Farmhouse Pantry
    • New Home: Linen Closet Makeover
    • New Home: Black + White Stripes Mantel Refresh
    • New Home: Stenciled Tile Fireplace Makeover
    • New Home: Cozy Glam Master Bedroom
    • Townhome Kitchen Remodel
    • Townhome DIY Pallet Wall
    • Townhome Faux Fireplace + Mantel Decor
    • Townhome Finished Basement
  • Party Ideas
    • Chevron Halloween Party
    • Curious George Party
    • Disney Princess Party
    • Elmo Party
    • Merry & Bright Party
    • Monster Bash
    • Monster High Party
    • Nautical Baby Girl Shower
    • Rainbow Dash Party
    • Rainbow Party
    • Watermelon Party
    • XOXO Valentine’s Party
  • e-design
  • About
    • Michelle + Ryan
    • Contact/Disclosure

August 23, 2016 by: Michelle

Rustic Chic DIY: Stain and Distress like a Pro

Hi! Nikki here with The Riojas House. As a lover of all things wood and farmhouse, it’s hard not to buy every rustic or chippy piece of furniture I pass by. But occasionally, I come across something that speaks to me, and it inevitably ends up in the back of our truck and into our home. It happened recently when doing a little thrift shopping one weekend. The perfect entryway bench was just sitting there, waiting for me to snap it up. Unfortunately, when I made my way through the crowd, I saw a little yellow note taped to the top with the words no thrifter wants to read: “For Display Only”.

Well, thank goodness for smart phones because with a photo and a quick measure, plan B was in full effect.

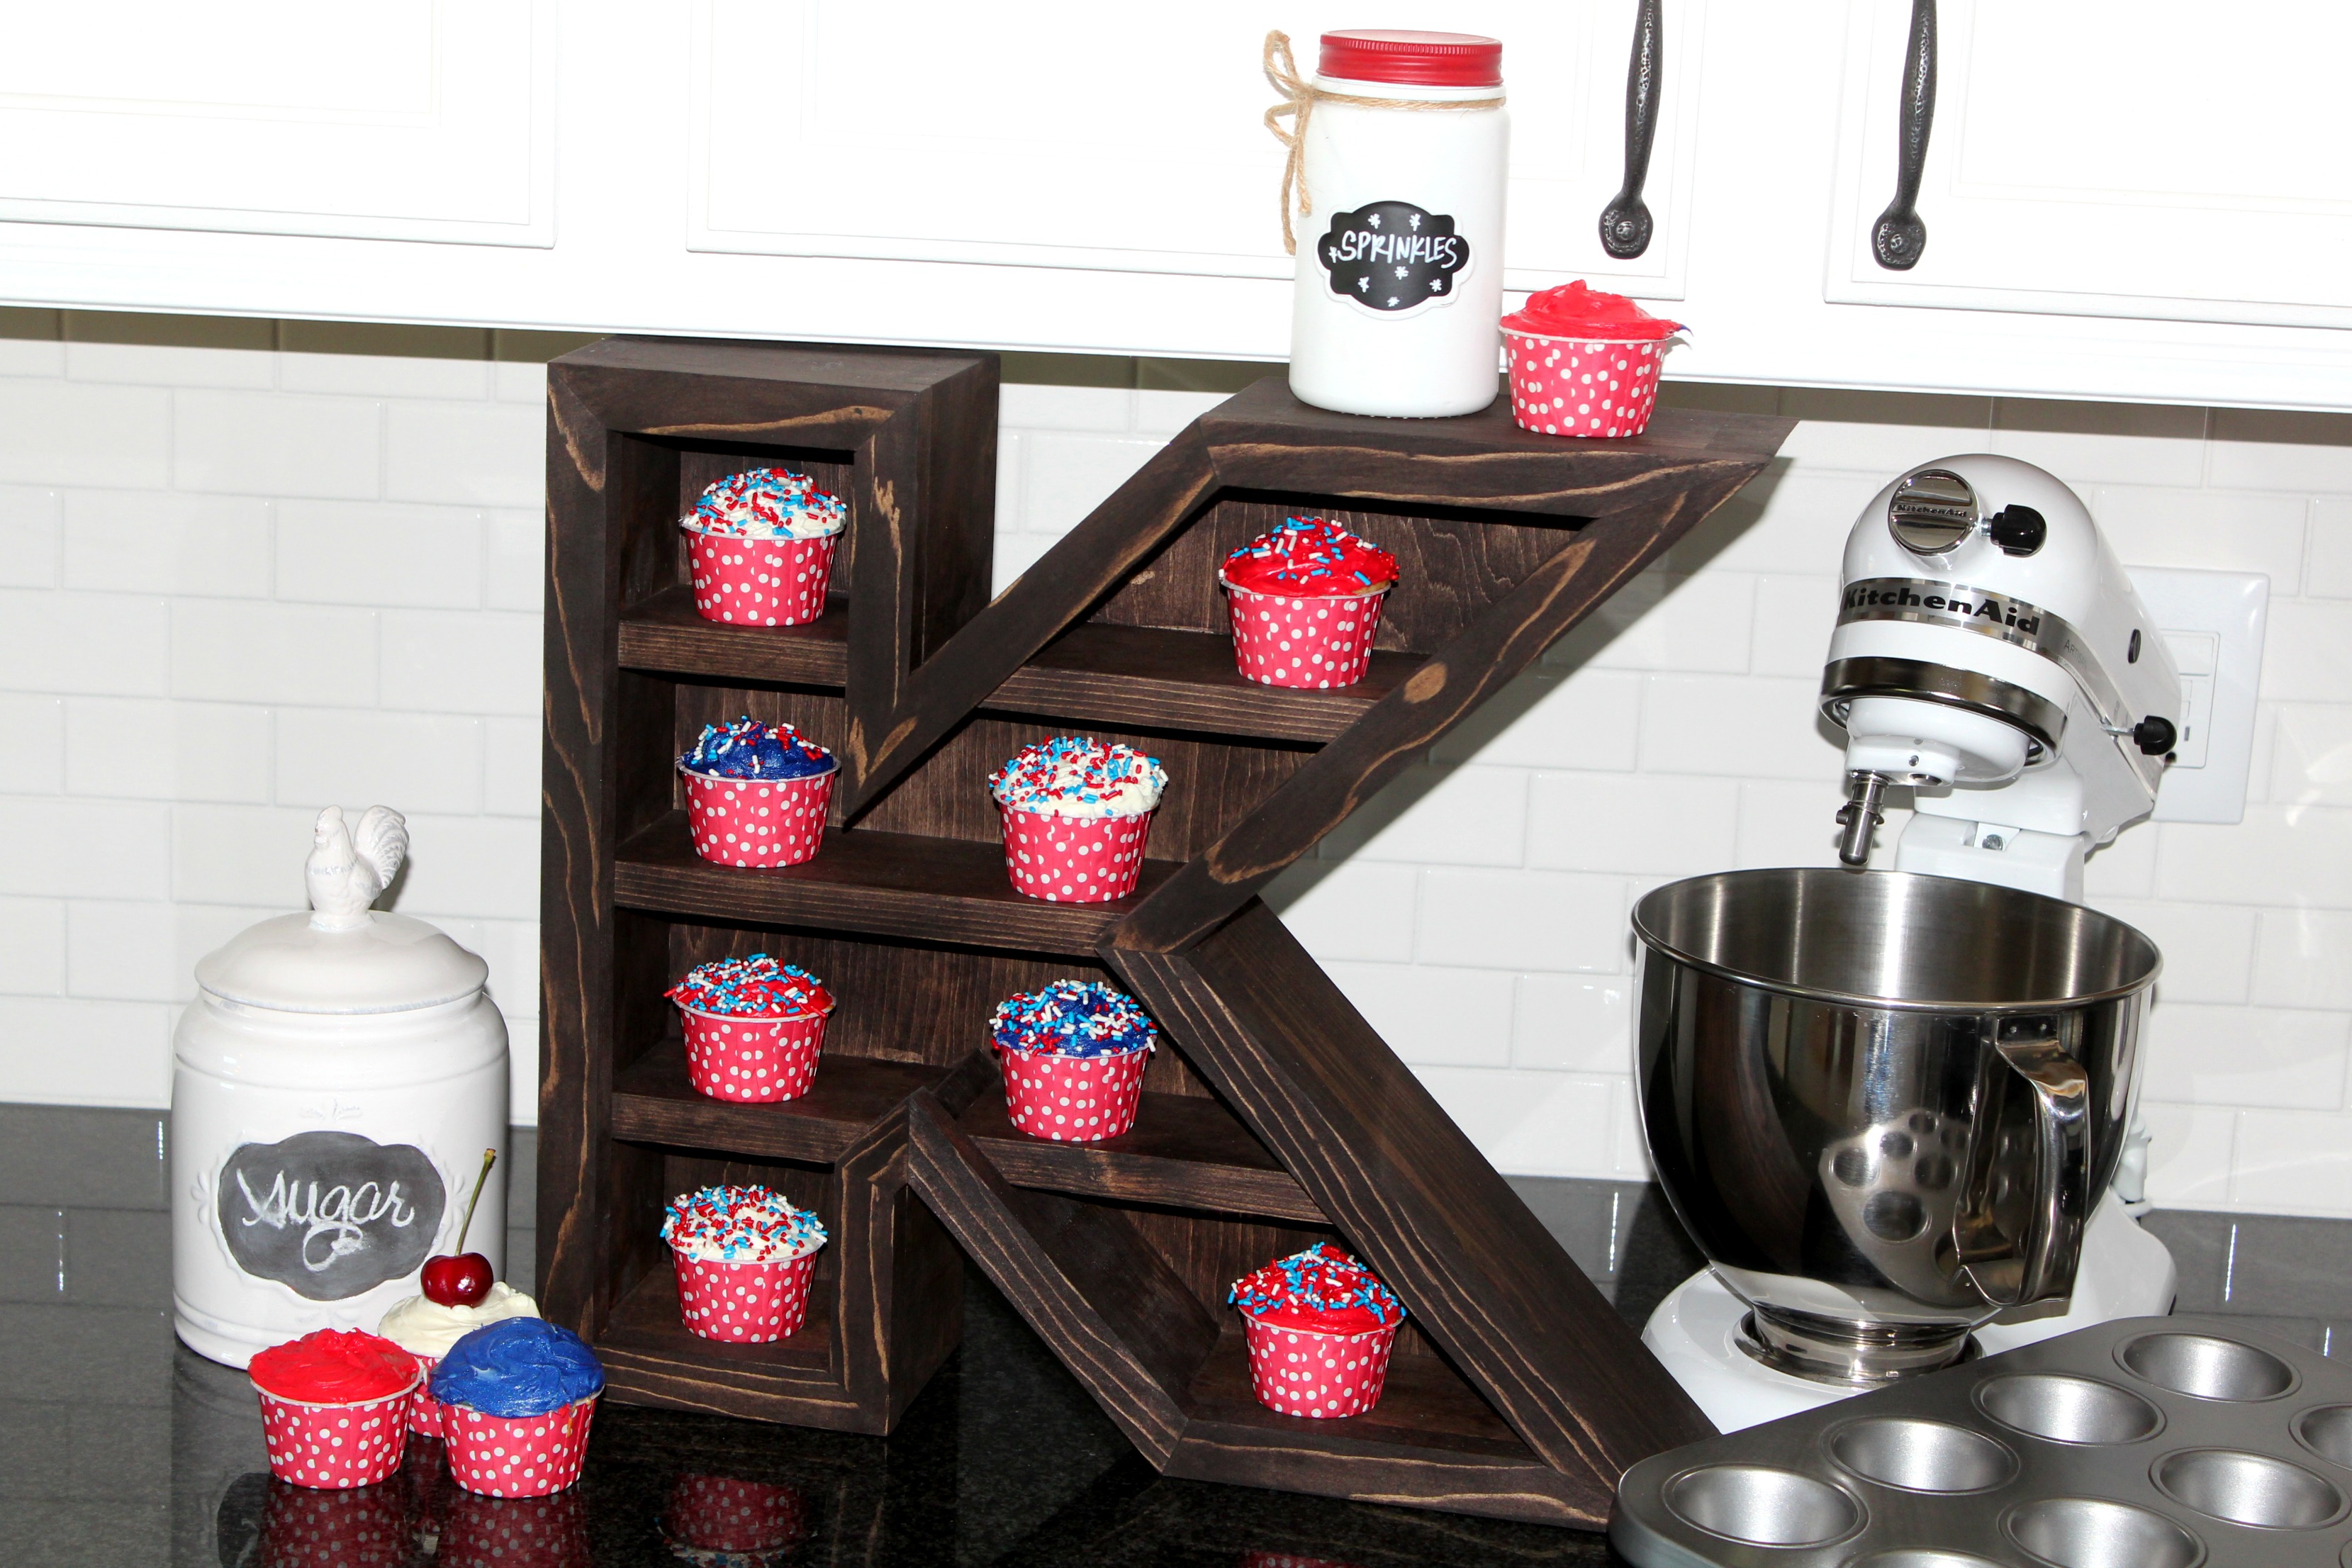
For those who enjoy a good DIY project, this one is a little bit MacGuyver, and little bit Joanna Gaines, and every bit of amazing when it’s finished!

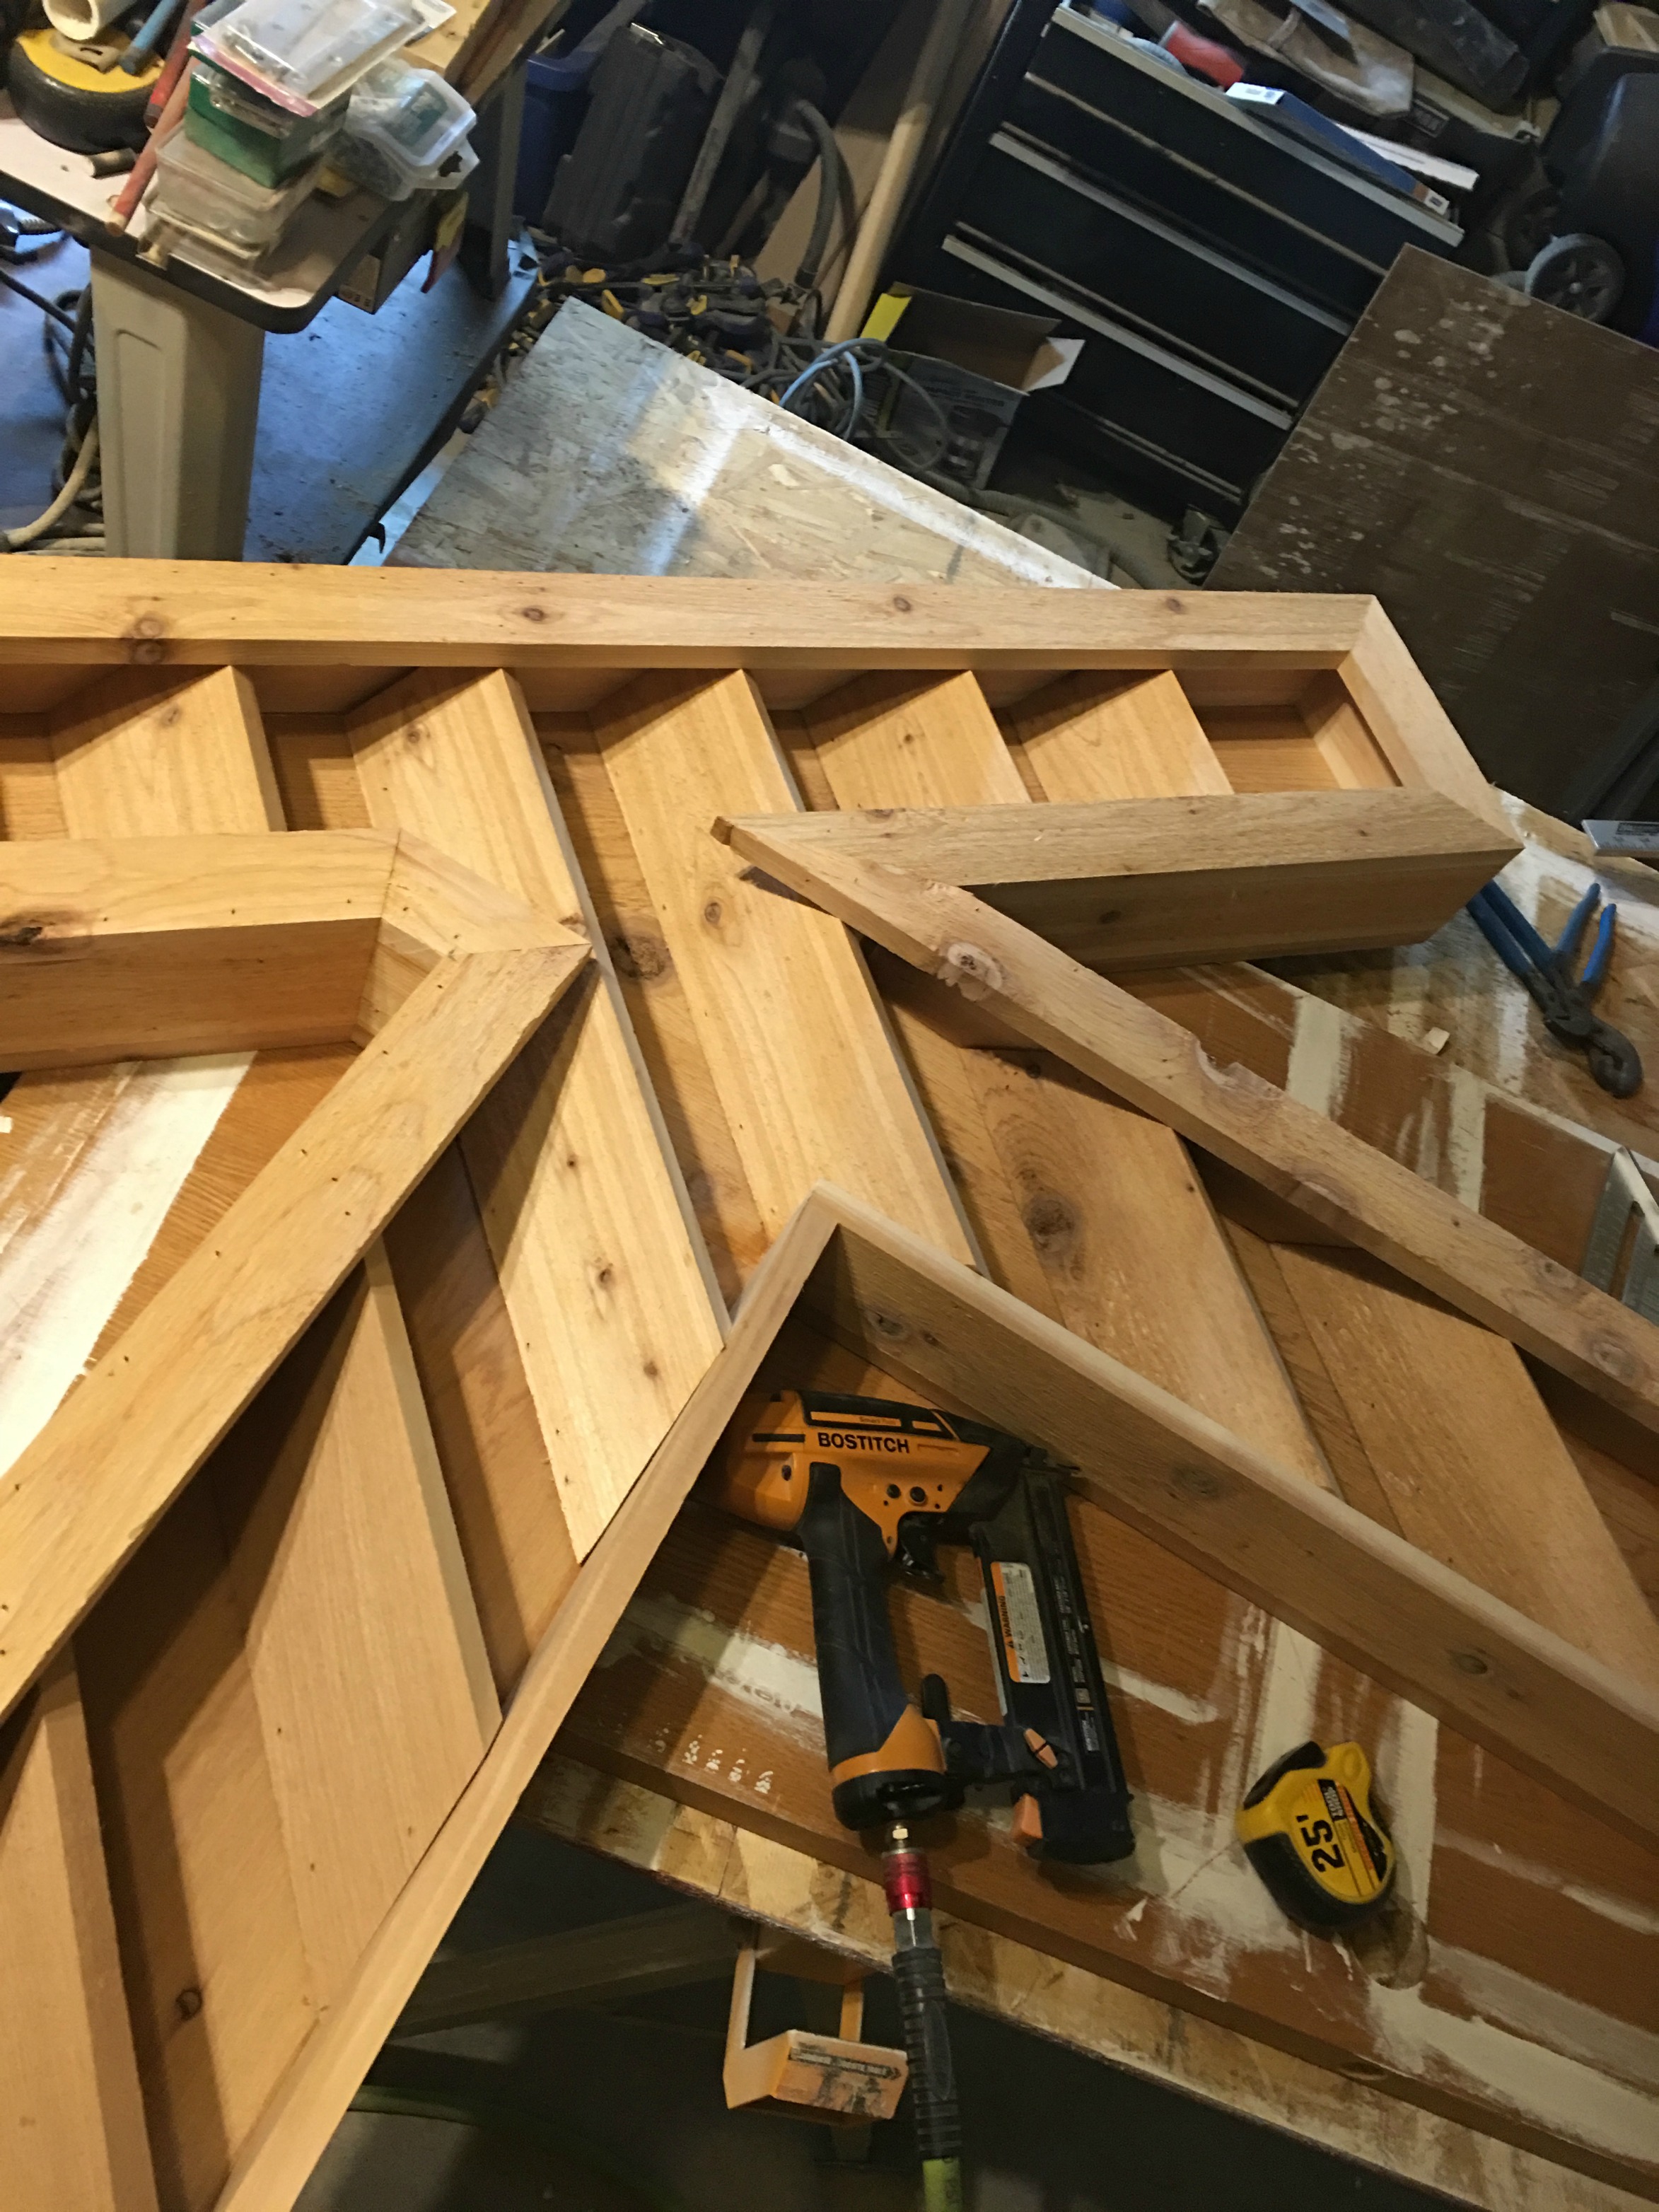
While not everyone has access to a skilled carpenter, I am fortunate enough to have a local  craftsman who is amazingly talented and can build just about anything. Once he looked at the photo of the un-buyable bench and jotted down the measurements, he was off and running.

Tip: Check your local farmers markets and swap meets if you’re looking for a woodworker or carpenter–many times you’ll find talented folks who you can hire by the job.

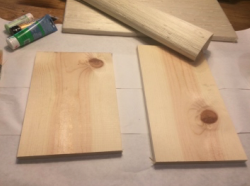
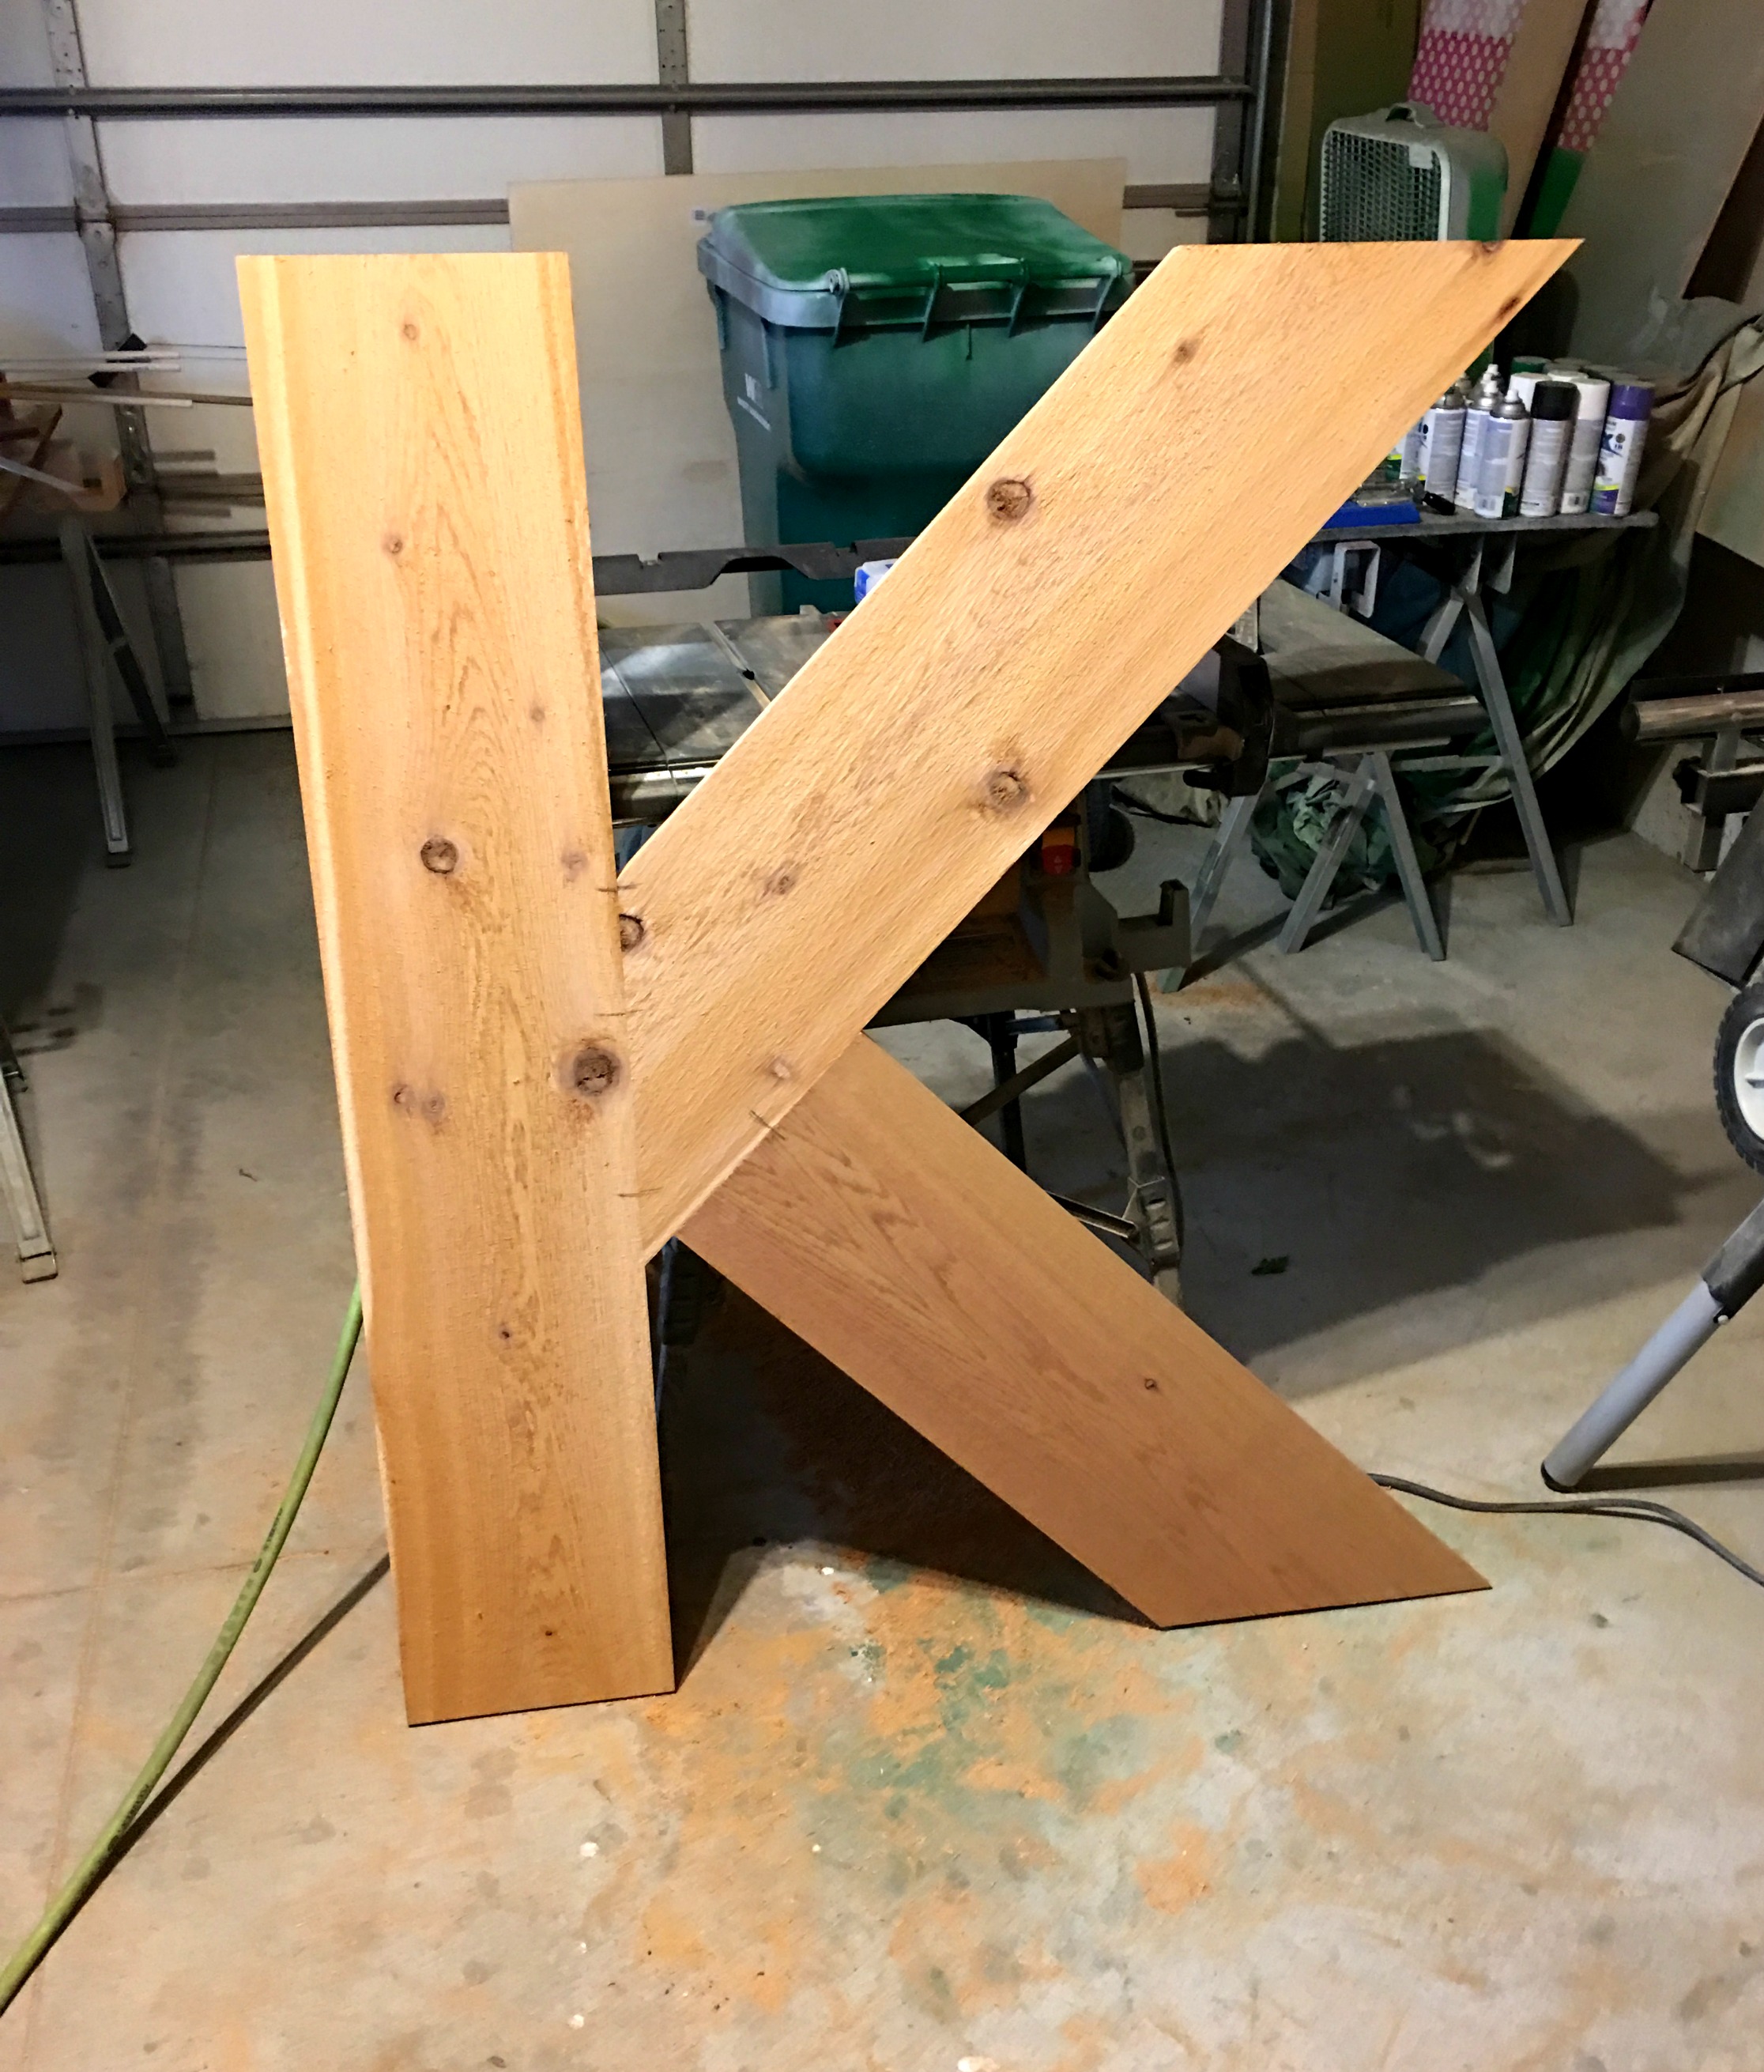
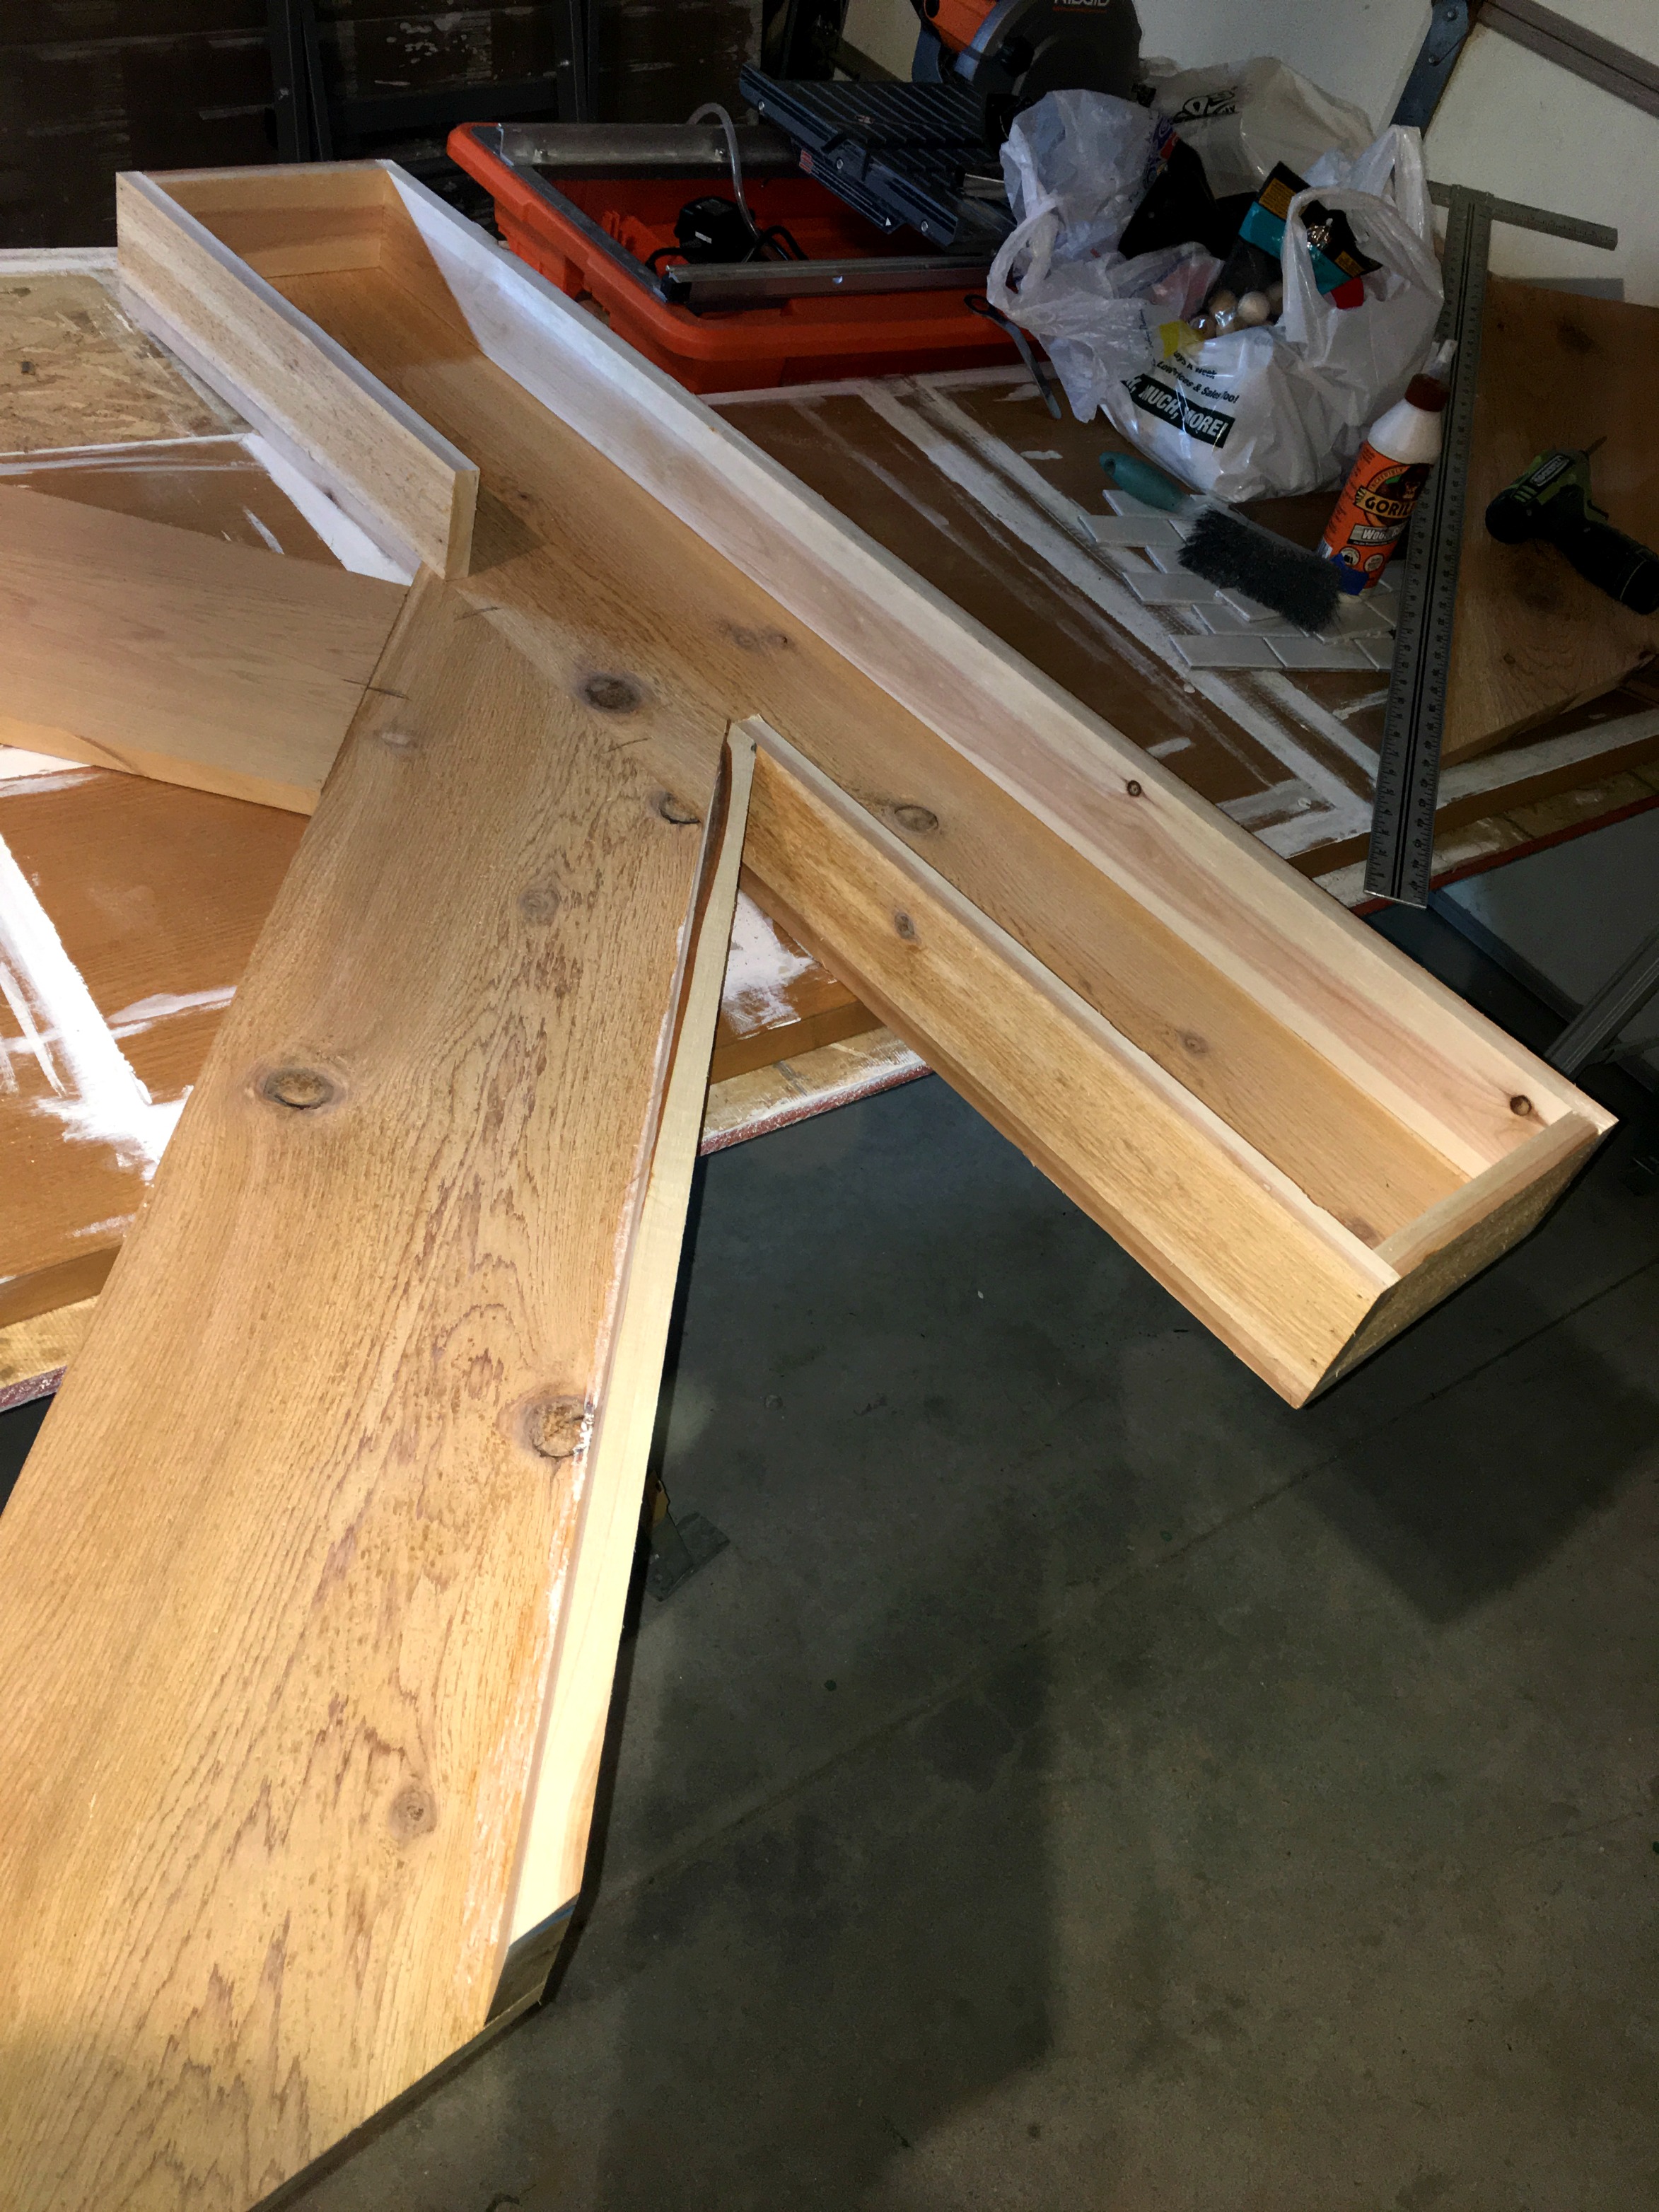
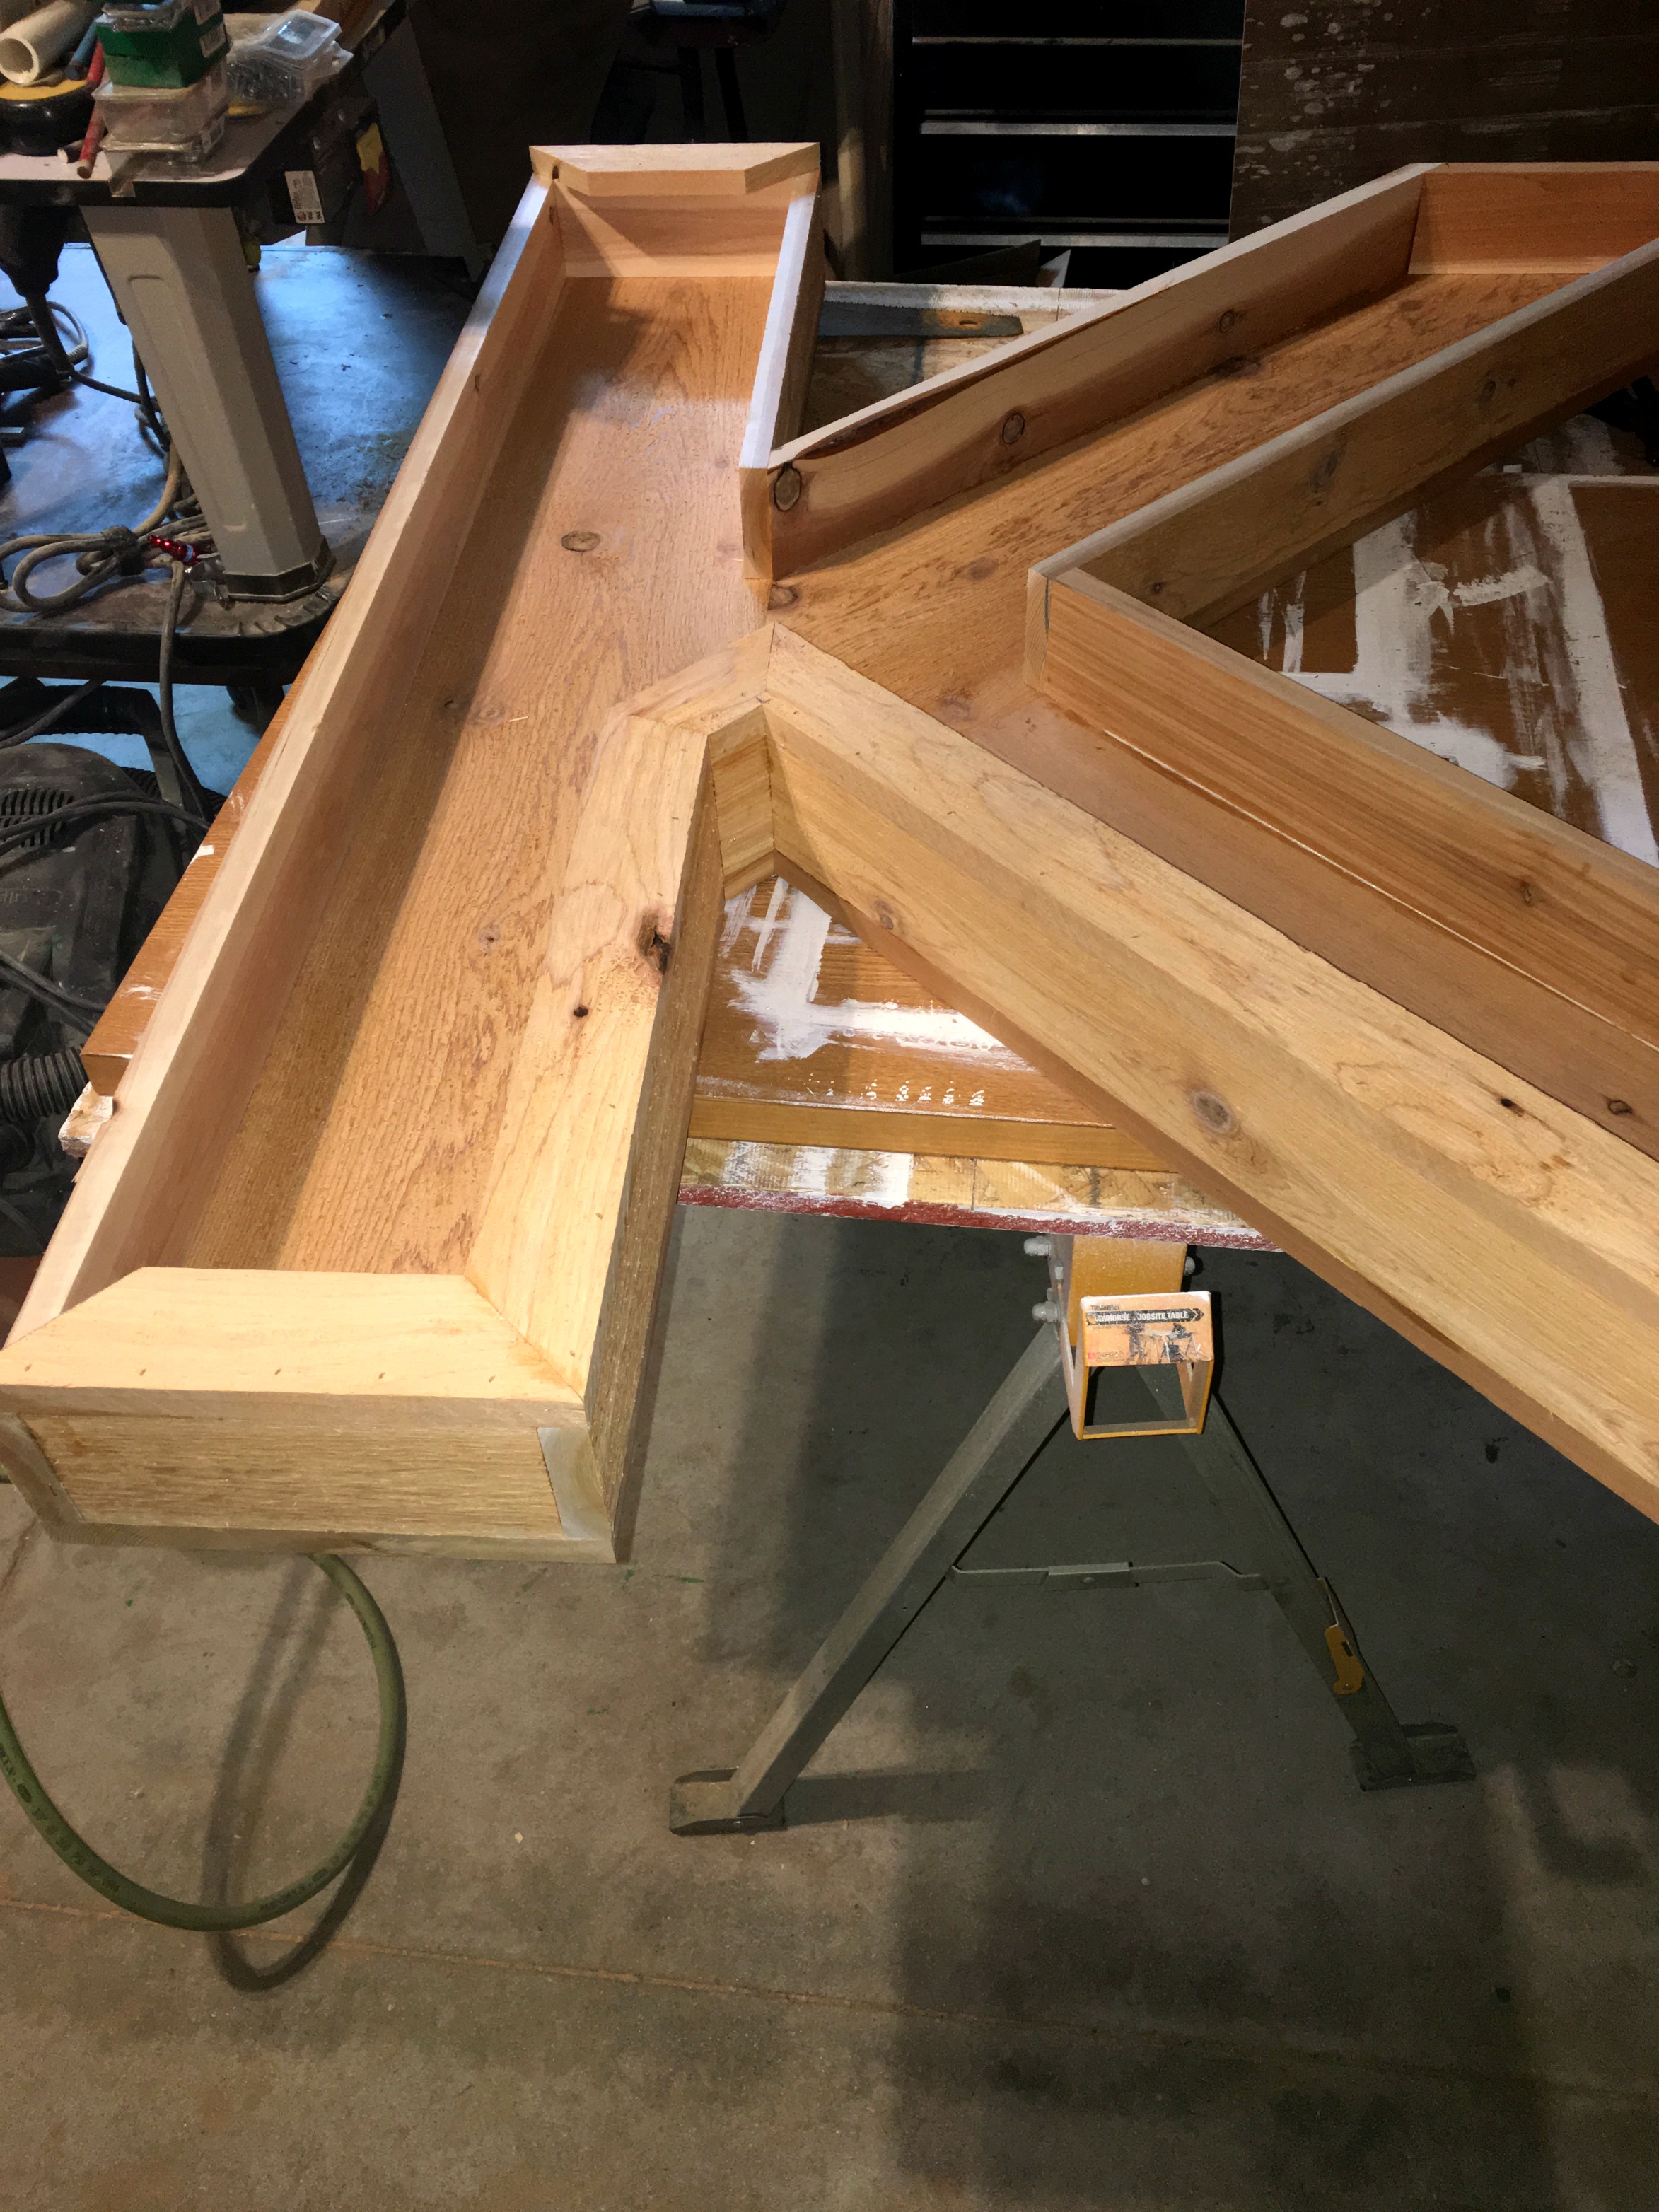
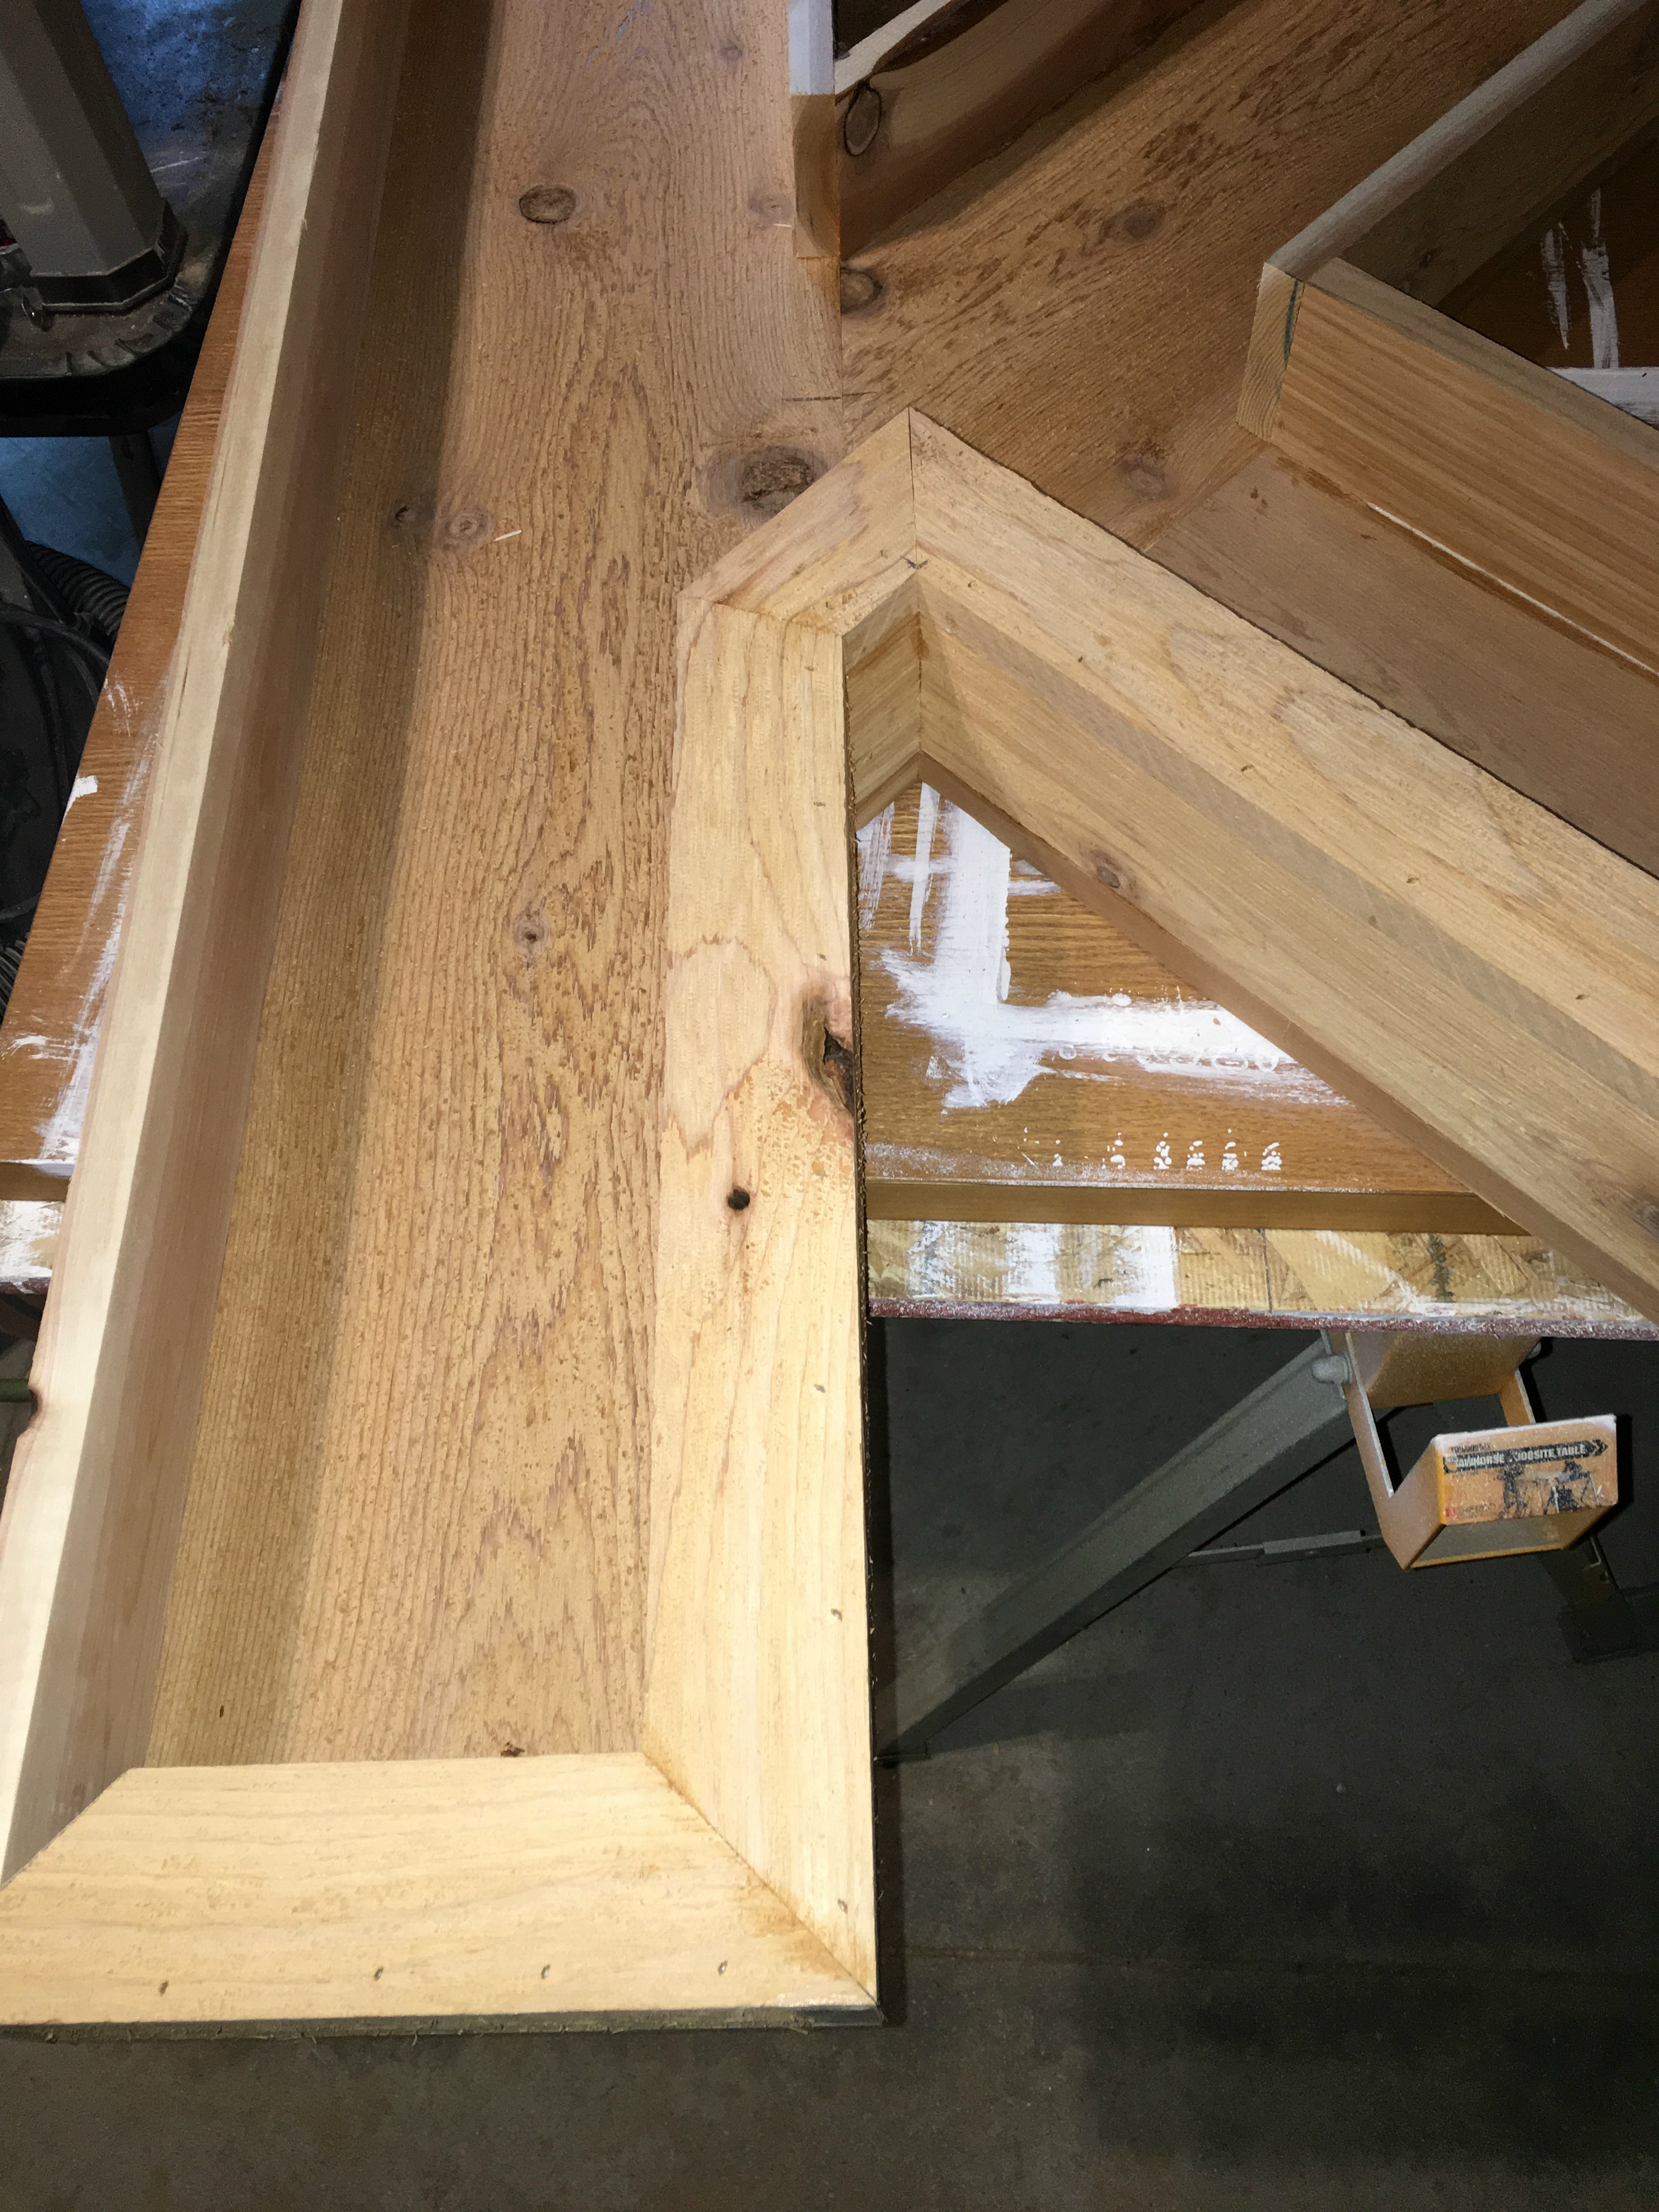
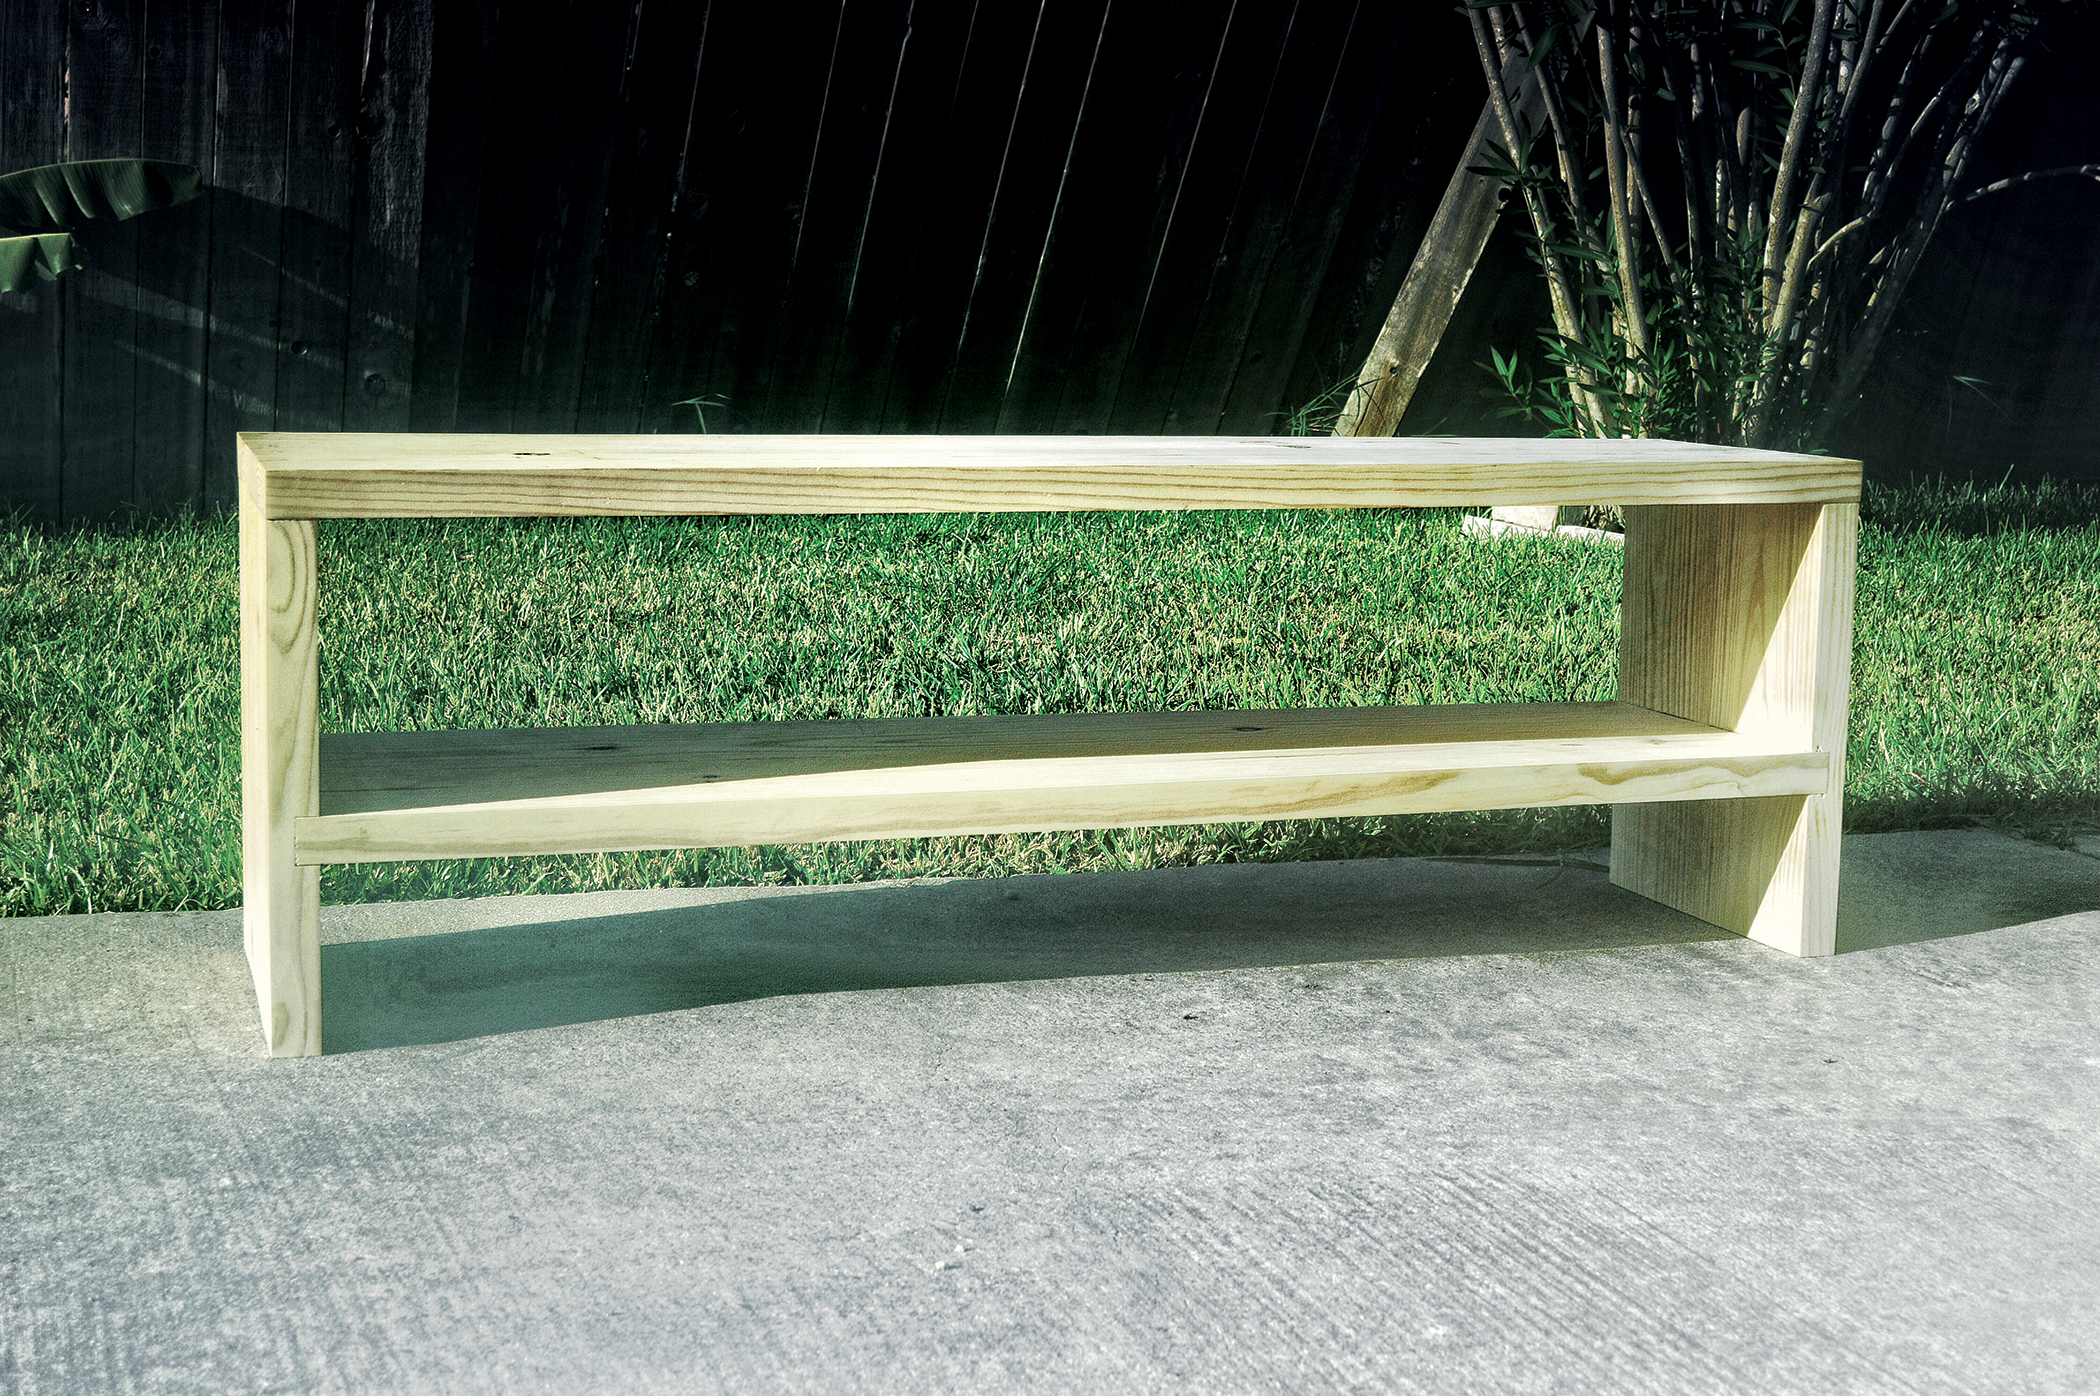
I knew I wanted to finish out the bench myself once it was constructed, so I asked my carpenter to build and sand it, but leave it unfinished. This way I could add my touches and save a little money too. This piece was built out of pine and was fairly simple in its design. I wanted an area made for baskets or shoes, so the shelf became the perfect catch-all.

Once I had it in our garage, the fun part really started. Now, whether it’s a bench, or a crate, or any kind of unfinished wooden piece, these instructions will work. I’m just using the bench as my example.

Rustic Chic DIY: Stain and Distress like a Pro The Riojas House for ElleryDesigns.com

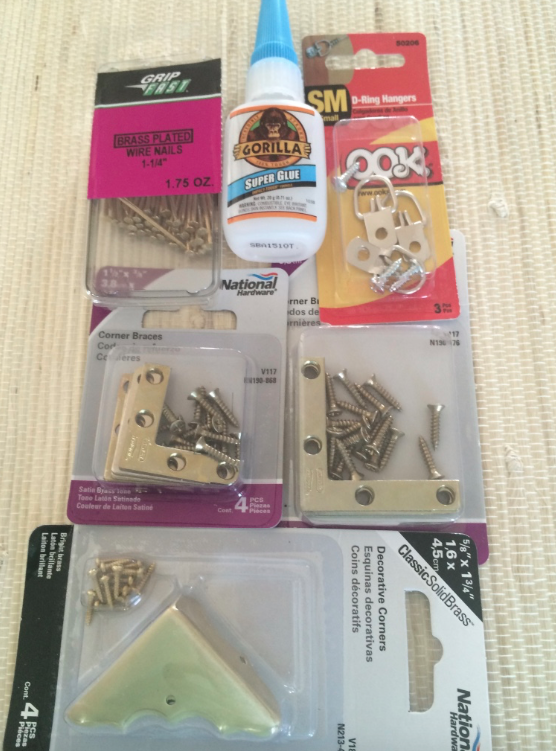
Before you get started, you’ll want to take a trip to your local hardware store and pick up all of your supplies.

What you’ll need:

  • Unfinished wooden tray (in any size you prefer)
  • Sandpaper (180 and 220 grit)
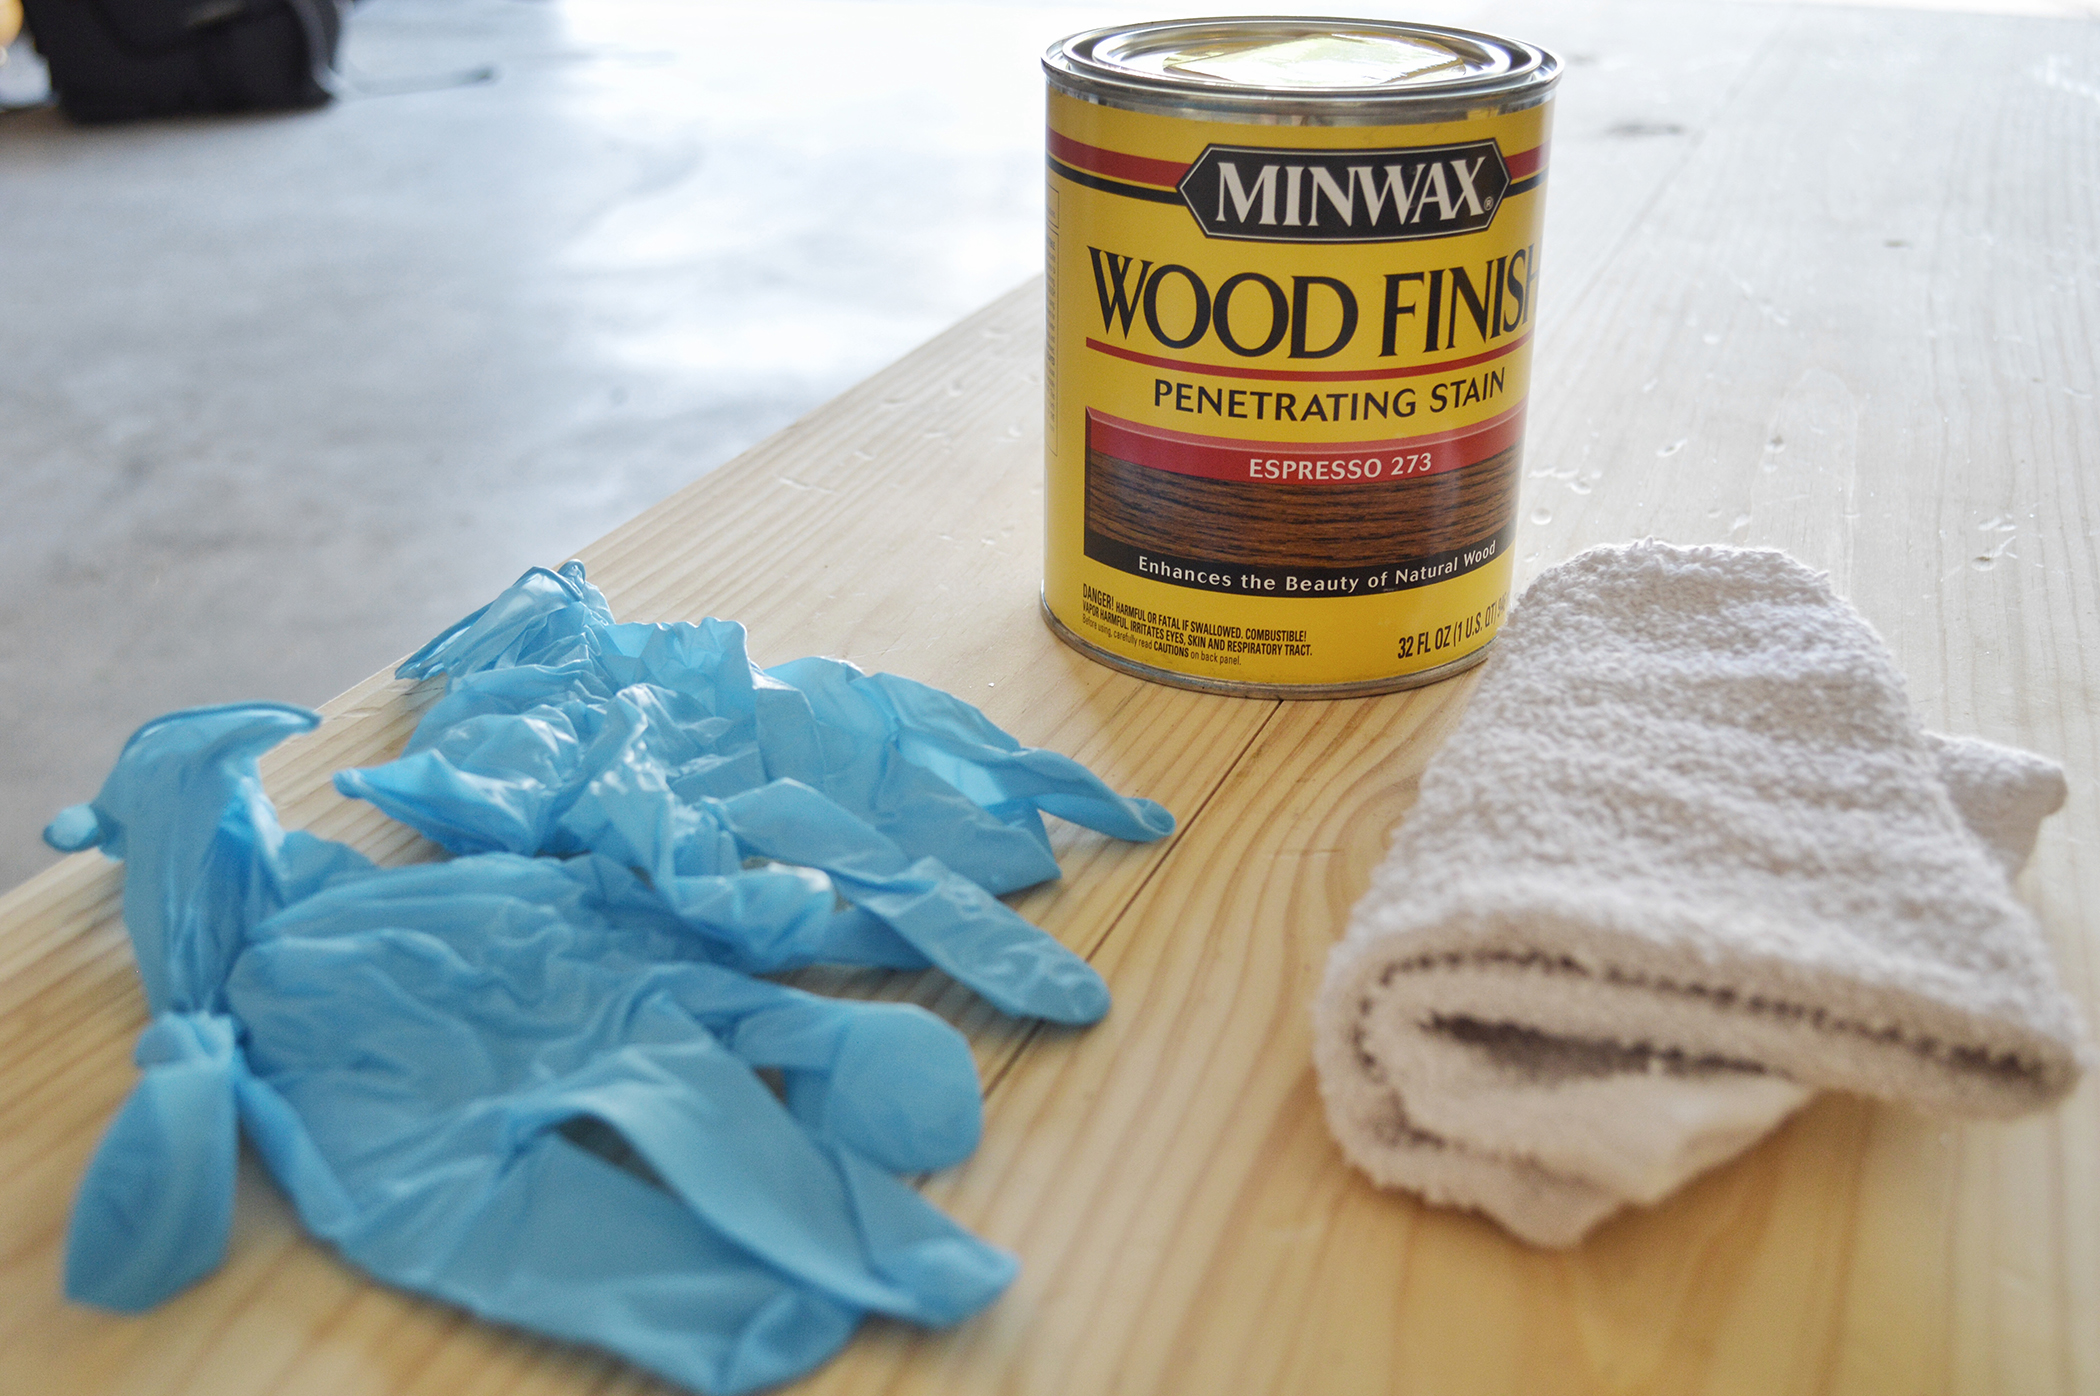
  • A clean rag (to apply the stain)
  • Rubber gloves
  • Wood stain (color of your choosing)
  • Soft paint brush (1-2” works best, for finishing with the satin poly)
  • Satin polyurethane

Rustic Chic DIY: Stain and Distress like a Pro The Riojas House for ElleryDesigns.com

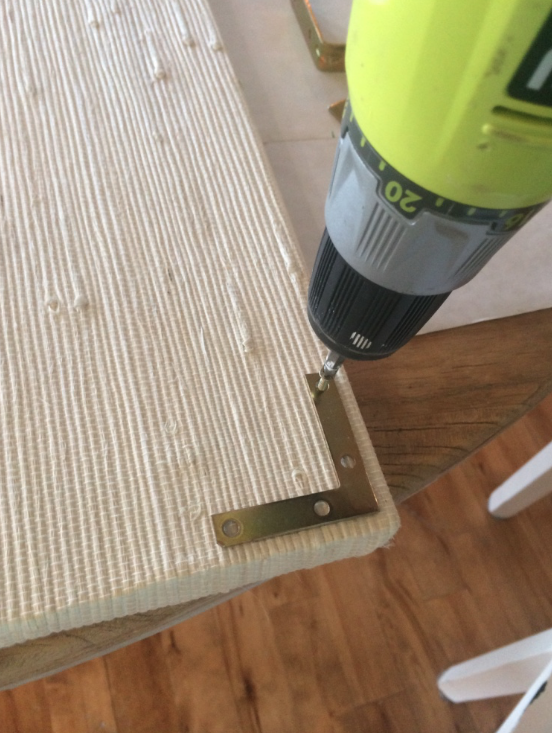
  1. Get your wooden piece ready to go by making sure it’s sanded well and free of any dust or dirt.
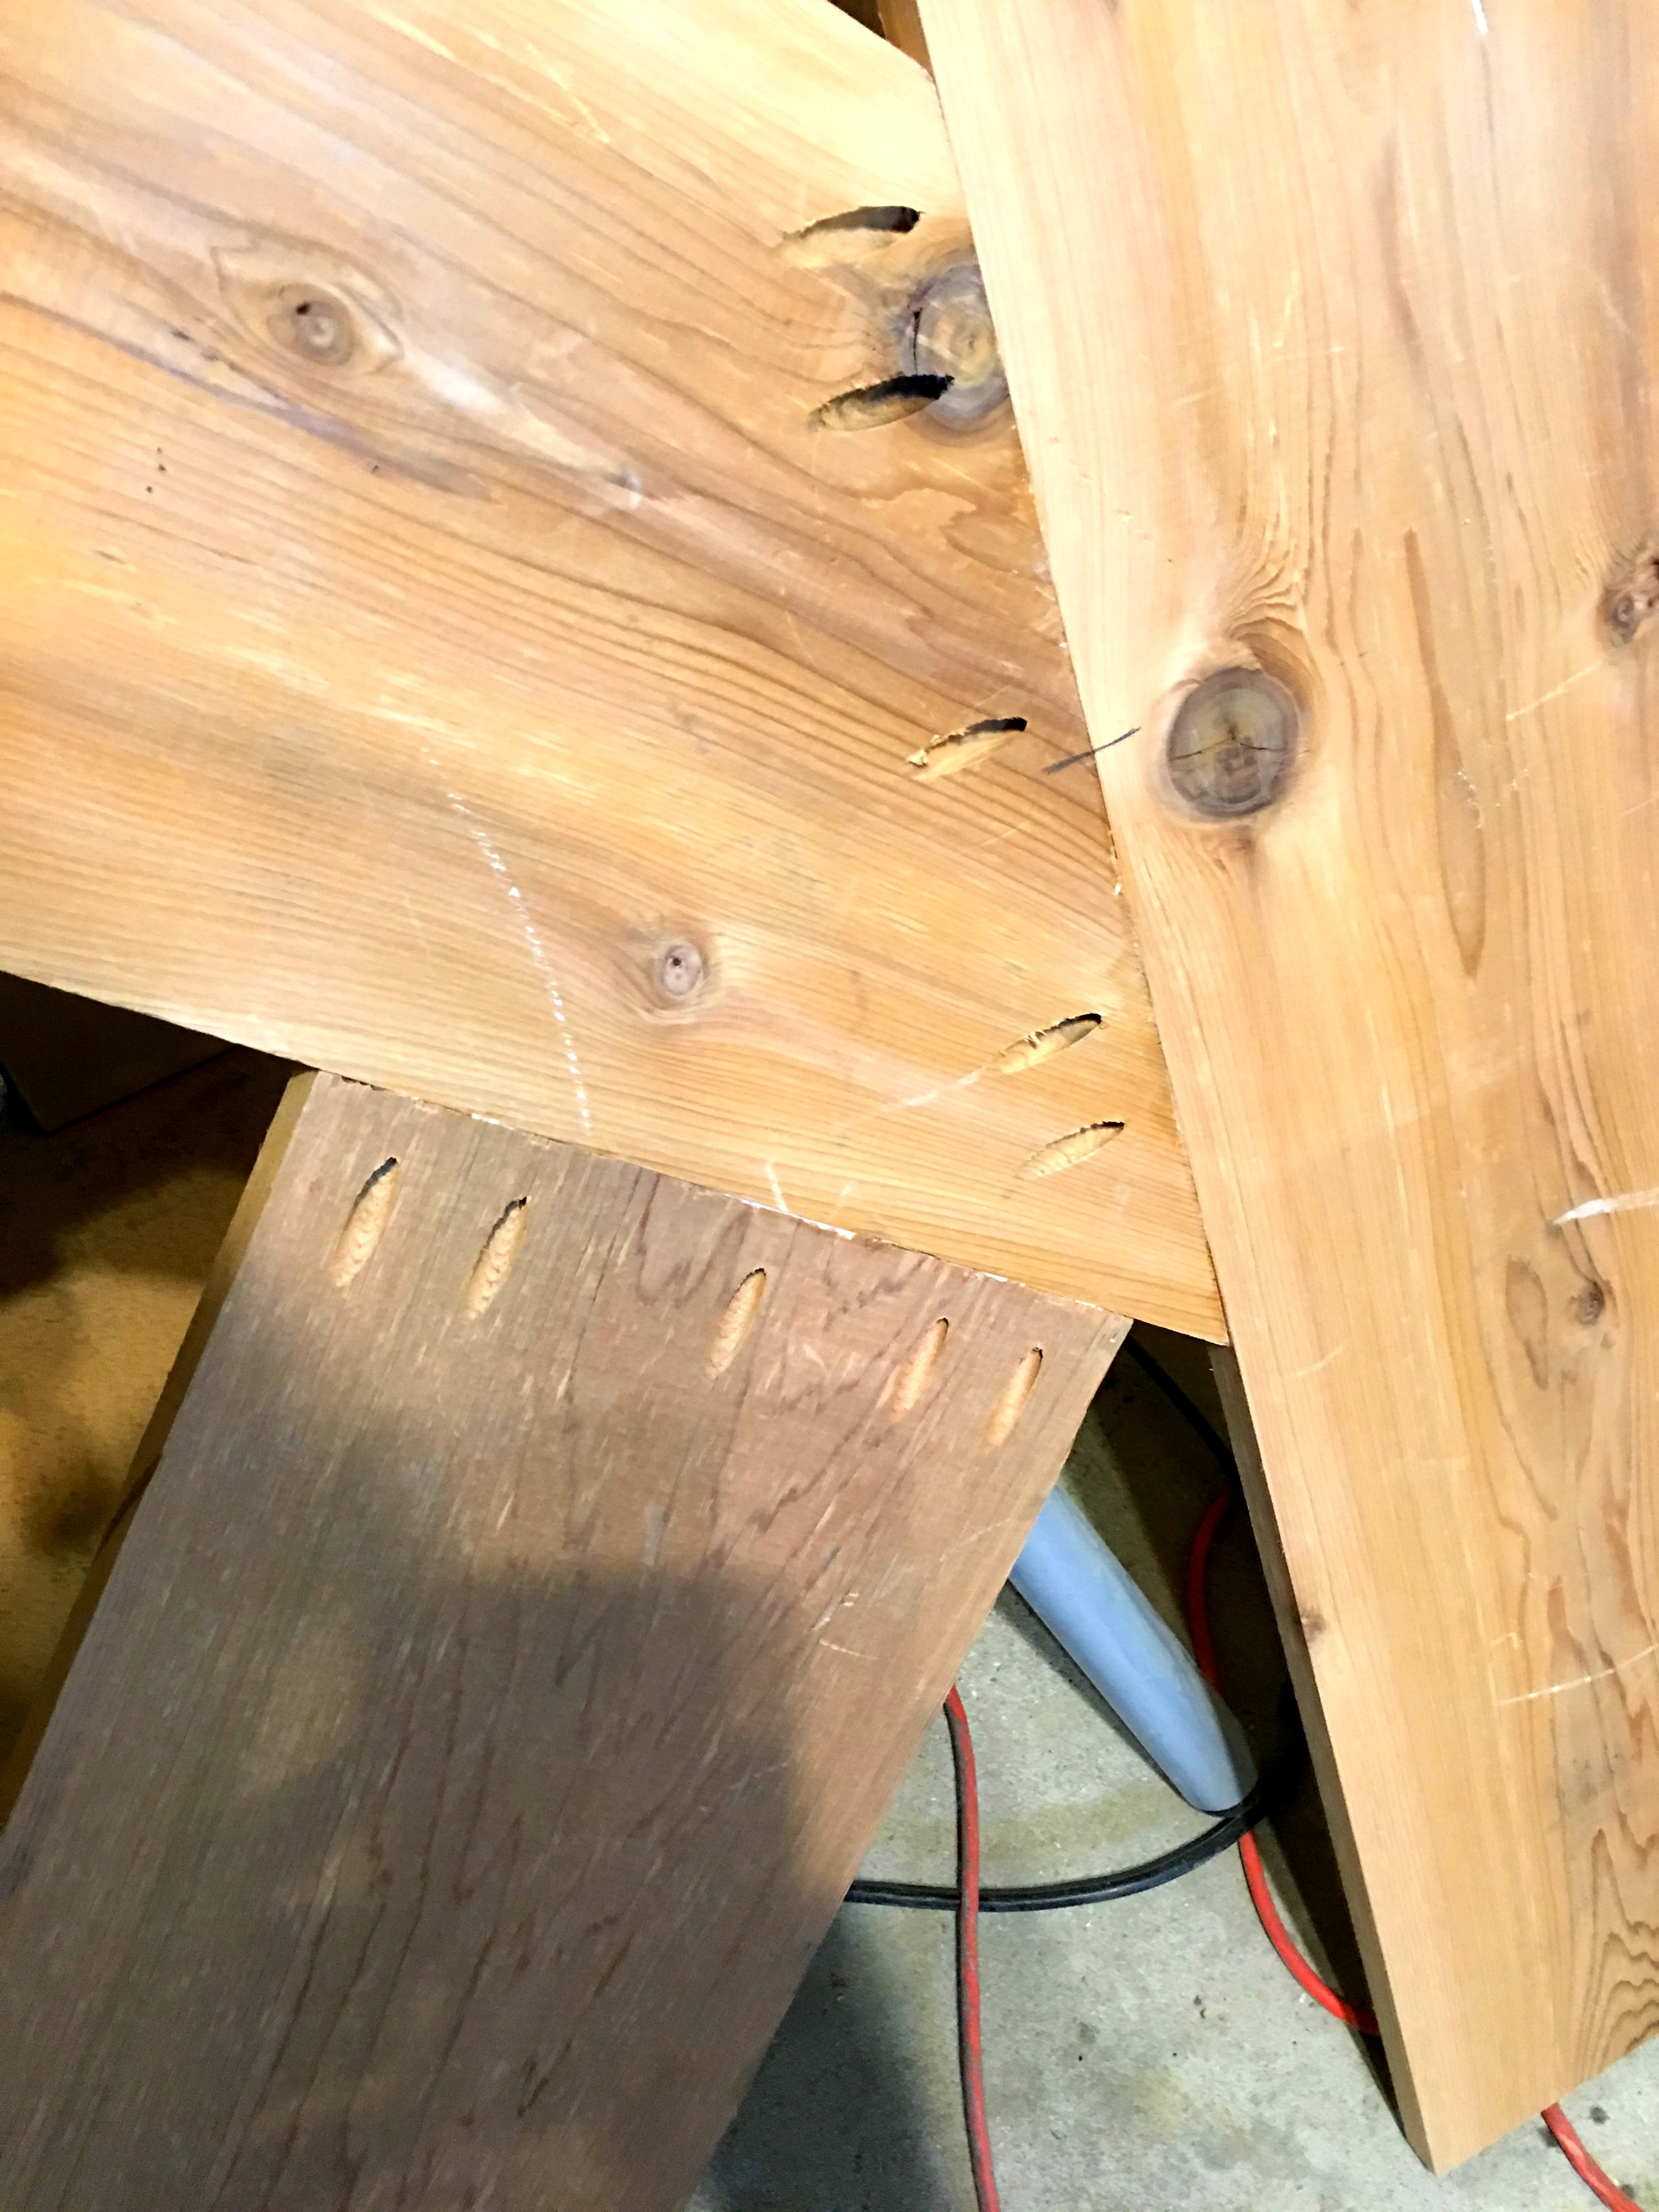
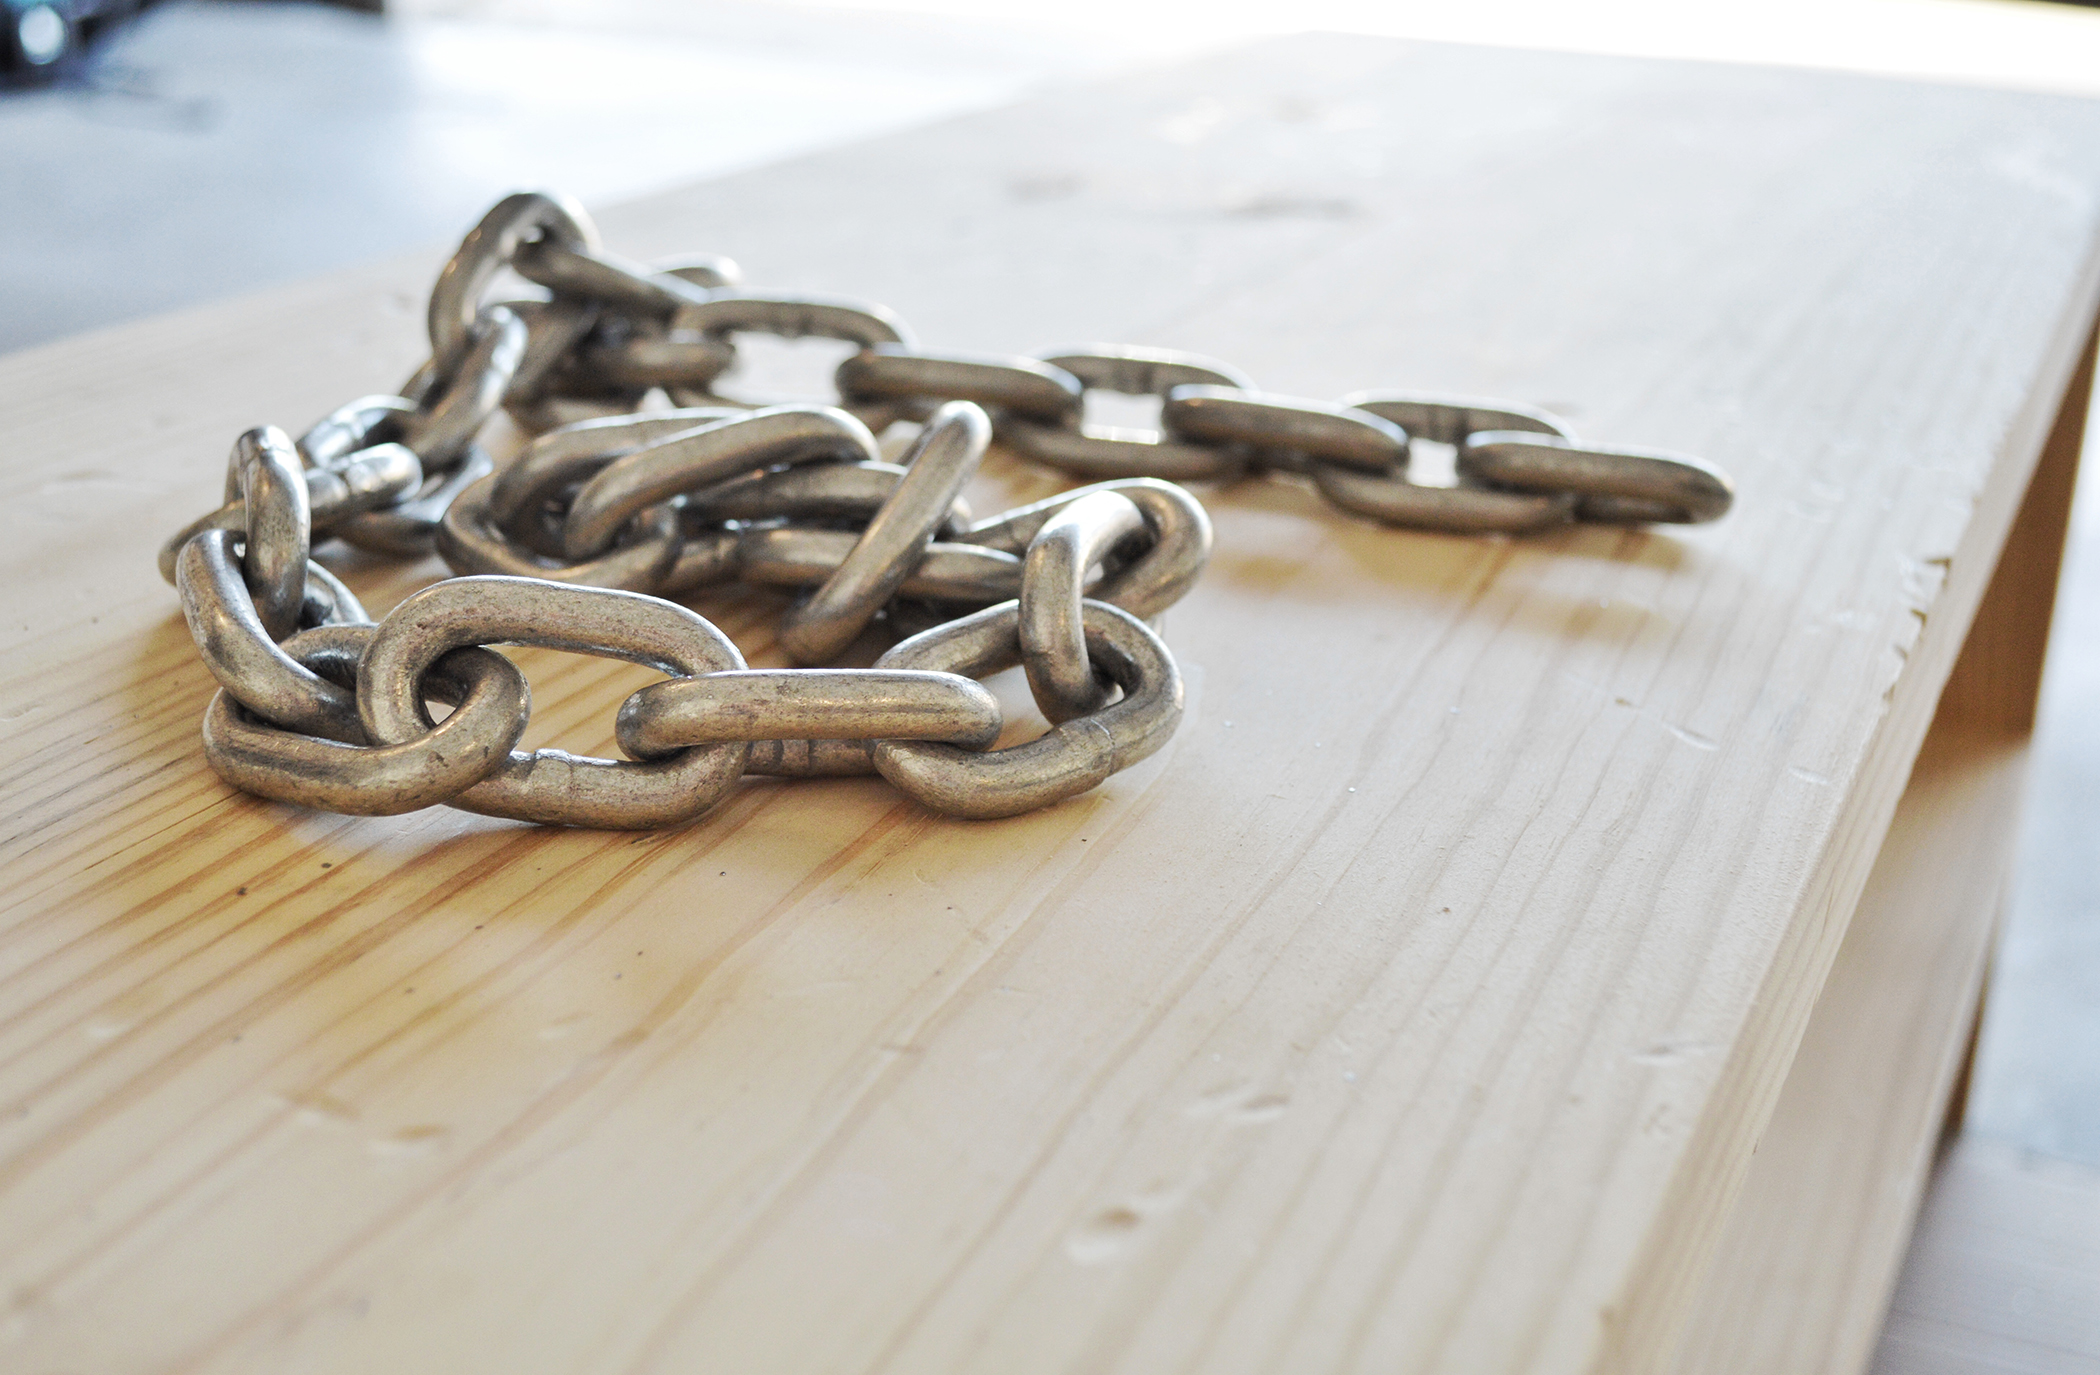
  2. If you like a more weathered look (like I do), an easy trick is to get some heavy chain (I grabbed about 3 feet from the hardware store) and hit the bench with it multiple times, from multiple directions, to add some divots and texture. It’s a great way to relieve stress after a long day too! Rustic Chic DIY: Stain and Distress like a Pro The Riojas House for ElleryDesigns.com
  3. Run some sandpaper (180 grit) over the edges to make sure they stay as smooth as possible.
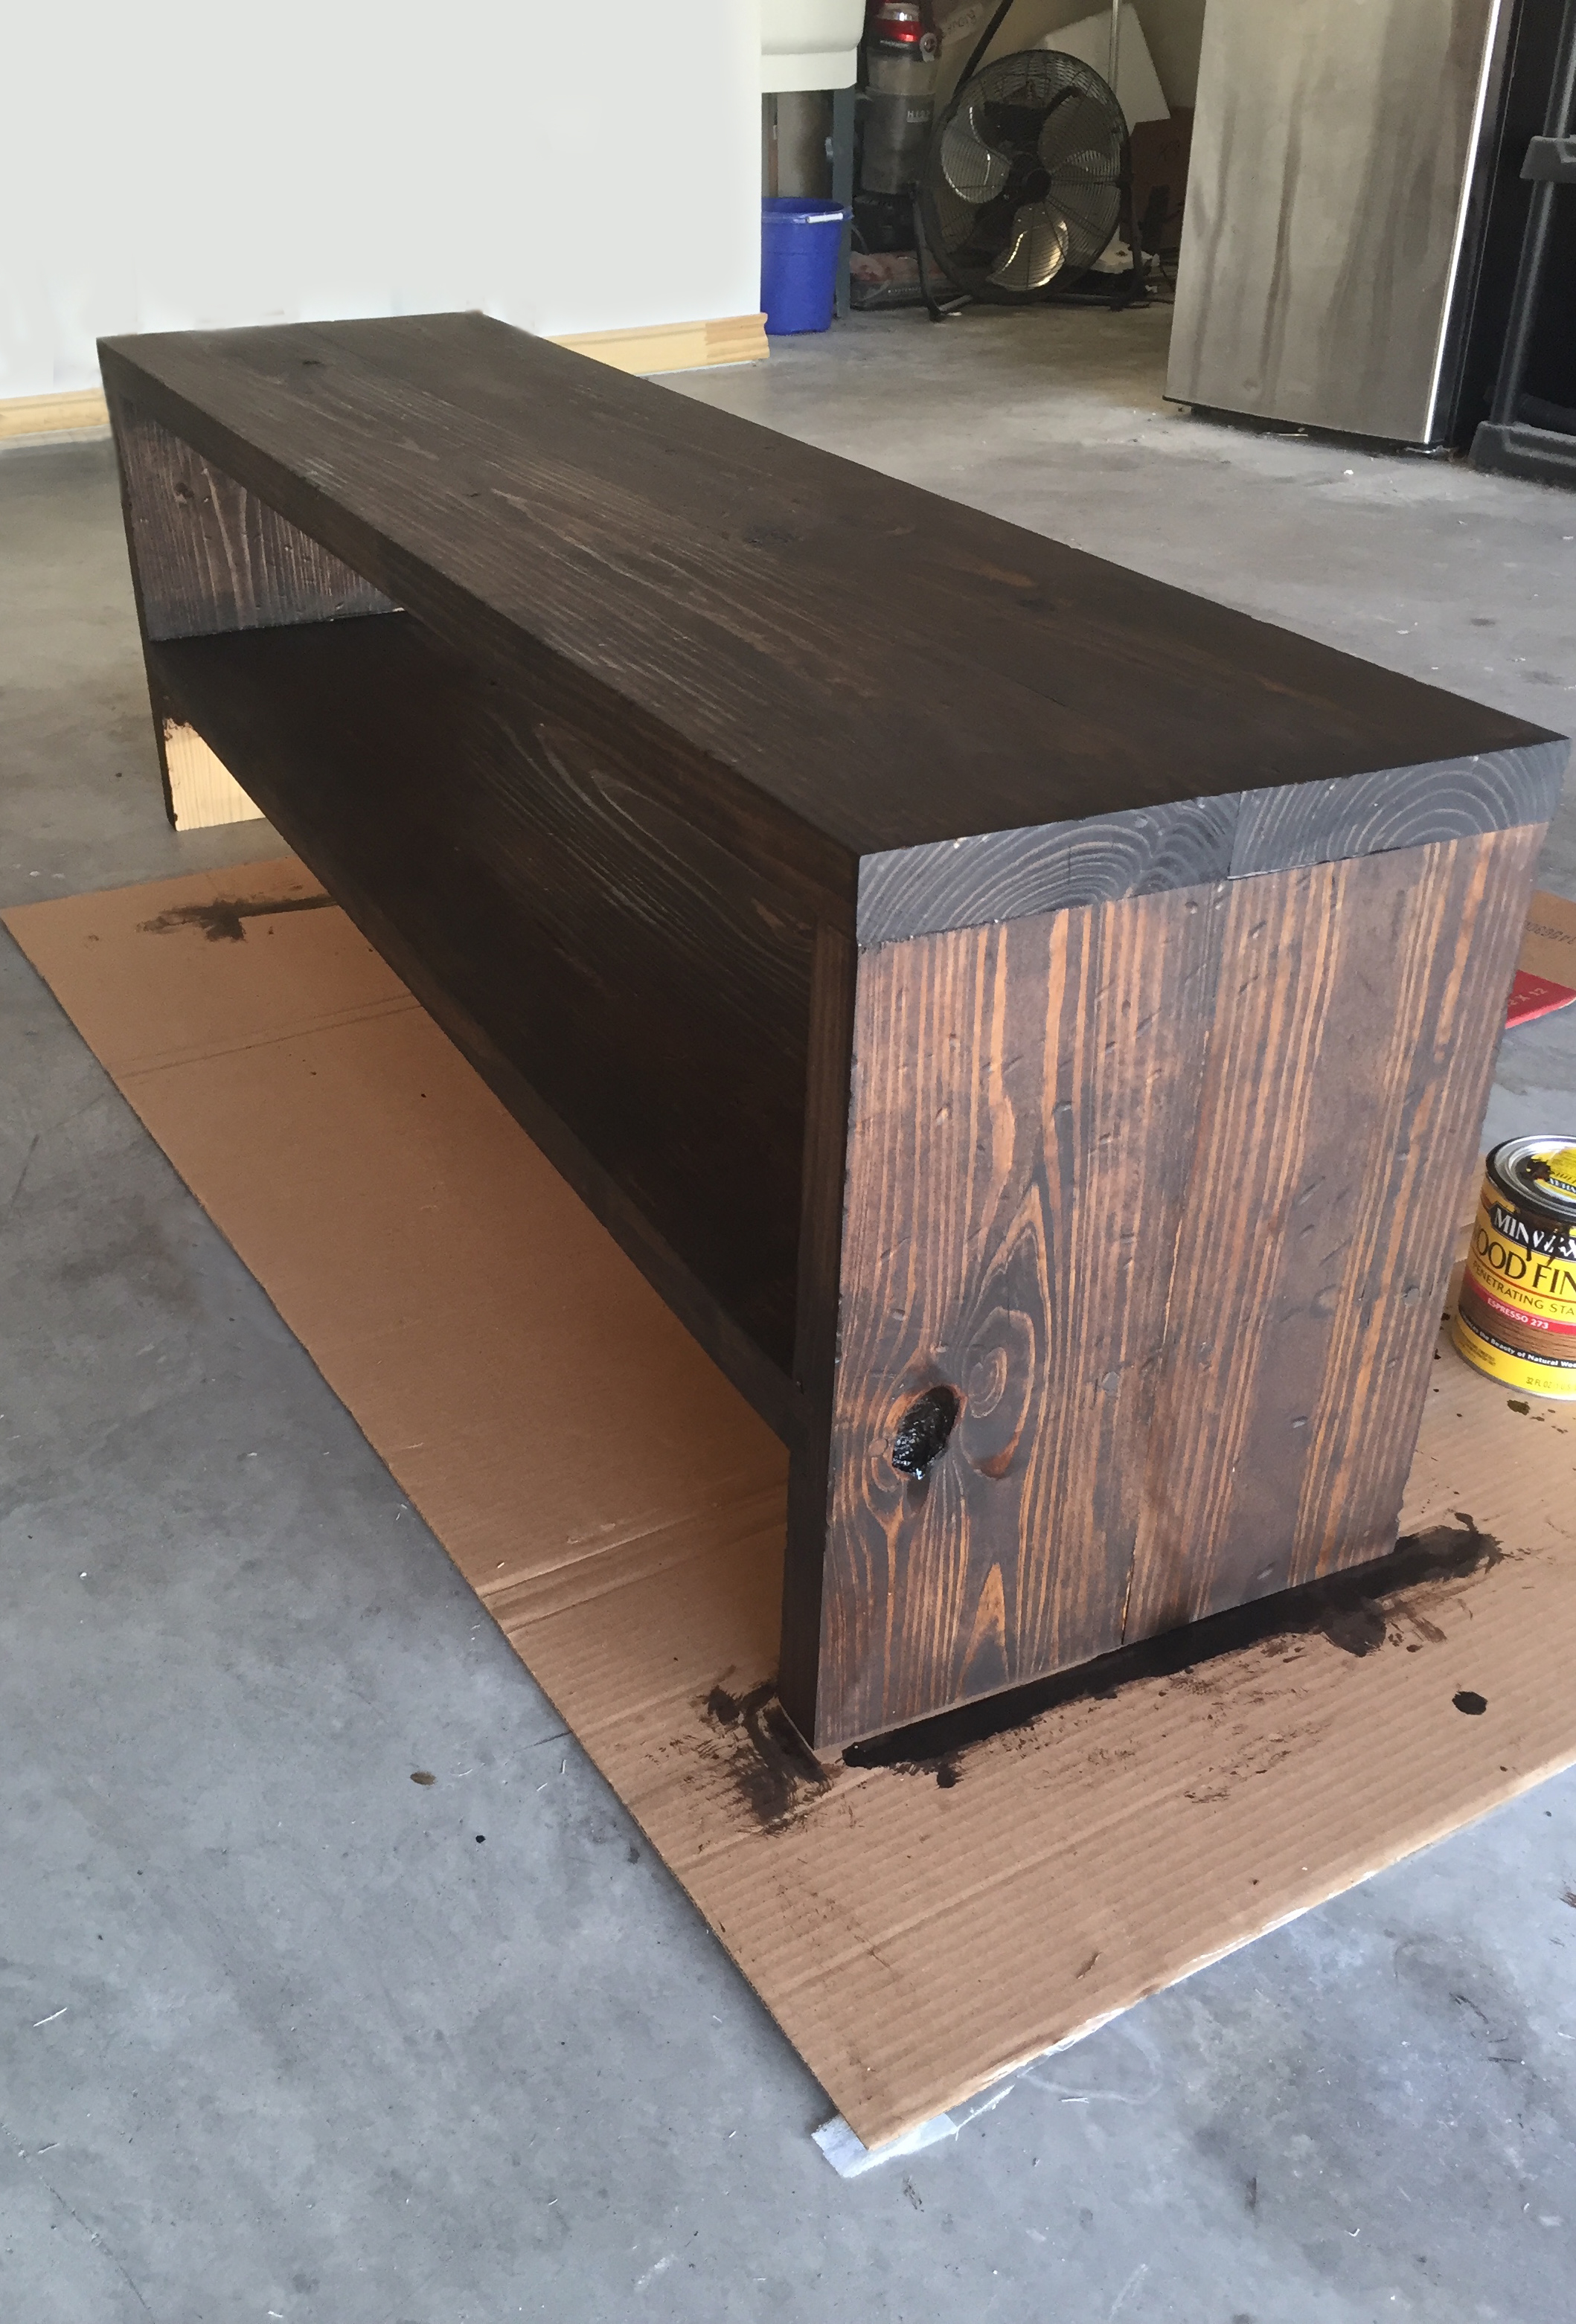
  4. Get your rubber gloves on and your stain ready (read the instructions on the back if you’ve not used it before). I like darker stains, so chose Espresso as my color. Rustic Chic DIY: Stain and Distress like a Pro The Riojas House for ElleryDesigns.com
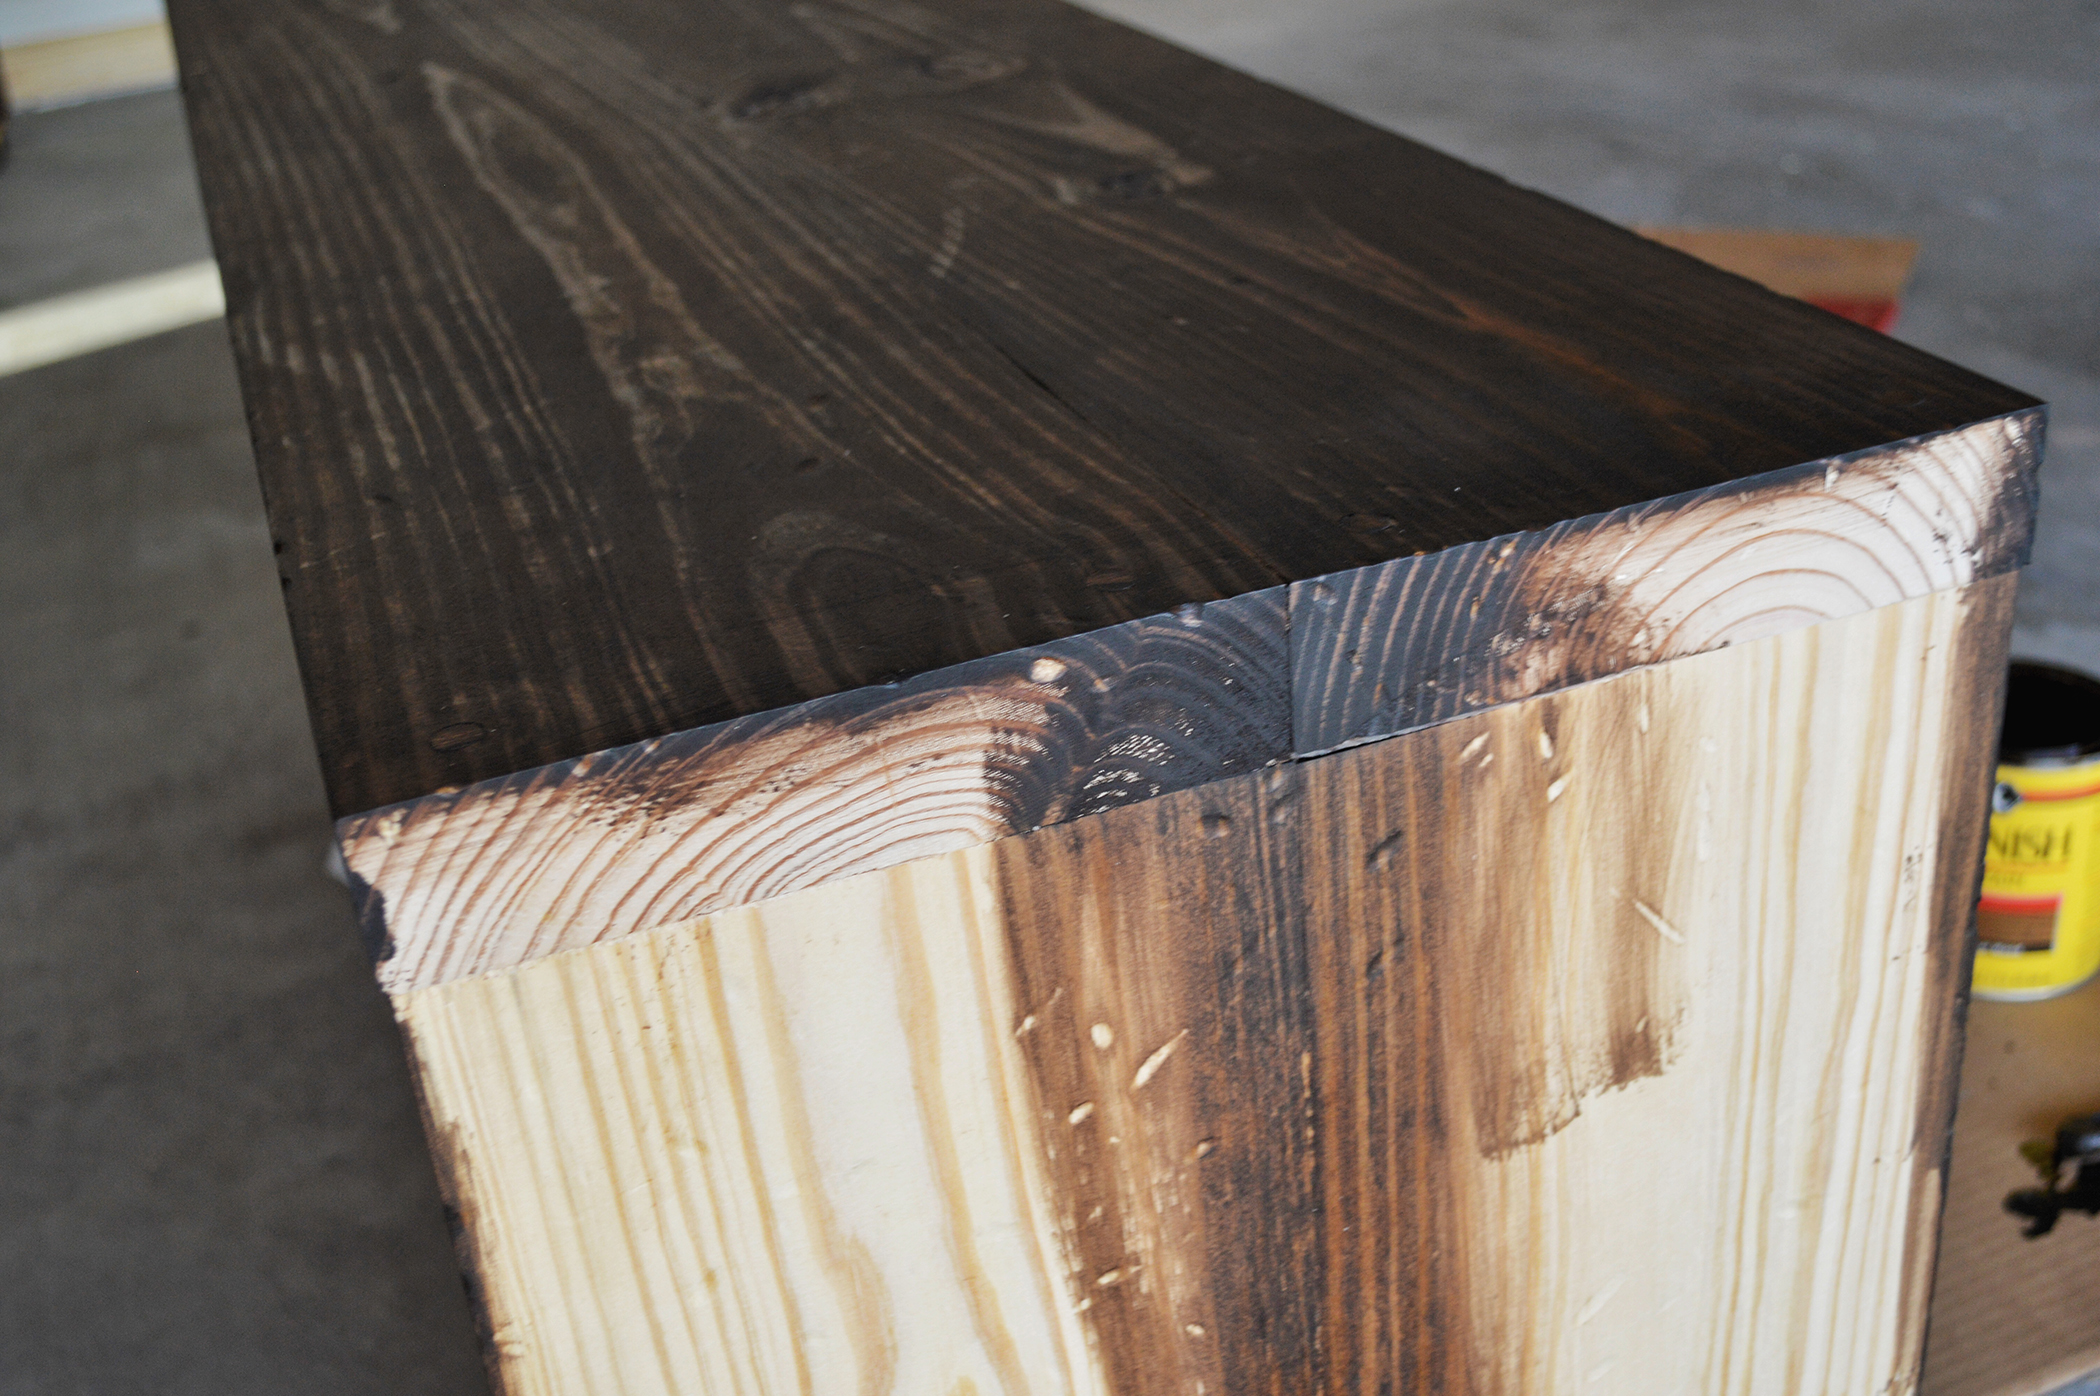
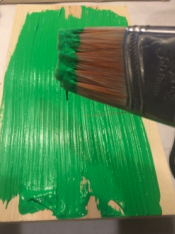
  5. Dip your clean rag into the stain and begin applying it onto the wood. Make sure you go with grain and put on a light, even coat. Ensure the first side is dry before flipping and staining the other side.
  1. If you want the stain color to look a bit deeper, apply a second coat once the first coat has completely set. Rustic Chic DIY: Stain and Distress like a Pro The Riojas House for ElleryDesigns.comRustic Chic DIY: Stain and Distress like a Pro The Riojas House for ElleryDesigns.com
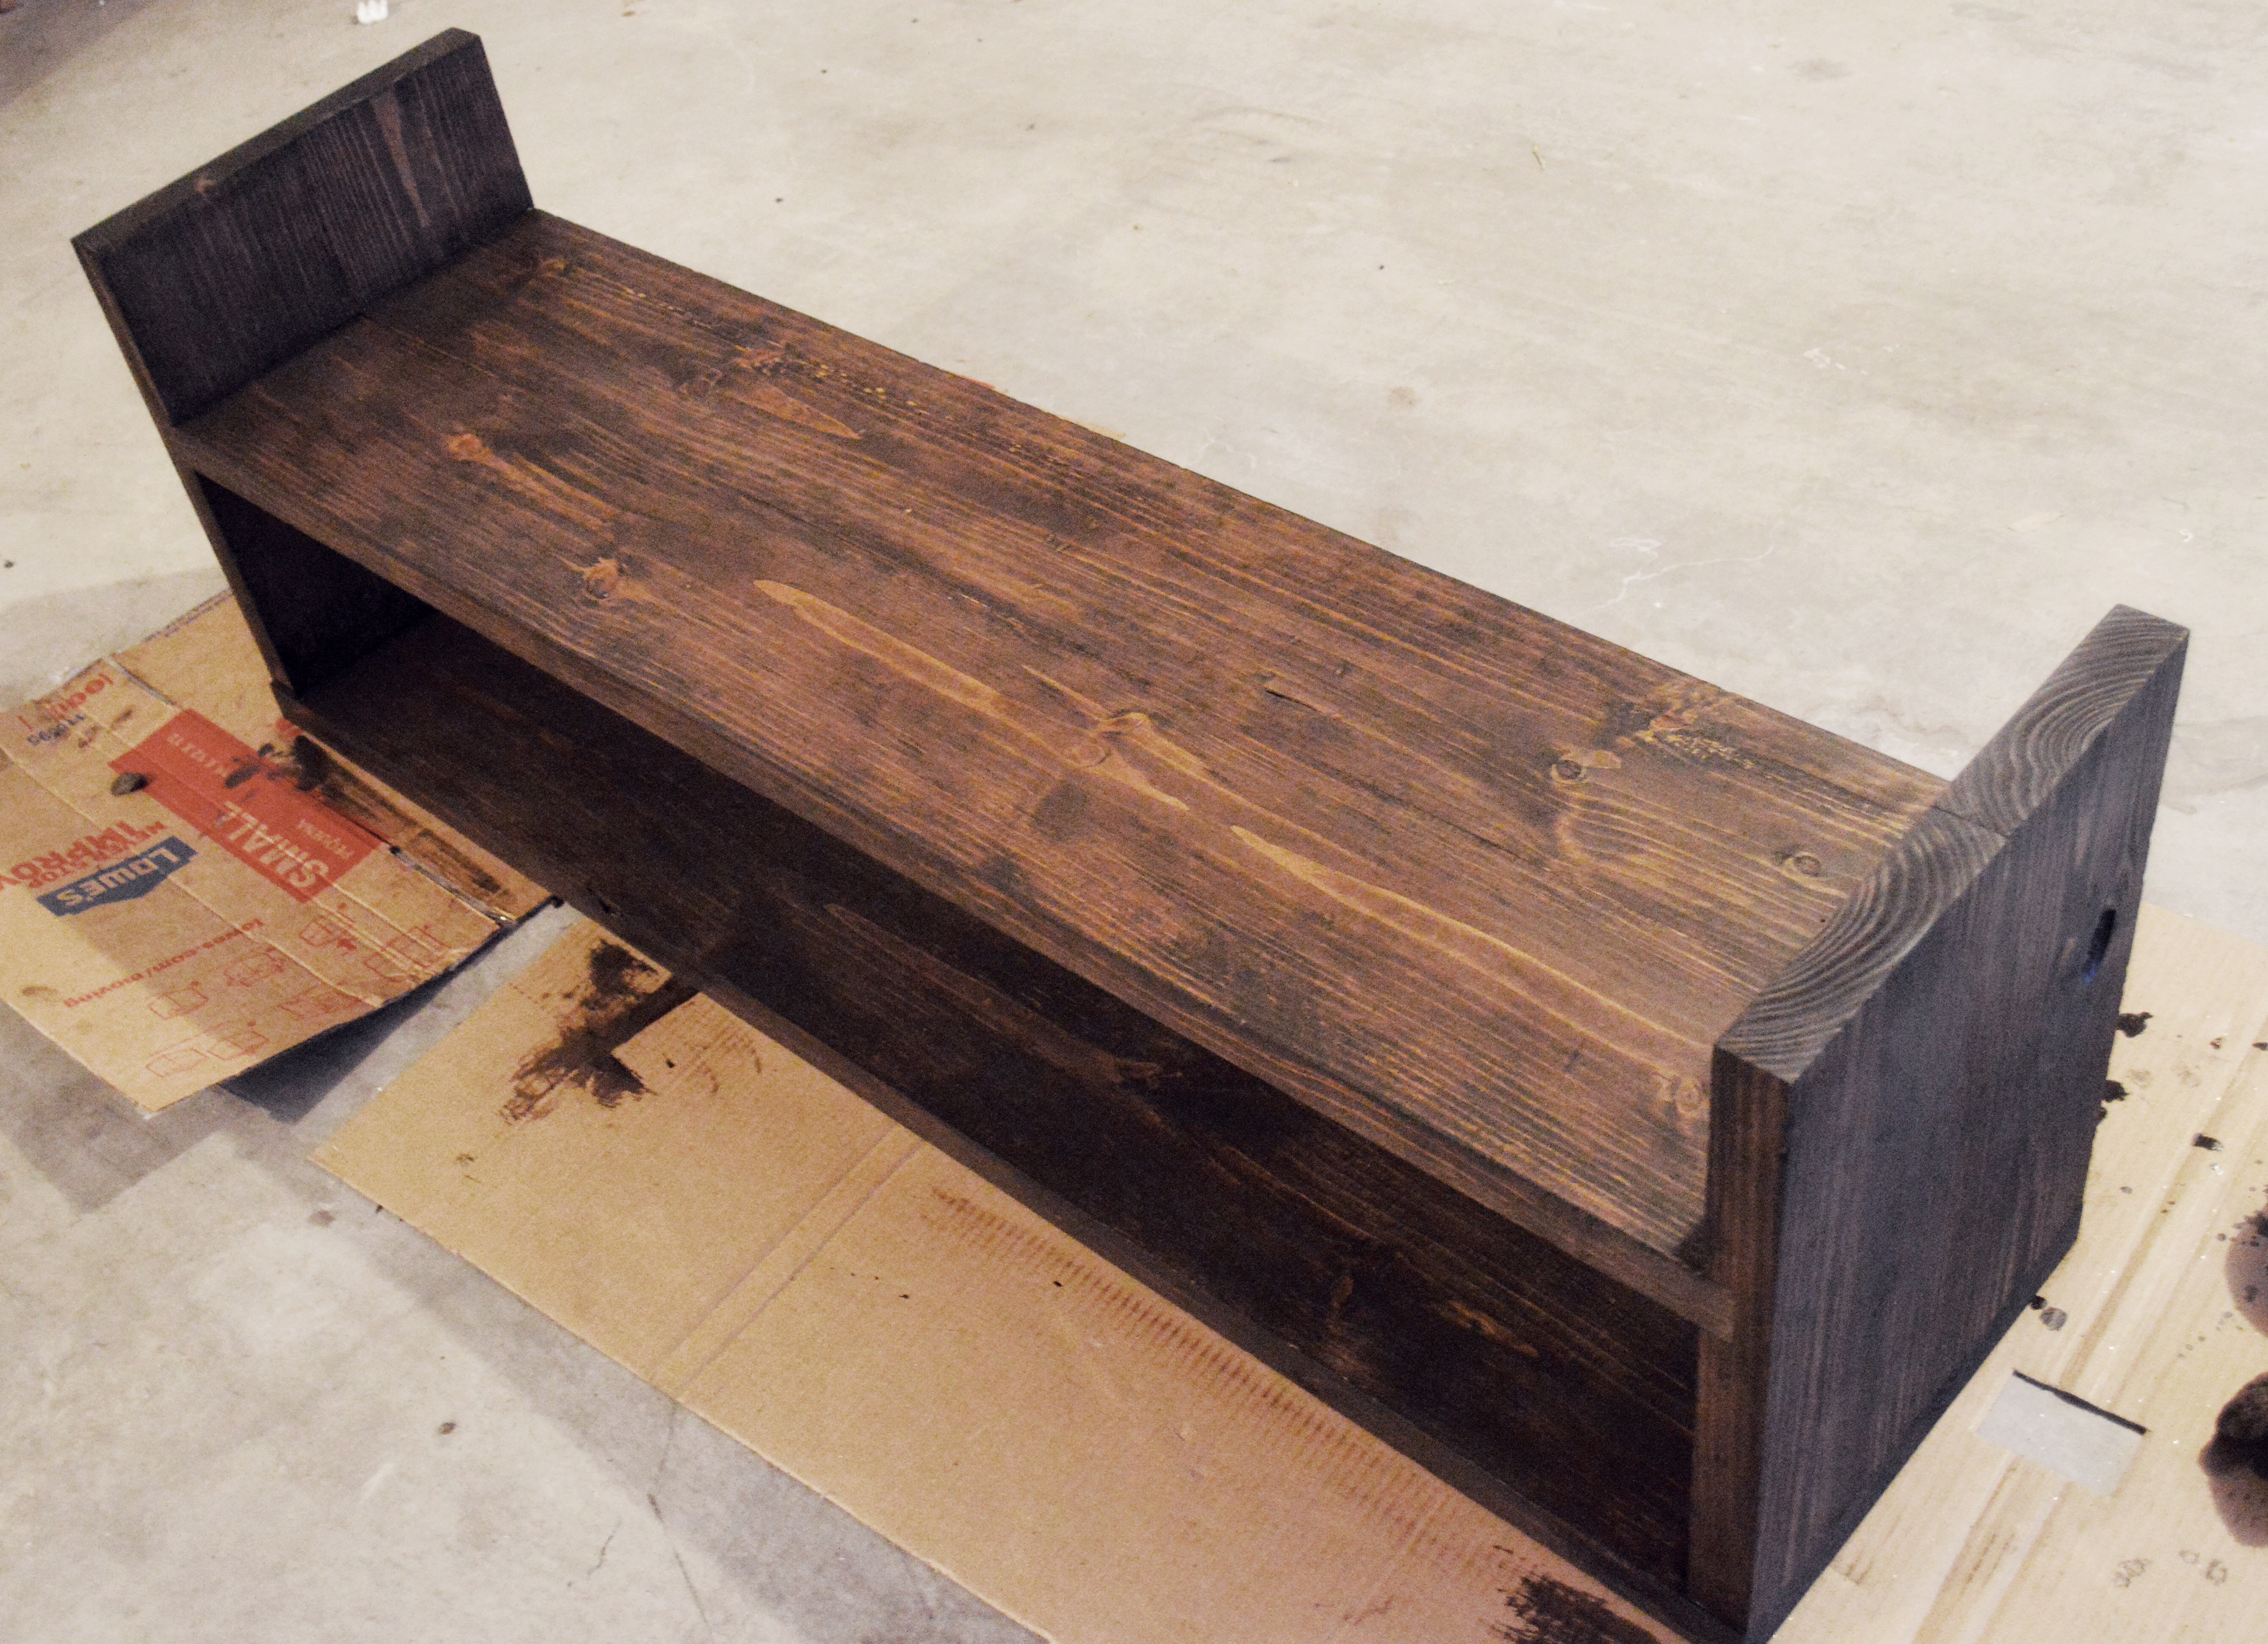
  2. After the piece has fully dried, you can seal it by brushing on a light coat of satin polyurethane to give it a little more protection (especially if it’s something you’ll be using often). Give that 24 hours to set and you’re ready to put your new piece into use!

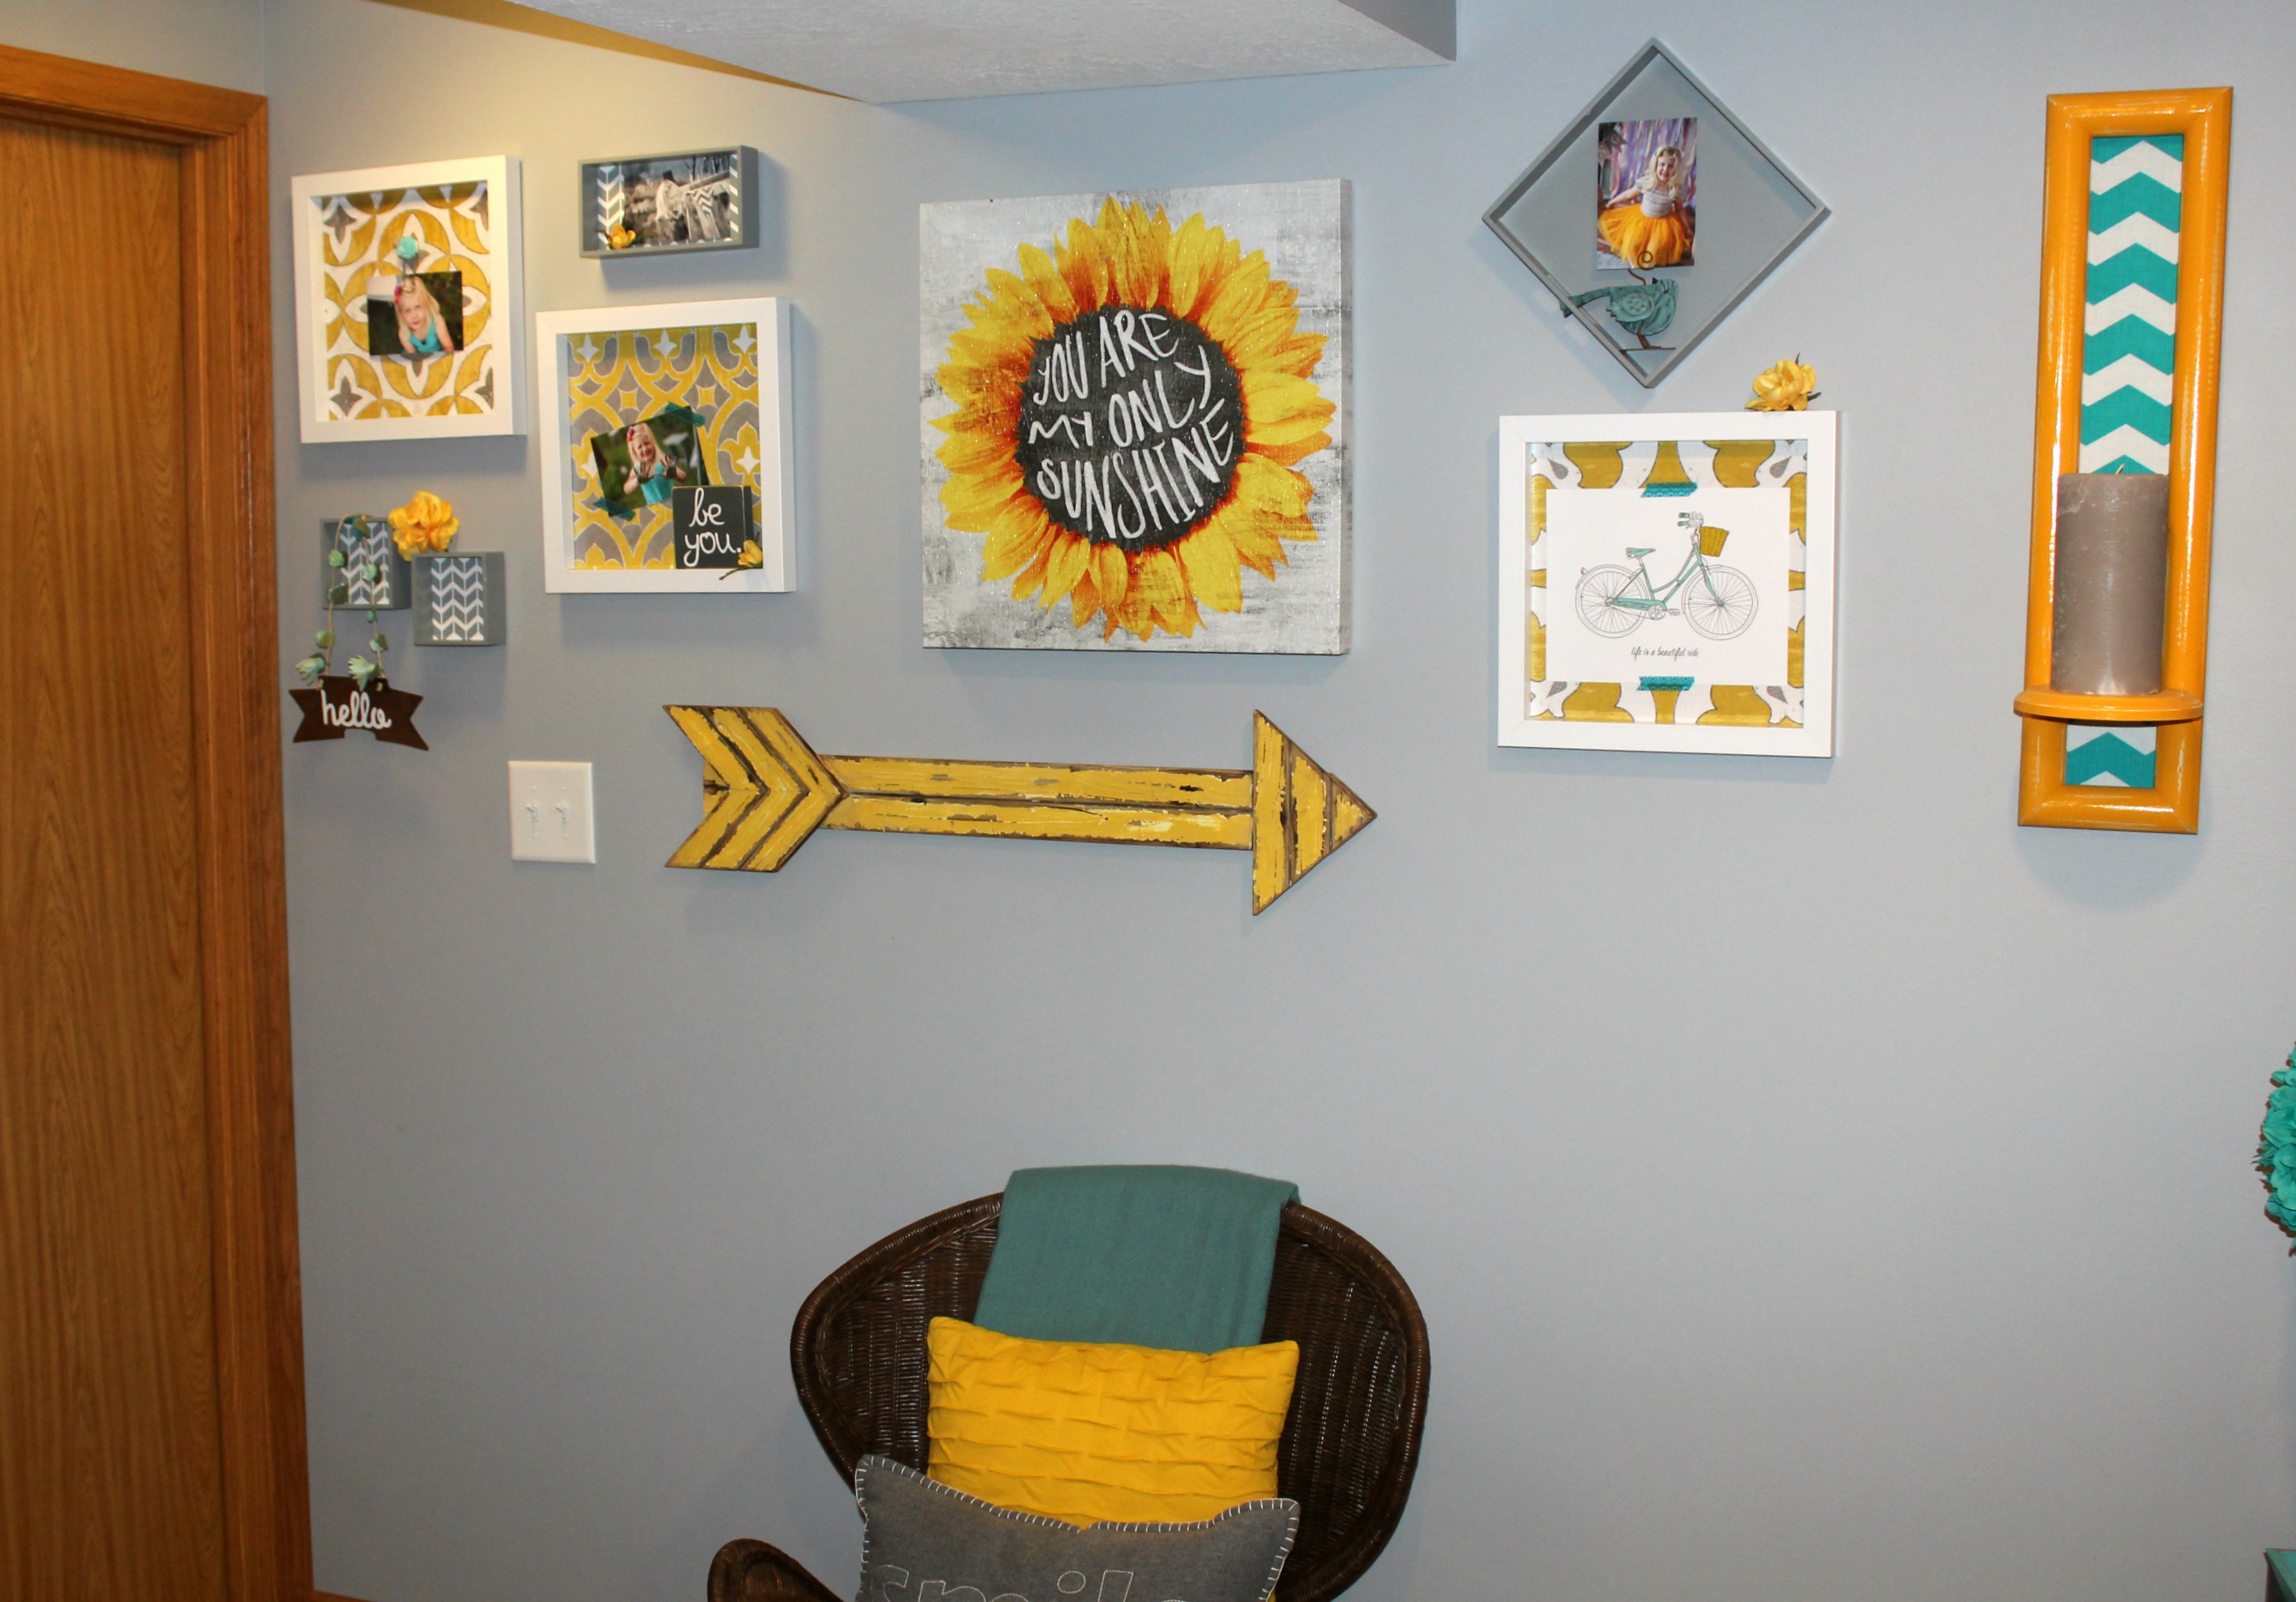
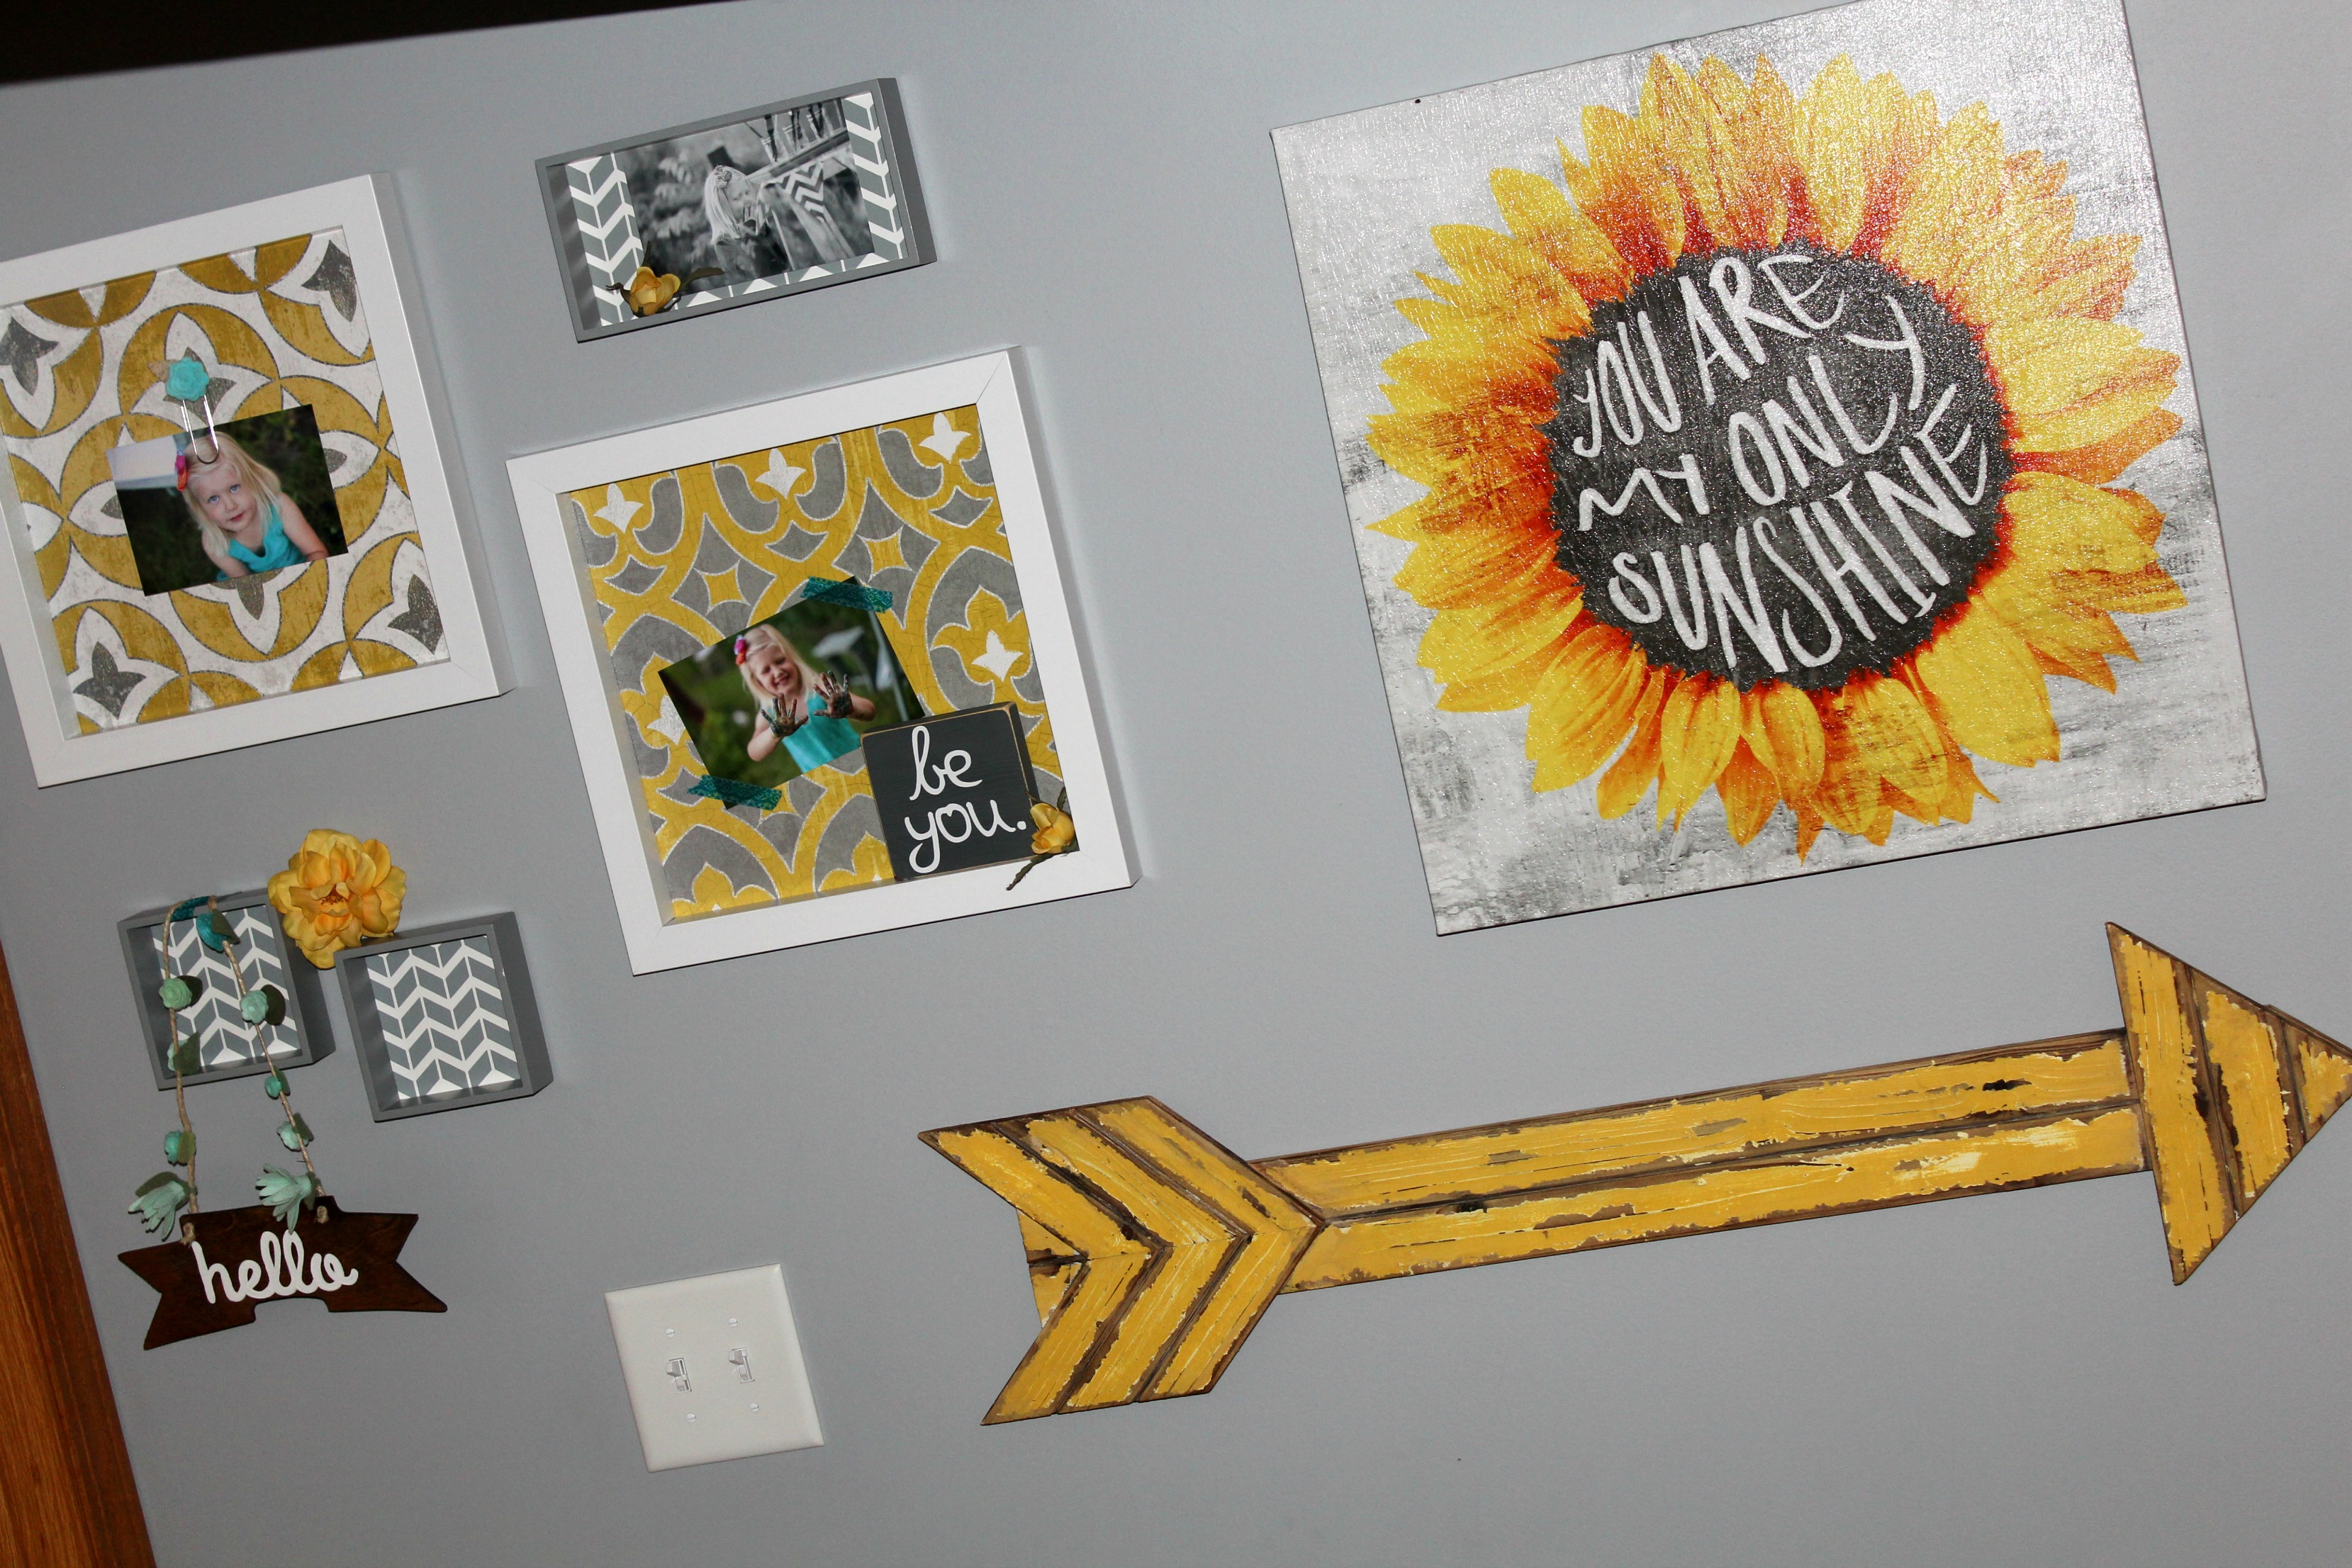
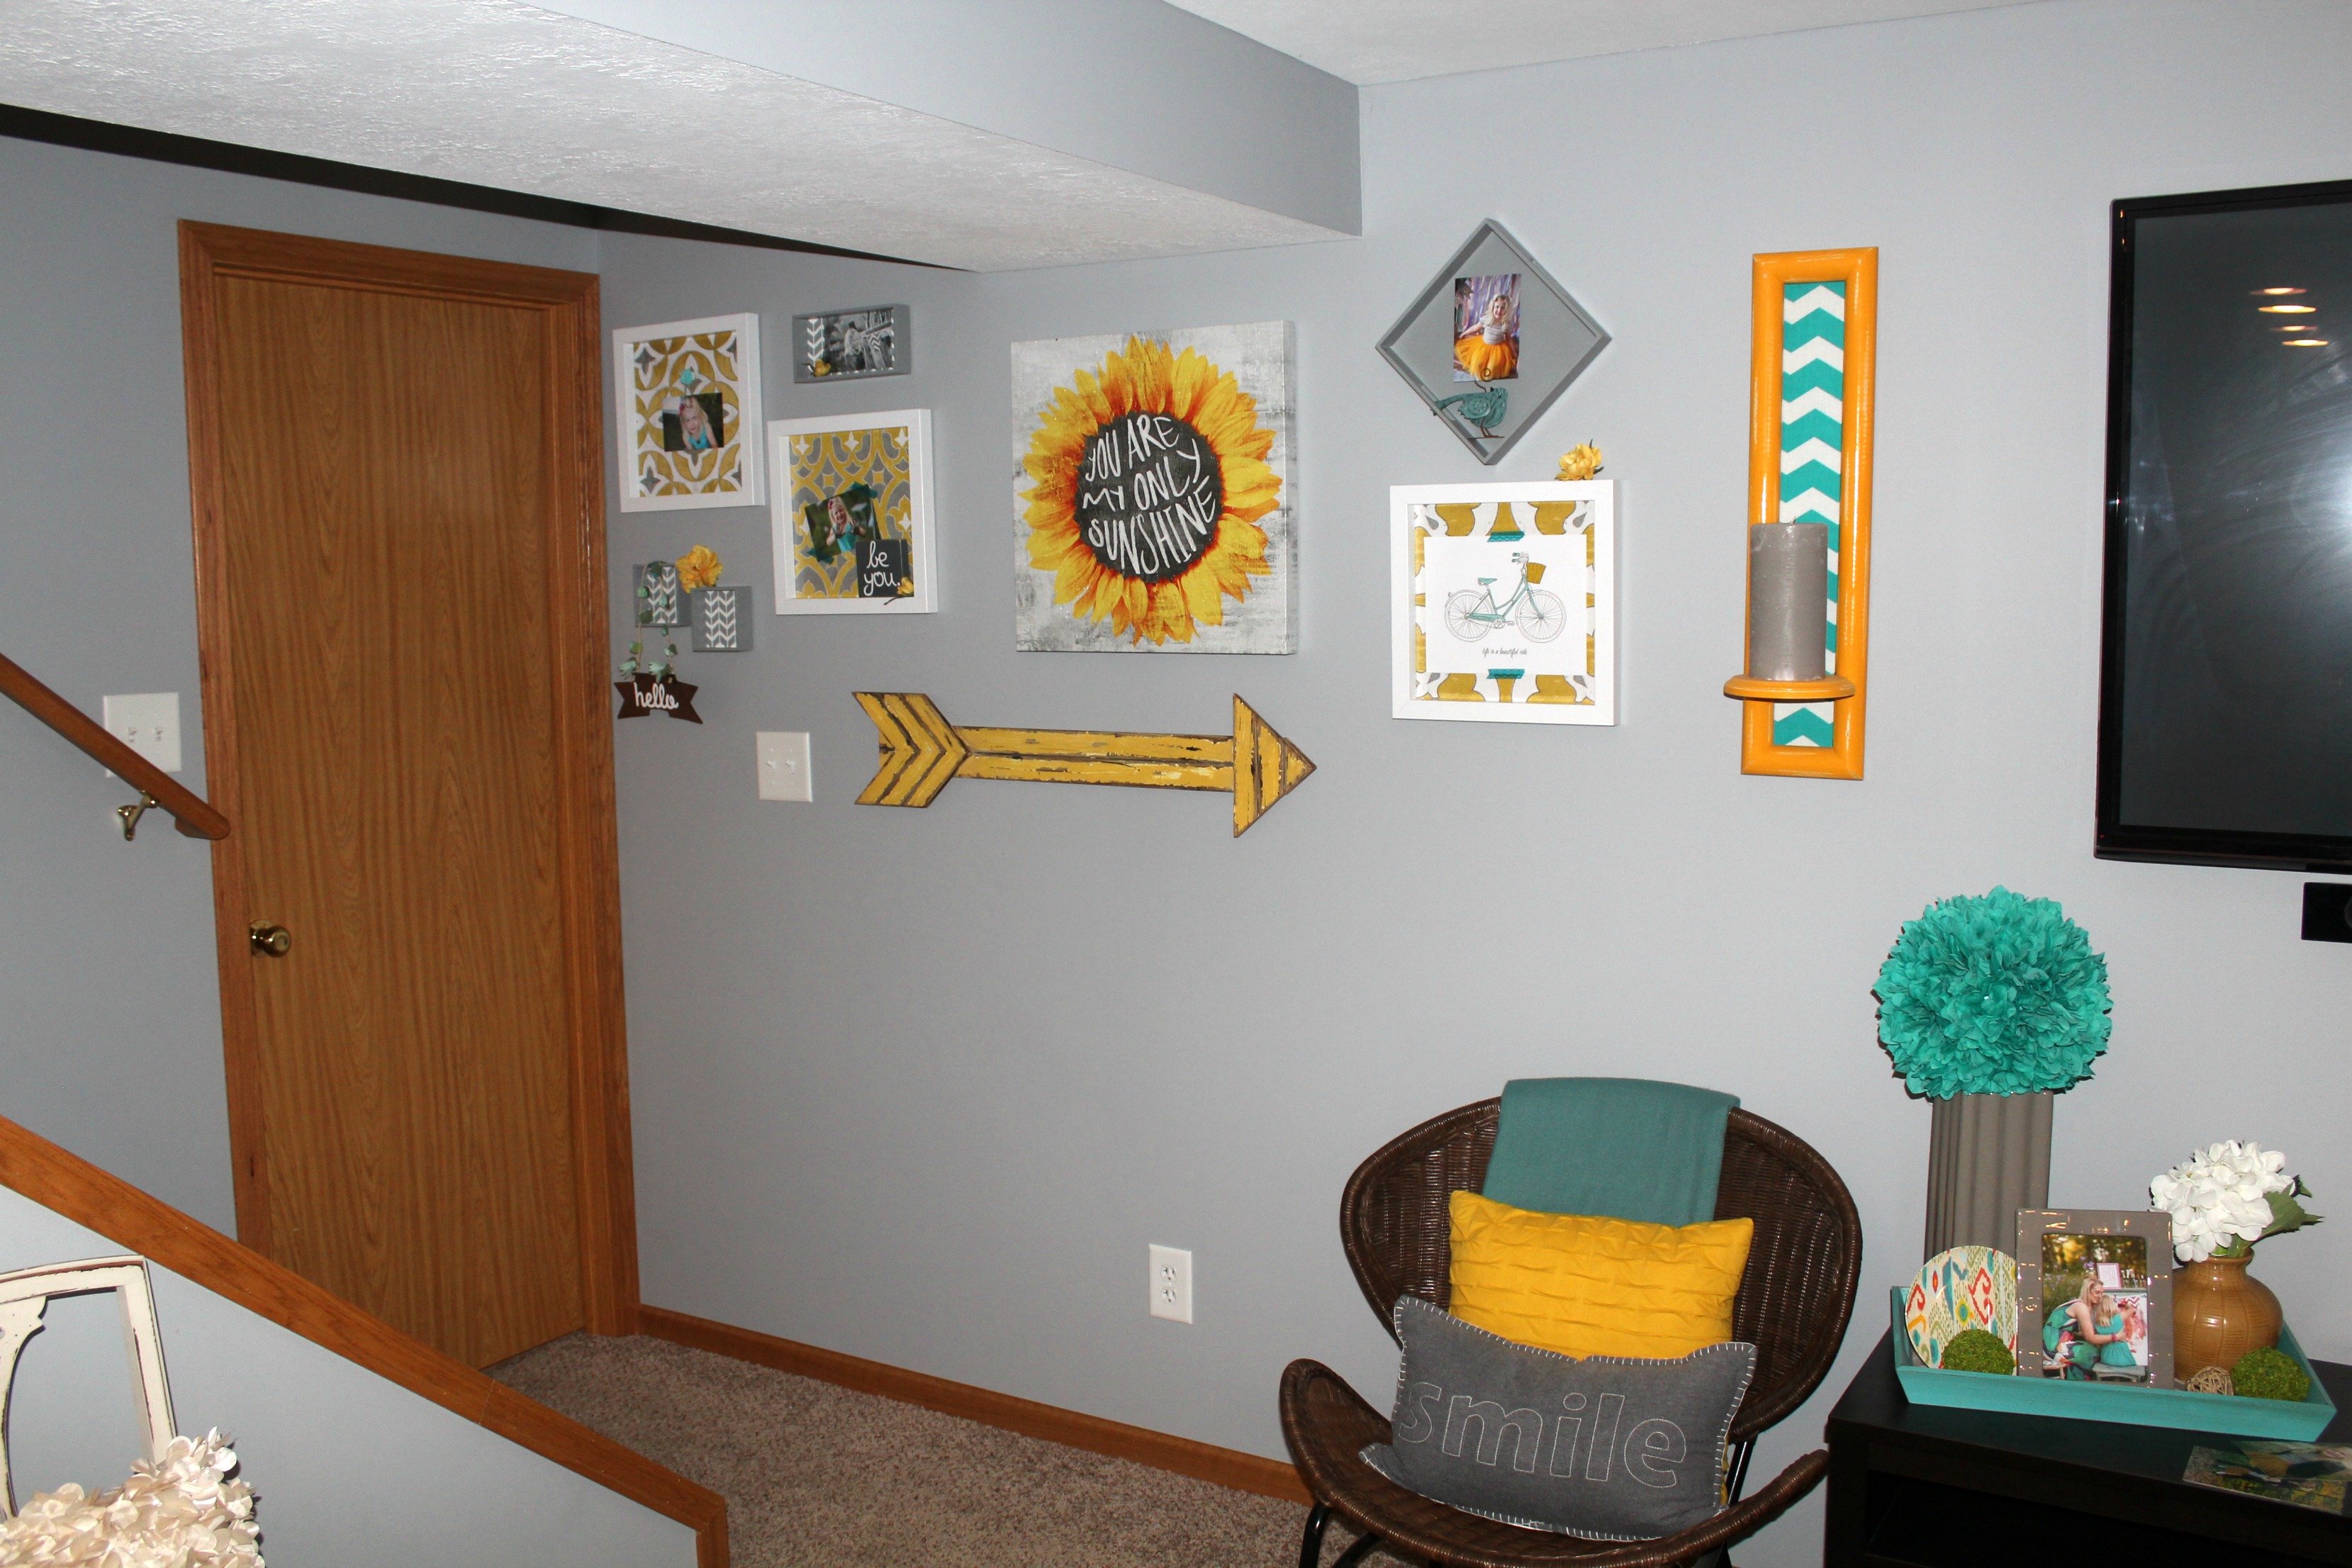
This bench is exactly how I had envisioned it, and has become a perfect, welcoming piece as you walk into our home. I’ve styled it simply with wicker baskets (great for storing little one’s shoes), and softened it up with a couple of pillows and a plush neutral throw.      Rustic Chic DIY: Stain and Distress like a Pro The Riojas House for ElleryDesigns.com

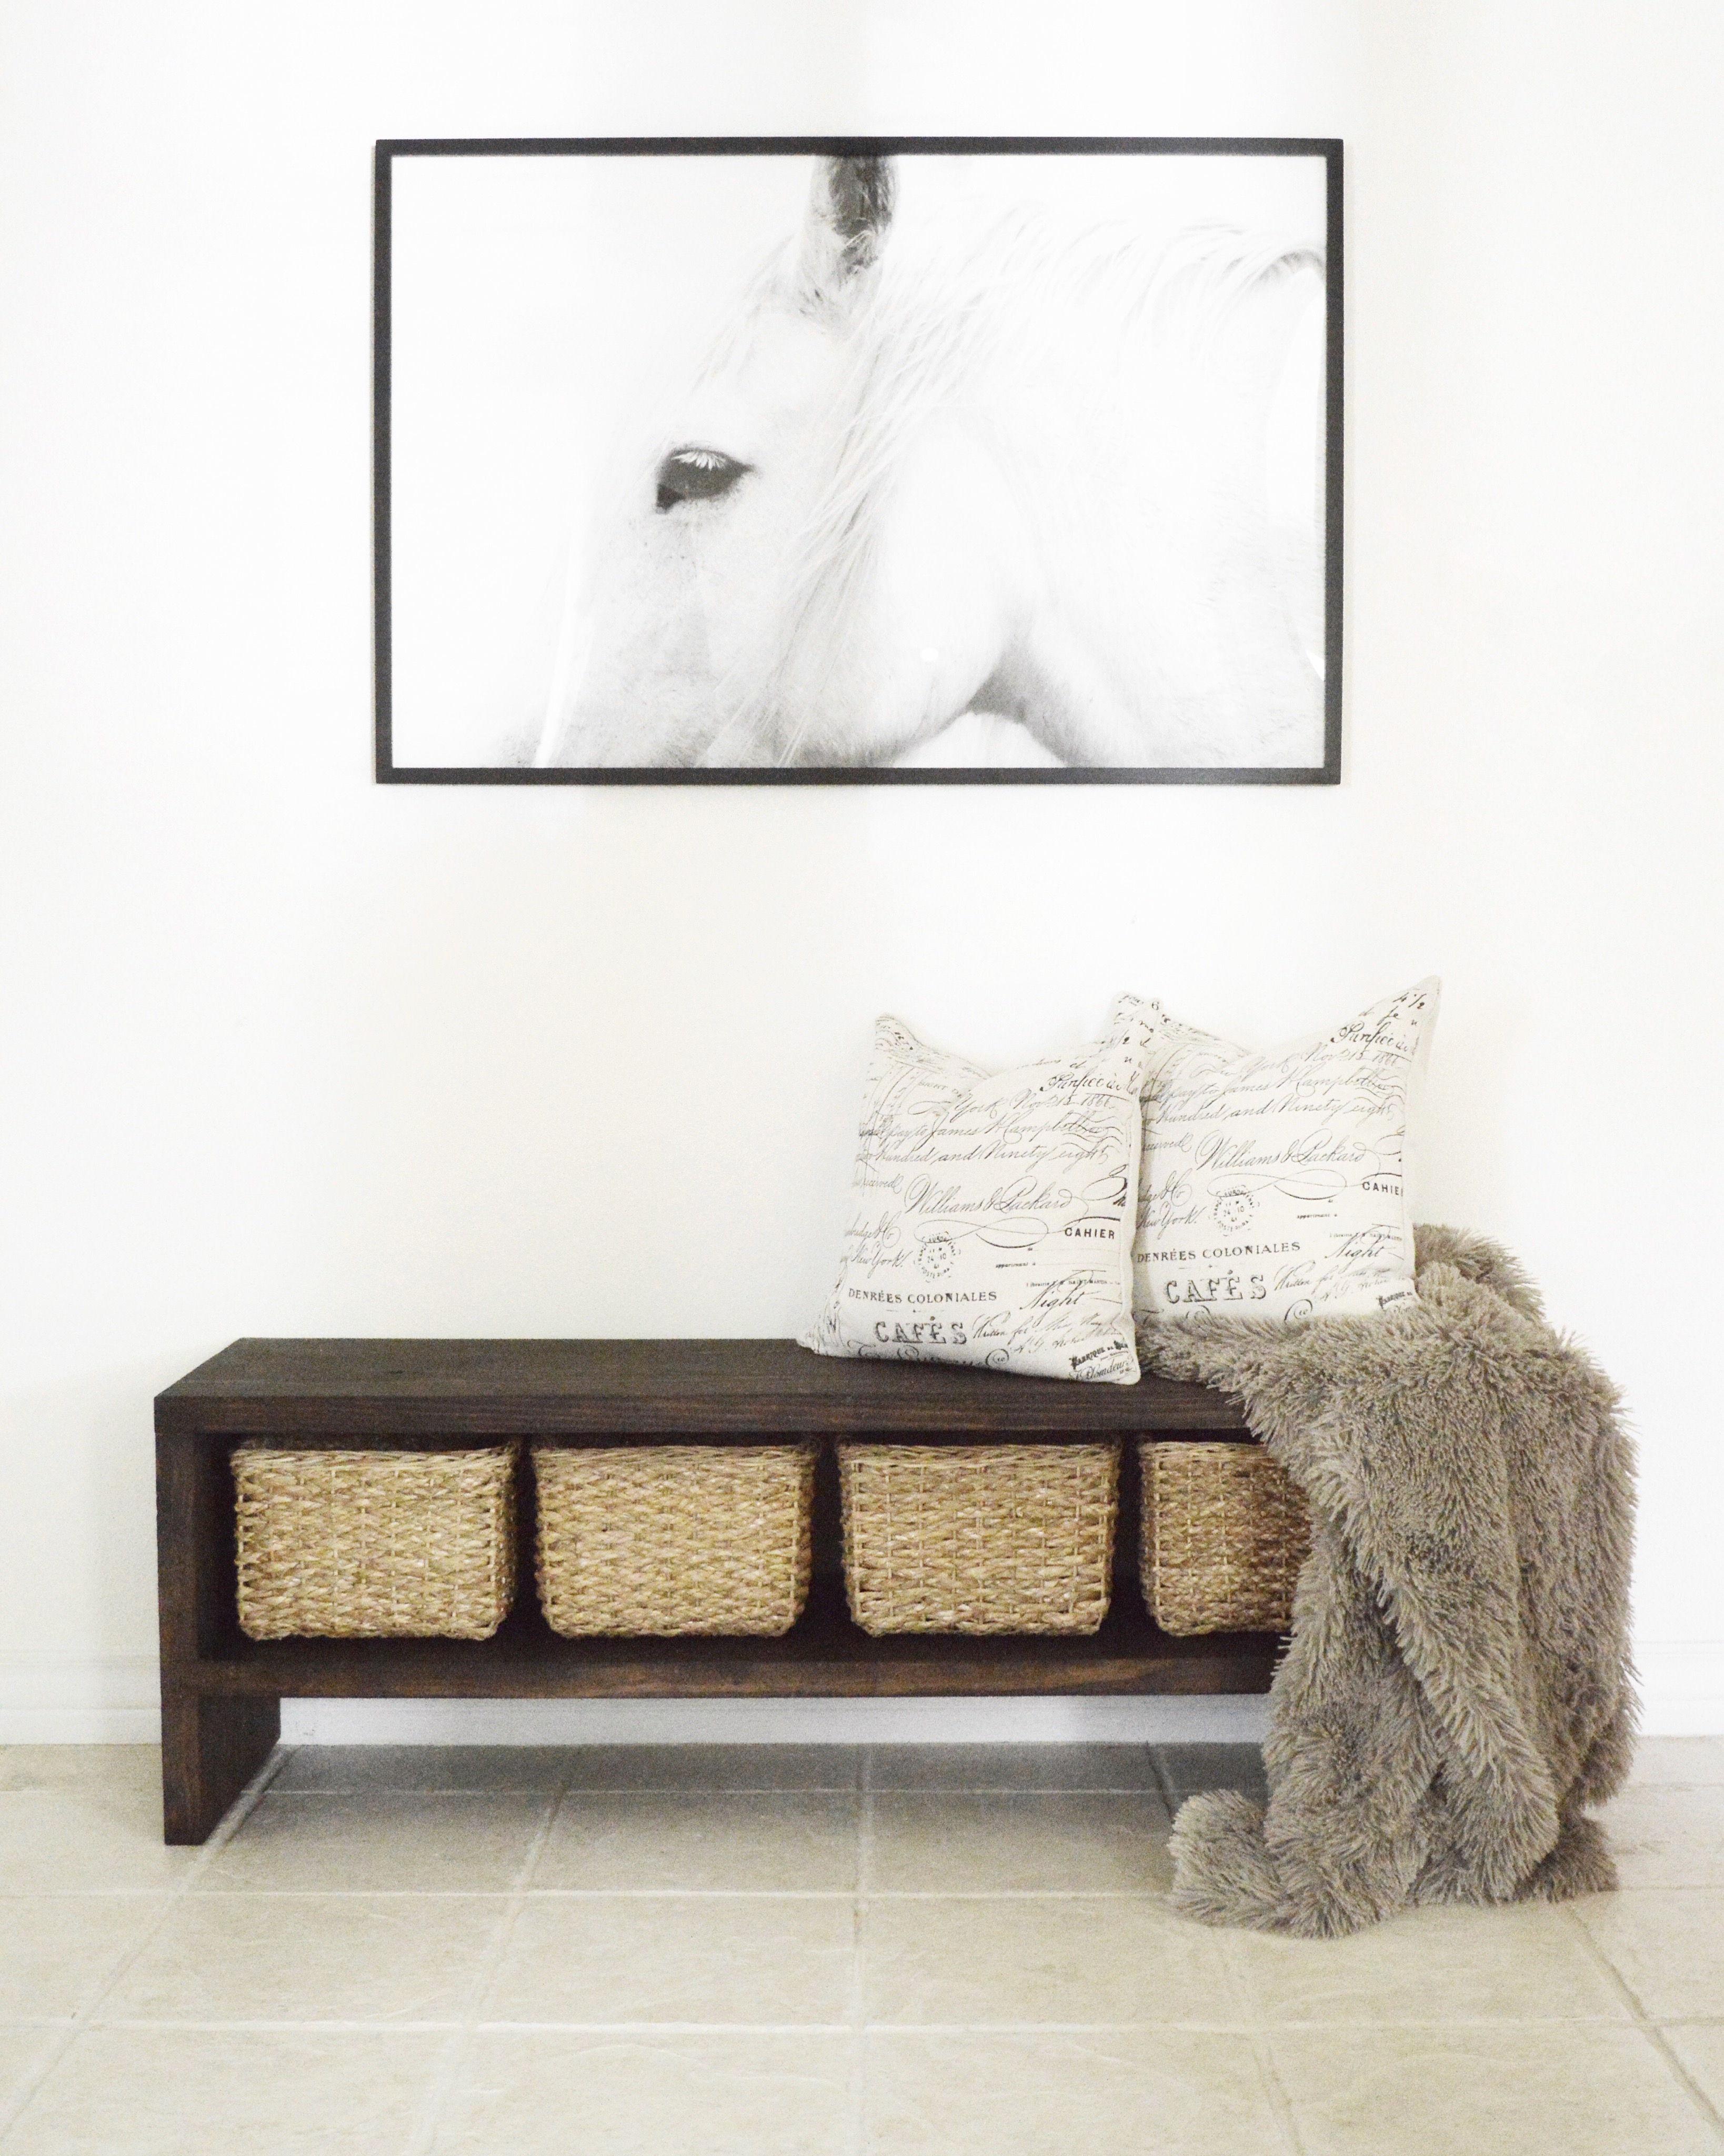
If you’re looking for a way to add a little rustic chic to your home, a project like this one could be right up your alley!

Nikki Riojas

@theriojashouse

www.riojashouse.com

Thanks so much for sharing Nikki! This bench is darling and I love how you styled it!

August 15, 2016 by: Michelle

First Day of School Free Printable

First Day of School Free Printable by ElleryDesigns.com

Hi friends! It’s back to school week in our home (insert huge sigh), so I decided to design a free printable to share with you that will work for all ages! I’m a sucker for black and white and this classic design will stay fresh for years to come! I hope you enjoy! I created every grade level from preschool thru twelfth grade! Be sure to tag me on Instagram @ellerydesigns for a chance to be featured using our printable! Hope you have a fantastic school year!

DOWNLOAD YOUR FREE PRINTABLE(S) HERE.

First Day of School Free Printables ellerydesigns.com

First Day of School Free Printables www.ellerydesigns.com

Back to School Free Printable by ElleryDesigns.com

July 5, 2016 by: Michelle

DIY Jewelry Stand

Hi, Brianna here with Hang the Moon Designs sharing my DIY Jewelry Stand. Here is a DIY that I bet doesn’t even require a trip to the hardware store for the basic pieces…but maybe to upgrade this project you might want to take a short trip.

DIY Jewelry Stand by Hang the Moon Designs on ElleryDesigns.com

Basic supplies and tools:

Scrap wood (or wood cutting board)

Hammer

Nails

Upgraded supplies: (Note: You do NOT need all of these so look at the finished products to decide what works best for you.)

Pretty thumb tacks

Gold nails with a wide flat head

Paint and paint brush OR

Scrap wallpaper

Gold brackets or decorative corners

Super glue

Wire cutters

Drill

Eye hooks

Leather/twine or some kind of hanging material

DIY Jewelry Stand by Hang the Moon Designs on ElleryDesigns.com

Choose your overall design.  I have three examples here:

  1. Beach vibe with a touch of glam

DIY Jewelry Stand by Hang the Moon Designs on ElleryDesigns.com

2. Kate Spade inspired

DIY Jewelry Stand by Hang the Moon Designs on ElleryDesigns.com

3. Simple and Chic

DIY Jewelry Stand by Hang the Moon Designs on ElleryDesigns.com

For the beach vibe I used scrap grasscloth wallpaper from a previous project and wallpapered onto my scrap wood.

For the Kate Spade inspired piece I chose green acrylic paint and for the simple and chic I used left over Sherwin Williams sea salt, one of my favorite paint colors.  You can you anything as the back ground but I encourage you to keep it simple because when it’s all finished your jewelry will the be the star.

2. The background: Paint, stain or wallpaper your wood piece DIY Jewelry Stand by Hang the Moon Designs on ElleryDesigns.com

DIY Jewelry Stand by Hang the Moon Designs on ElleryDesigns.com

3. Decide on hardware, if any, and attach.  This will probably require a drill.

DIY Jewelry Stand by Hang the Moon Designs on ElleryDesigns.com DIY Jewelry Stand by Hang the Moon Designs on ElleryDesigns.com DIY Jewelry Stand by Hang the Moon Designs on ElleryDesigns.com DIY Jewelry Stand by Hang the Moon Designs on ElleryDesigns.com DIY Jewelry Stand by Hang the Moon Designs on ElleryDesigns.com DIY Jewelry Stand by Hang the Moon Designs on ElleryDesigns.com

4. CRITICAL: Decide how you’re hanging your piece, or you could set on an easel.  This is important to know now because if you’re hanging with brackets on the back ATTACH NOW (decide vertical or horizontal).  This will be difficult when all the nails are in.  If you decide to hang from the top with eye hooks and leather/twine you can move on.

5. Using wire cutters cut off the backs of tacks.  I would do this over a small box and cover with your hand so the backs don’t fly everywhere.

6. Decide placement of your nails and hammer them in.  Keep in mind what kind of jewelry: long and short necklaces, bracelets, dangle earrings, studs. You might want to grab a couple bracelets so you can see how they’re going to fall. I make sure there are two apart to link together with wire for dangle earrings.

DIY Jewelry Stand by Hang the Moon Designs on ElleryDesigns.com

7. ALL at once, so the superglue keeps flowing, attach your pretty tack heads to the nail heads.  This takes a big of patience.  If you went with the cute animal tacks from Target you need to drill a tiny hole in the back and then put glue in that and thread over the nail.  Let it dry!

DIY Jewelry Stand by Hang the Moon Designs on ElleryDesigns.com DIY Jewelry Stand by Hang the Moon Designs on ElleryDesigns.com Screen DIY Jewelry Stand by Hang the Moon Designs on ElleryDesigns.com2016-05-24 at 1.08.44 PM  DIY Jewelry Stand by Hang the Moon Designs on ElleryDesigns.com


8. If you have decided to use eye hooks to hang your piece then attach those now by drilling in a tiny hole on either side, about 1 inch from the edge, and screw them in.

9. ADD your pretty pieces or sign the back with a little note and wrap it in a garment box and get ready to give away!

DIY Jewelry Stand by Hang the Moon Designs on ElleryDesigns.com

June 28, 2016 by: Michelle

K is for KitchenAid – Stand Mixer Review & Giveaway

KitchenAid provided me this stand mixer free of charge but all opinions expressed are 100% mine.

K is for Kitchen Aid - Stand Mixer Review & Giveaway! www.ellerydesigns.com

My daughter and I whipped up some patriotic cupcakes using our new KitchenAid Stand Mixer and we couldn’t be more in love! It’s true, I’ve never had one until now and it is a game changer! I feel like I may be the last person on Earth to own one of these beauties but I’m seriously amazed at how easy it is to bake and cook now! I’m a little embarrassed to admit that these always intimidated me, as I’m no professional in the kitchen, but oh my WOW does this thing change your life! No, really. What a time saver! I love that it comes with several attachment options to fit all of your cooking needs! I love it so much that I store it — better yet, display it on my counter, because it’s not only functional but it’s also pretty to look at! 😉 And we loved watching it work it’s mixing magic without having to do any work.

I’m all about easy baking, so store bought cake mix and frosting for the win! Also, you may notice a sneak peak of our new Monogram Shelves coming to the shop soon! As you can see here, used to display our cupcakes but the options are really endless as to how you can style your shelves!

K is for Kitchen Aid - Stand Mixer Review & Giveaway! www.ellerydesigns.com K is for Kitchen Aid - Stand Mixer Review & Giveaway! www.ellerydesigns.comK is for Kitchen Aid - Stand Mixer Review & Giveaway! www.ellerydesigns.comK is for Kitchen Aid - Stand Mixer Review & Giveaway! www.ellerydesigns.comK is for Kitchen Aid - Stand Mixer Review & Giveaway! www.ellerydesigns.comK is for Kitchen Aid - Stand Mixer Review & Giveaway! www.ellerydesigns.com

K is for Kitchen Aid - Stand Mixer Review & Giveaway! www.ellerydesigns.comK is for Kitchen Aid - Stand Mixer Review & Giveaway! www.ellerydesigns.com K is for Kitchen Aid - Stand Mixer Review & Giveaway! www.ellerydesigns.com K is for Kitchen Aid - Stand Mixer Review & Giveaway! www.ellerydesigns.com K is for Kitchen Aid - Stand Mixer Review & Giveaway! www.ellerydesigns.comK is for Kitchen Aid - Stand Mixer Review & Giveaway! www.ellerydesigns.com K is for Kitchen Aid - Stand Mixer Review & Giveaway! www.ellerydesigns.comK is for KitchenAid Stand Mixer Review & Giveaway

We had so much fun making these together, super kid-friendly patriotic cupcakes! I think anytime sprinkles are involved it’s a win-win! 🙂

Last but not least, KitchenAid is kindly giving away ONE Artisan Series 5-Quart Stand Mixer, just like mine to one of my followers over on Instagram! Winner gets to choose the color of their choice! It took me a while to decide what color I wanted but ended up going with the traditional “white” to blend well with our new white kitchen makeover. Click here to head over to my Instagram page tonight to enter.


K is for KitchenAid Stand Mixer Giveaway - www.ellerydesigns.com

June 20, 2016 by: Michelle

Styling a Unique Gallery Wall with Designer Living

Thank you Designer Living for sending me these amazing products for review. All thoughts and opinions written are 100% mine.

Styling a Unique Gallery Wall with Designer Living at ElleryDesigns.com

Gallery walls are my favorite, and what I love even more is using unique pieces to complete the design. For example, on this wall I used the 4 piece decorative tray set in gray from Designer Living. Typically seen on tables, I decided to hang the trays on my gallery wall using command strips and adding different photos and textures to make them really give them some added dimension and character. I hung the plain gray tray on a diagonal to spice it up a bit because my daughter said she liked how it looked like a diamond. Sometimes, you gotta listen to your kiddos design advice b/c I love how it looks. I had that little birdie picture holder laying around so decided to add that inside the tray to display the photograph.

We’ve had this blank wall space in our finished basement for awhile now and I’m so happy with how it turned out. The color scheme is gray, yellow and pops of aqua/turquoise and we’ve kept that theme throughout all of the decor. The You Are My Sunshine canvas is dear to me because our daughter is our one and only sunshine so it’s more than fitting for us. These pictures of my daughter are some of my favorites of her from a fun outdoor art session we did a few years ago. I used more photos, funky paperclips, faux flowers and washi tape to dress up the three tuscan tile patterned frames.

Styling a Unique Gallery Wall with Designer Living at ElleryDesigns.comStyling a Unique Gallery Wall with Designer Living at ElleryDesigns.comStyling a Unique Gallery Wall with Designer Living at ElleryDesigns.comStyling a Unique Gallery Wall with Designer Living at ElleryDesigns.comStyling a Unique Gallery Wall with Designer Living at ElleryDesigns.comStyling a Unique Gallery Wall with Designer Living at ElleryDesigns.comStyling a Unique Gallery Wall with Designer Living at ElleryDesigns.comDL11Styling a Unique Gallery Wall with Designer Living at ElleryDesigns.com

Styling a Unique Gallery Wall with Designer Living - ElleryDesigns.comStyling a Unique Gallery Wall with Designer Living at ElleryDesigns.com

For some even better news, Designer Living is offering my readers 15% off their next purchase using code DLED15. Non-stacking, one time use only. Does not apply to steals, designer boutique, or specials, valid 6/20 – 7/31. Happy Shopping! ALSO, be sure to head over to my instagram page for the $75 giveaway we are hosting later today! TWO lucky winners will receive a $75 gift certificate to Designer Living. Yay!!

Designer Living $75 Giveaway

Sources:

Sunshine Canvas, Frames & Trays (seen on wall): Designer Living

Yellow Arrow: Hobby Lobby

Hello Wooden Tag: Tiny House Vintage Art

Life is a Beautiful Ride Print: These Bare Walls

June 7, 2016 by: Michelle

Jord Watch Gift Idea, Free Printables & Contest

Thank you Jord for sending me this amazing watch. All thoughts and opinions written are 100% mine.

Jord Wood Watch Gift Idea, Free Printable & Giveaway!

When your new watch matches your home decor, you instantly fall in LOVE! I mean look how matchy-matchy and awesome it looks next to our pallet wall! Also, I’m all about pretty packaging and attention to detail and this came dressed to impress!

Jord Wood Watch Gift Idea, Free Printable & Giveaway!

Jord watches are made out of natural wood. Talk about some serious arm candy! Each time I’ve worn it I get asked where I got it! It’s a conversation starter, that’s for sure! So unique and super comfortable, too! The best part is they are the perfect gift idea for anyone in your life and I’ve got you covered! You can thank me later! 😉 I designed a few different free printables for you, for almost any occasion! Yay! Birthday’s, Anniversary’s and with Father’s Day coming up – surprise your hubby with a wood watch – he’ll absolutely LOVE it!

Here’s the watch I chose from the Fieldcrest series and am officially obsessed; the best part is it goes with everything! If you follow us on Instagram, you know we are lovers of woodworking so I swear these wood watches are perfect for us! There are so many amazing options, you can view all of the women’s watches here.

Jord Wood Watches Giveaway and Free Printables

Jord Wood Watch Gift Idea, Free Printable & Giveaway! Jord3

What do you think? Do you have a Jord Watch? If not, you can enter to win a $75 voucher toward your next purchase!! Lucky YOU! Follow the below link to enter:

https://www.woodwatches.com/g/ellerydesigns

The contest will close 6/14 at 11:59pm. The randomly selected winner will be contacted and announced on 6/15.  Just for entering, you’ll be given a $20 coupon code so what are you waiting for? Enter above and good luck!

Download the free WATCH printables below by right clicking on the image to save or print. Enjoy!! These would be cute framed or tied along with the packaging. WATCH1 Watch2 Watch3 Watch4 Watch5

June 1, 2016 by: Michelle

Our DIY Kitchen Remodel – Painting Your Cabinets White

Painting Your Kitchen Cabinets White - DIY Tutorial by Ellery Designs

I’m so excited to share with you the best way to paint your cabinets white! (or any color, really but white was the look we were going for.) Snow White Milk Paint by General Finishes to be exact. After researching my options I felt this was the best fit! Light and bright kitchens are ever so popular right now and it is AMAZING what a coat of paint does to a room! You can see our complete kitchen renovation here.

Now this is quite the project you guys. A tedious project but BEYOND worth it! I did a lot of research and while I don’t like to say people are wrong, let me tell you don’t believe everything you read. We went through a lot of trial and error before we found how to achieve beautiful results.

Best Way to Paint Your Kitchen Cabinets White - www.ellerydesigns.com

Materials:

  • Paint – General Finishes Snow White Milk Paint
  • Top Coat – General Finishes High Performance Top Coat in Satin
  • Denatured Alcohol
  • Paint Brushes – we like Purdy brand the best bought at Menards (they are more pricey but worth it)
  • Foam Roller (not a big one – small one worked best like this one.)
  • Paint Tray
  • Primer (GF Milk Paint does not require Primer but we did this extra step to ensure the best result)

Painting Your Kitchen Cabinets White - ElleryDesigns.com

STEPS:

  1. Remove current hardware from cabinets.
  2. Clean your cabinets by using 1/2 denatured alcohol and half water. (I put in a spray bottle and cleaned using a scotch brite pad and let dry for several hours)
  3. Remove cabinets/drawers – we started with the top cabinets. Once those were fully completed, we moved on to the bottom.
  4. Sand cabinet doors/drawers and cabinet box using sanding pads and sandpaper. Be sure to sand really well near the handles or where you touch the cabinets the most – we found these spots needed most sanding b/c of the oils released from your hands. We sanded really well and did not need to sand in between coats of paint.
  5. Clean off cabinets really well to make sure there is no left over sanding residue, etc. before painting. Tack cloths work great for this.
  6. Prime cabinets. HERE ARE THE IMPORTANT STEPS: We brushed on the paint with our Purdy paintbrushes and then back rolled them all using a foam roller to eliminate brush strokes. This is the only way to eliminate brush strokes, as we tried using foam paint brushes but it did not work well for us. SO YES, it’s kind of a double process but paint your cabinets with your paint brush then back roll. I uploaded a YouTube video of me doing those steps below. (Sorry for the low quality, I was doing this myself so was trying to video and paint at the same time, ha!)
  7. Using the same technique as in the video above, paint three coats of General Finishes Milk Paint. This paint dries VERY FAST so once your done with one coat of about 8 cabinets, you can most likely move on to the second coat right after. That’s what worked best for us. We painted them in our garage. Be sure to use small wooden blocks to raise your cabinets so you can wipe off the access paint on the sides or you will have messy drip marks on the backside and it won’t be a good starting part when you flip them over to repeat the process. Yes, four coats on each side is time consuming but it turned out amazing and the time put in was worth the amazing result. Again, you do not need to prime but we decided this was probably for the best.Paint Your Kitchen Cabinets White - www.ellerydesigns.com
  8. Lastly, we used General Finishes High Performance Top Coat in Satin for the finishing coat. This is very easy to apply and we just painted it on, no back rolling.

Painting Your Kitchen Cabinets White - No Sanding Between Coats! www.ellerydesigns.com

Here’s a work in progress shot of them complete with the new hardware – isn’t the difference so worth it? It’s amazing how white paint can transform a room!

Paint Your Kitchen Cabinets White - From Drab to Glam. ElleryDesigns.com

Ahhh….the white is so beautiful and I just love the clean look!! Everyone that comes over can’t believe it’s the same space!

Paint Your Kitchen Cabinets White - General Finishes Milk Paint - www.ellerydesigns.com

So all in all, YES this is a very tedious project. If we were just painting our cabinets, and our cabinets only, it would have been much easier. We could have completed them in two weekends. Since we tackled an entire renovation, we had a lot of bead board, crown and trim to also paint. By the time we were finished we were so over painting but were amazed at the end result! I read a lot of different articles online and to be very honest, none of them worked for us. We are true perfectionists at heart so what some people may think looks good, we did not find looked good so through trial and error, we came up with the technique listed above that worked best for us. Yes, a few extra steps but it was SO worth it! I hope you enjoyed our transformation and if you’re up for the makeover, be sure to send me photos! Paint Your Kitchen Cabinets White With General Finishes Milk Paint by Ellery Designs

Check out the completed kitchen transformation here. Happy Painting!!

May 26, 2016 by: Michelle

BloomsyBox Review – Get Fresh Flowers to Your Doorstep Every Month!

Thank you BloomsyBox for sending me this bouquet to review. All thoughts and opinions written are 100% mine.

BloomsyBox Review - A monthly flower subscription

You guys! Did you know there is such thing as a monthly flower subscription? Sign me up! When I first learned of BloomsyBox I was intrigued – it’s like the BirchBox or StitchFix of flowers!

I’m basically obsessed with this idea. They send you a monthly bouquet of UNIQUE, hand picked flowers fresh from the farms for your enjoyment! No hassle, no filler flowers – a gorgeous bouquet arrives each month on your doorstep.

When my box arrived, inside were gorgeous red calla lilies! Yay! Just perfect for spring and the upcoming holiday weekend.

BloomsyBox Review - Fresh Flowers to your doorstep every month!

So why not go to your local grocery store? There are a few major differences from the average floral supplier. First, no mixed bouquets with unnecessary extras – BloomsyBox only deals in “single-variety”- hand-tied bunches; second, the flowers are sourced direct from suppliers in South America, Holland, Thailand and California meaning no middle-man mark-up to increase the price.

A basic subscription costs $34.99 per bouquet for a monthly delivery (and includes free shipping – yay!) but there are other options to choose from. Wouldn’t this make a fabulous gift idea for a loved one? You’re welcome. 😉
BloomsyBox Review - Fresh Flowers to your doorstep every month! BloomsyBox Review - Get Fresh Flowers Delivered to Your Doorstep Each Month!
I’ve only had them for a day and I keep rearranging them all around the house! They are beautiful and I just love the concept of having a little present arrive each month and not knowing what’s inside! That’s the beauty of it, really. Head over to the BloomsyBox website and check out the monthly options that works best for you! Life can be messy at times, right? Spice it up with the beauty of BloomsyBox!
BloomsyBox Review - Fresh Flowers to your doorstep every month!

May 18, 2016 by: Michelle

DIY Cedar Monogram Planter Box

DIY Cedar Monogram Planter Box by ElleryDesigns.com

UPDATE 2017: PURCHASE OUR NEW AND IMPROVED, SMALLER MONOGRAM PLANTER HERE.

Our DIY Monogram Planter has had such a positive response on Instagram and I’m so excited to share the details with you today. This initial is HUGE! 4 ft x 4.5 ft x 5 inches deep to be exact. My hubby built this and came up with the fantastic idea all on his own – yay for handy hubbies and creative minds! I cannot wait for the blooms to start growing to see this baby fill out! The options are endless – I can’t wait to decorate it with mini pumpkins and fake cobwebs for fall and have some fun things planned for Christmas. We used cedar since it is ideal for exterior projects and has great weather resistance.

Materials:

-Cedar purchased at Menards

  • 1×12 cedar for the back of the letter.
  • 1×4 cedar for the sides
  • 1×3 cedar for the front
  • 1×6 cedar for the planter slats

–18 gauge 1 3/4 brad nails (and nail gun)

–Gorilla Wood Glue (Used on all of the joints with the brads)

-Compound Miter Saw

–Miracle Gro Potting Mix

-Flowers (We used impatiens since this is a shaded area)

Obviously the materials will vary depending on how large your initial is and what letter you will be building. Like I mentioned earlier, our K is really large so it wasn’t a cheap project. First, he built the base/backside of the K – no, he didn’t trace anything just kind of created it as he went. Some letters will obviously be more intrusive than others.

First, he made the base of the K using 1×12’s.

DIY Cedar Monogram Planter Box by ElleryDesigns.com

He used his kreg jig to piece this together as seen below.

DIY Cedar Monogram Planter Box by ElleryDesigns.com

Next, he used the 1×4 pieces of cedar to complete the sides. Yes, it’s a lot of cuts and patience. He used his compound miter saw to cut everything.

DIY Cedar Monogram Planter Box by ElleryDesigns.com

After the sides are complete, next are 1×3’s for the front pieces. Again, a lot more cuts!

DIY Cedar Monogram Planter Box by ElleryDesigns.comDIY Cedar Monogram Planter Box by ElleryDesigns.com

Next, he completed the inside planter slats using 1×6 cedar, using brad nails to secure in place. Once the slats were complete, he drilled small holes on the bottom of each one to allow for water to drain properly.

DIY Cedar Monogram Planter Box by ElleryDesigns.comDIY Cedar Monogram Planter Box by ElleryDesigns.com

Lastly, he hung it up by screwing it directly into the siding using extra long screws.

DIY Cedar Monogram Planter Box by ElleryDesigns.com DIY Cedar Monogram Planter Box by ElleryDesigns.com

Next it was time to plant this baby! Since this is a fully shaded area, my options were limited as to which flowers would work in shade only. One thing I learned is don’t overpack with dirt – less is more. The first time you water them it was a bit of a mess with access dirt pouring out but they seem to be doing well so far! We only water about every three days or so since these flowers are very easy to keep alive.

DIY Cedar Monogram Planter Box by ElleryDesigns.com

And that’s it!! I know, it’s a bit complicated if you’re not comfortable using saw’s and intricate cuts but I’m beyond happy with how this turned out! And it was 100% Ryan’s idea and the best part, a new and unique idea! Like I said, your options are endless! I have been brainstorming different ideas and how cool would this monogram be displayed at a wedding filled with real or fake flowers?! Also, since this is made of cedar and our siding is vinyl so we don’t need to worry about any damage.

DIY Cedar Monogram Planter Box by ElleryDesigns.comDIY Cedar Monogram Planter Box by ElleryDesigns.com

And here’s a little before and after….what a difference a DIY makes!

DIY Cedar Monogram Planter Box by ElleryDesigns.com

We hope you love it as much as we do! If you give it a try, be sure to share and tag me on Instagram so I can see! Username is @ellerydesigns. Happy planting!!

UPDATE JULY: This planter is growing even better than expected and here is an updated photo!

DIY Cedar Monogram Planter

Linking up to: Tatertots & Jello, I Heart Nap Time, Lil’ Luna, Somewhat Simple, The 36th Avenue

May 11, 2016 by: Michelle

Our DIY Kitchen Remodel – The Full Reveal

Complete Kitchen Makeover - ElleryDesigns.com

UPDATE: Our Kitchen has been featured on Shutterfly.com’s 100 Creative Kitchens! Yay! View the inspiration here.

Alright, this is my favorite post EVER. Our Modern Industrial DIY Farmhouse Kitchen Makeover. I’m doing things a little different and doing the FULL REVEAL post now and will have all the other posts (like all the tips and tricks on how to paint your cabinets white – yay!) in days to come.

The before and after photos sort of speak for themselves! The best part of this remodel is my handy hubby and I did everything ourselves. Whew! I think we need a vacation. It was a lot of work but BEYOND worth it! We are in LOVE with our new kitchen. It seriously feels like a brand new home. I love the modern industrial farmhouse feel with a touch of rustic glam. I can’t believe how much stuff I thought was acceptable to decorate with above the cabinets in our before pictures, yowsa! I am loving the fresh, clean feel it brings and the painted white cabinets really brighten up this room and feels much more spacious.

Here’s everything we updated:

  • Custom Crown on Ceiling and Top of Cabinets
  • Trim on Bottom of Cabinets
  • Bead board/Chair Rail/Trim on Adjacent Walls and in Dining Room
  • Handmade Breakfast Bar
  • Painted Cabinets
  • New Cabinet Hardware
  • Subway Tile Backsplash
  • Added Seeded Glass to Corner Display Cabinet and Glass Shelf
  • Upper and Lower Cabinet Lighting
  • Updated Outlet Covers
  • New Light Fixtures
  • Updated Counter Top Appliances by Kitchen Aid
  • New Fridge

Now, for the details and some progress photos along the way. Gosh, was it messy but you can’t appreciate the after photos without seeing some of the progress, right?! Here’s our first materials haul from Menards – we were probably at Menards three times a week during our five week renovation. Yep, we finished it all within five weeks! Felt much longer, but that’s another story….;)

DIY Kitchen Makeover by Ellery Designs - Installing the Crown Molding

The first thing we completed was the upper crown on the wall above the cabinets – you wouldn’t believe it but it’s three separate pieces all nailed together to make that beautiful crown! My hubby did most of the work I just used the nail gun 😉 P.S. Filling and sanding nail holes is the worst!! Never knew how long that takes but WOW. Time consuming but worth it!

DIY Kitchen Makeover by Ellery Designs - Installing the Crown Molding

We then added crown and trim above and below the cabinets, as seen in the last photo above. Next up, he added the beadboard and custom chair rail and base trim around the mini wall in the kitchen as well as the adjoining walls in the dining room to tie everything together. I can’t get over how detailed the trim work is – the hubby is quite the craftsman! You can see in this photo the detail work of this – it’s not just one piece of trim my friends. It’s pretty fab and I’m amazed at the process it takes to make your trim really stand out!

Beautiful White Kitchen Makeover - Beadboard and Trim - ElleryDesigns.com

The added breakfast bar is my favorite addition to this room. Not only does it add additional seating, but the details are amazing! He laid acacia wood for the bar top, which is the same type of wood on our dining room table, which ties in perfectly with our pallet wall. Win, win!

Beautiful White Industrial Farmhouse Kitchen Makeover - ElleryDesigns.comBeautiful White Industrial Farmhouse Kitchen Makeover - ElleryDesigns.com

After all the woodworking was complete, we filled alllllll the nail holes, sanded and it was ready for paint!! Yay for white and bright! We painted the cabinets using General Finishes Water Based Milk Paint Snow White Gallon.

Beautiful White Industrial Farmhouse Kitchen Makeover - ElleryDesigns.com

I’ll be sharing ALL the details of our painted cabinets next week. It’s AMAZING what a coat of paint (or three) does to this room! I’m in LOVE! It is a very time consuming process, but as you’ll see soon – it is SO worth it!

I’m so glad we took the corner cabinet to our local glass shop. They added seeded glass to the door and made a matching glass shelf. I love display cabinets and the hubby added a light and it’s one of my favorite parts of the room! It really breaks up the white and love that it’s a spot I can decorate and change up from season to season. It wasn’t cheap, but really glad we spent the extra money to do this.

Beautiful White Industrial Farmhouse Kitchen Makeover - ElleryDesigns.com

Once everything was painted, he completed the breakfast bar top and moved on to the backsplash. I’m in love with subway tile! We used white grout as well to keep with the light and bright theme of the renovation. We removed the small granite piece that went all the way across the bottom to ensure the new subway tile would be flush with the counters. Ryan was adamant about removing this and I’m glad he did! He’s always right…well, most of the time! 😉 You can see in the above photos where we removed it.

Beautiful White Industrial Farmhouse Kitchen Makeover - ElleryDesigns.com

After that was installed, it was really just touching up our walls and installing the light fixtures. He also added LED Cabinet Strip Lighting above and below the cabinets that really highlight the crown and subway tiles when turned on at night. It’s all controlled by a remote and you can pick the percentage of lighting – so worth the extra dollars! More on the lighting coming in a future post. The cabinet hardware I picked out from Menards are gorgeous! It’s a matte black almost dark grey color that really makes the cabinets pop and goes great with our black and galvanized accents throughout the room.

OK, enough with the boring photos! I’m so excited to bring you the FULL REVEAL!! Enjoy….!!

Complete Kitchen Makeover - ElleryDesigns.comOur DIY Kitchen Remodel - The Full Reveal & Details - ElleryDesigns.com


Fabulous Kitchen Makeover - ElleryDesigns.comBeautiful White Industrial Farmhouse Kitchen Makeover - ElleryDesigns.comFabulous Kitchen Makeover - ElleryDesigns.comIndustrial Farmhouse Kitchen Remodel by Ellery DesignsBeautiful White Industrial Farmhouse Kitchen Makeover - ElleryDesigns.com Fabulous White Kitchen Makeover - ElleryDesigns.comStunning White Farmhouse Kitchen Renovation by Ellery DesignsOur DIY Kitchen Remodel - The Full Reveal & Details - ElleryDesigns.comBeautiful White Industrial Farmhouse Kitchen Makeover - ElleryDesigns.comBeautiful White Industrial Farmhouse Kitchen Makeover - ElleryDesigns.comGorgeous Kitchen Remodel by ElleryDesigns.comAmazing DIY White Kitchen Renovation by Ellery DesignsBeautiful White Industrial Farmhouse Kitchen Makeover - ElleryDesigns.comAmazing Kitchen Makeover - ElleryDesigns.comStunning DIY White Kitchen Makeover - ElleryDesigns.comComplete Kitchen Renovation by Ellery Designs - Industrial Modern Farmhouse StyleBeautiful White Kitchen Remodel - ElleryDesigns.comBeautiful White Industrial Farmhouse Kitchen Makeover - ElleryDesigns.comBeautiful White Industrial Farmhouse Kitchen Makeover - ElleryDesigns.comBeautiful White Industrial Farmhouse Kitchen Makeover - ElleryDesigns.comBeautiful White Industrial Farmhouse Kitchen Makeover - ElleryDesigns.comAmazing White Kitchen Makeover - ElleryDesigns.comComplete Kitchen Makeover Lighting - ElleryDesigns.comBeautiful White Industrial Farmhouse Kitchen Makeover - ElleryDesigns.comBeautiful White Industrial Farmhouse Kitchen Makeover - ElleryDesigns.comComplete Kitchen Makeover - Custom Breakfast Bar - ElleryDesigns.comBeautiful White Industrial Farmhouse Kitchen Makeover - ElleryDesigns.comAmazing DIY Kitchen Remodel by Ellery DesignsBeautiful White Industrial Farmhouse Kitchen Makeover - ElleryDesigns.comBeautiful White Industrial Farmhouse Kitchen Makeover - ElleryDesigns.com

You made it! Yay! 🙂 I would love to know – what is your favorite part of our kitchen remodel? Let me know in the comments! There are many more detailed posts to come regarding this project but hope you are left inspired! It’s amazing what a little time, paint and patience does to a room transformation! Our kitchen has gone from drab to glam and can’t believe it’s mine!

Beautiful White Industrial Farmhouse Kitchen Makeover - ElleryDesigns.com

SOURCES LIST:

Lighting: Menards
All wood/beadboard/trim: Menards
Subway Tile Backsplash: Menards
Cabinet Hardware: Menards
Acacia Wood seen on breakfast bar: Lumber Liquidators
White Paint: General Finishes Milk Paint & HP Top Coat in Satin Finish
Pub Stools: World Market
Knife Set, Stand Mixer: Kitchen Aid
The Knox Kitchen Cutting Board: Our Board Boutique
Bread Box: Painted Fox 
White Milk Bottle Tray & Faux Succulent Stems: World Market
Fork & Knife Food Sign: Barn Owl Primitives
Chalkboard on Wall: World Market
Chalkboard Canisters: Kohls
Placemats: HomeGoods
3 Tiered Farmhouse Tray: Olde Farm Creek

Beautiful DIY Kitchen Makeover by Ellery Designs

  • « Previous Page
  • 1
  • …
  • 3
  • 4
  • 5
  • 6
  • 7
  • …
  • 28
  • Next Page »

FALL FEELS TEES ON SALE NOW!

FALL FEELS TEES ON SALE NOW!

Shop my FAV Hearth & Hand Products!


Stencil, stencils, wall stencil, stencil designs, stencil pattern, stenciling

Latest Pins

Youth #football coaches be like - we still havin practice! Repin if this applies to you. #youthfootball www.youthfootballonline.comLight themed transitional living room cozies up with an ivory sofa paired with gray accent chairs around a wooden and metal coffee table.Christina Henck designed this Philadelphia home to be light and airy with a modern bohemian feel. In the living room, a gold mirrored coffee table and green velvet accent chairs add a touch of glam, while the patterned accent pillows give the design dimension. Gem tones act as the grounding force for this modern classic living room. See more of this gorgeous design on henckdesign.com!Funny Pictures Of The Day - 35 PicsThis cedar wood screen adds loads of character to a back yard, is budget friendly, and gives an outdoor patio space extra privacy.Decorating your Kitchen Island for Christmas with Hobby Lobby – Ellery Designs #christmasDecorating your Kitchen Island for Christmas with Hobby Lobby – Ellery DesignsChristmas Tee, Christmas Shirt for Women, Christmas T-Shirt, Baking Tee, Christmas Apparel, Christmas Tree Shirt  - Vintage Red Unisex TeeTween Chic Bedroom Makeover – Ellery DesignsTween Chic Bedroom Makeover – Ellery DesignsDecorating for fall with Afloral – Ellery DesignsDecorating for fall with Afloral – Ellery Designs
Follow Me on Pinterest

#ElleryWear Tees ON SALE!

Our New Home Before + After

Our New Home Before + After

How to Organize Your Pantry

How to Organize Your Pantry

Linen Closet Makeover

Linen Closet Makeover

Truly Blessed Tees ON SALE!

Our Menards Commercial

Our Menards Commercial

Cozy Glam Bedroom Refresh by Ellery Designs

Cozy Glam Bedroom Refresh by Ellery Designs

Tween Chic Bedroom Makeover

DIY Planter

DIY Planter

Refresh your mantel with wallpaper

Refresh your mantel with wallpaper

Stencil Your Fireplace Tiles

Stencil Your Fireplace Tiles

Gallery Wall Ideas

Gallery Wall Ideas

Our Townhome Kitchen Remodel

Our Townhome Kitchen Remodel

#ElleryWear ON SALE NOW!

#ElleryWear ON SALE NOW!

Our Pantry Makeover

Our Pantry Makeover

Thanks for stopping by!

We hope you leave inspired for your next project! Come back soon to see what we've been up to! Have a question or want to collaborate? Let's Chat...

Looking for something?

© 2025 · Ellery Designs · website by Pretty Darn Cute Design