UPDATE: Our Kitchen has been featured on Shutterfly.com’s 100 Creative Kitchens! Yay! View the inspiration here.
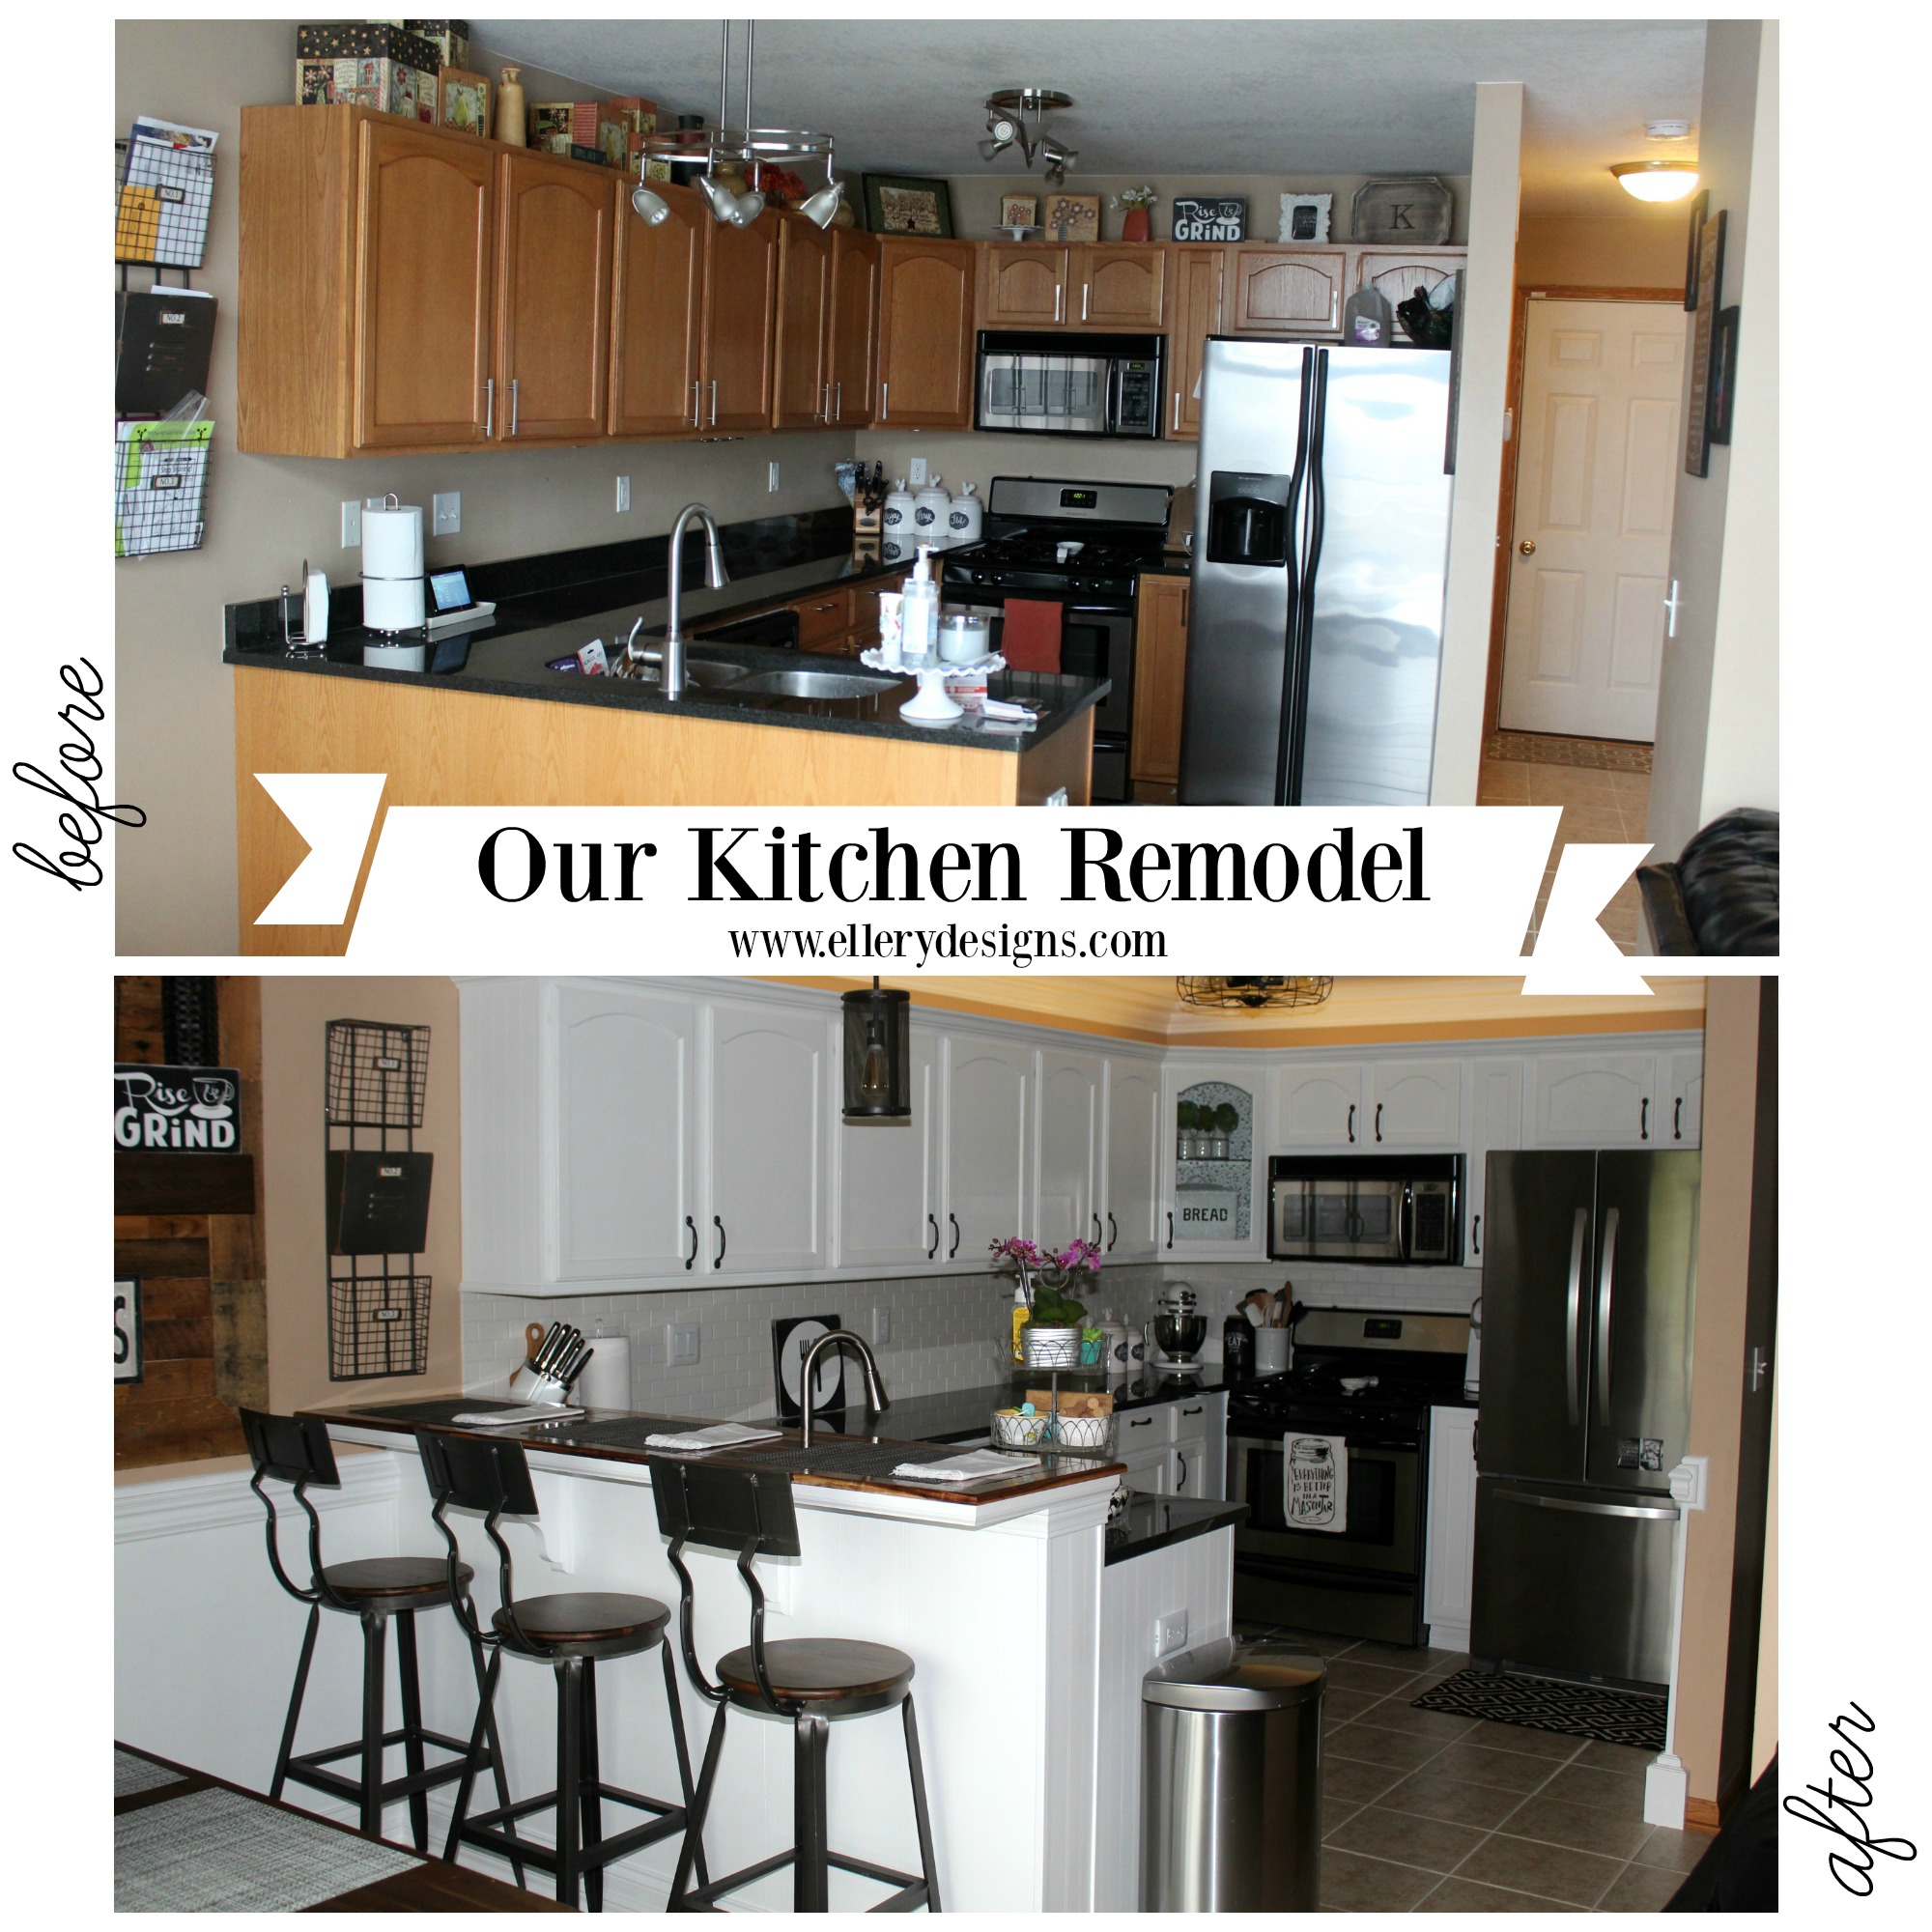
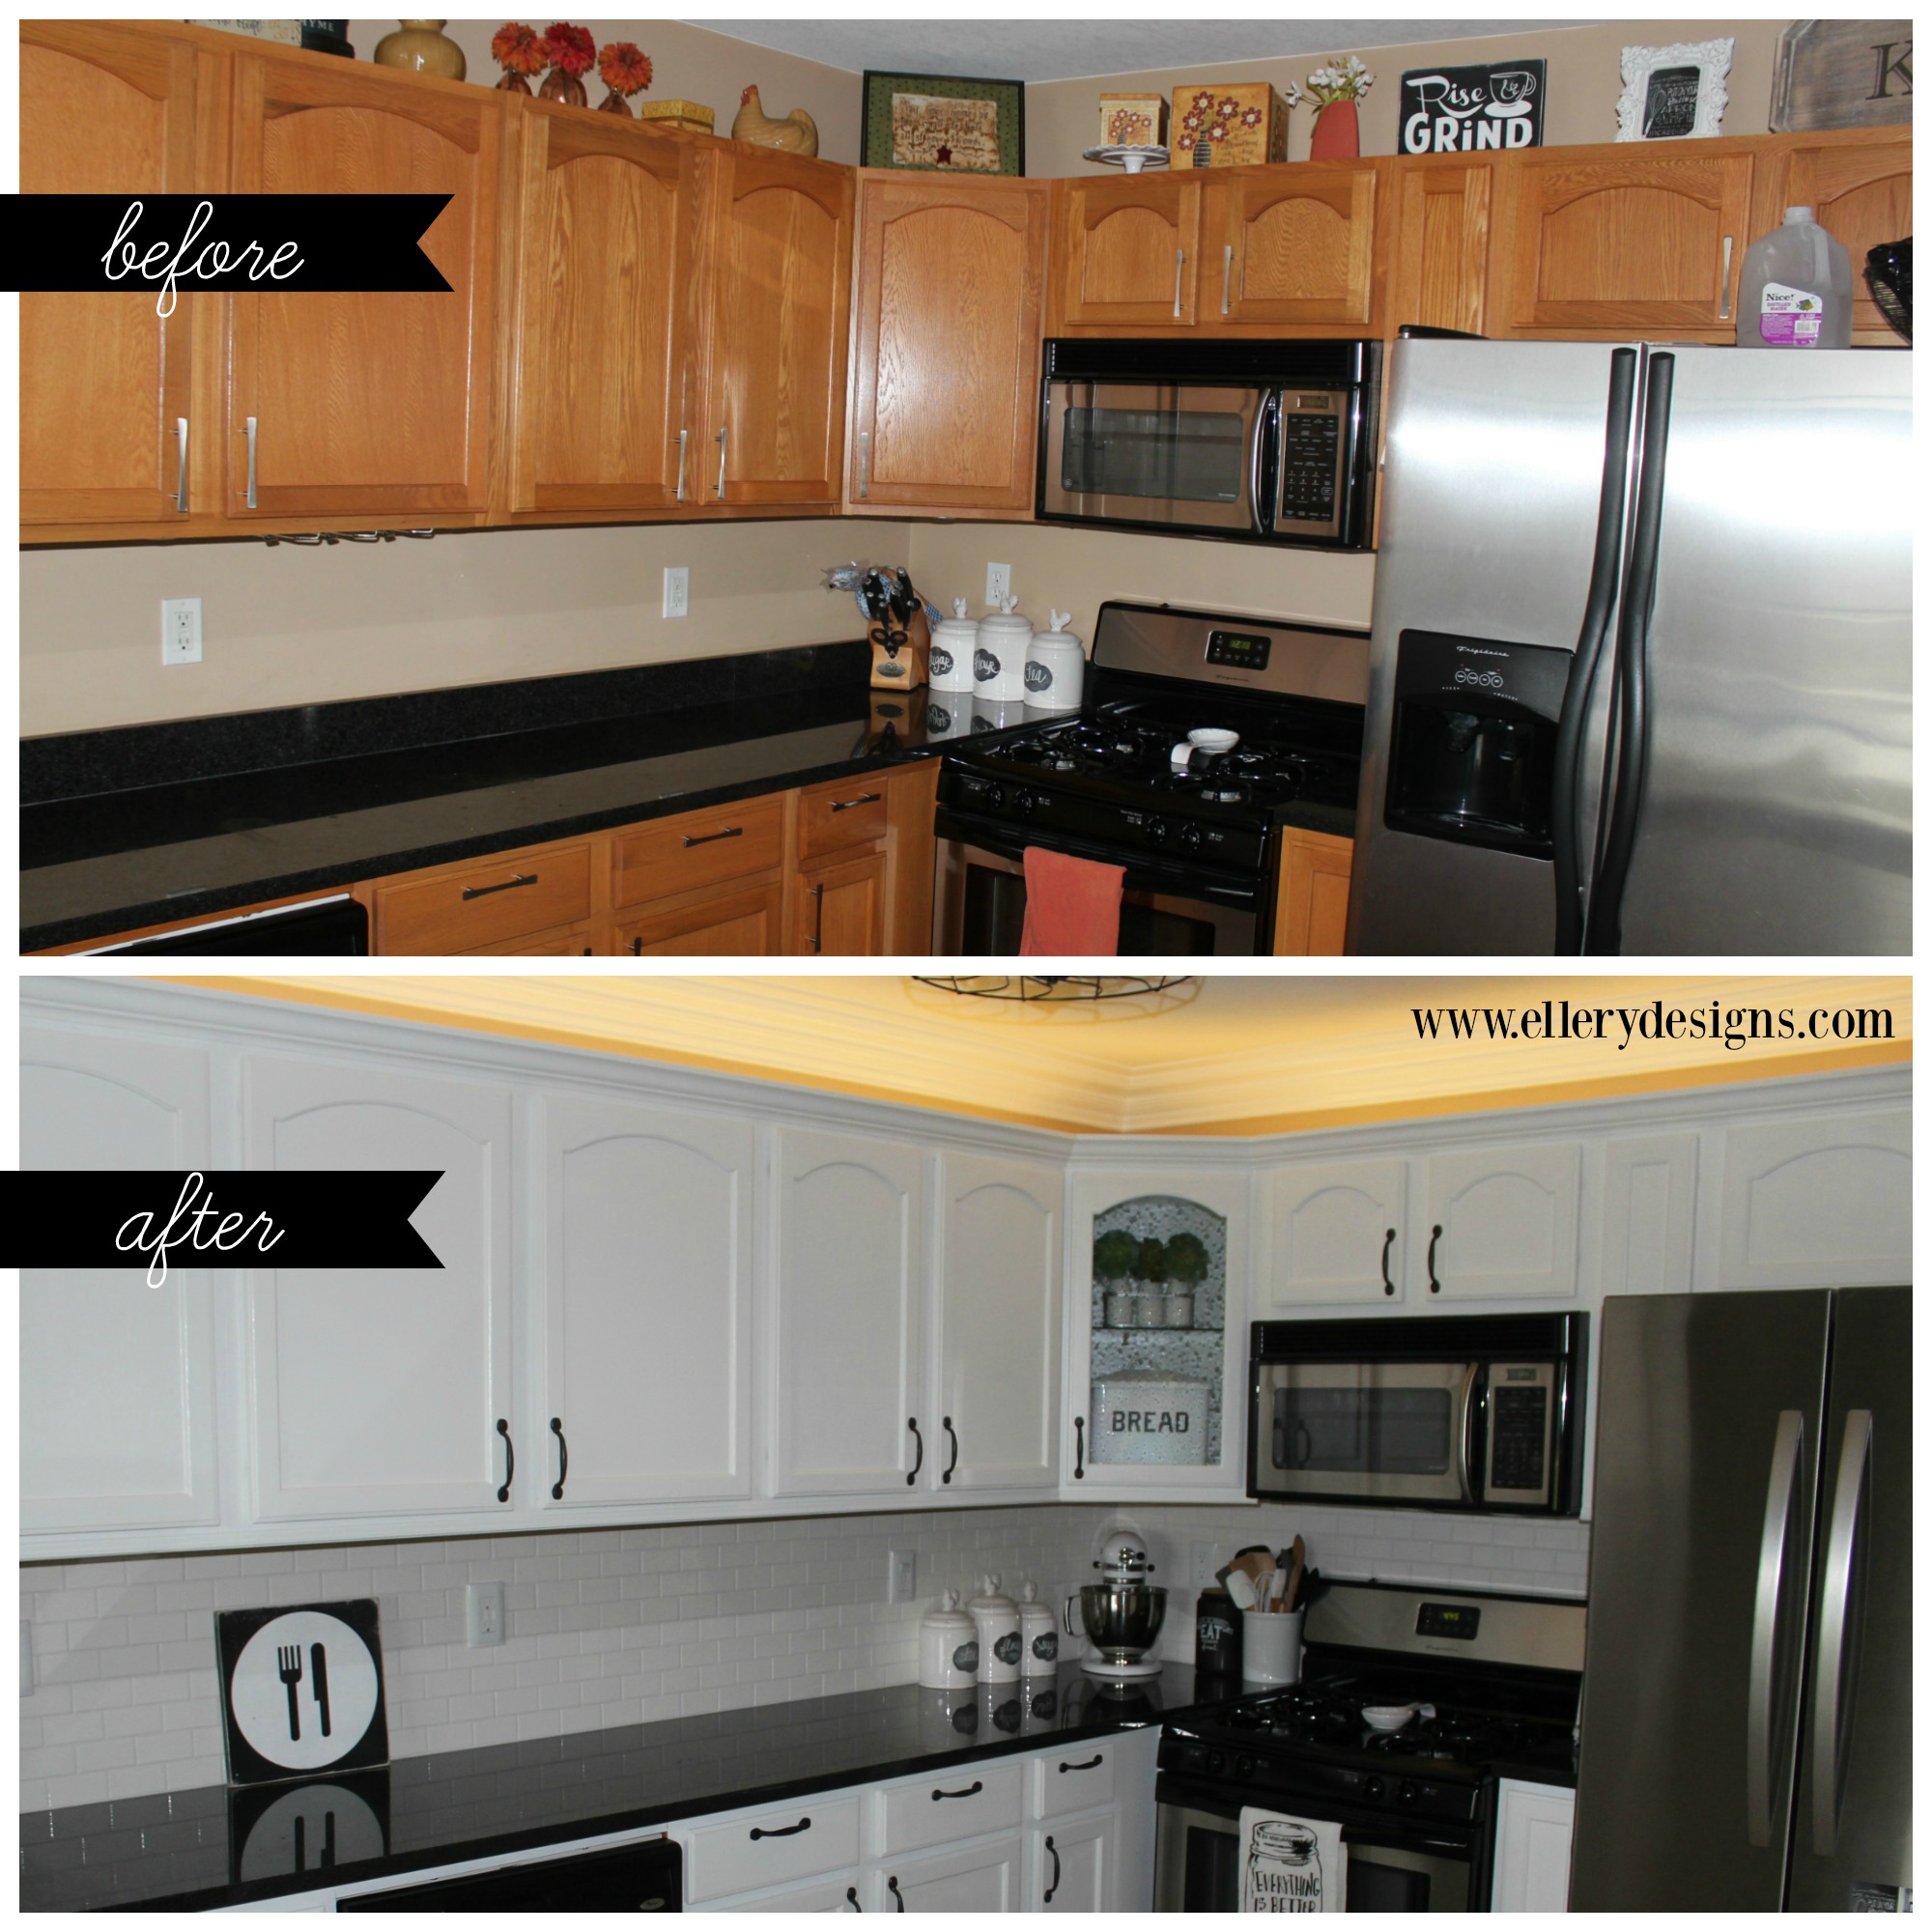
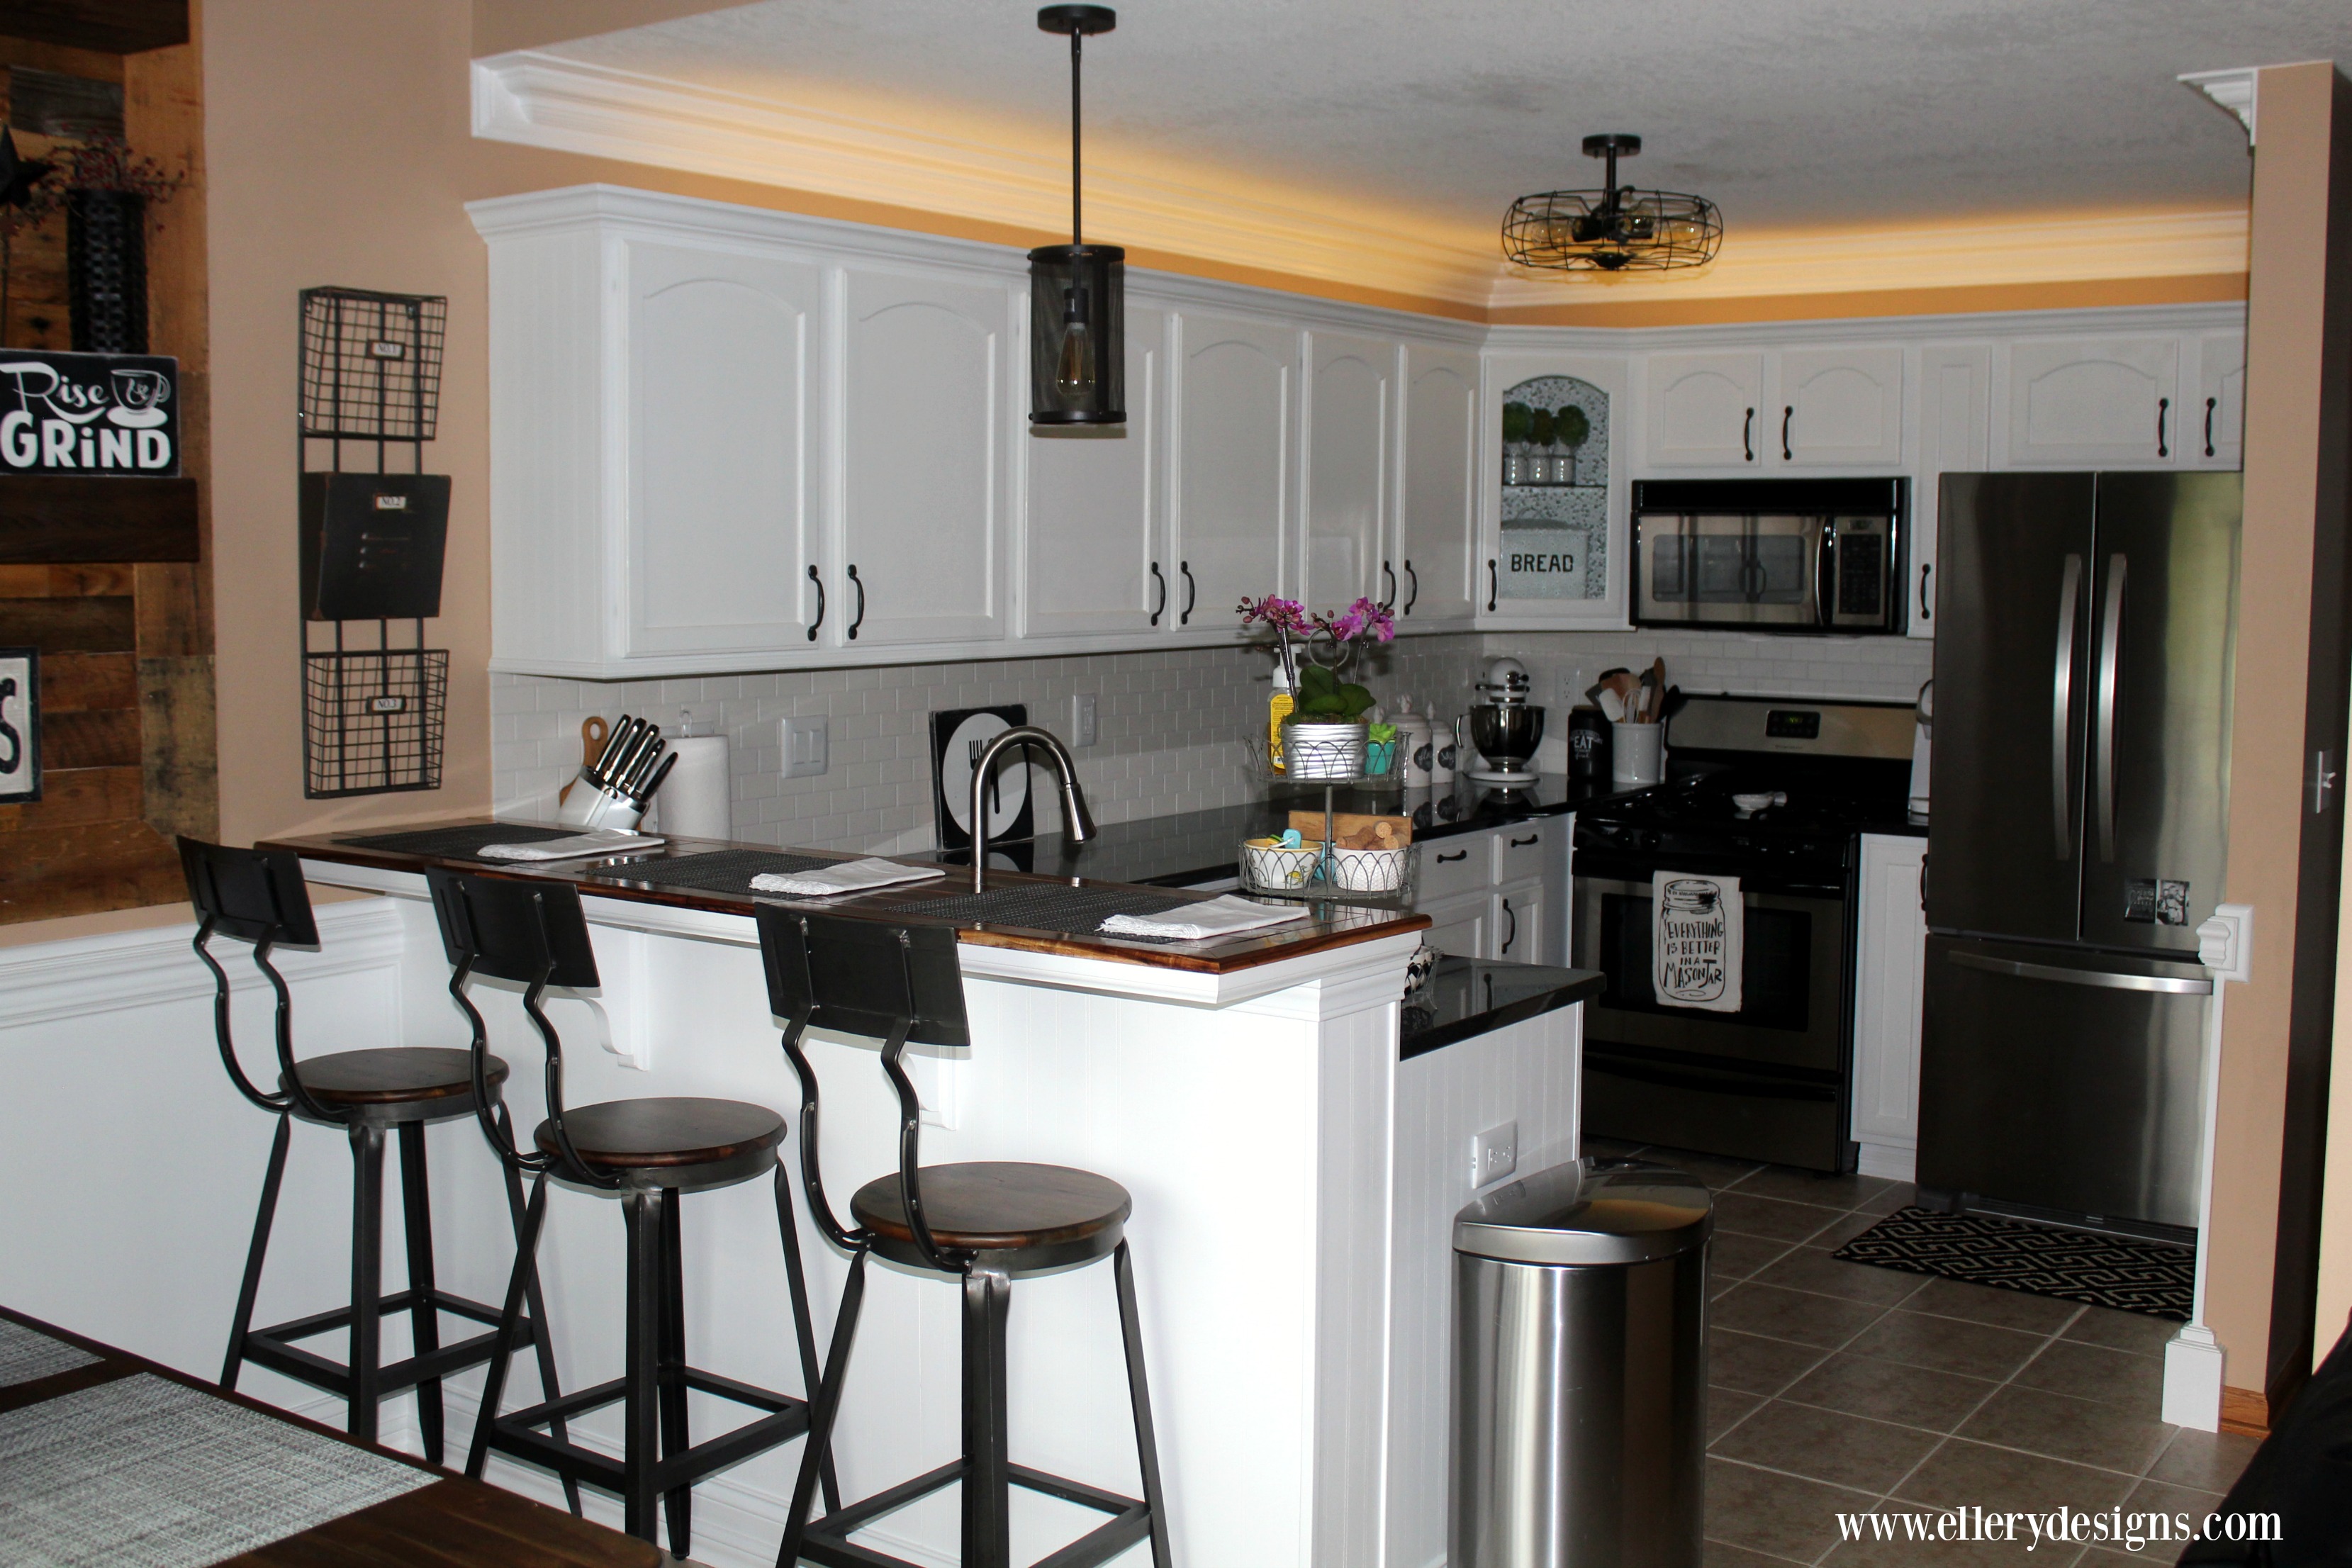
Alright, this is my favorite post EVER. Our Modern Industrial DIY Farmhouse Kitchen Makeover. I’m doing things a little different and doing the FULL REVEAL post now and will have all the other posts (like all the tips and tricks on how to paint your cabinets white – yay!) in days to come.
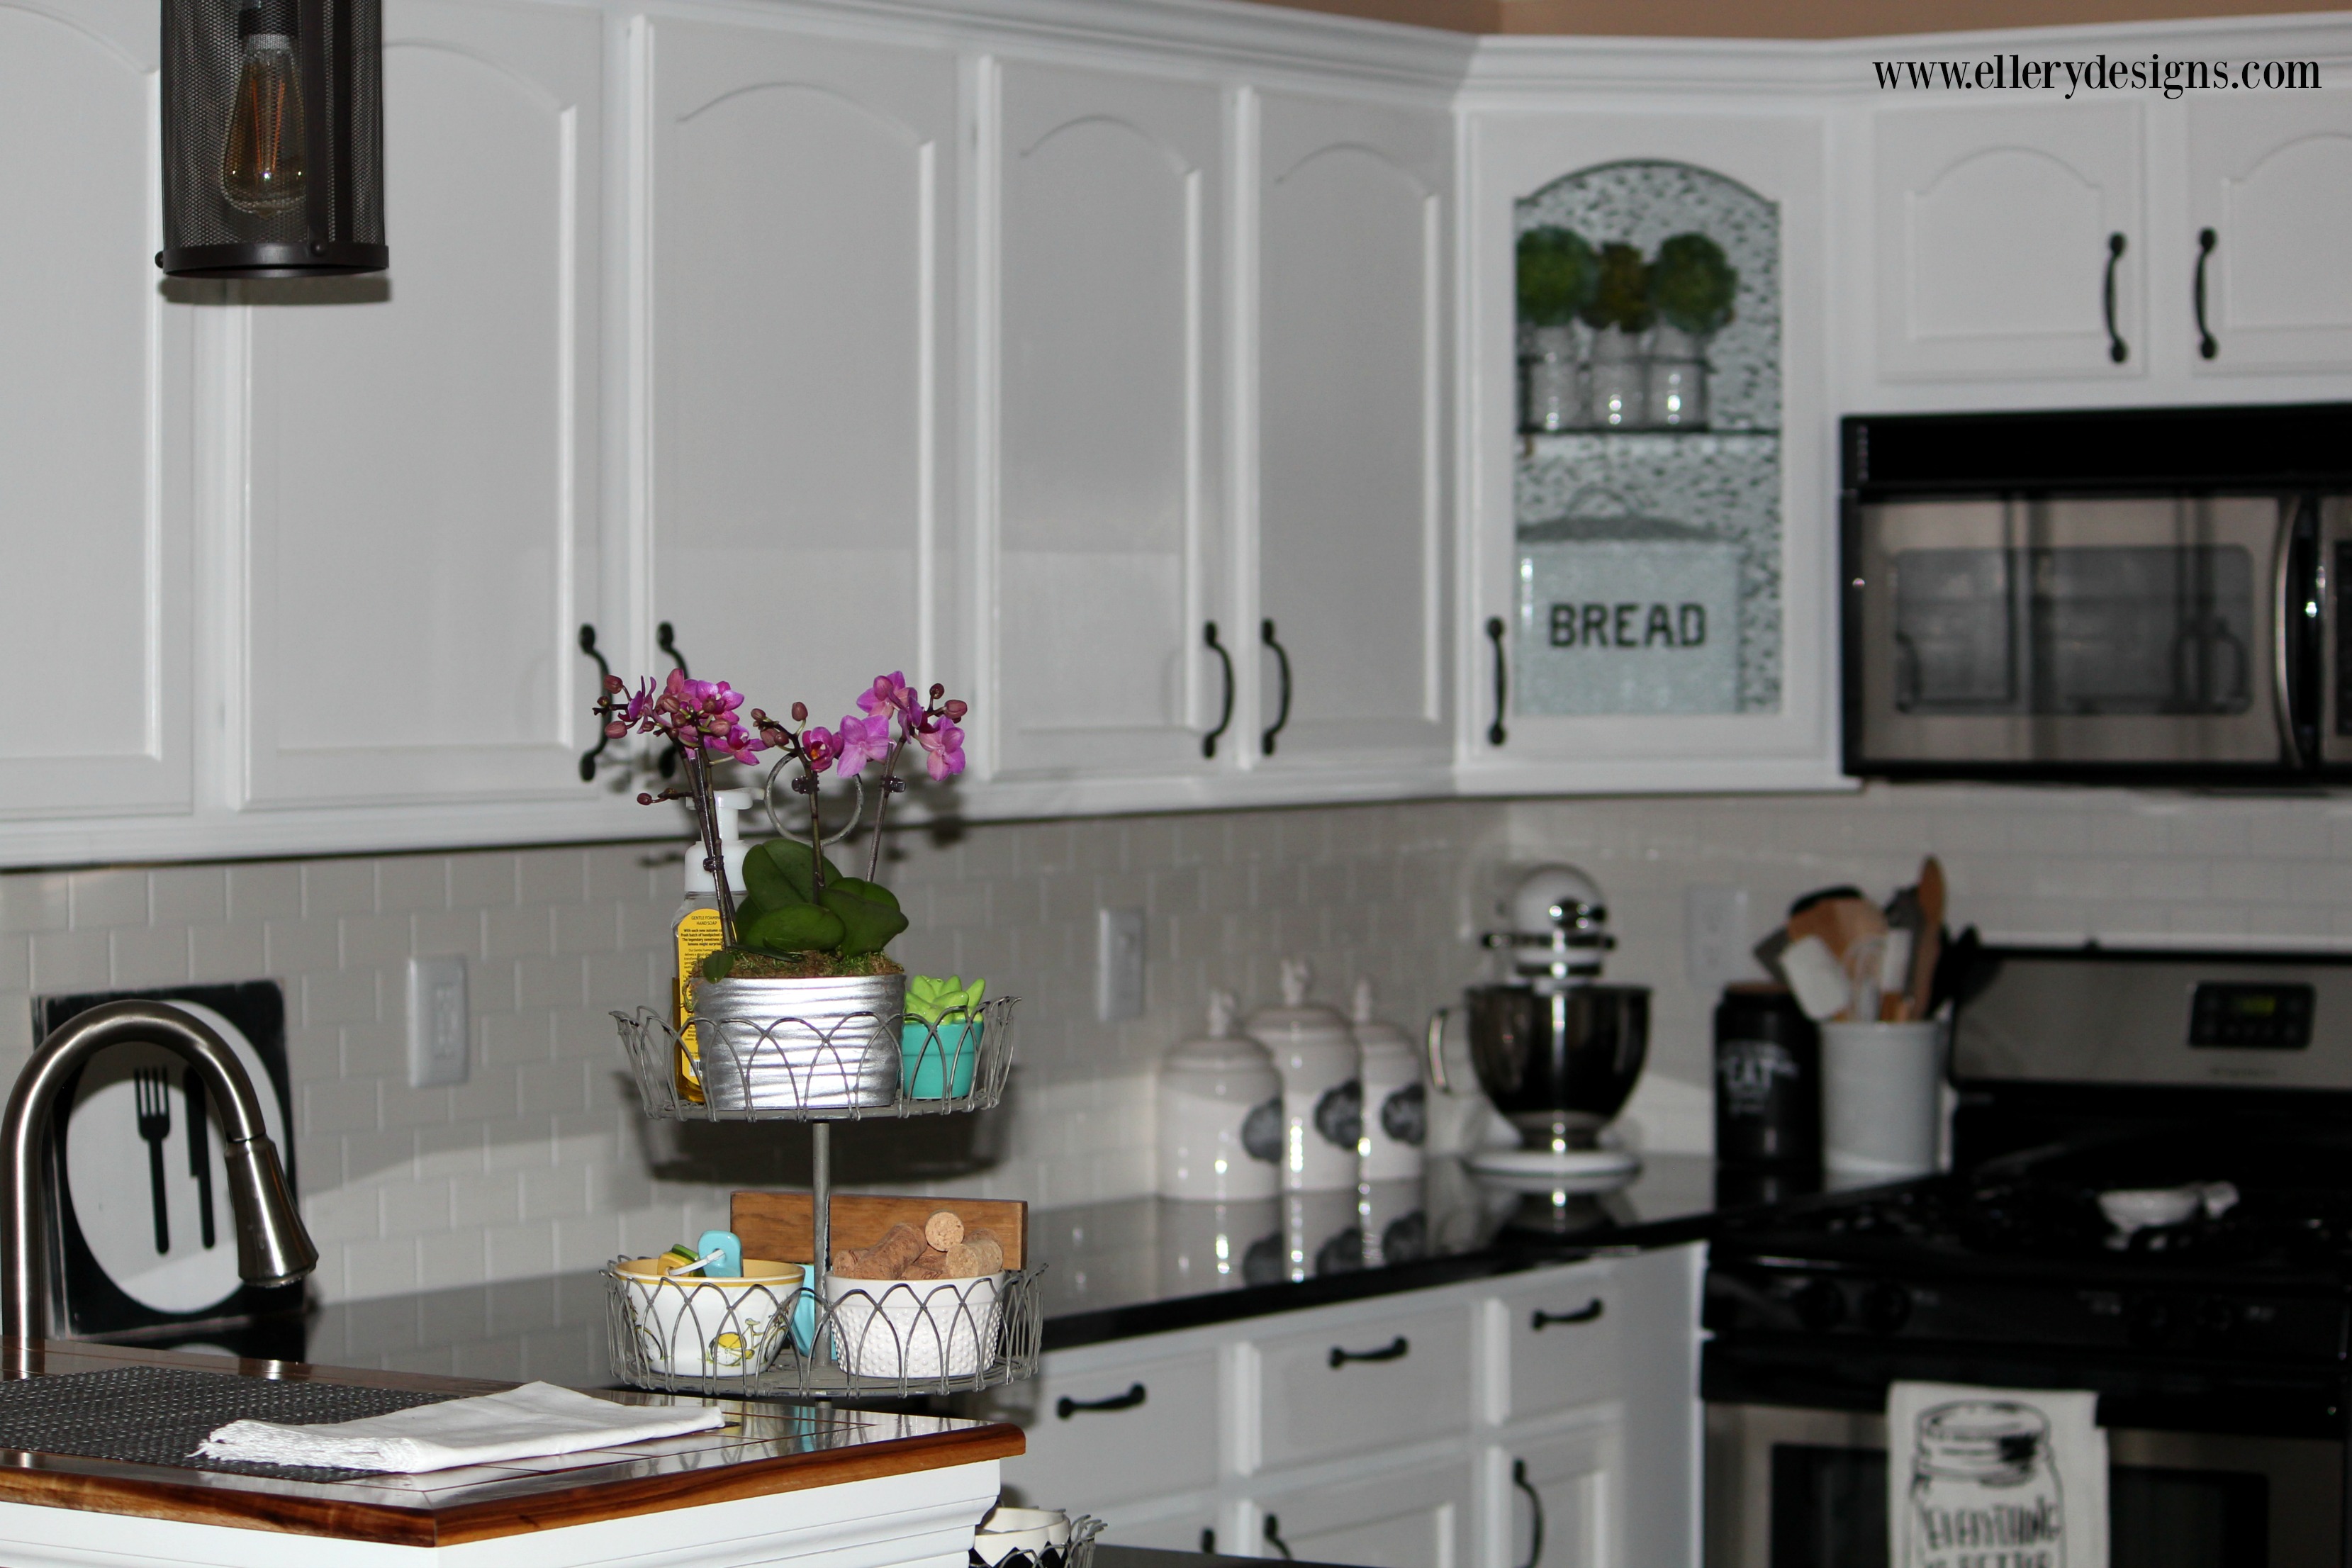
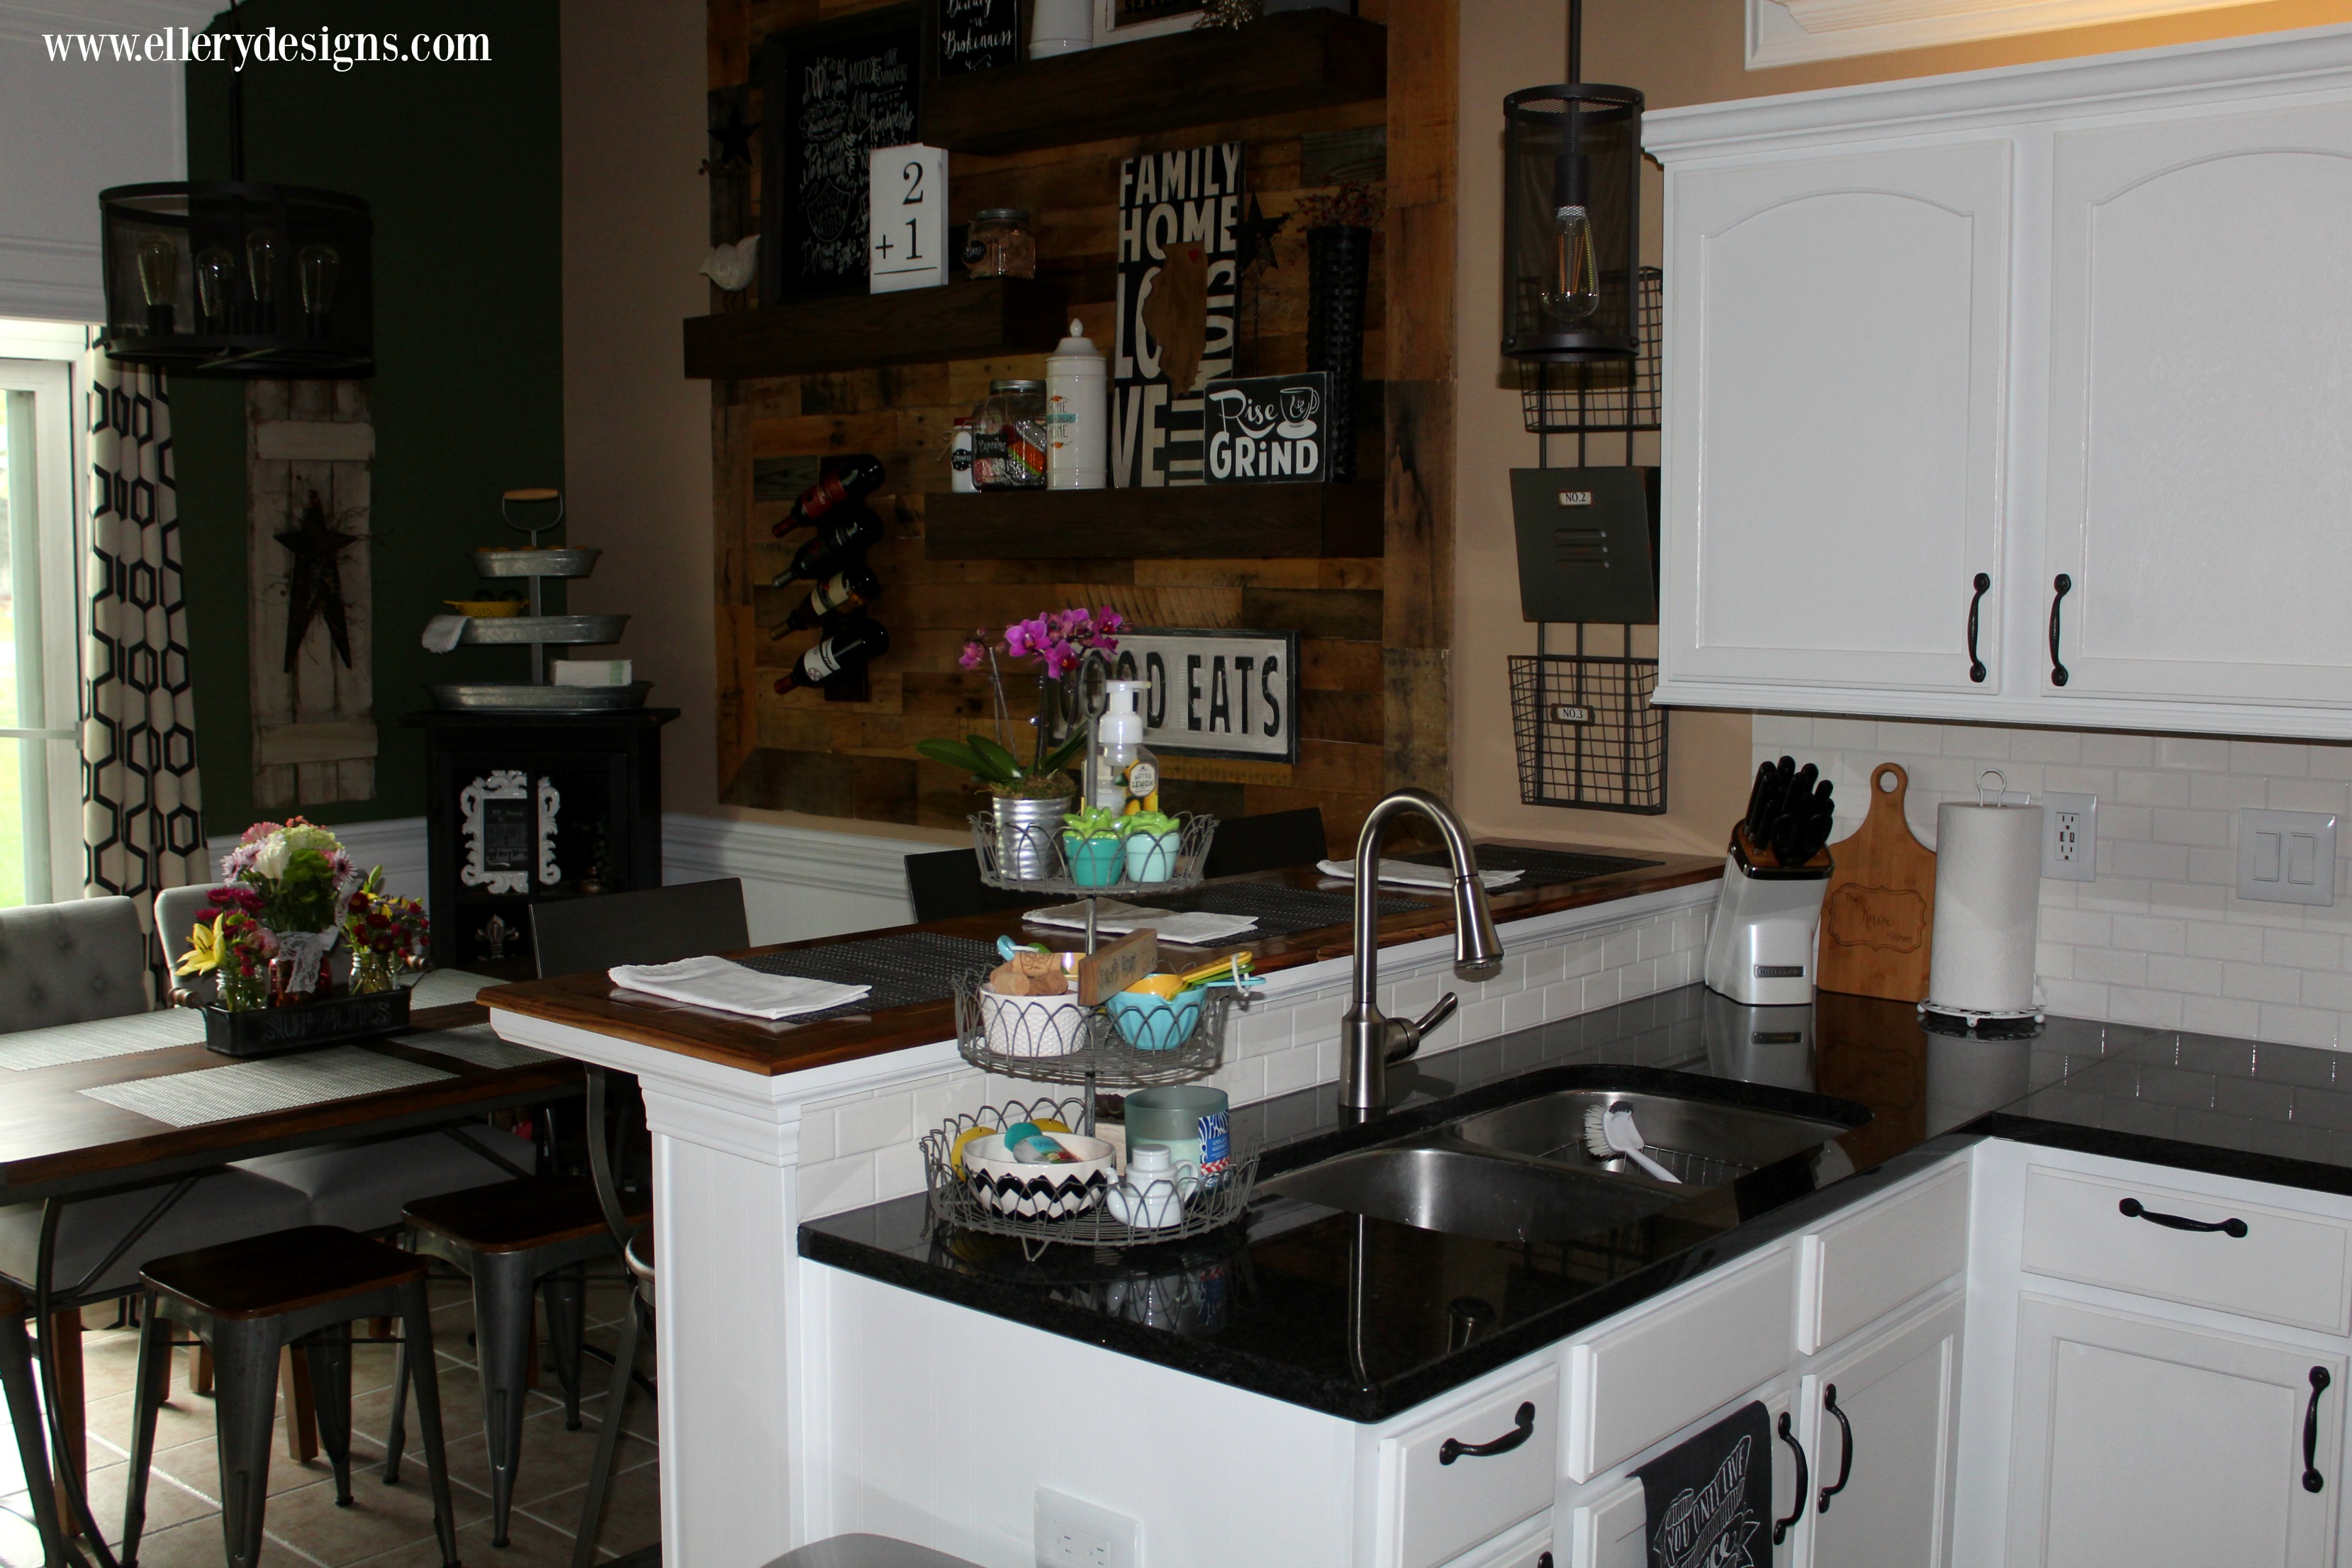
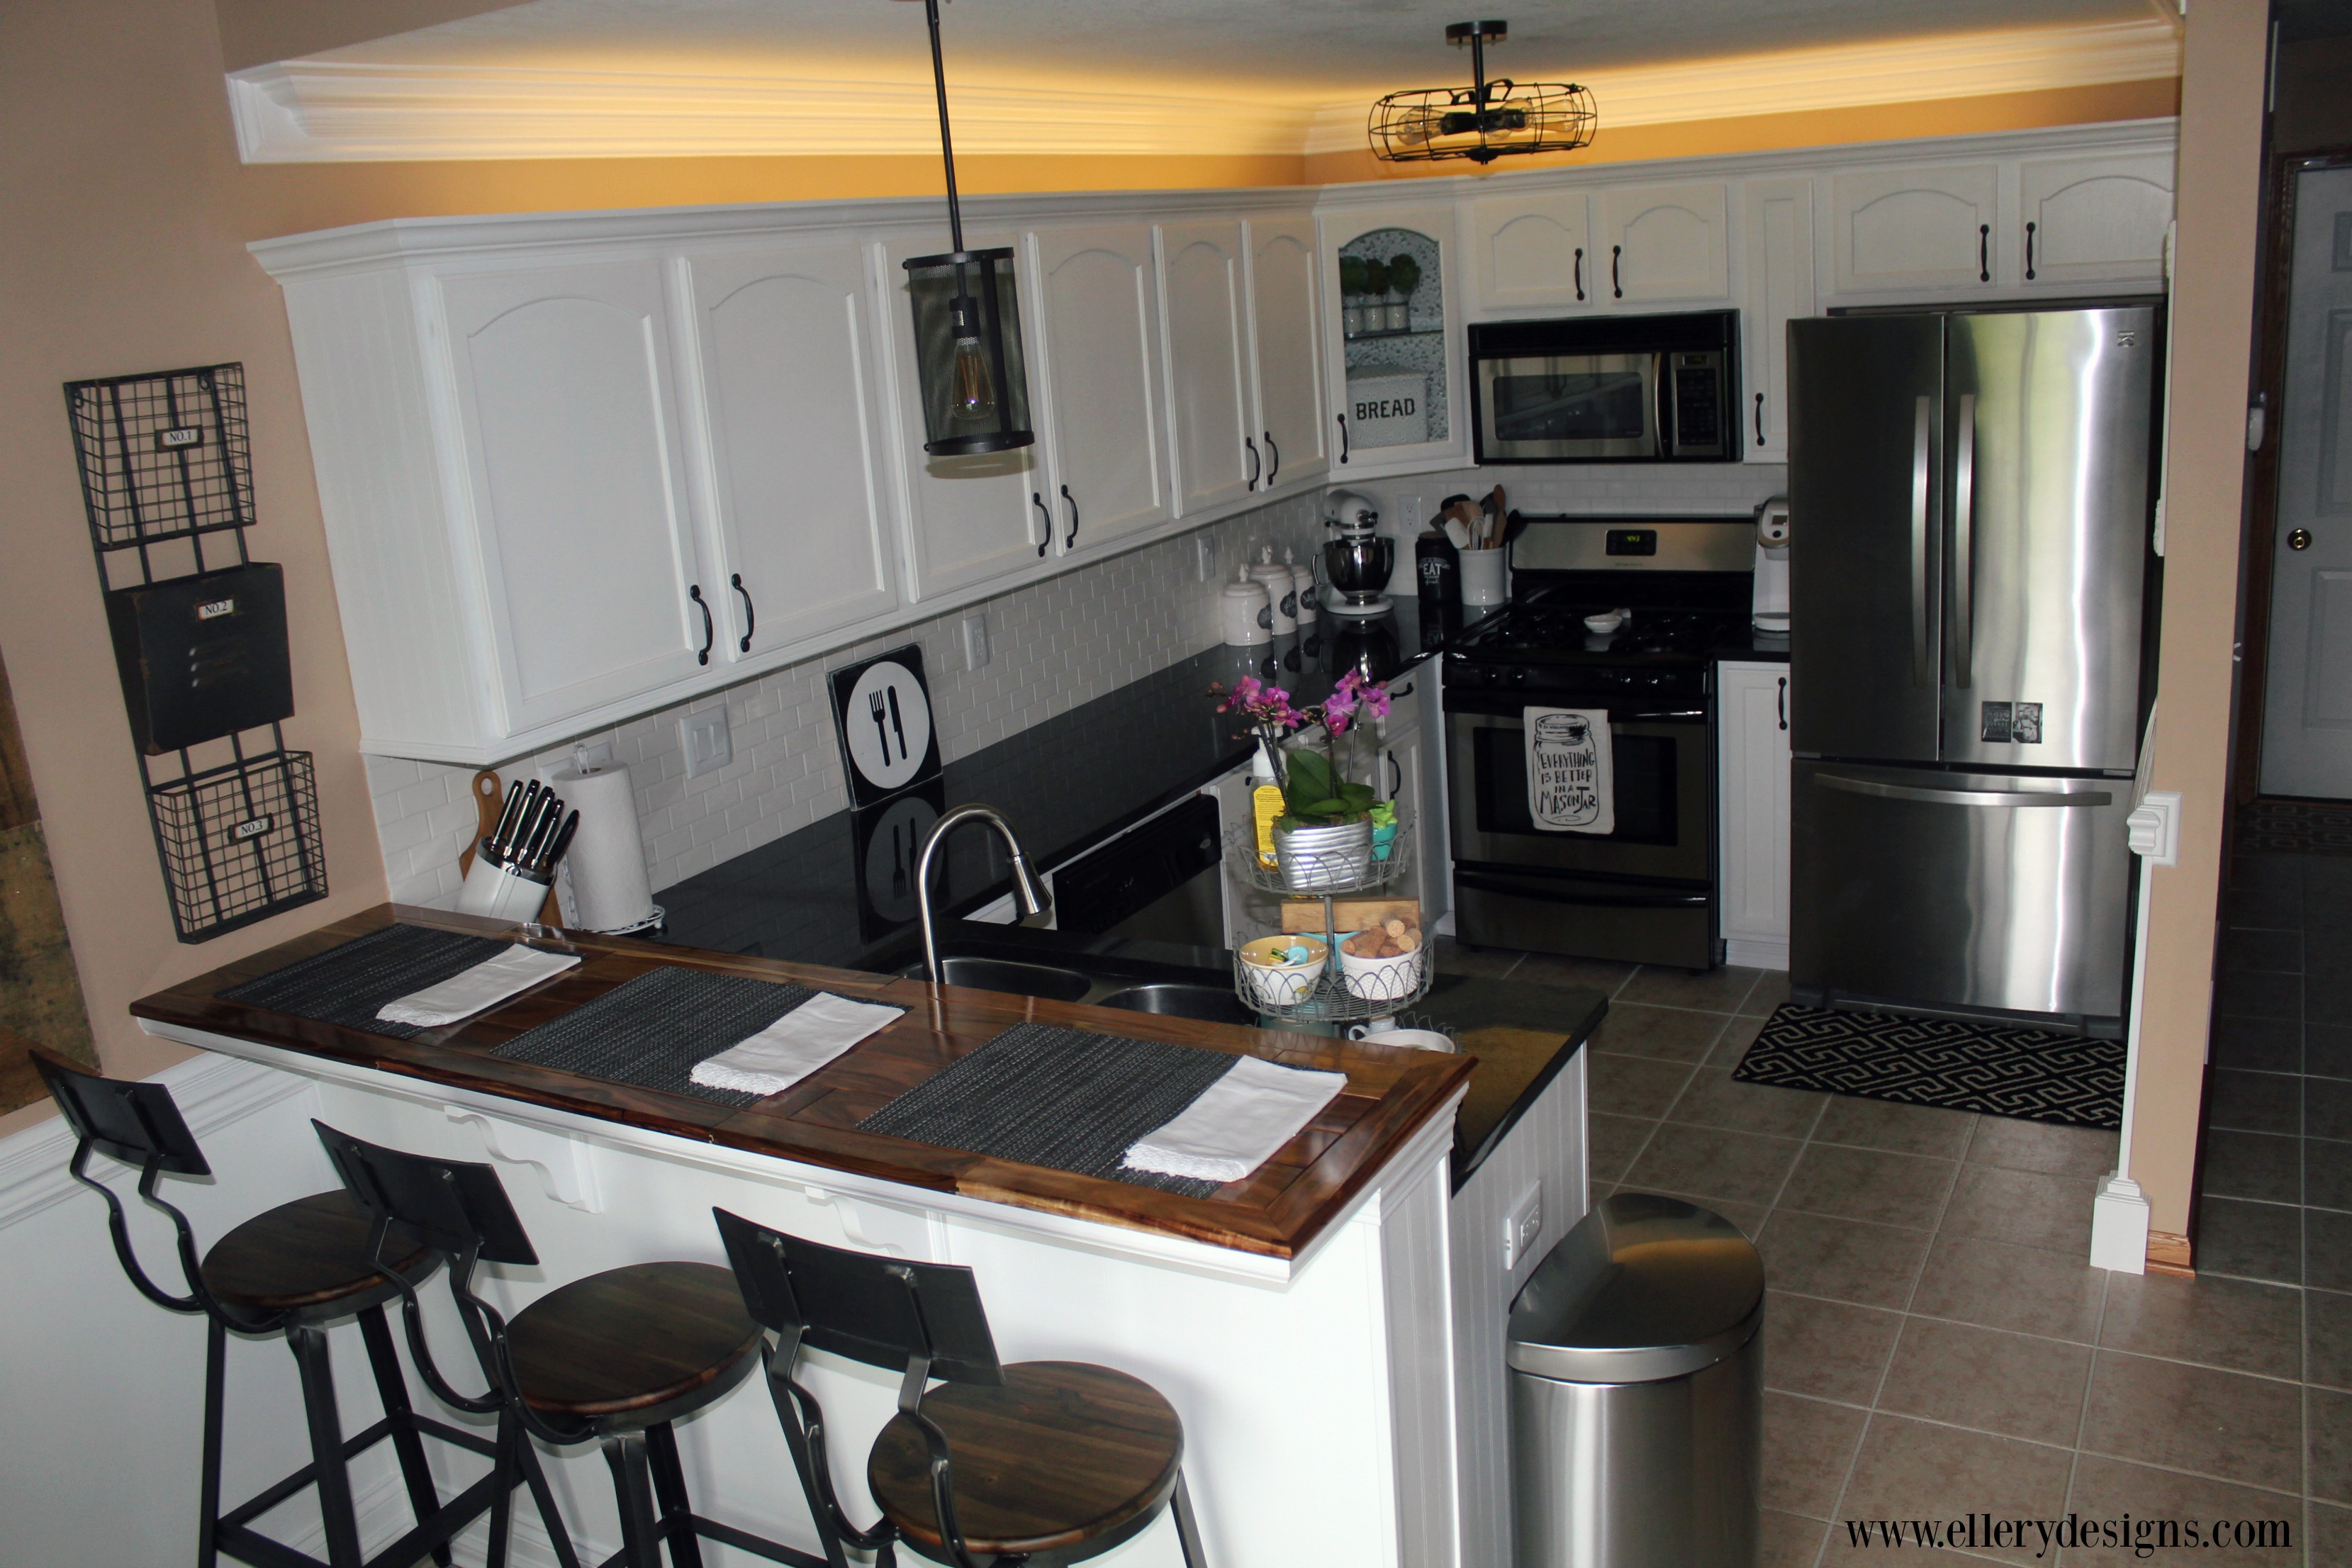
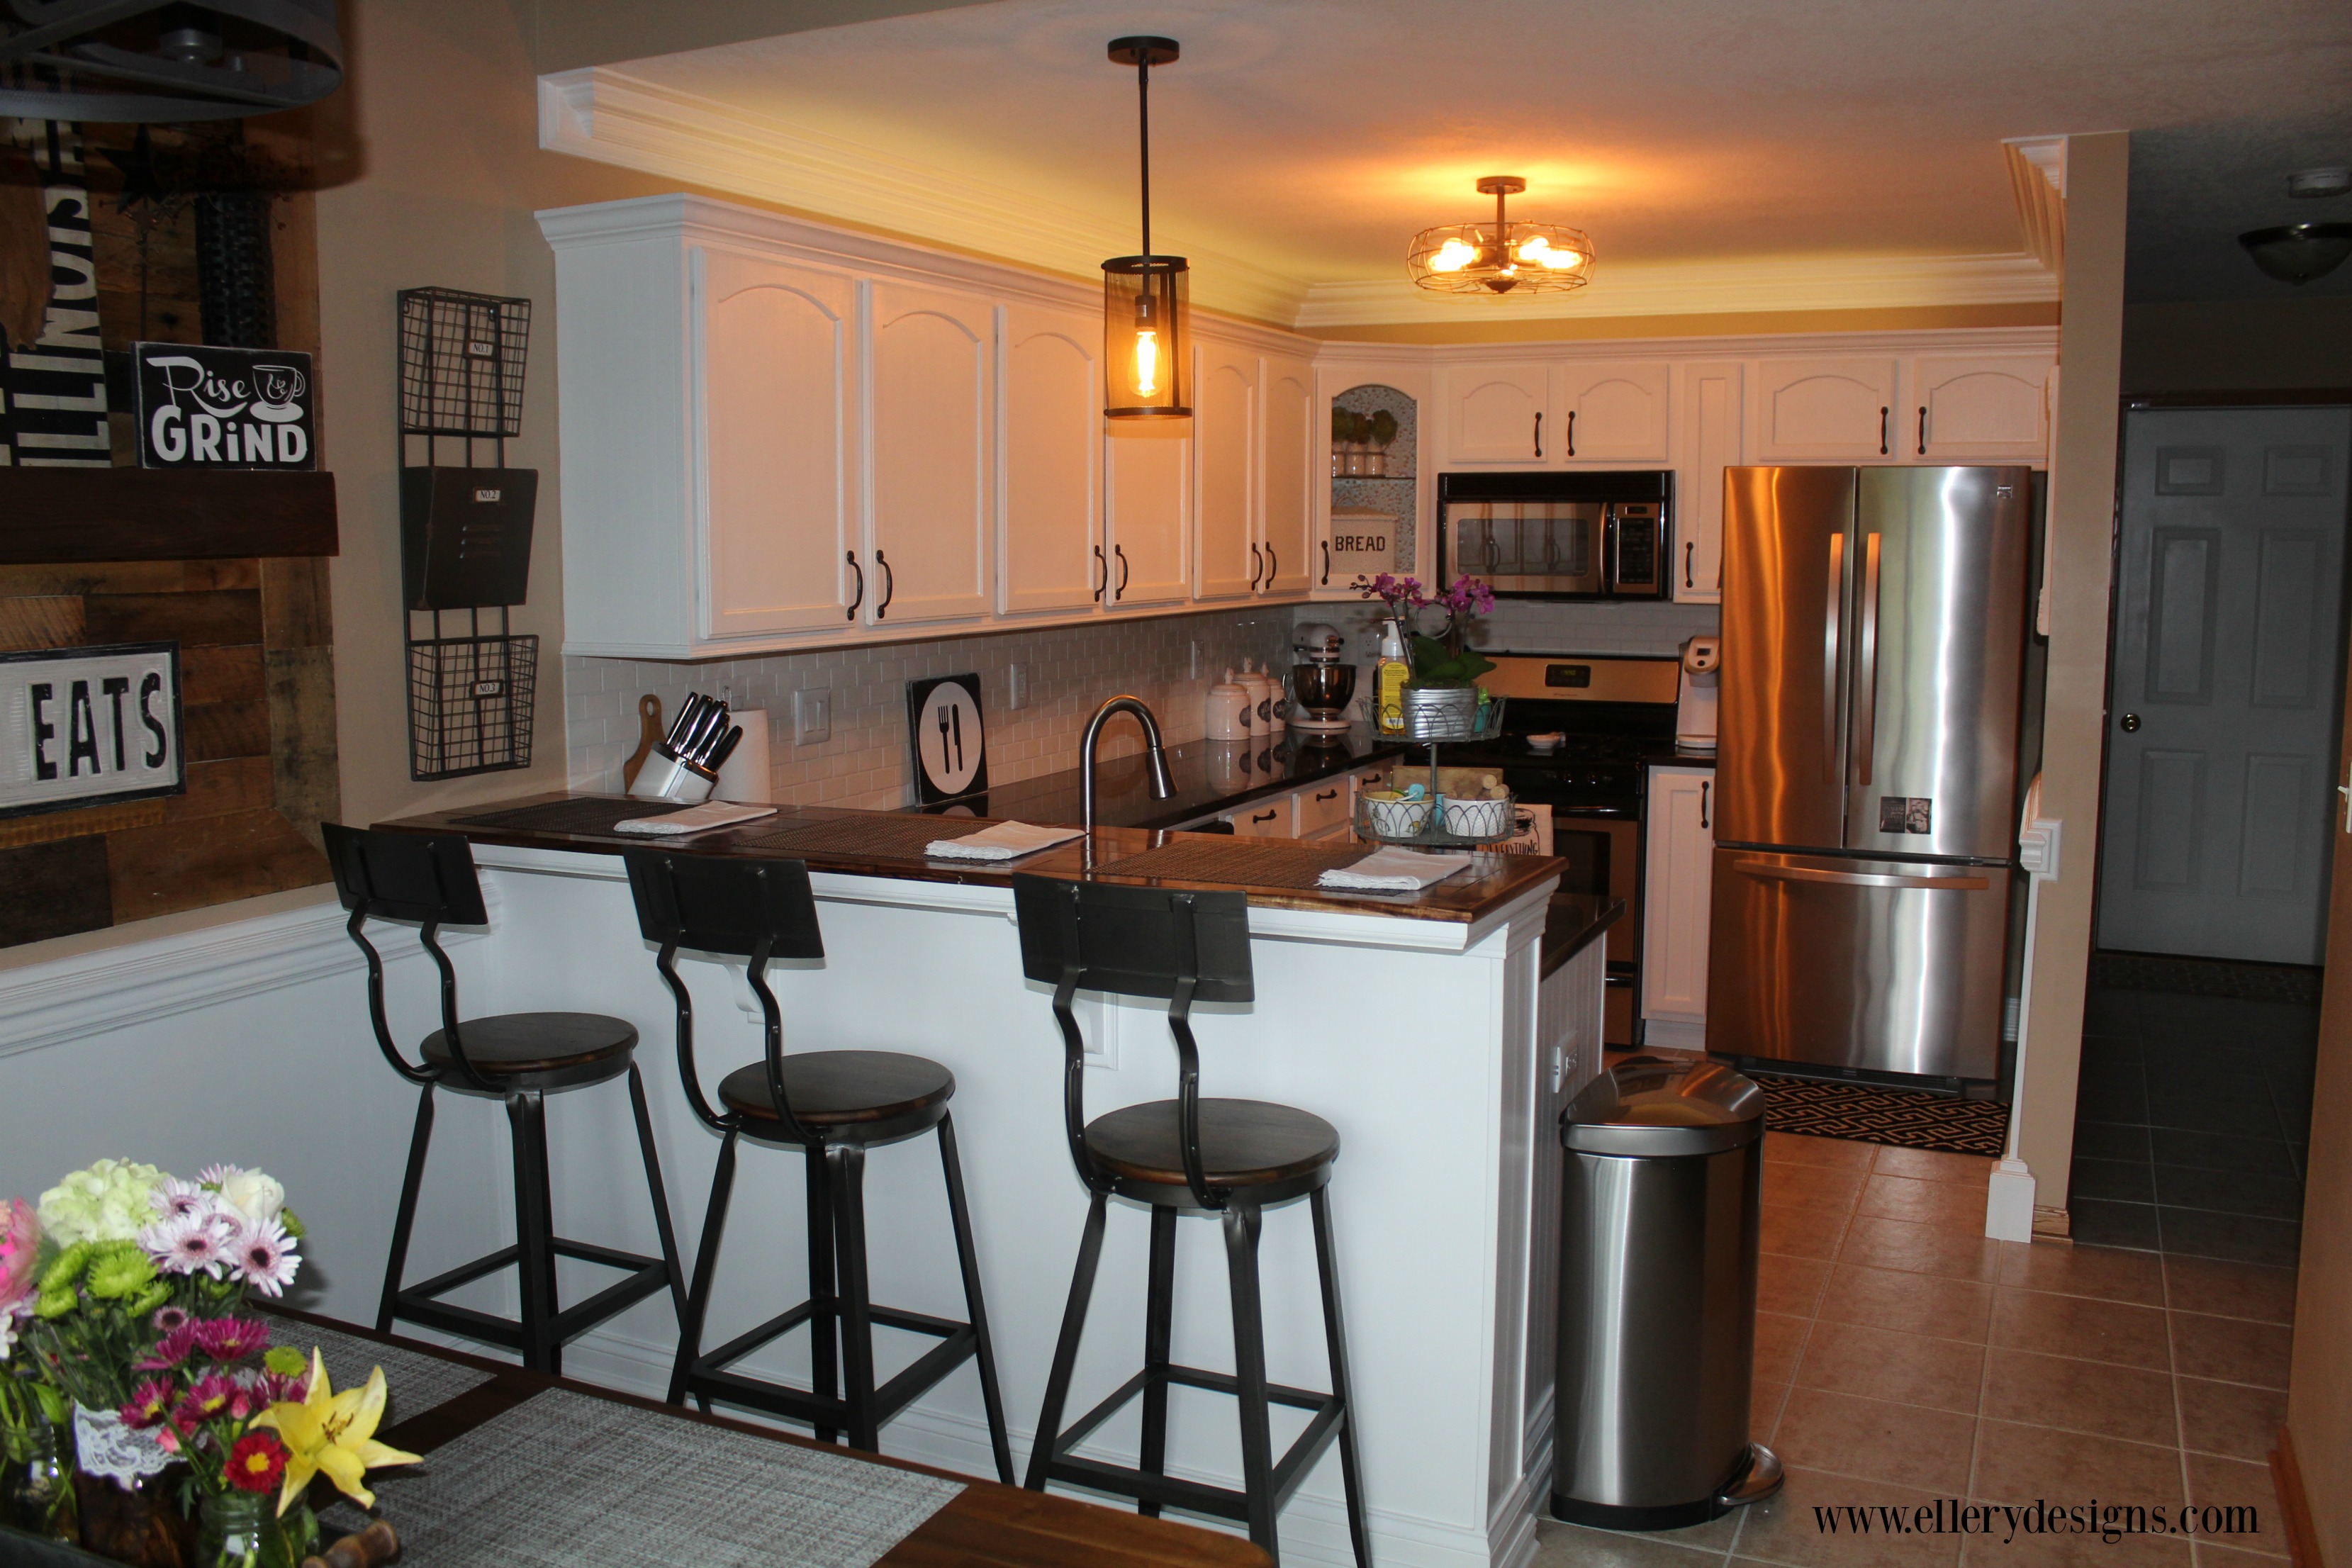
The before and after photos sort of speak for themselves! The best part of this remodel is my handy hubby and I did everything ourselves. Whew! I think we need a vacation. It was a lot of work but BEYOND worth it! We are in LOVE with our new kitchen. It seriously feels like a brand new home. I love the modern industrial farmhouse feel with a touch of rustic glam. I can’t believe how much stuff I thought was acceptable to decorate with above the cabinets in our before pictures, yowsa! I am loving the fresh, clean feel it brings and the painted white cabinets really brighten up this room and feels much more spacious.
Here’s everything we updated:
- Custom Crown on Ceiling and Top of Cabinets
- Trim on Bottom of Cabinets
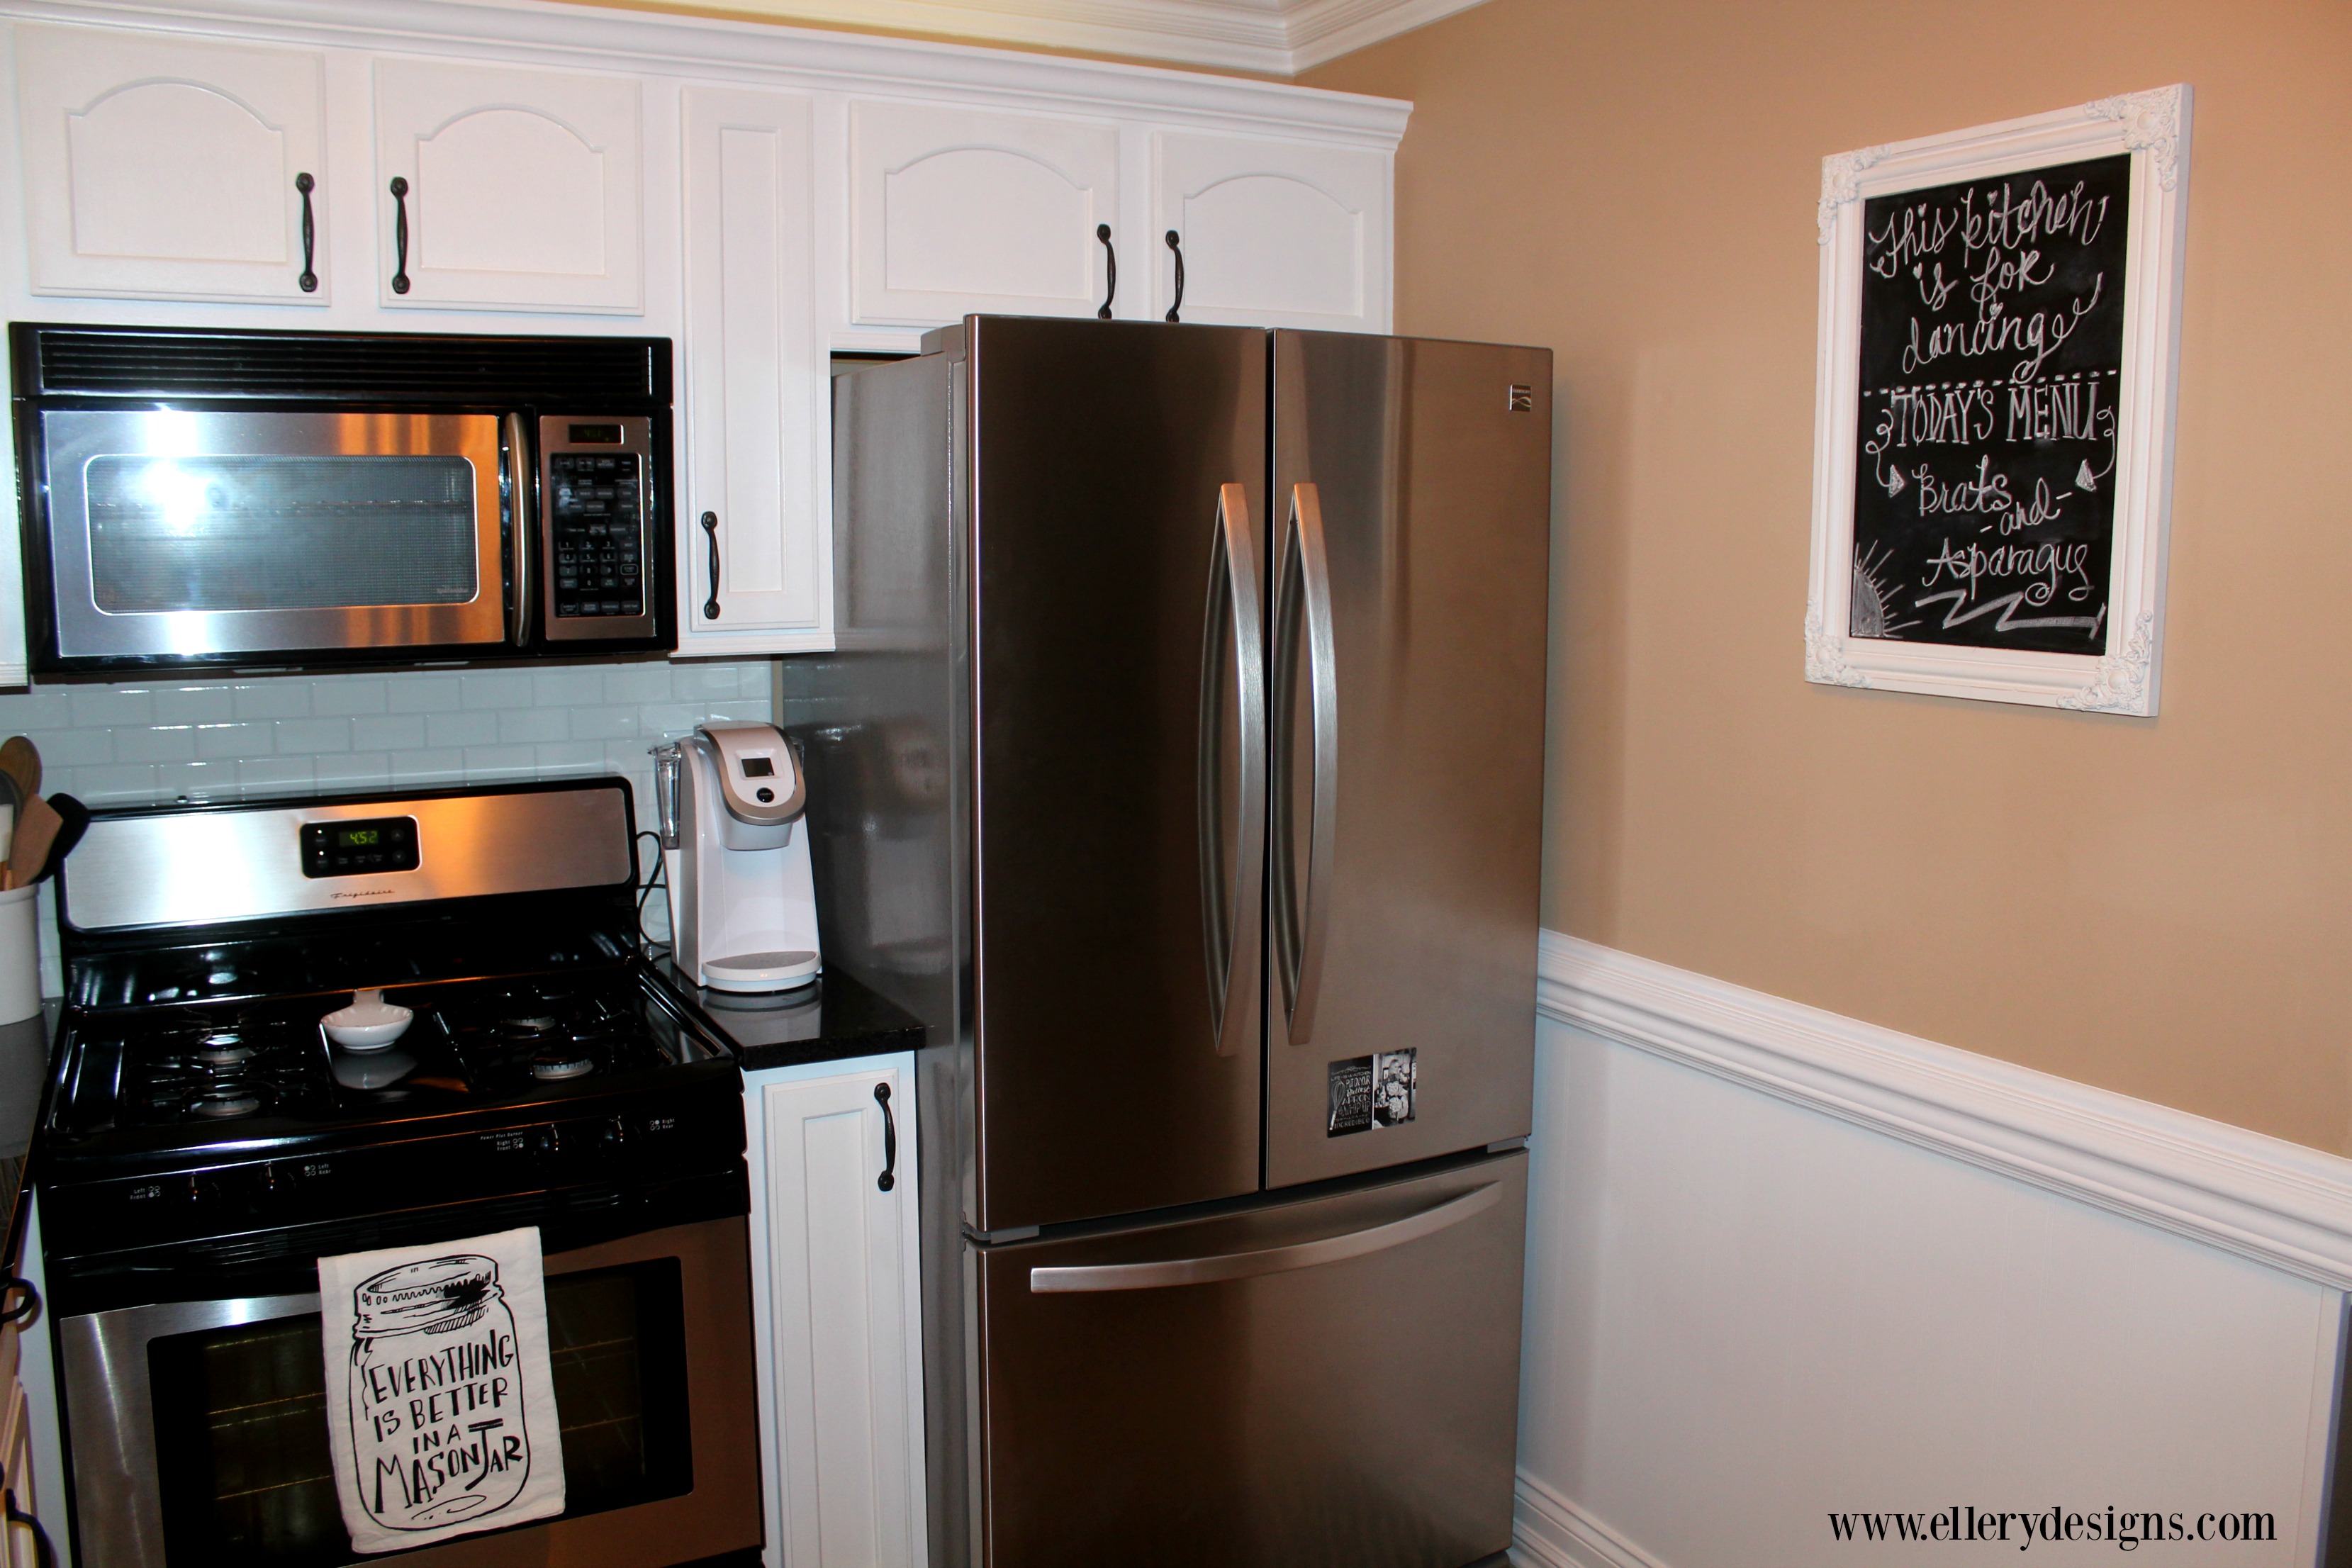
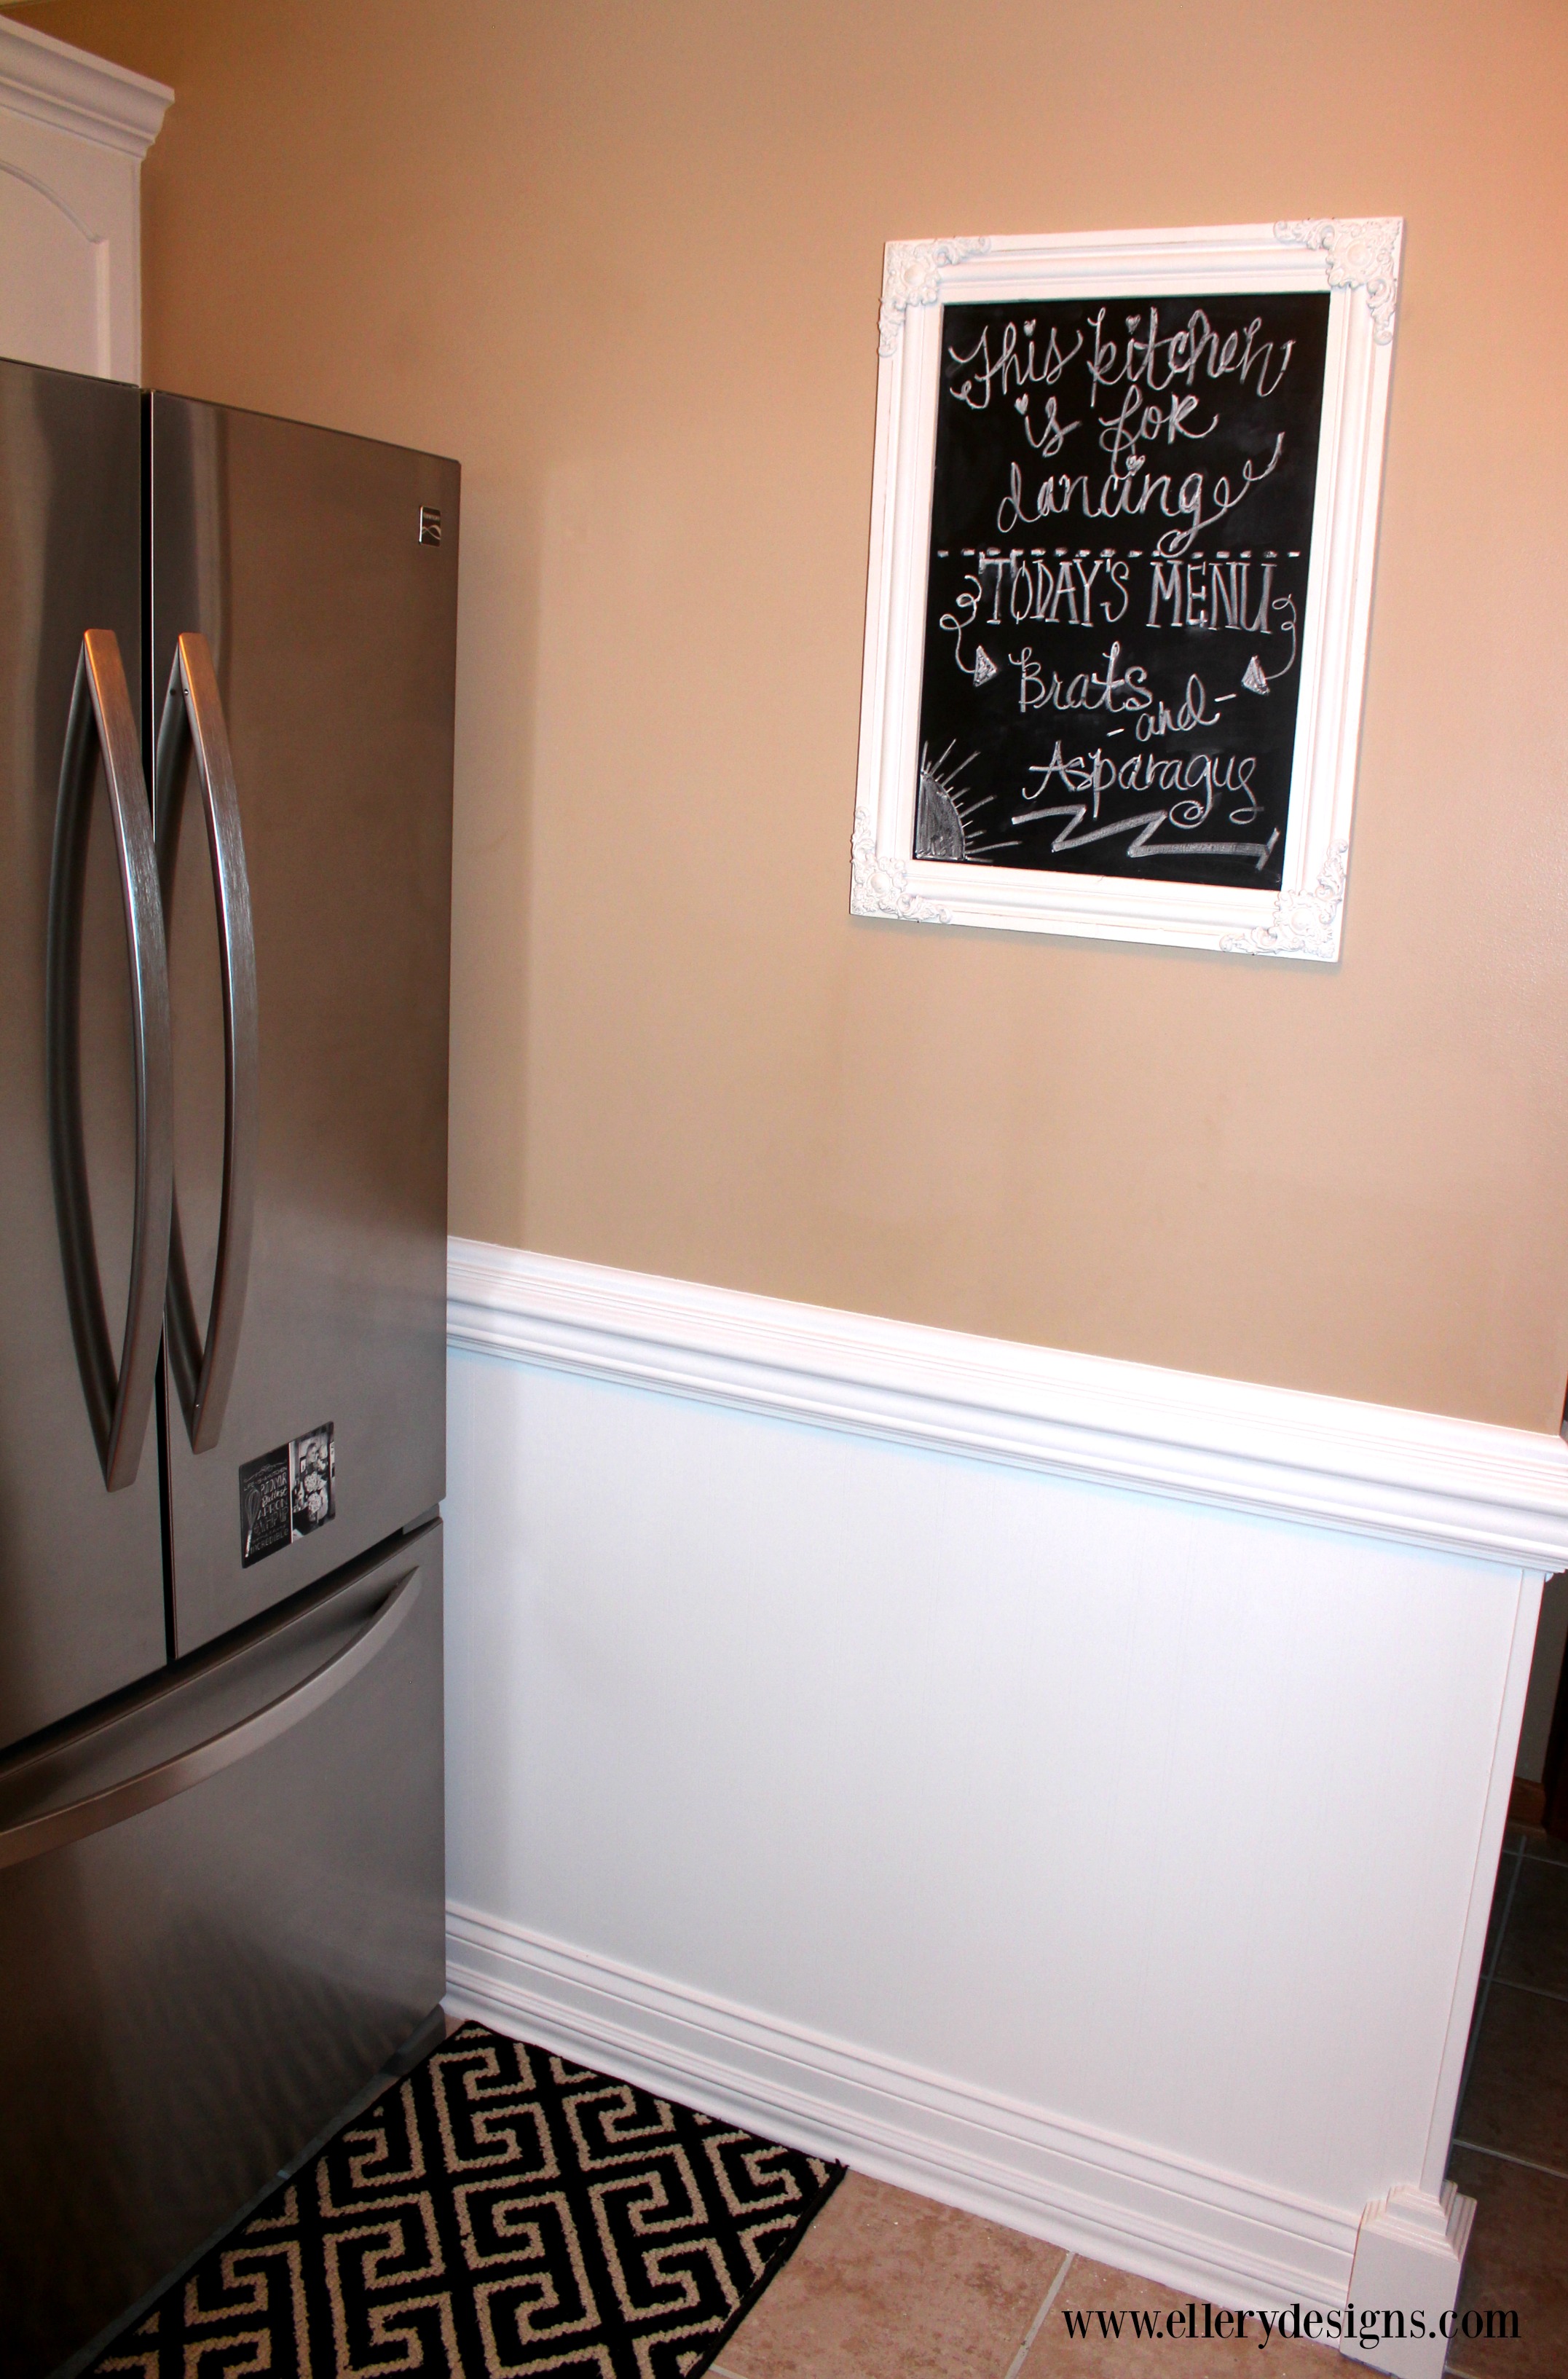
- Bead board/Chair Rail/Trim on Adjacent Walls and in Dining Room
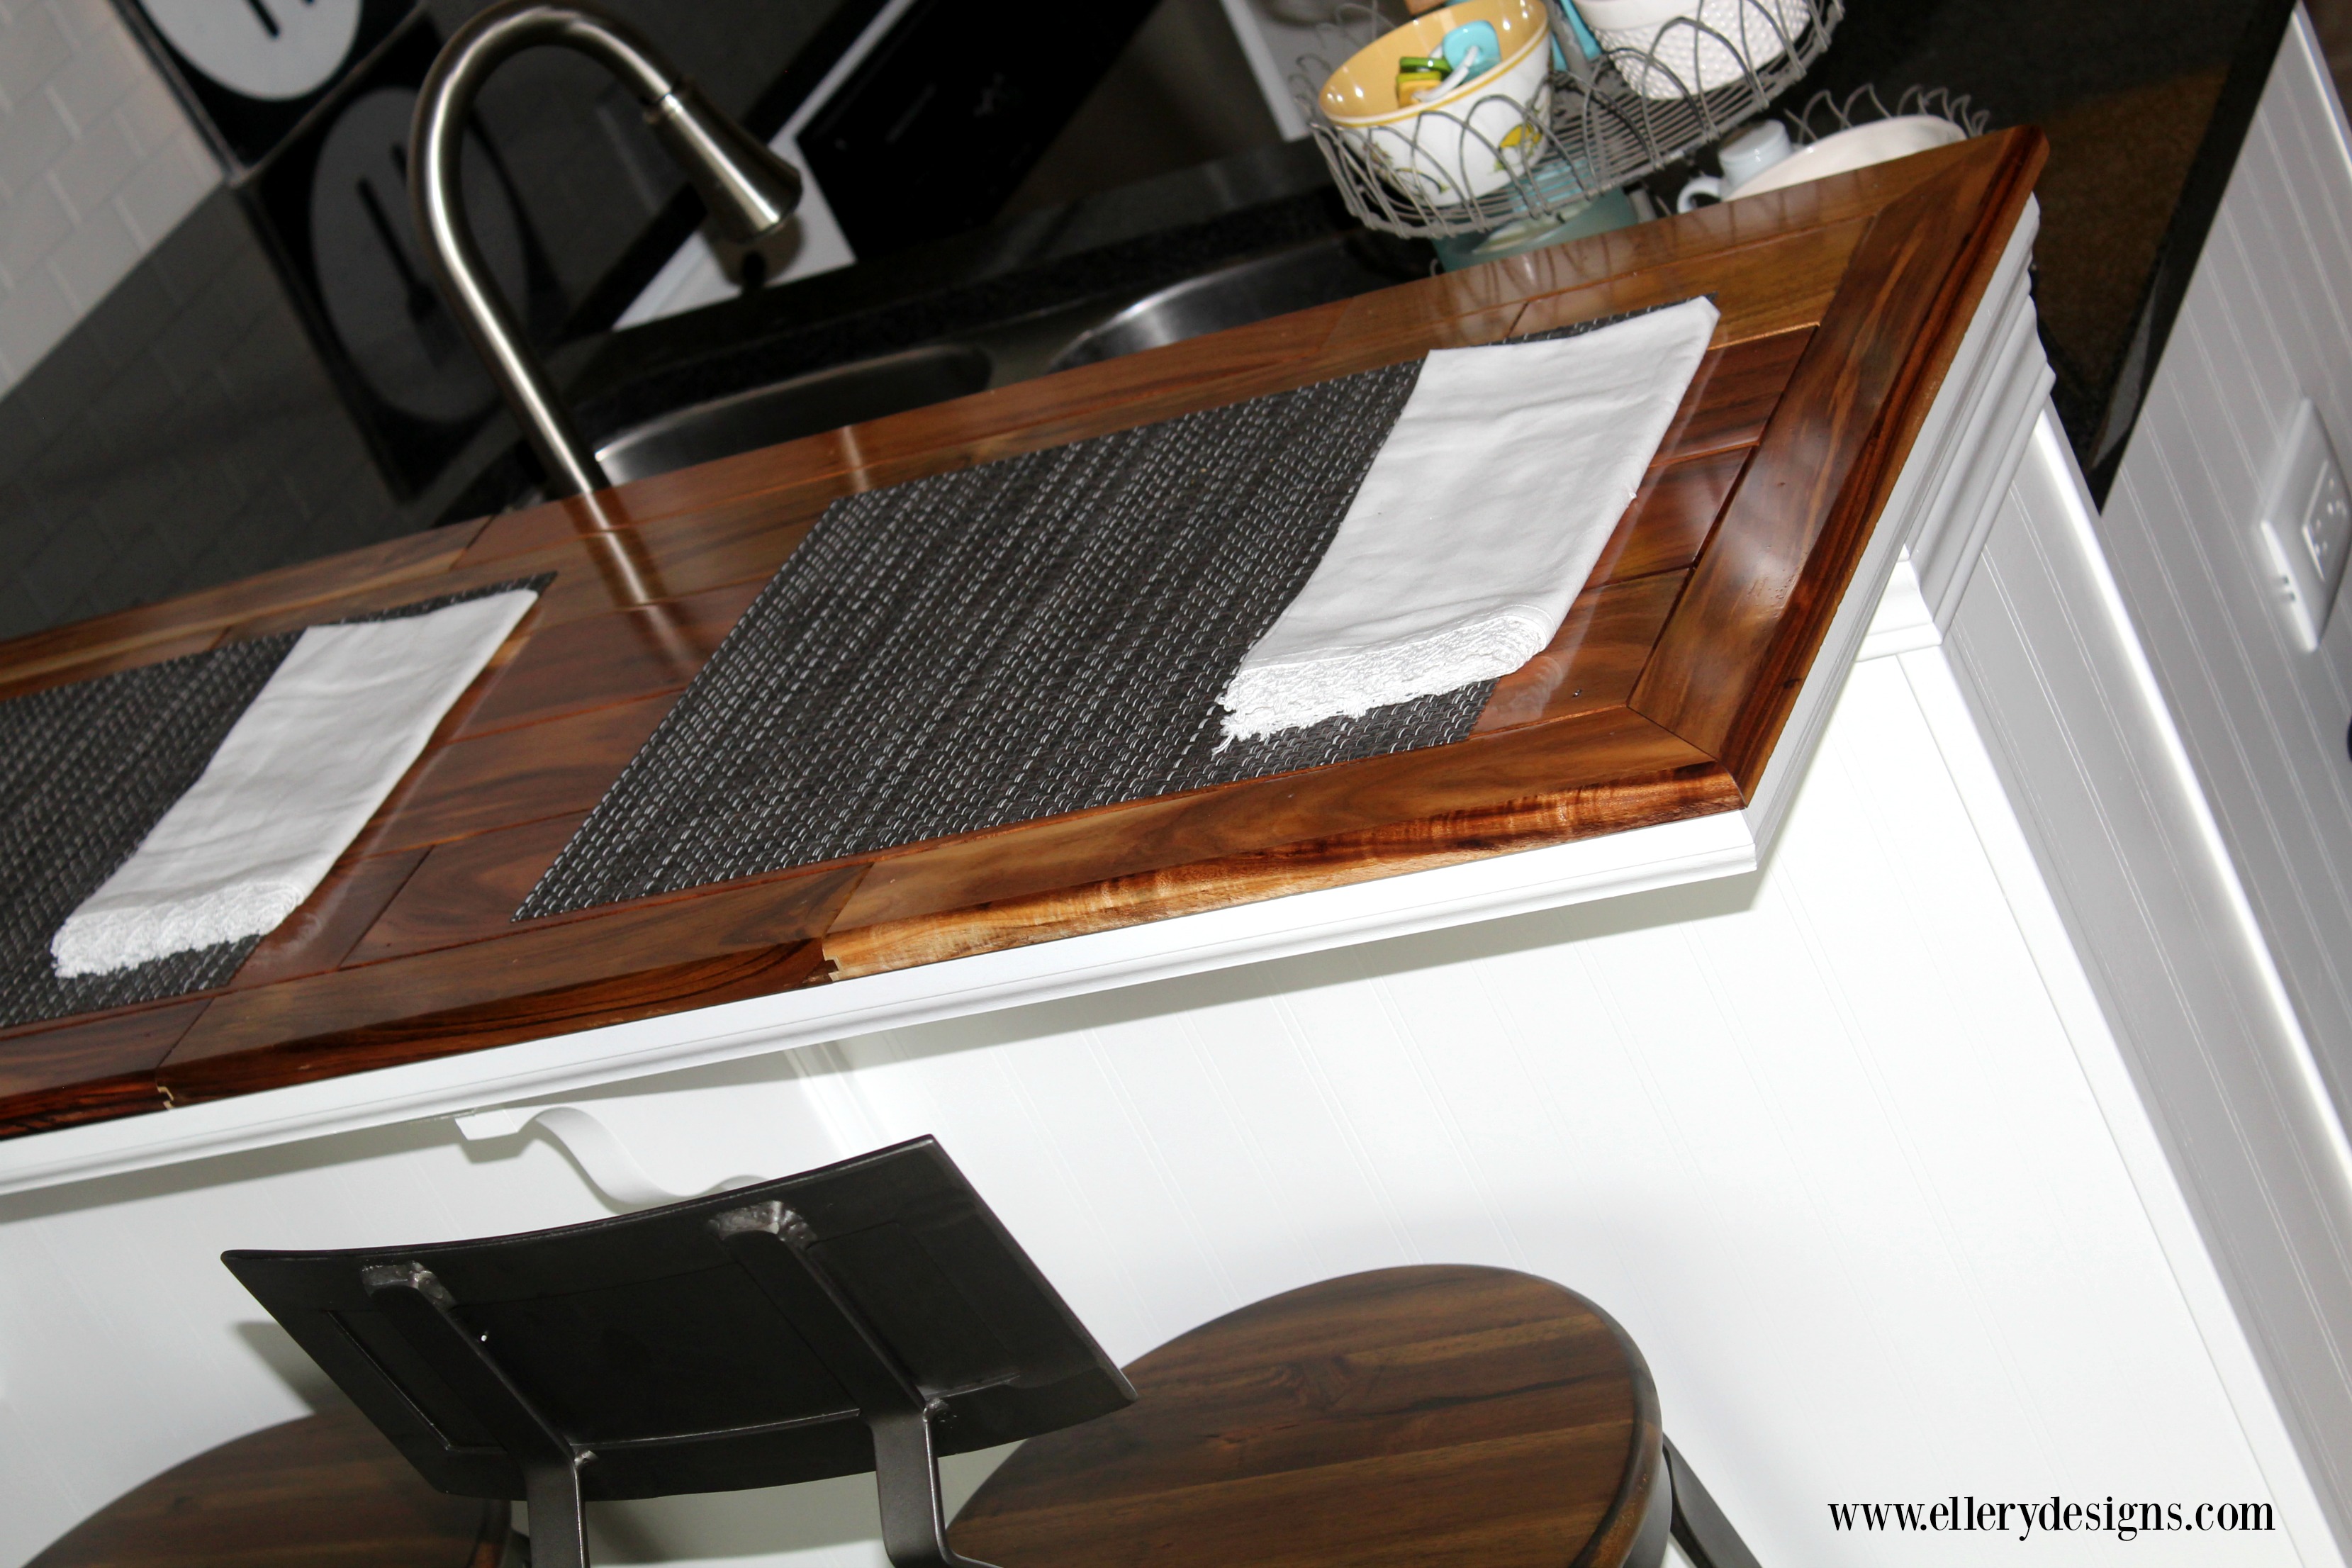
- Handmade Breakfast Bar
- Painted Cabinets
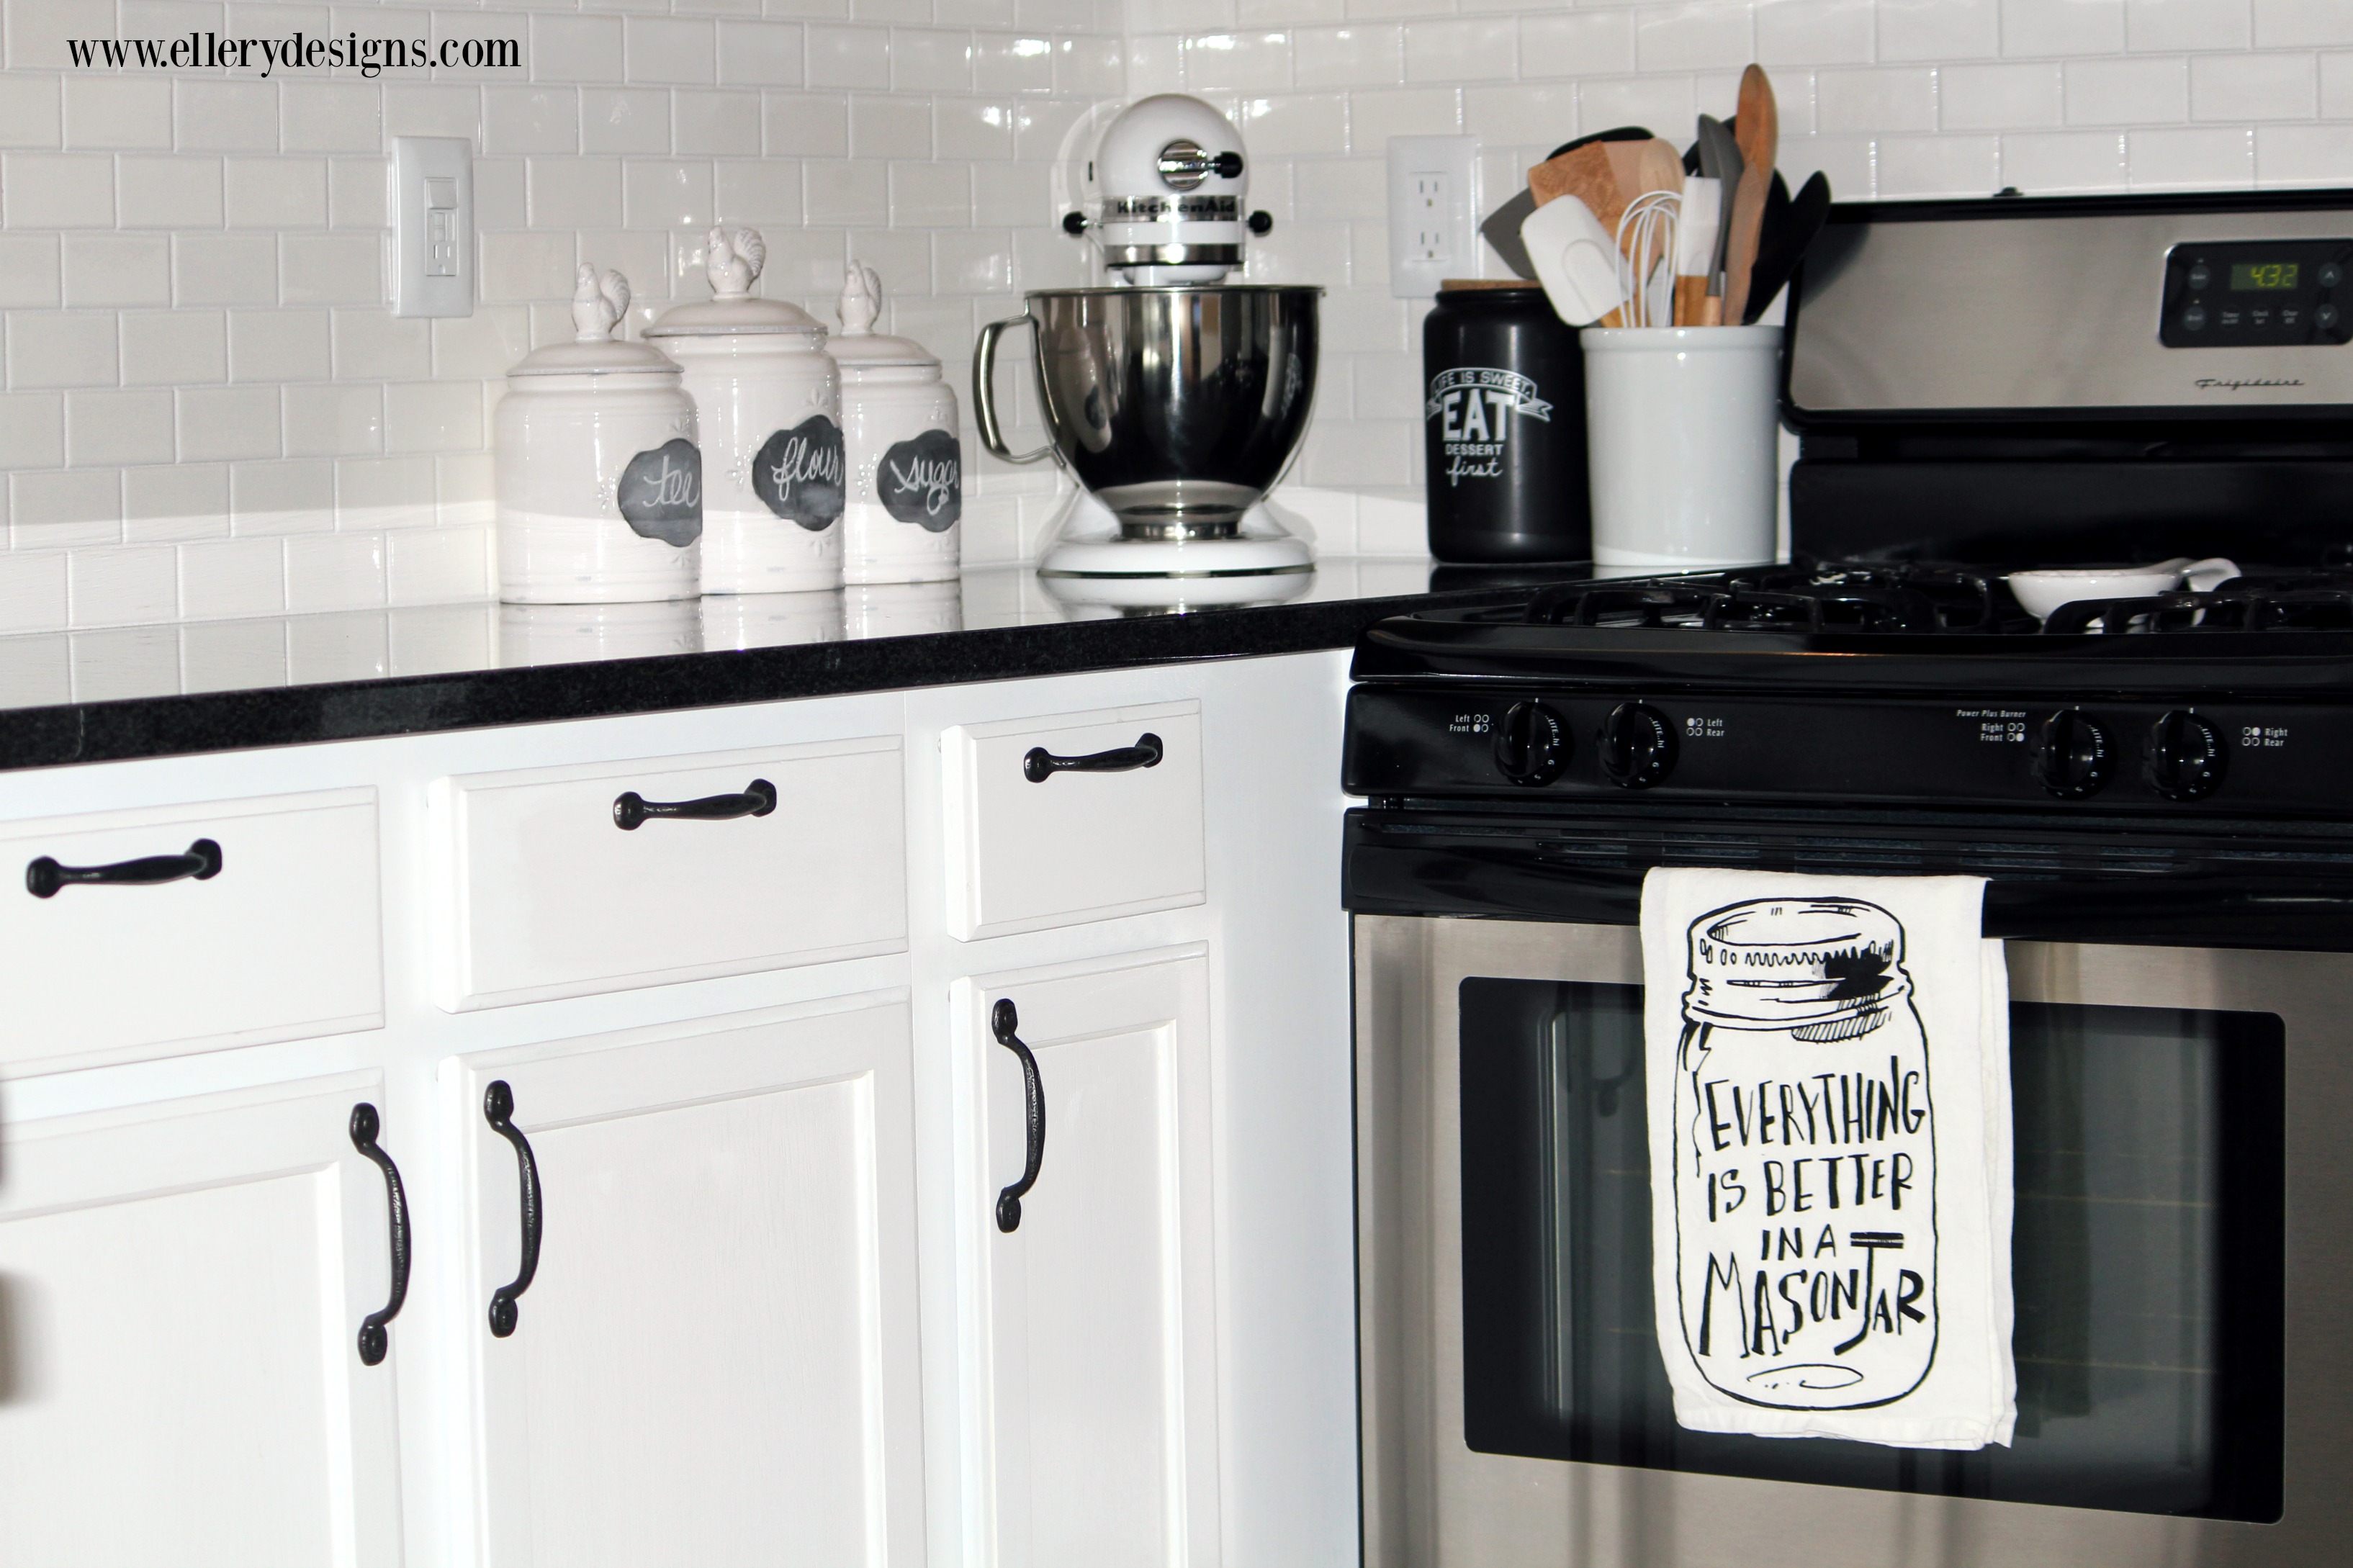
- New Cabinet Hardware
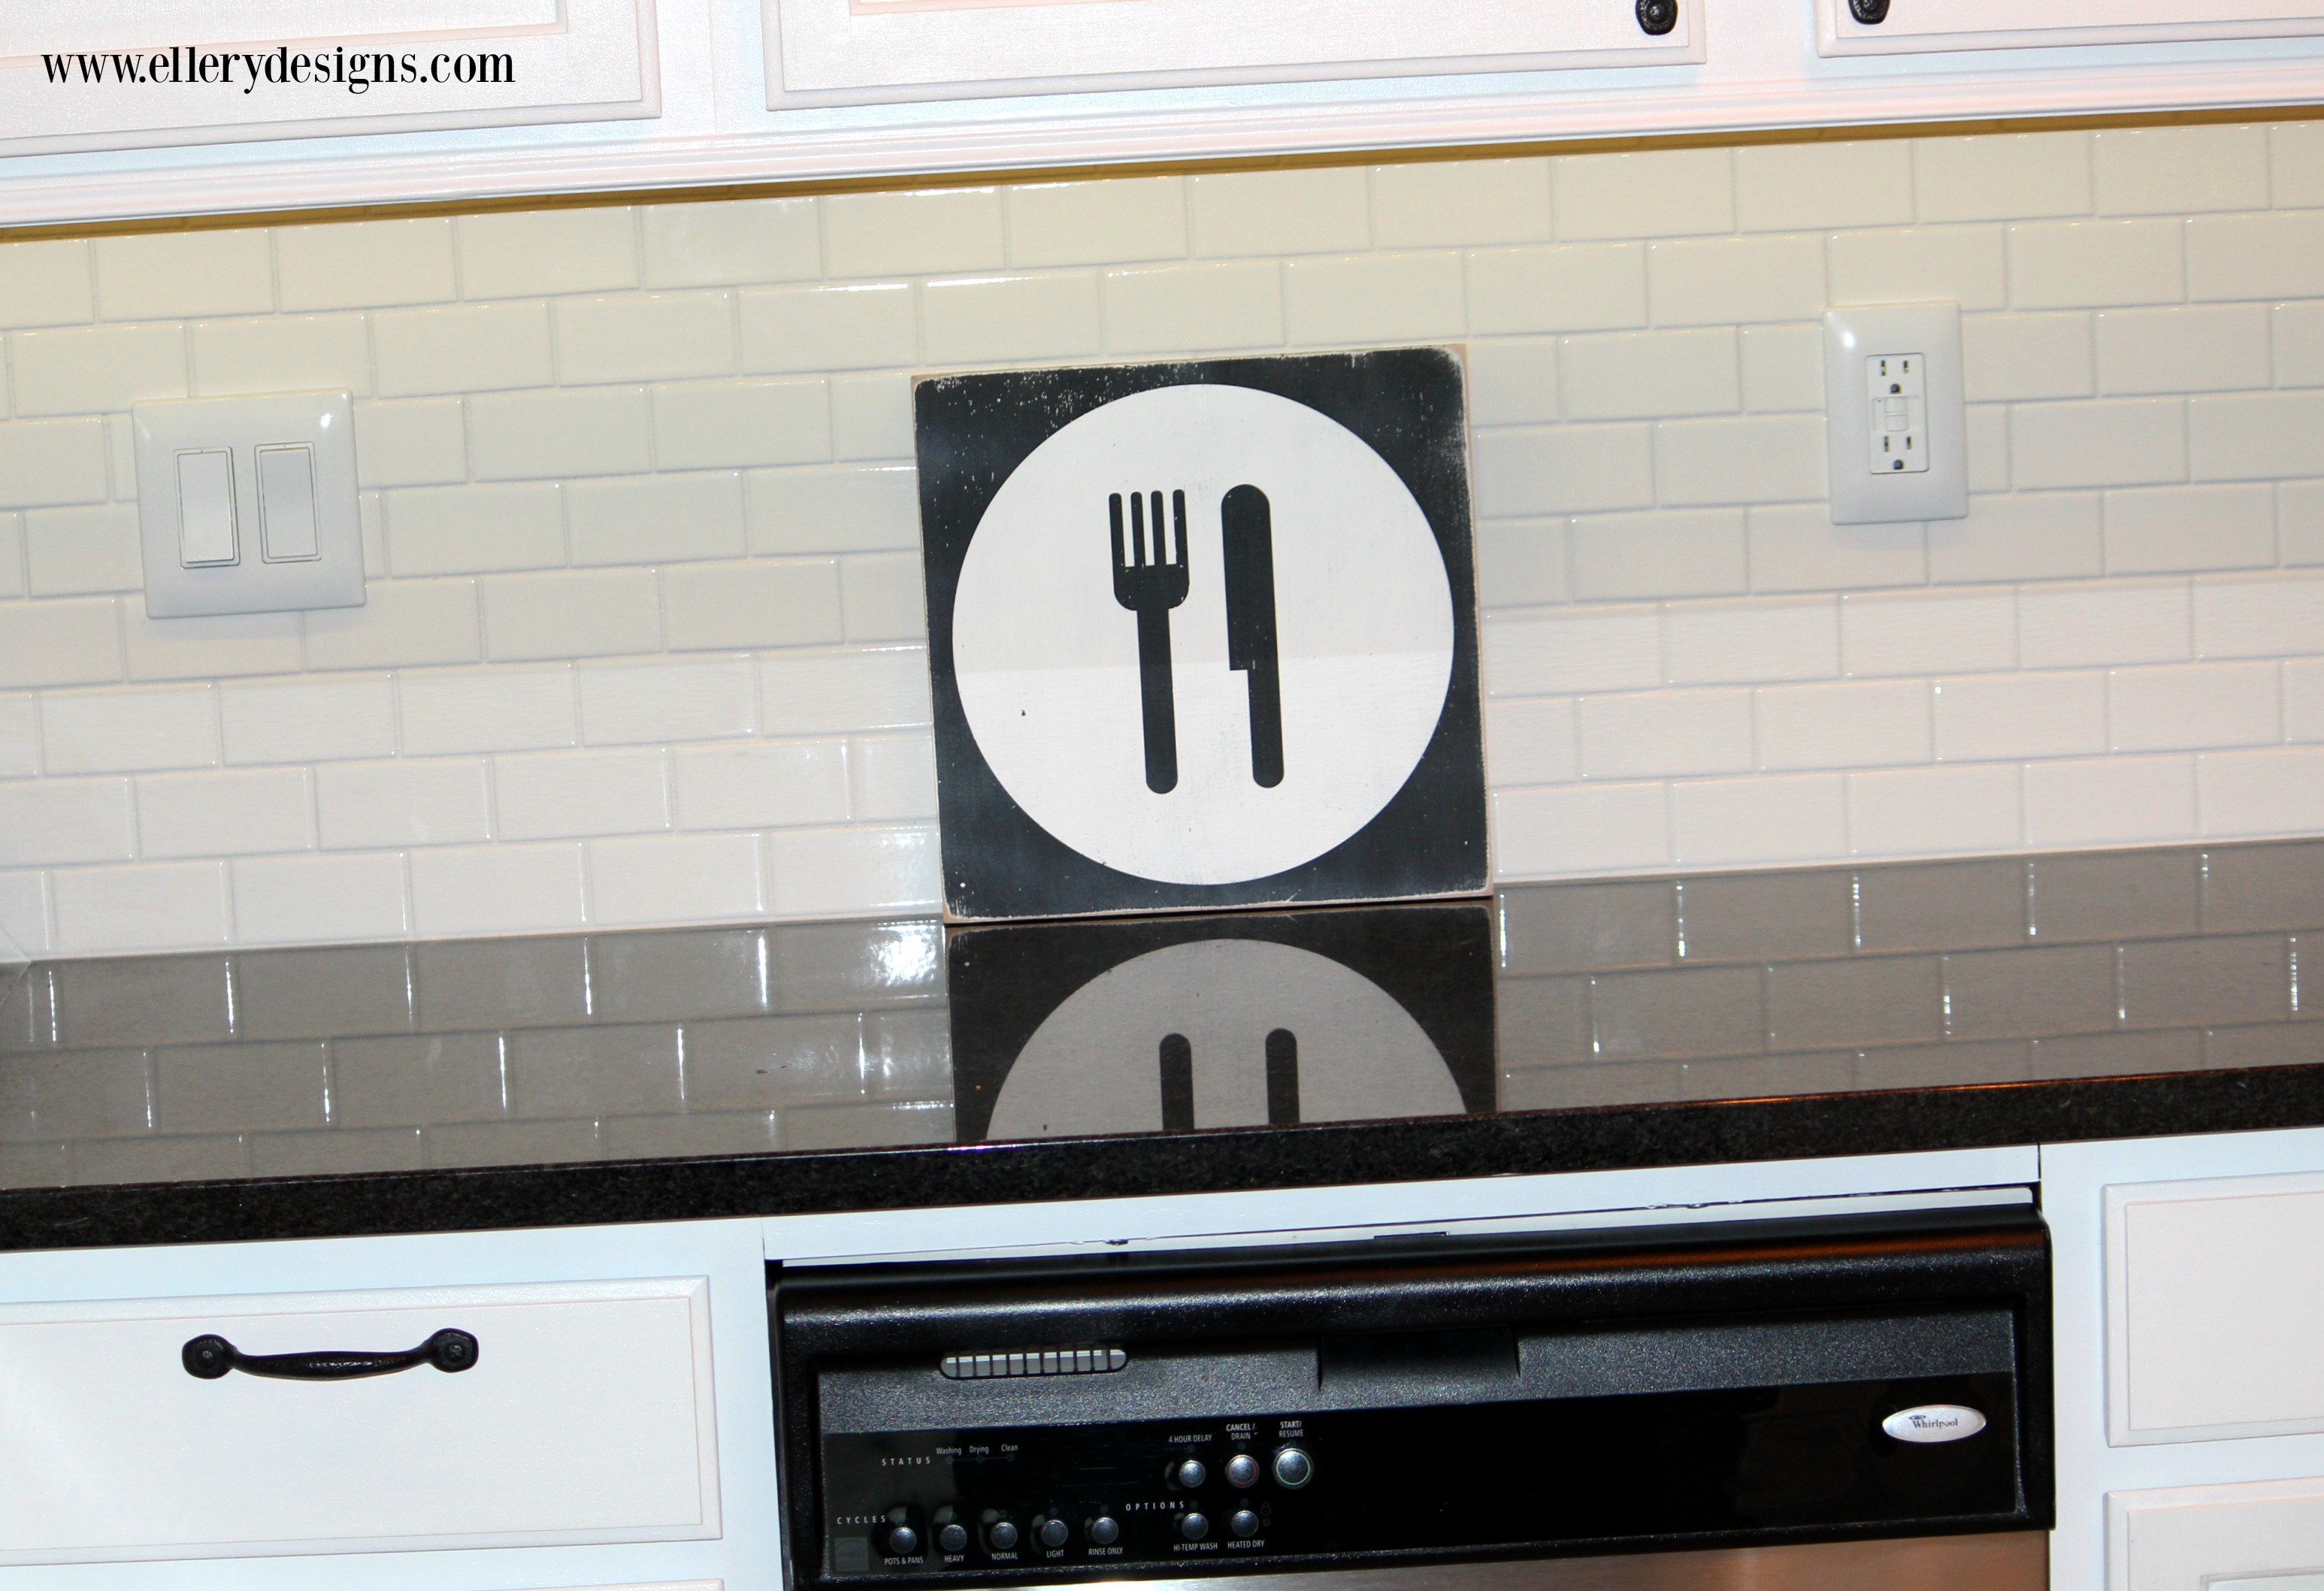
- Subway Tile Backsplash
- Added Seeded Glass to Corner Display Cabinet and Glass Shelf
- Upper and Lower Cabinet Lighting
- Updated Outlet Covers
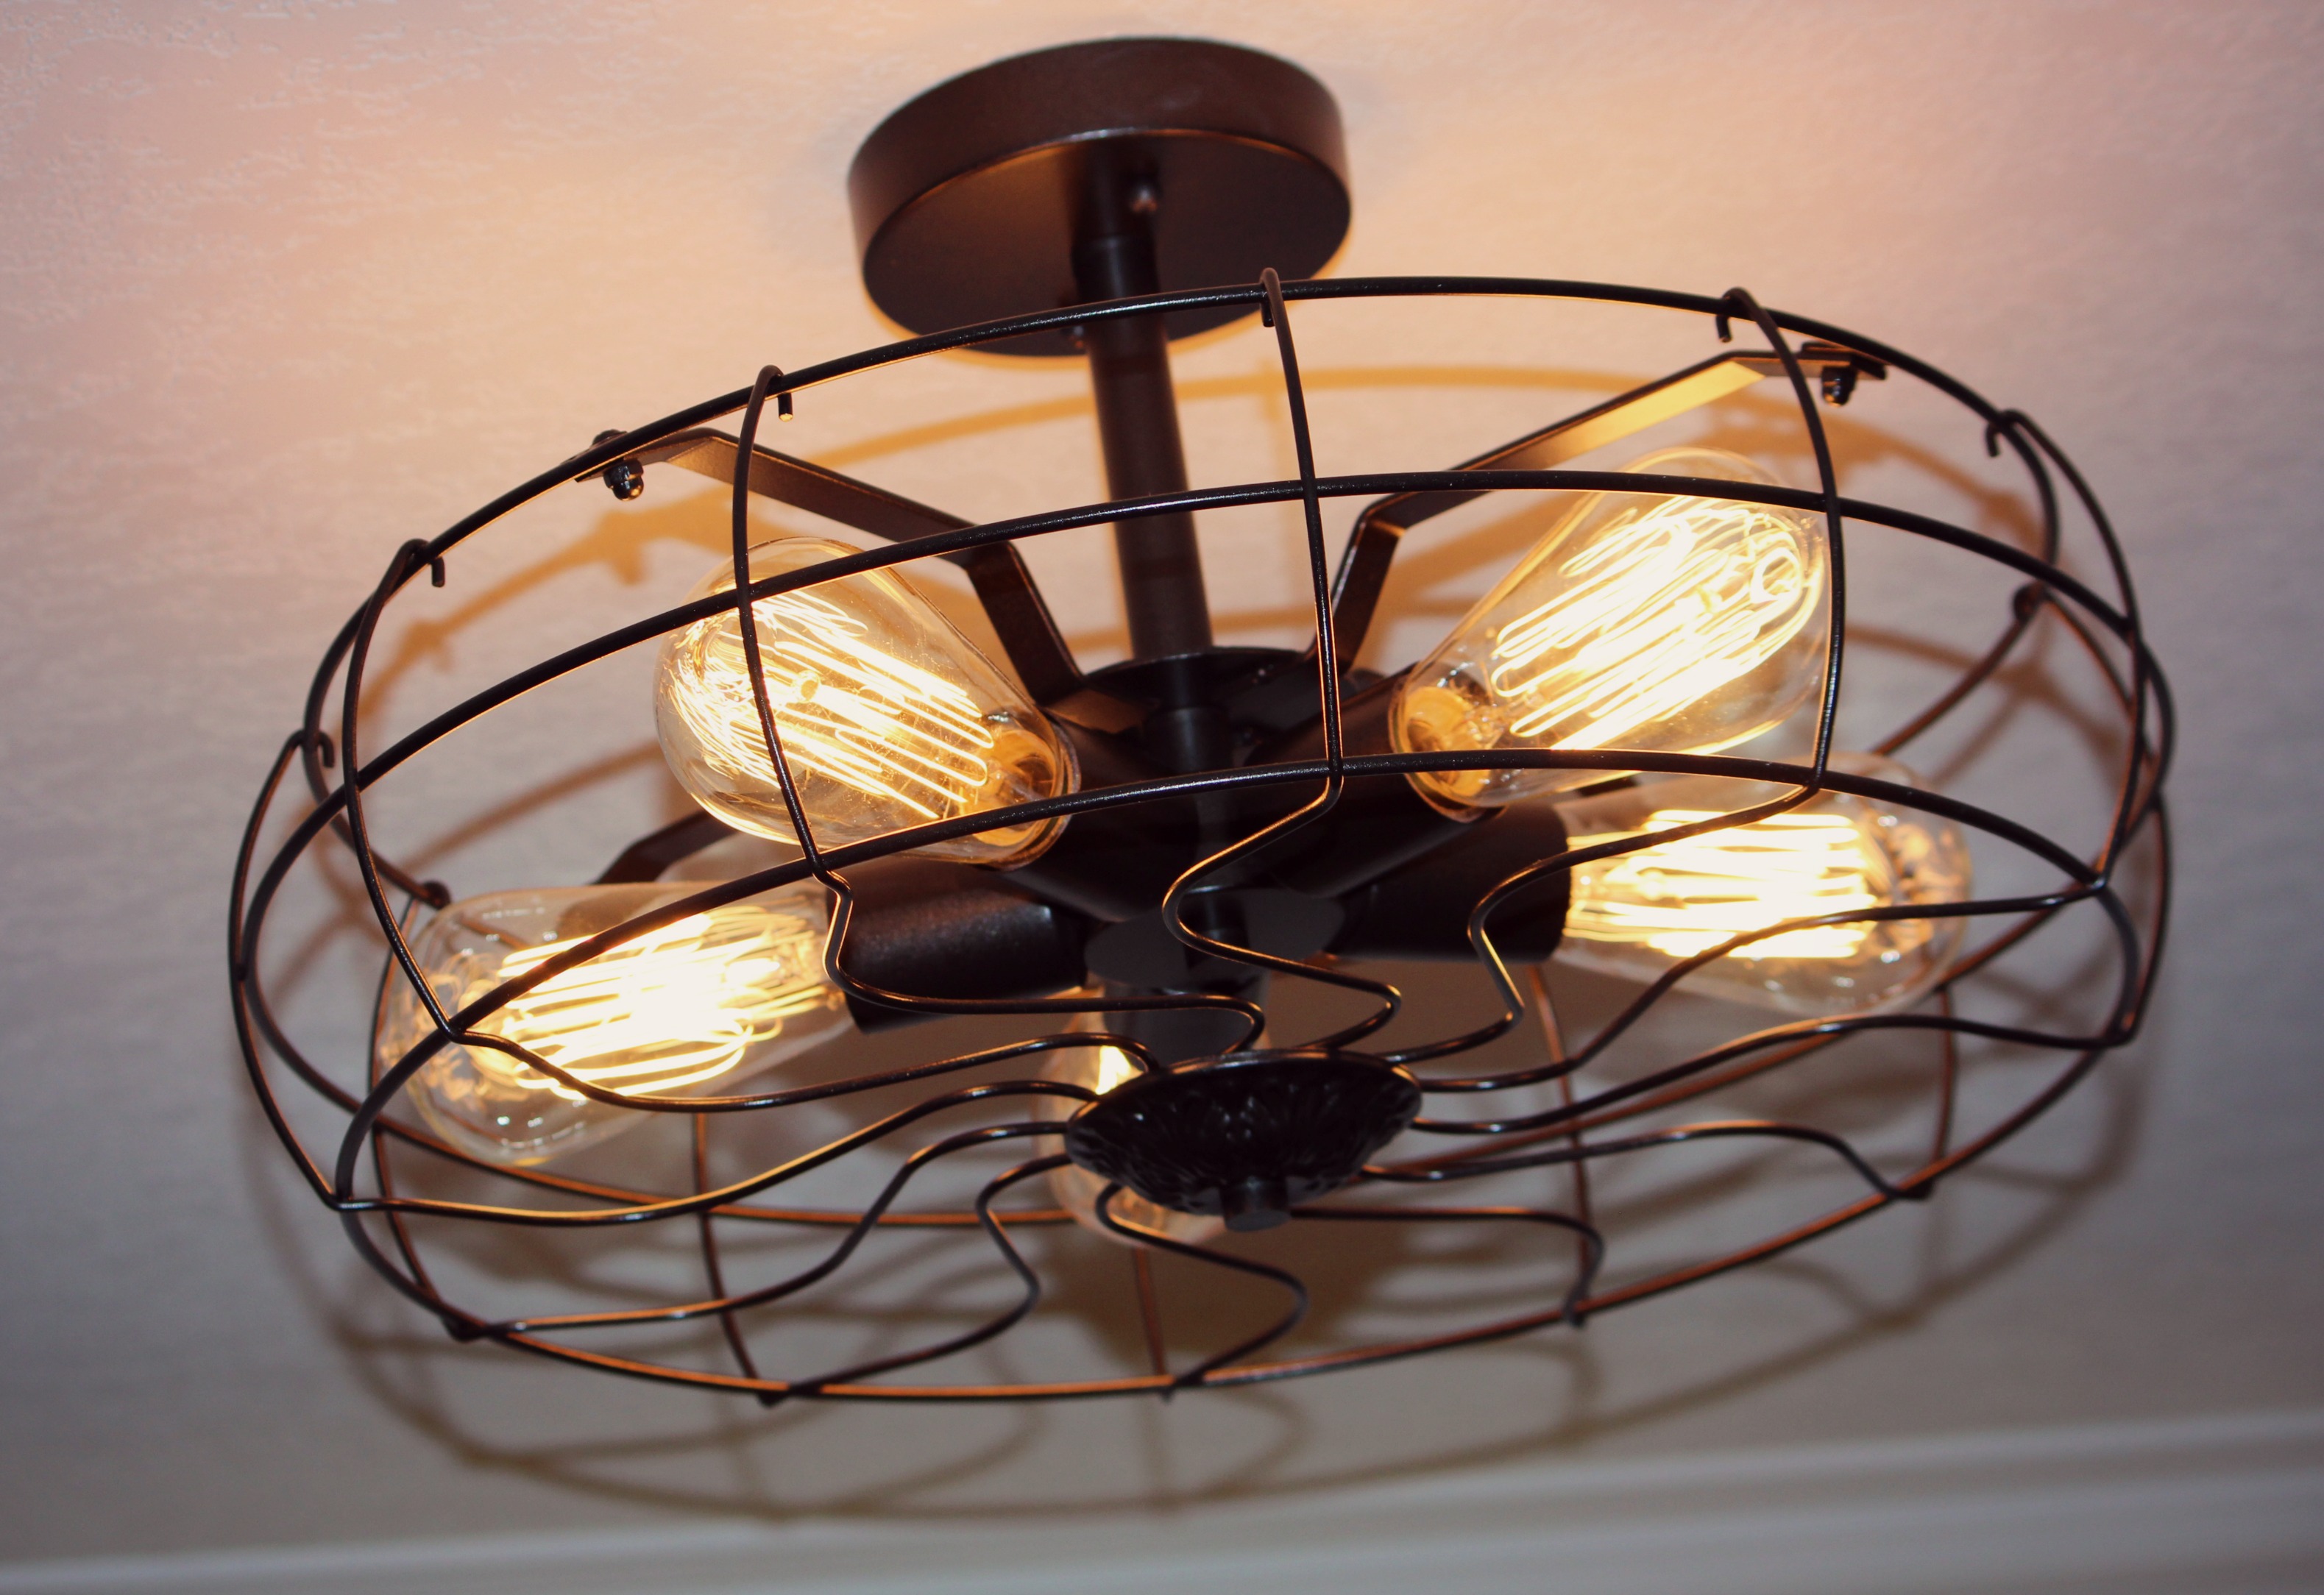
- New Light Fixtures
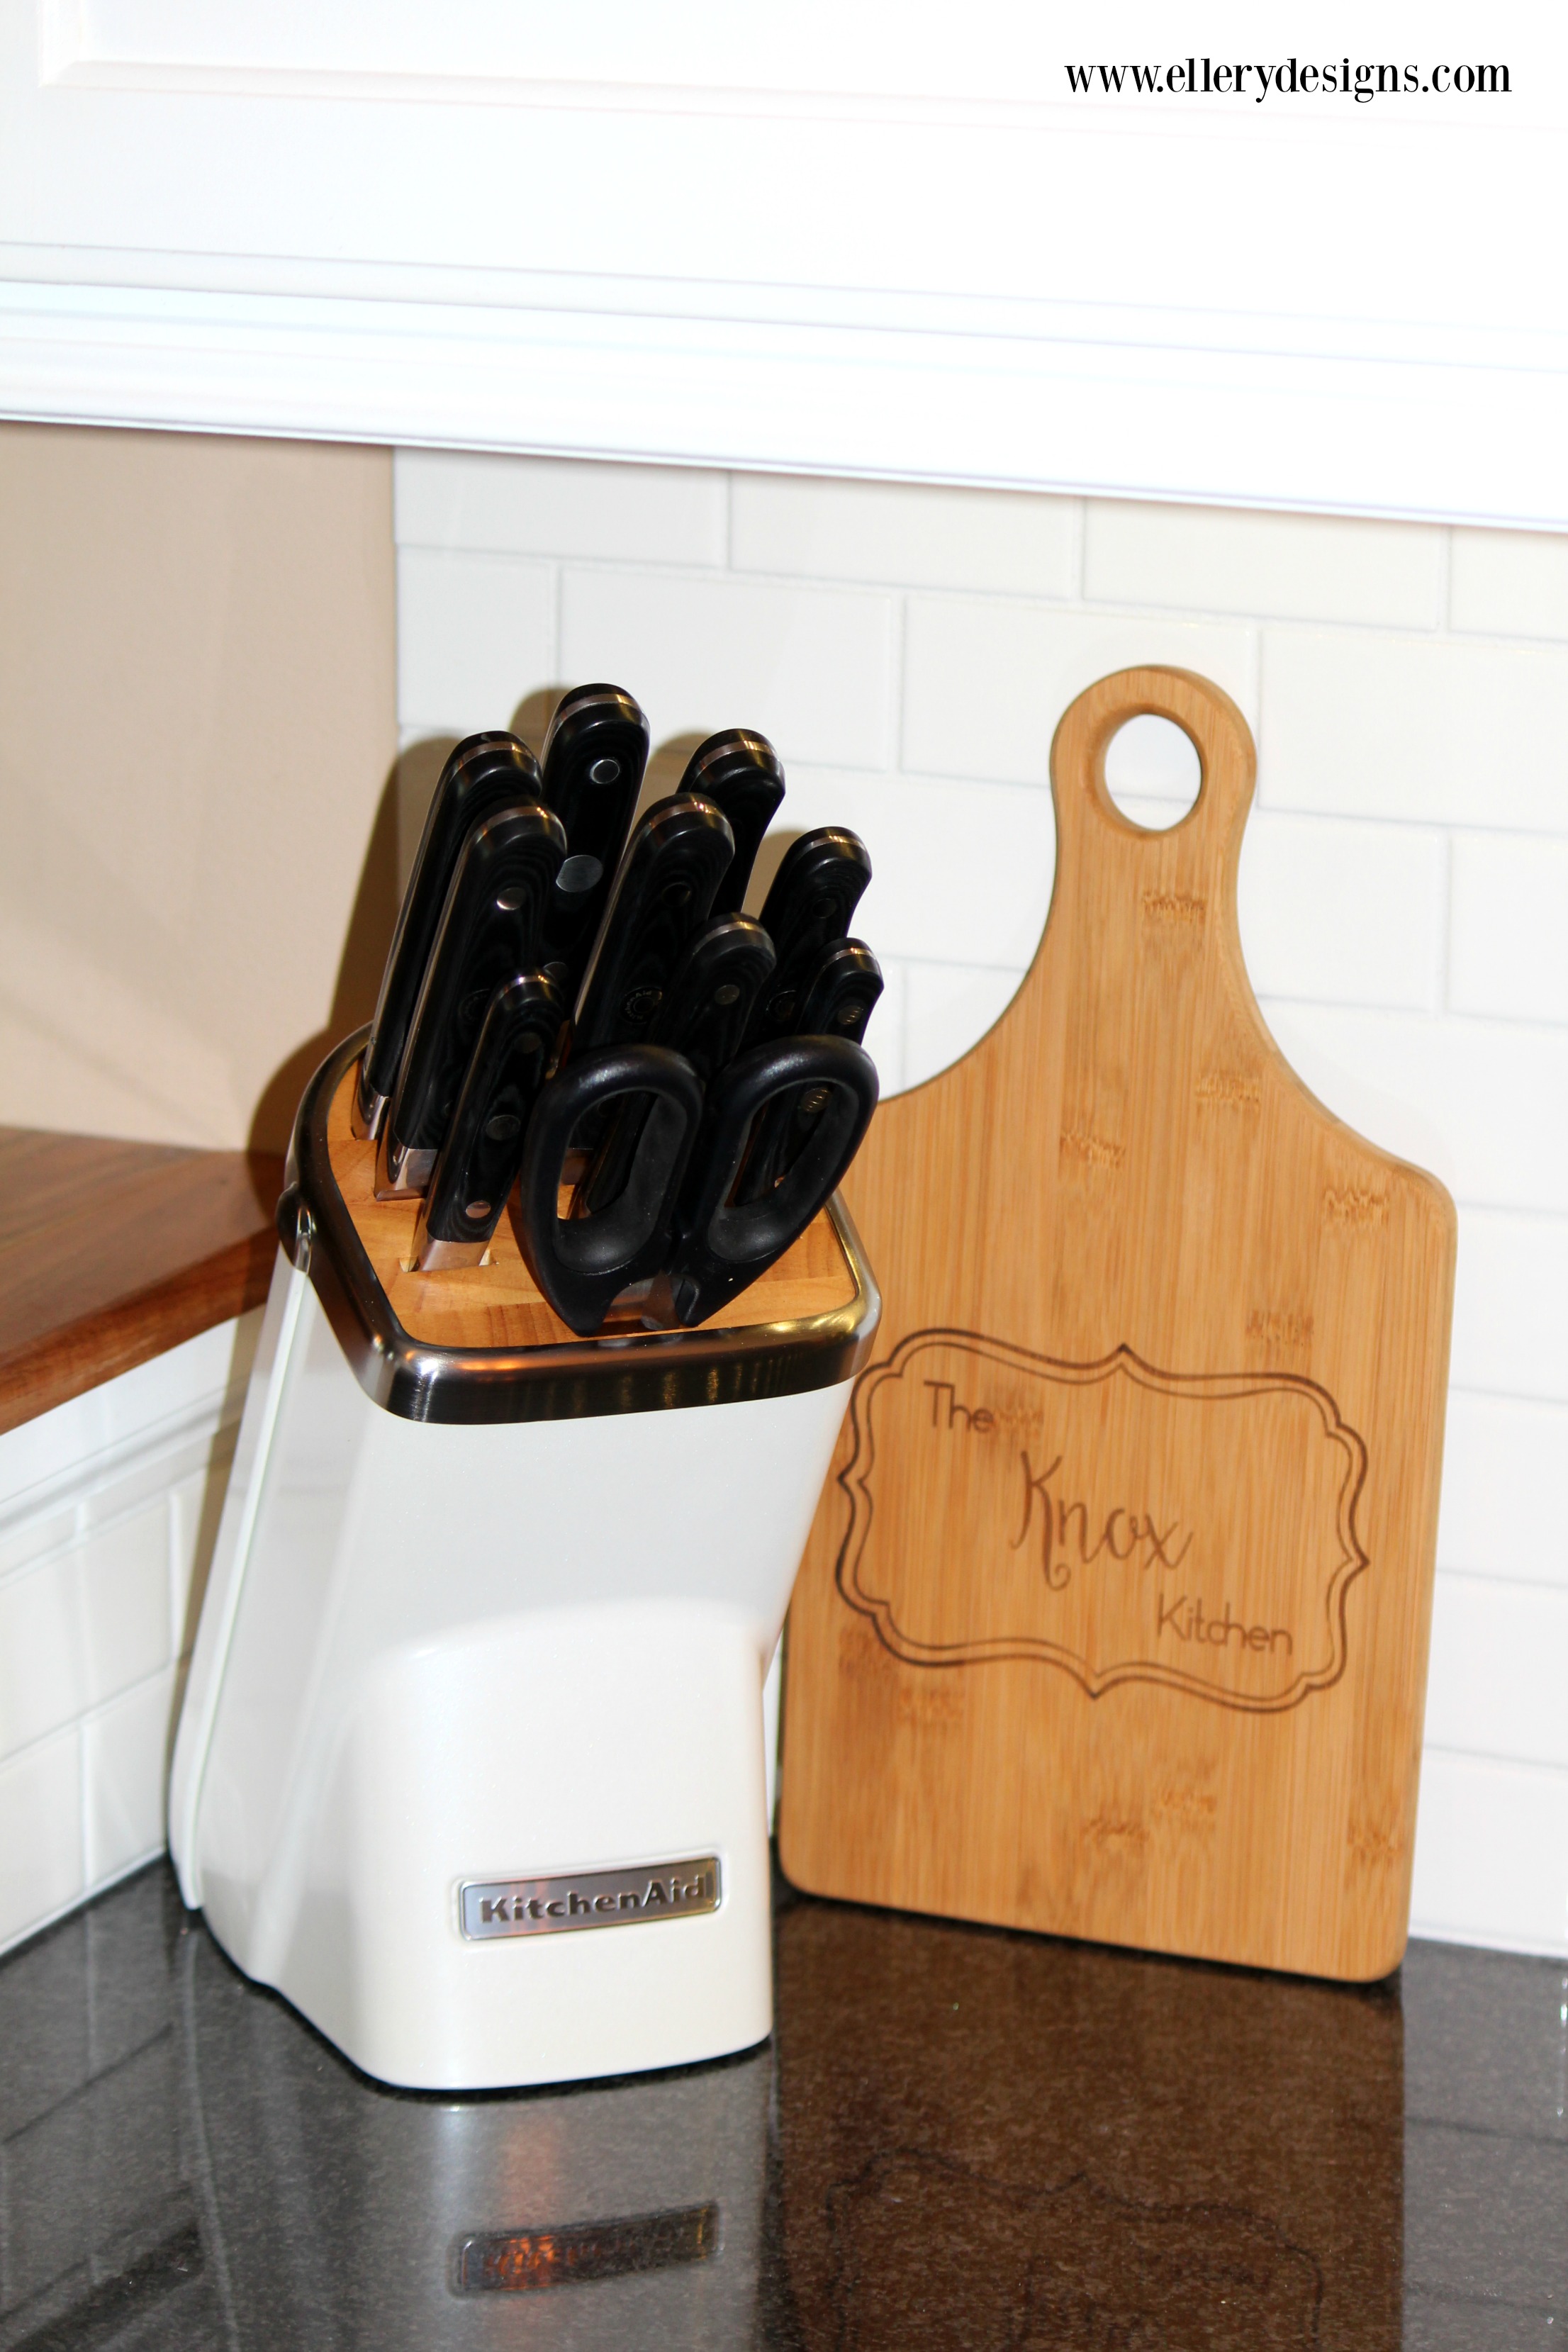
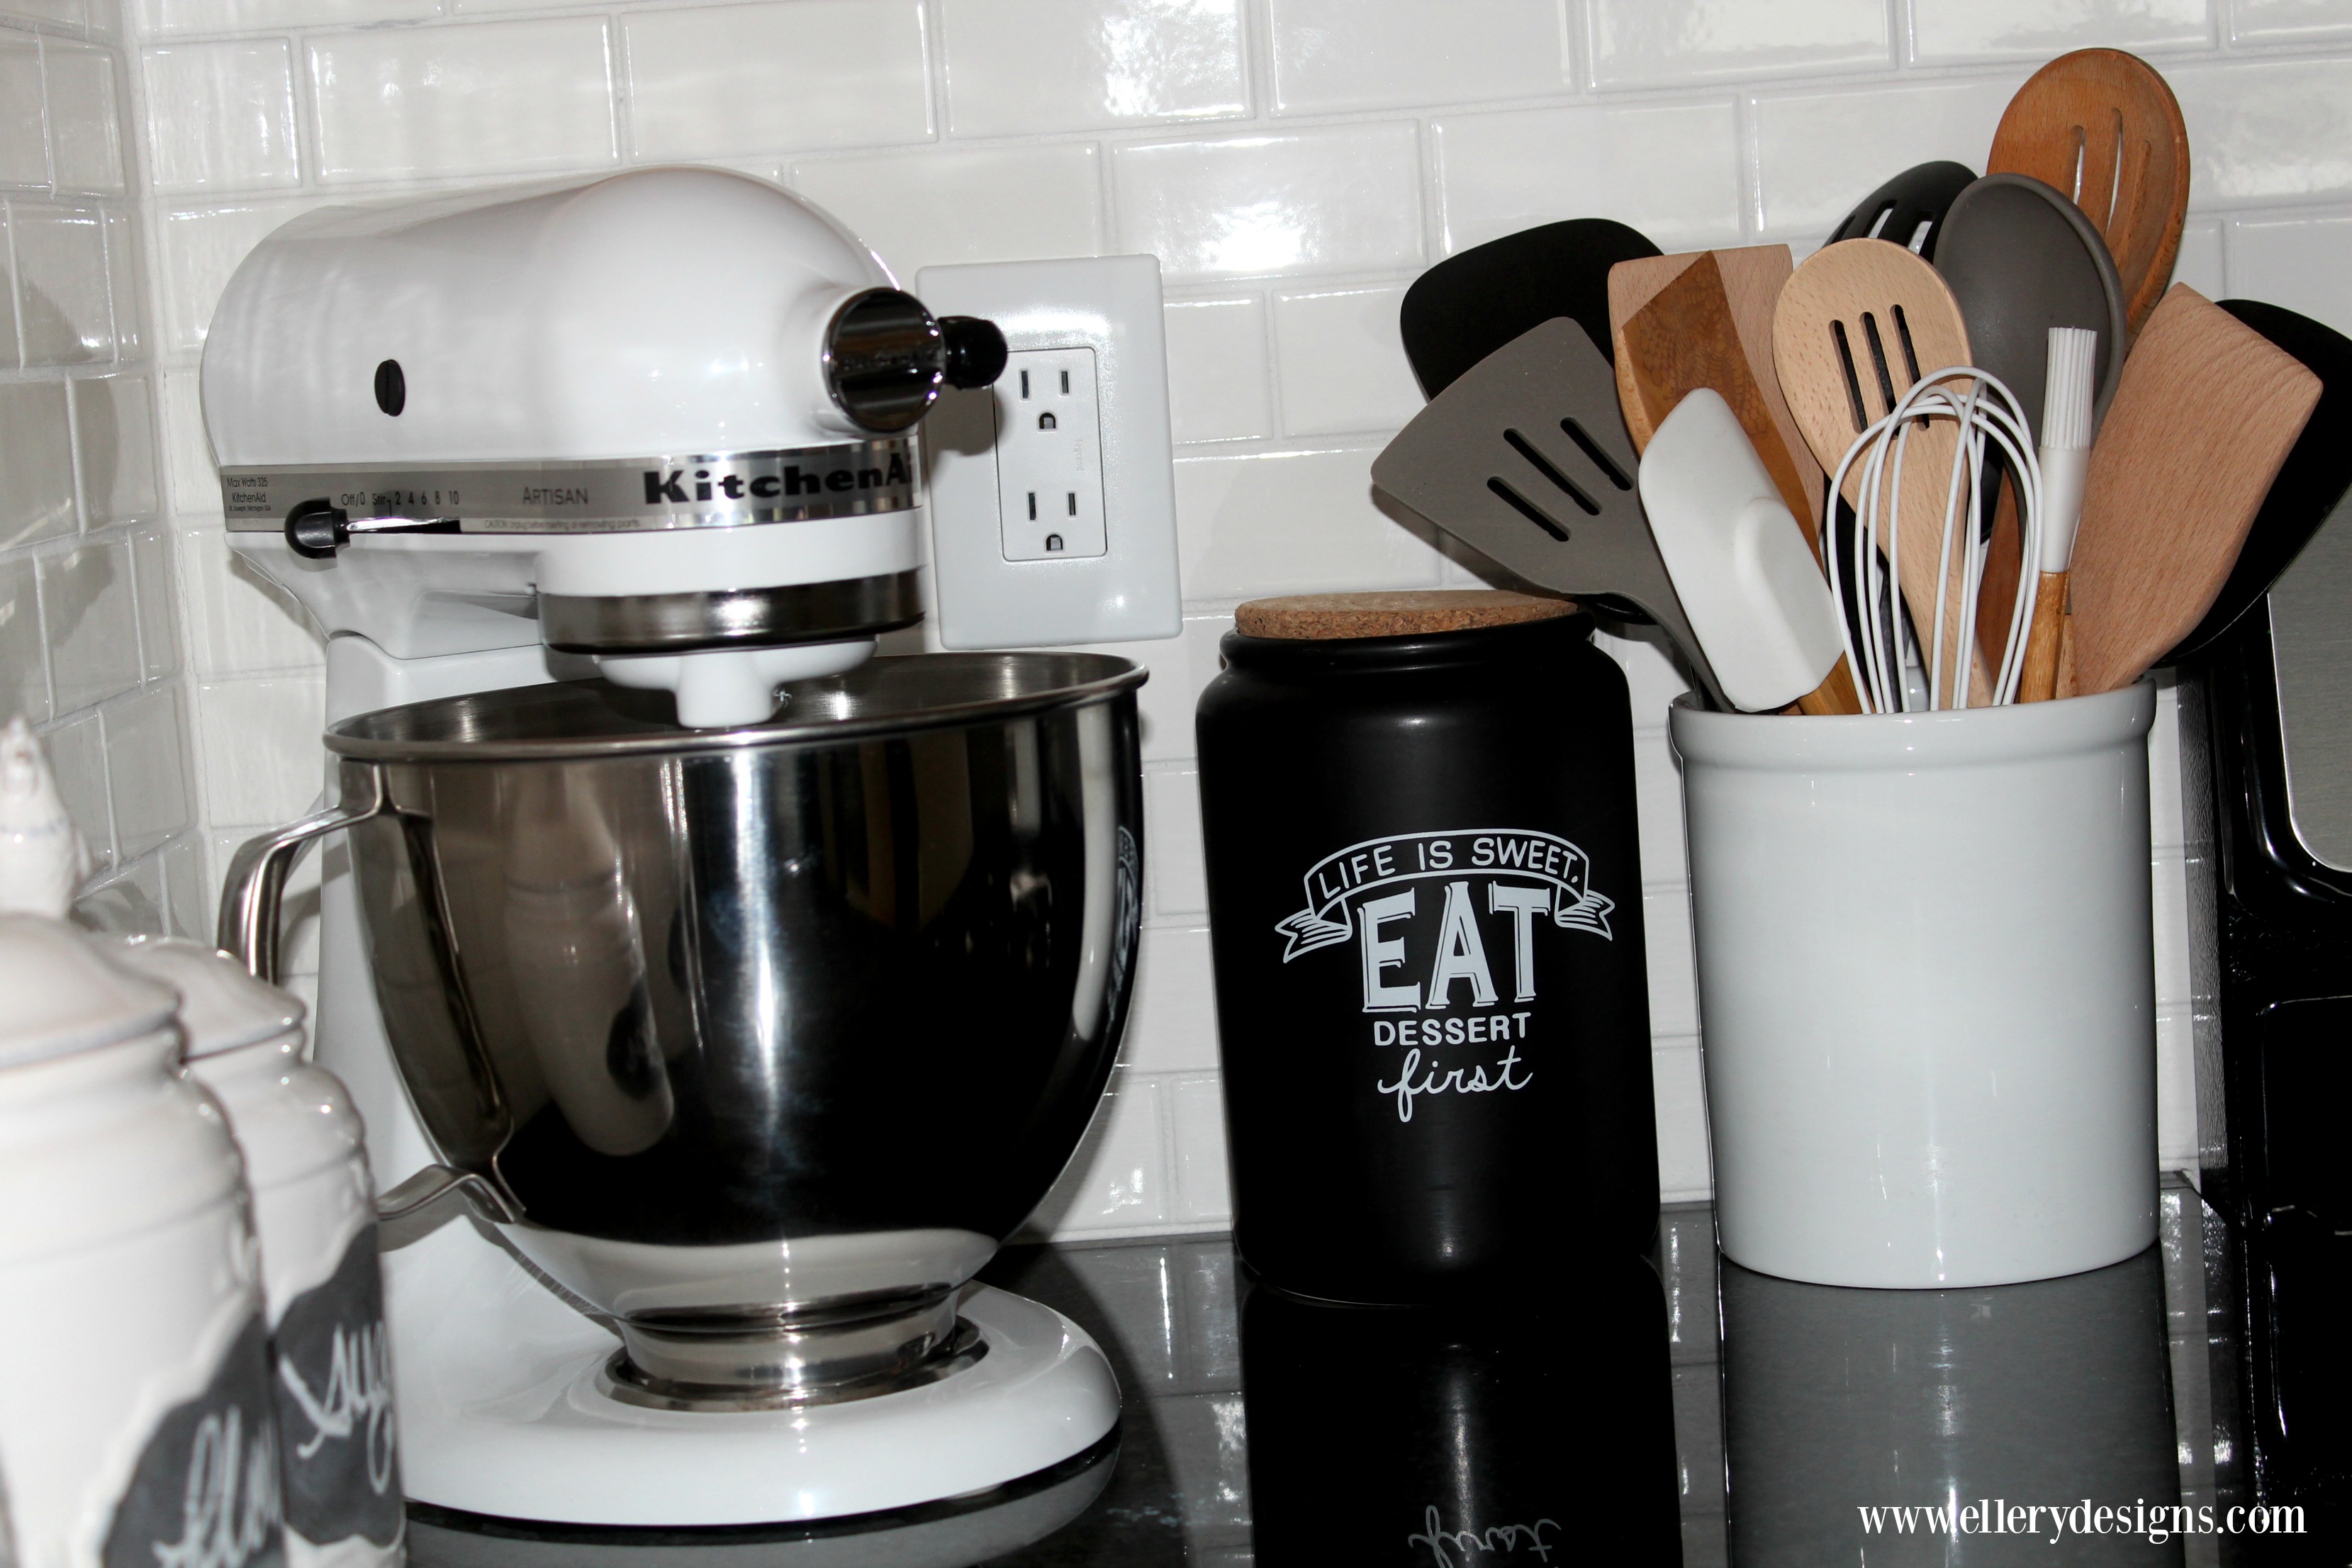
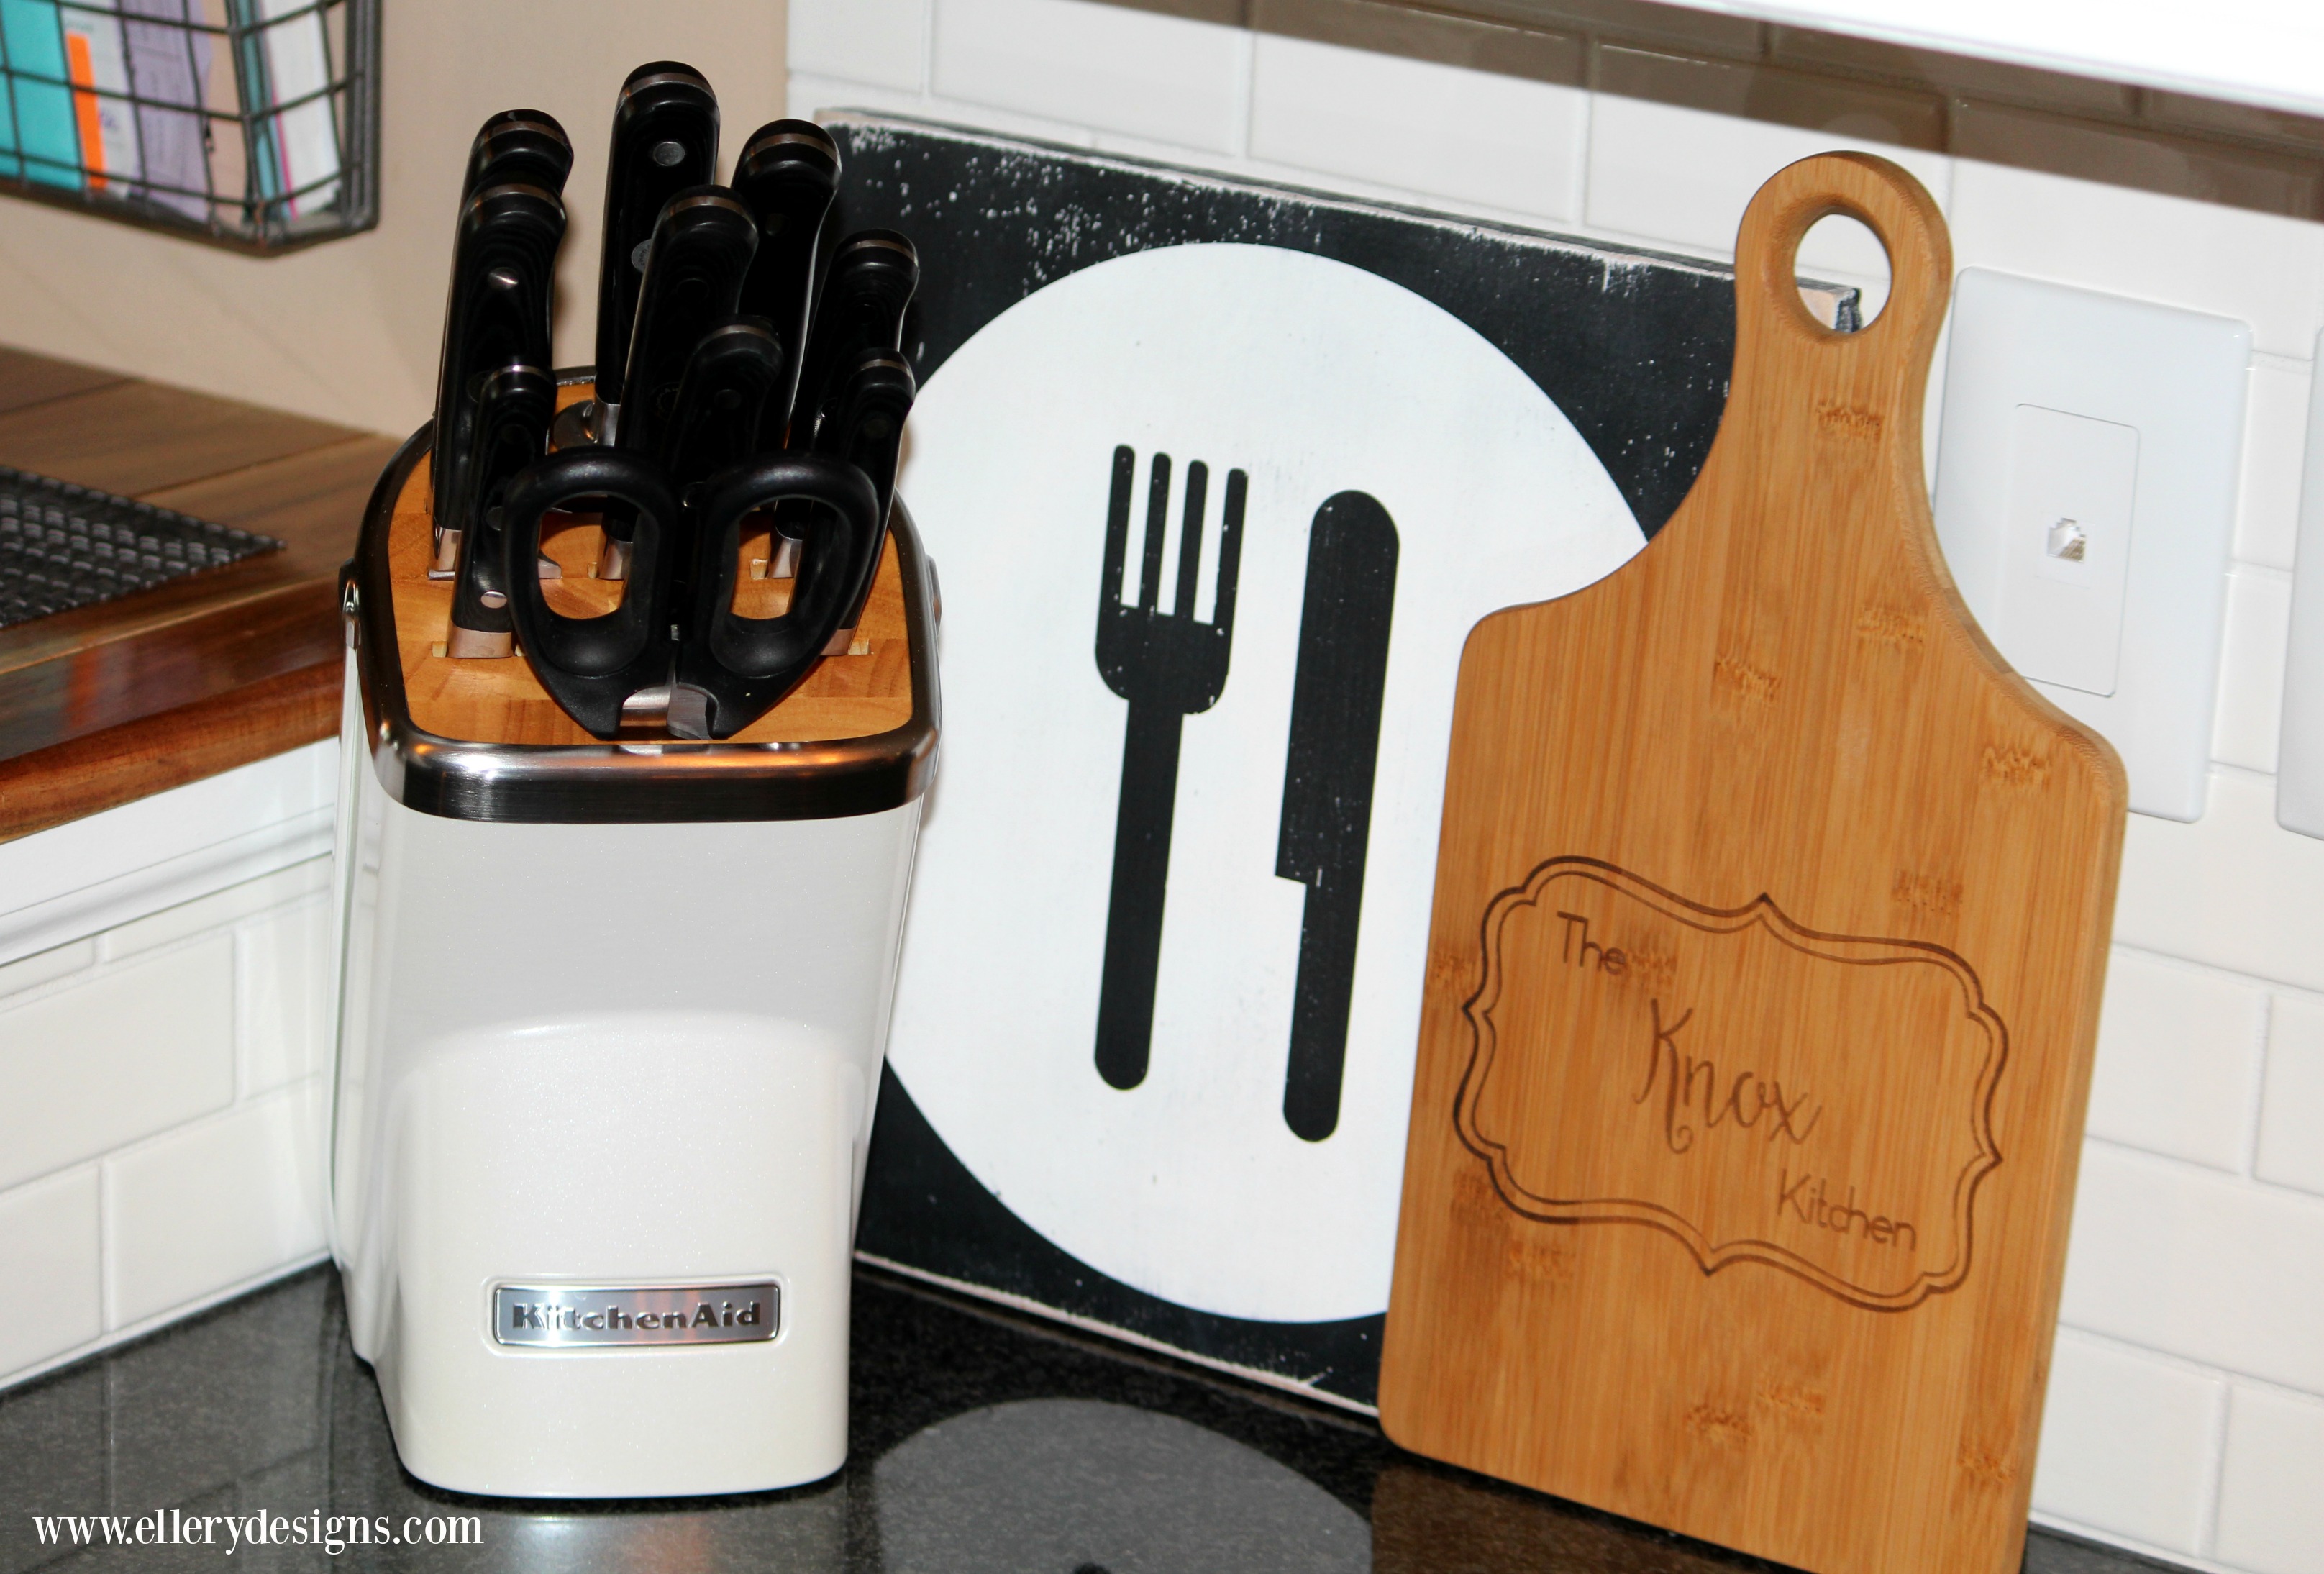
- Updated Counter Top Appliances by Kitchen Aid
- New Fridge
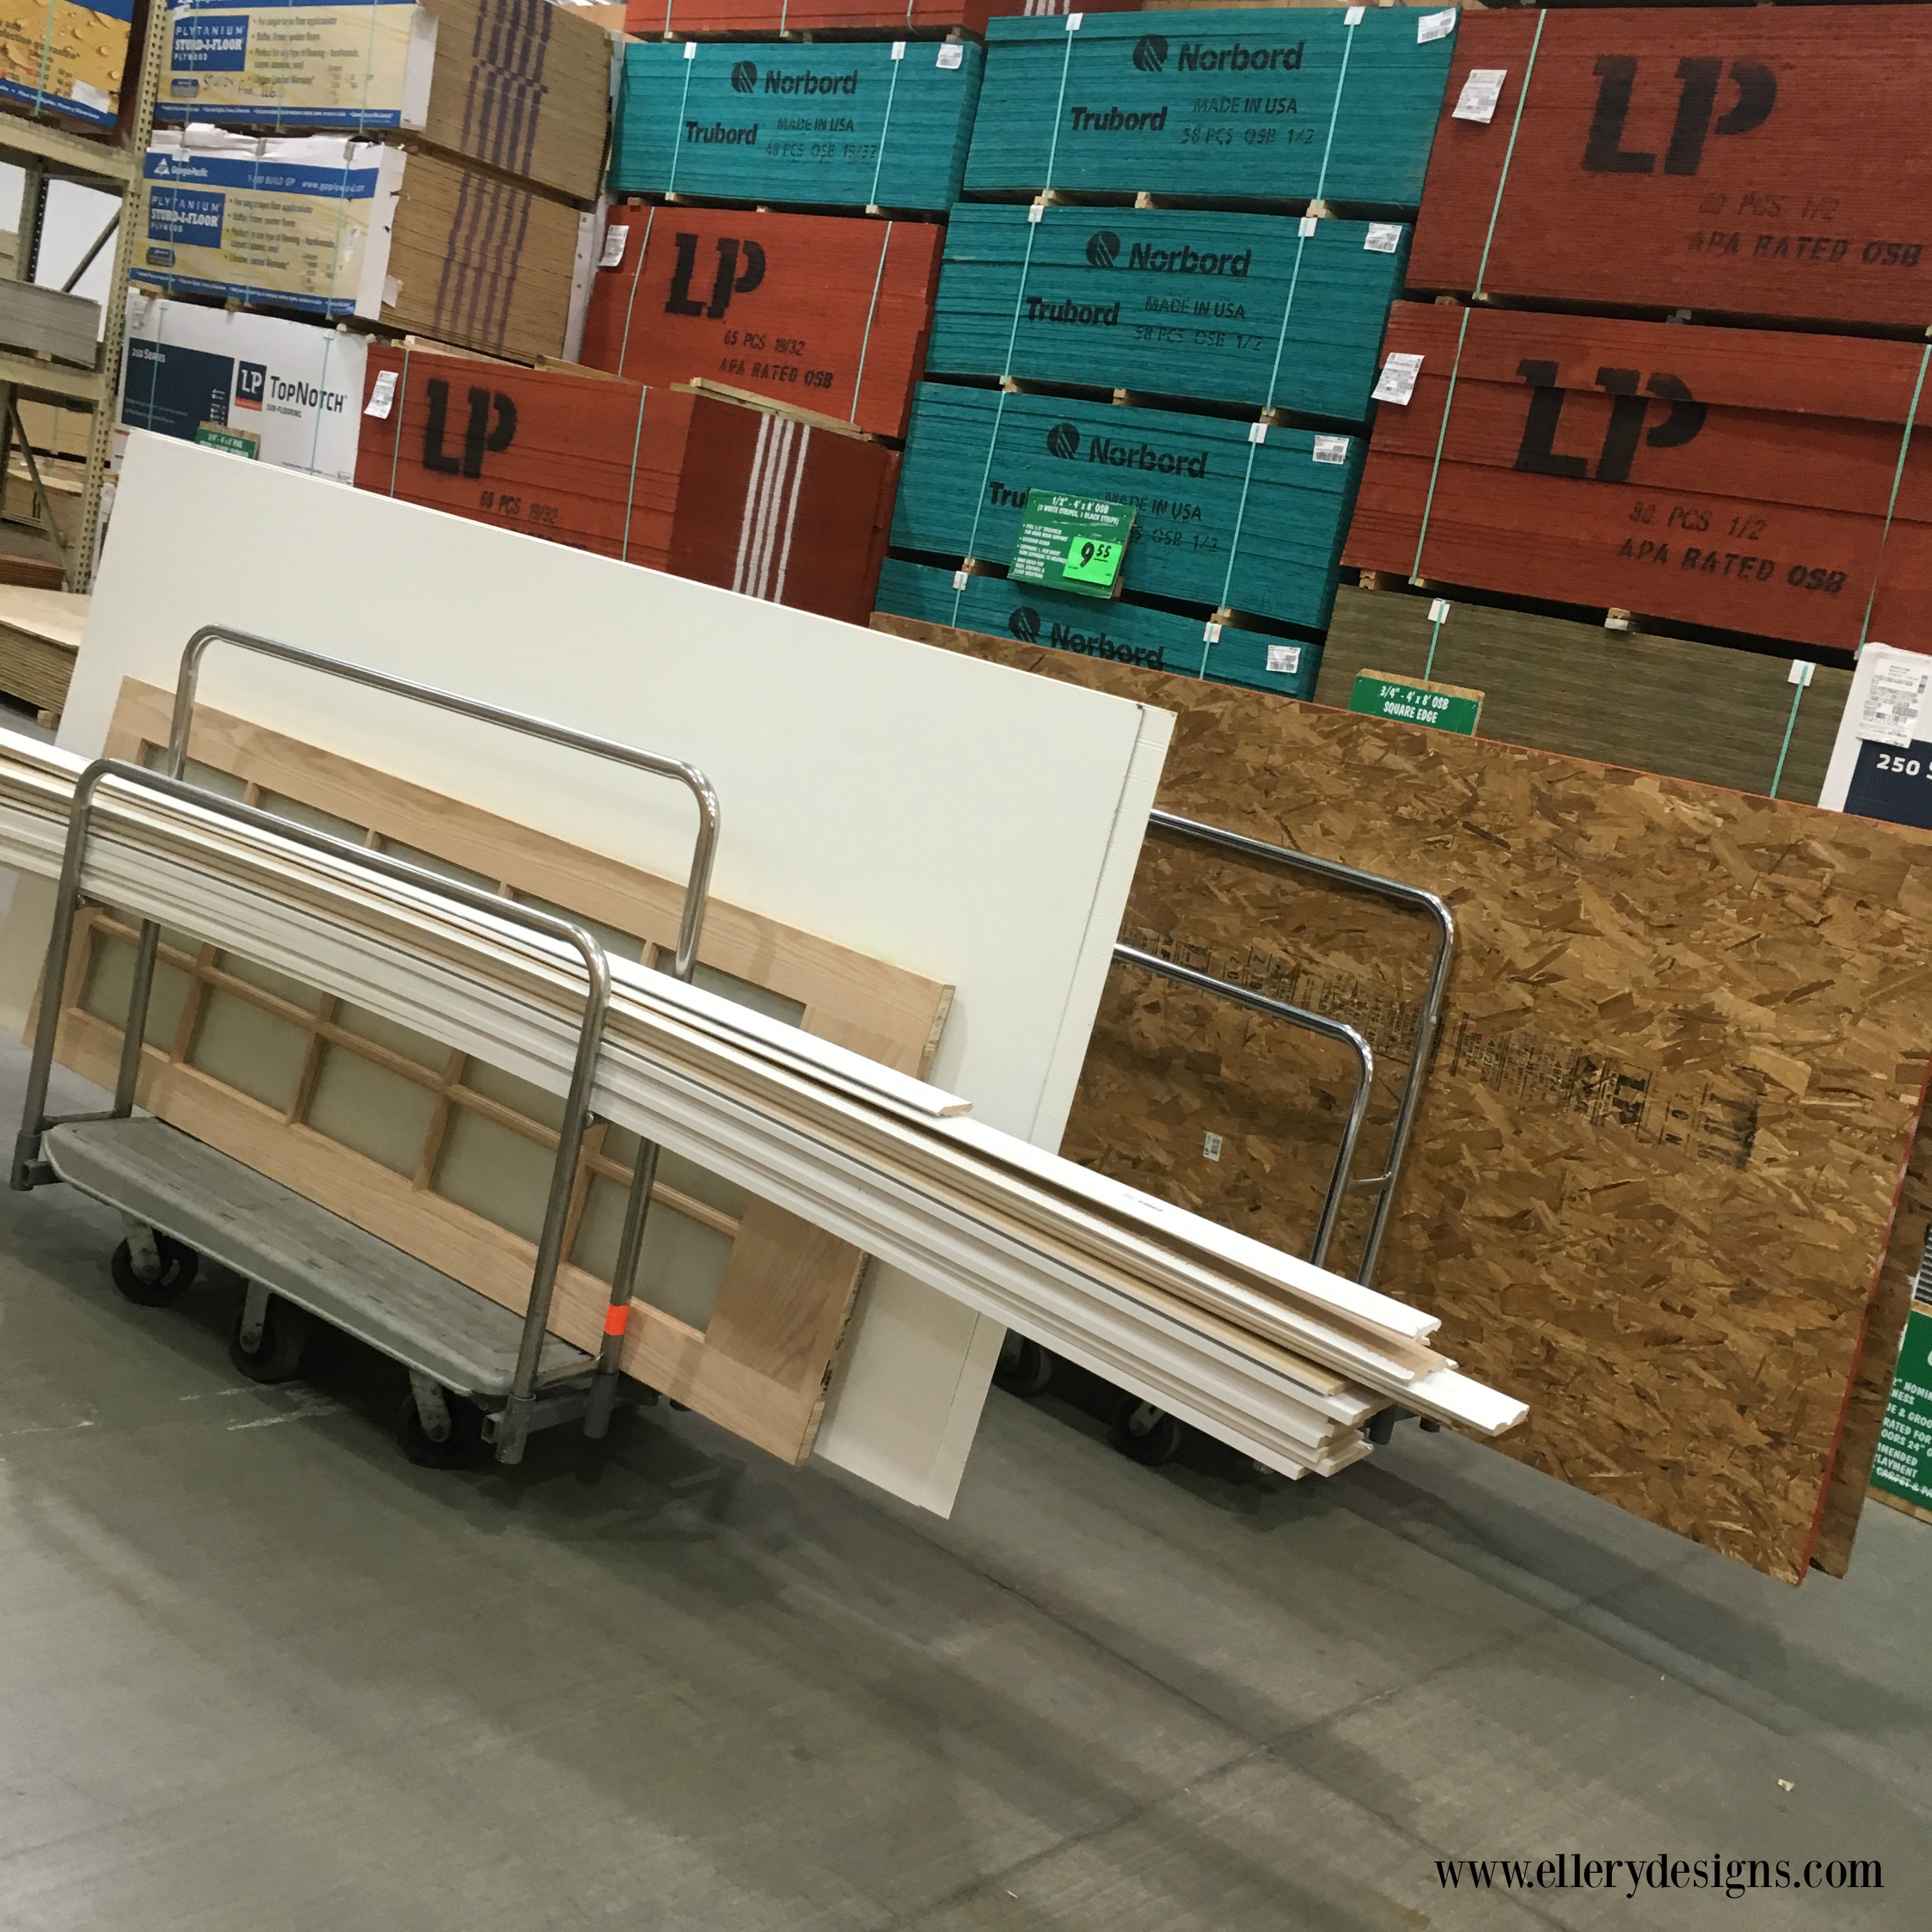
Now, for the details and some progress photos along the way. Gosh, was it messy but you can’t appreciate the after photos without seeing some of the progress, right?! Here’s our first materials haul from Menards – we were probably at Menards three times a week during our five week renovation. Yep, we finished it all within five weeks! Felt much longer, but that’s another story….;)
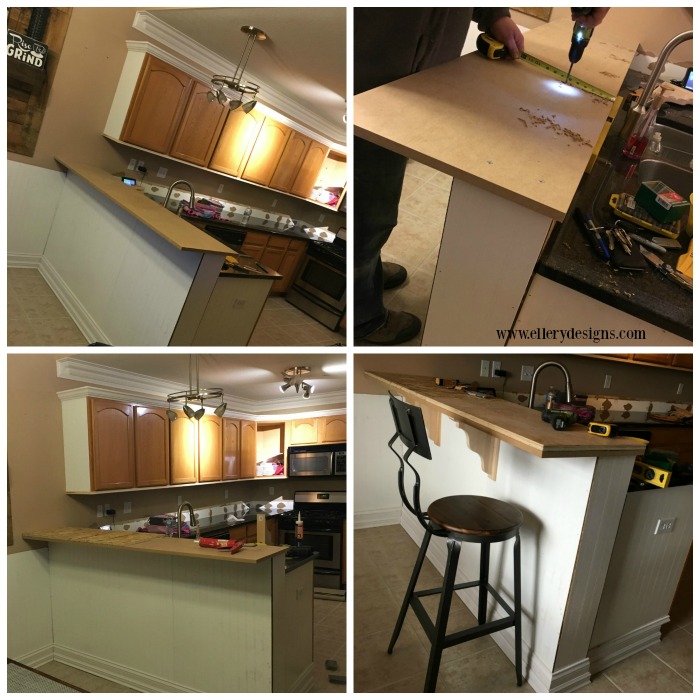
The first thing we completed was the upper crown on the wall above the cabinets – you wouldn’t believe it but it’s three separate pieces all nailed together to make that beautiful crown! My hubby did most of the work I just used the nail gun 😉 P.S. Filling and sanding nail holes is the worst!! Never knew how long that takes but WOW. Time consuming but worth it!
We then added crown and trim above and below the cabinets, as seen in the last photo above. Next up, he added the beadboard and custom chair rail and base trim around the mini wall in the kitchen as well as the adjoining walls in the dining room to tie everything together. I can’t get over how detailed the trim work is – the hubby is quite the craftsman! You can see in this photo the detail work of this – it’s not just one piece of trim my friends. It’s pretty fab and I’m amazed at the process it takes to make your trim really stand out!
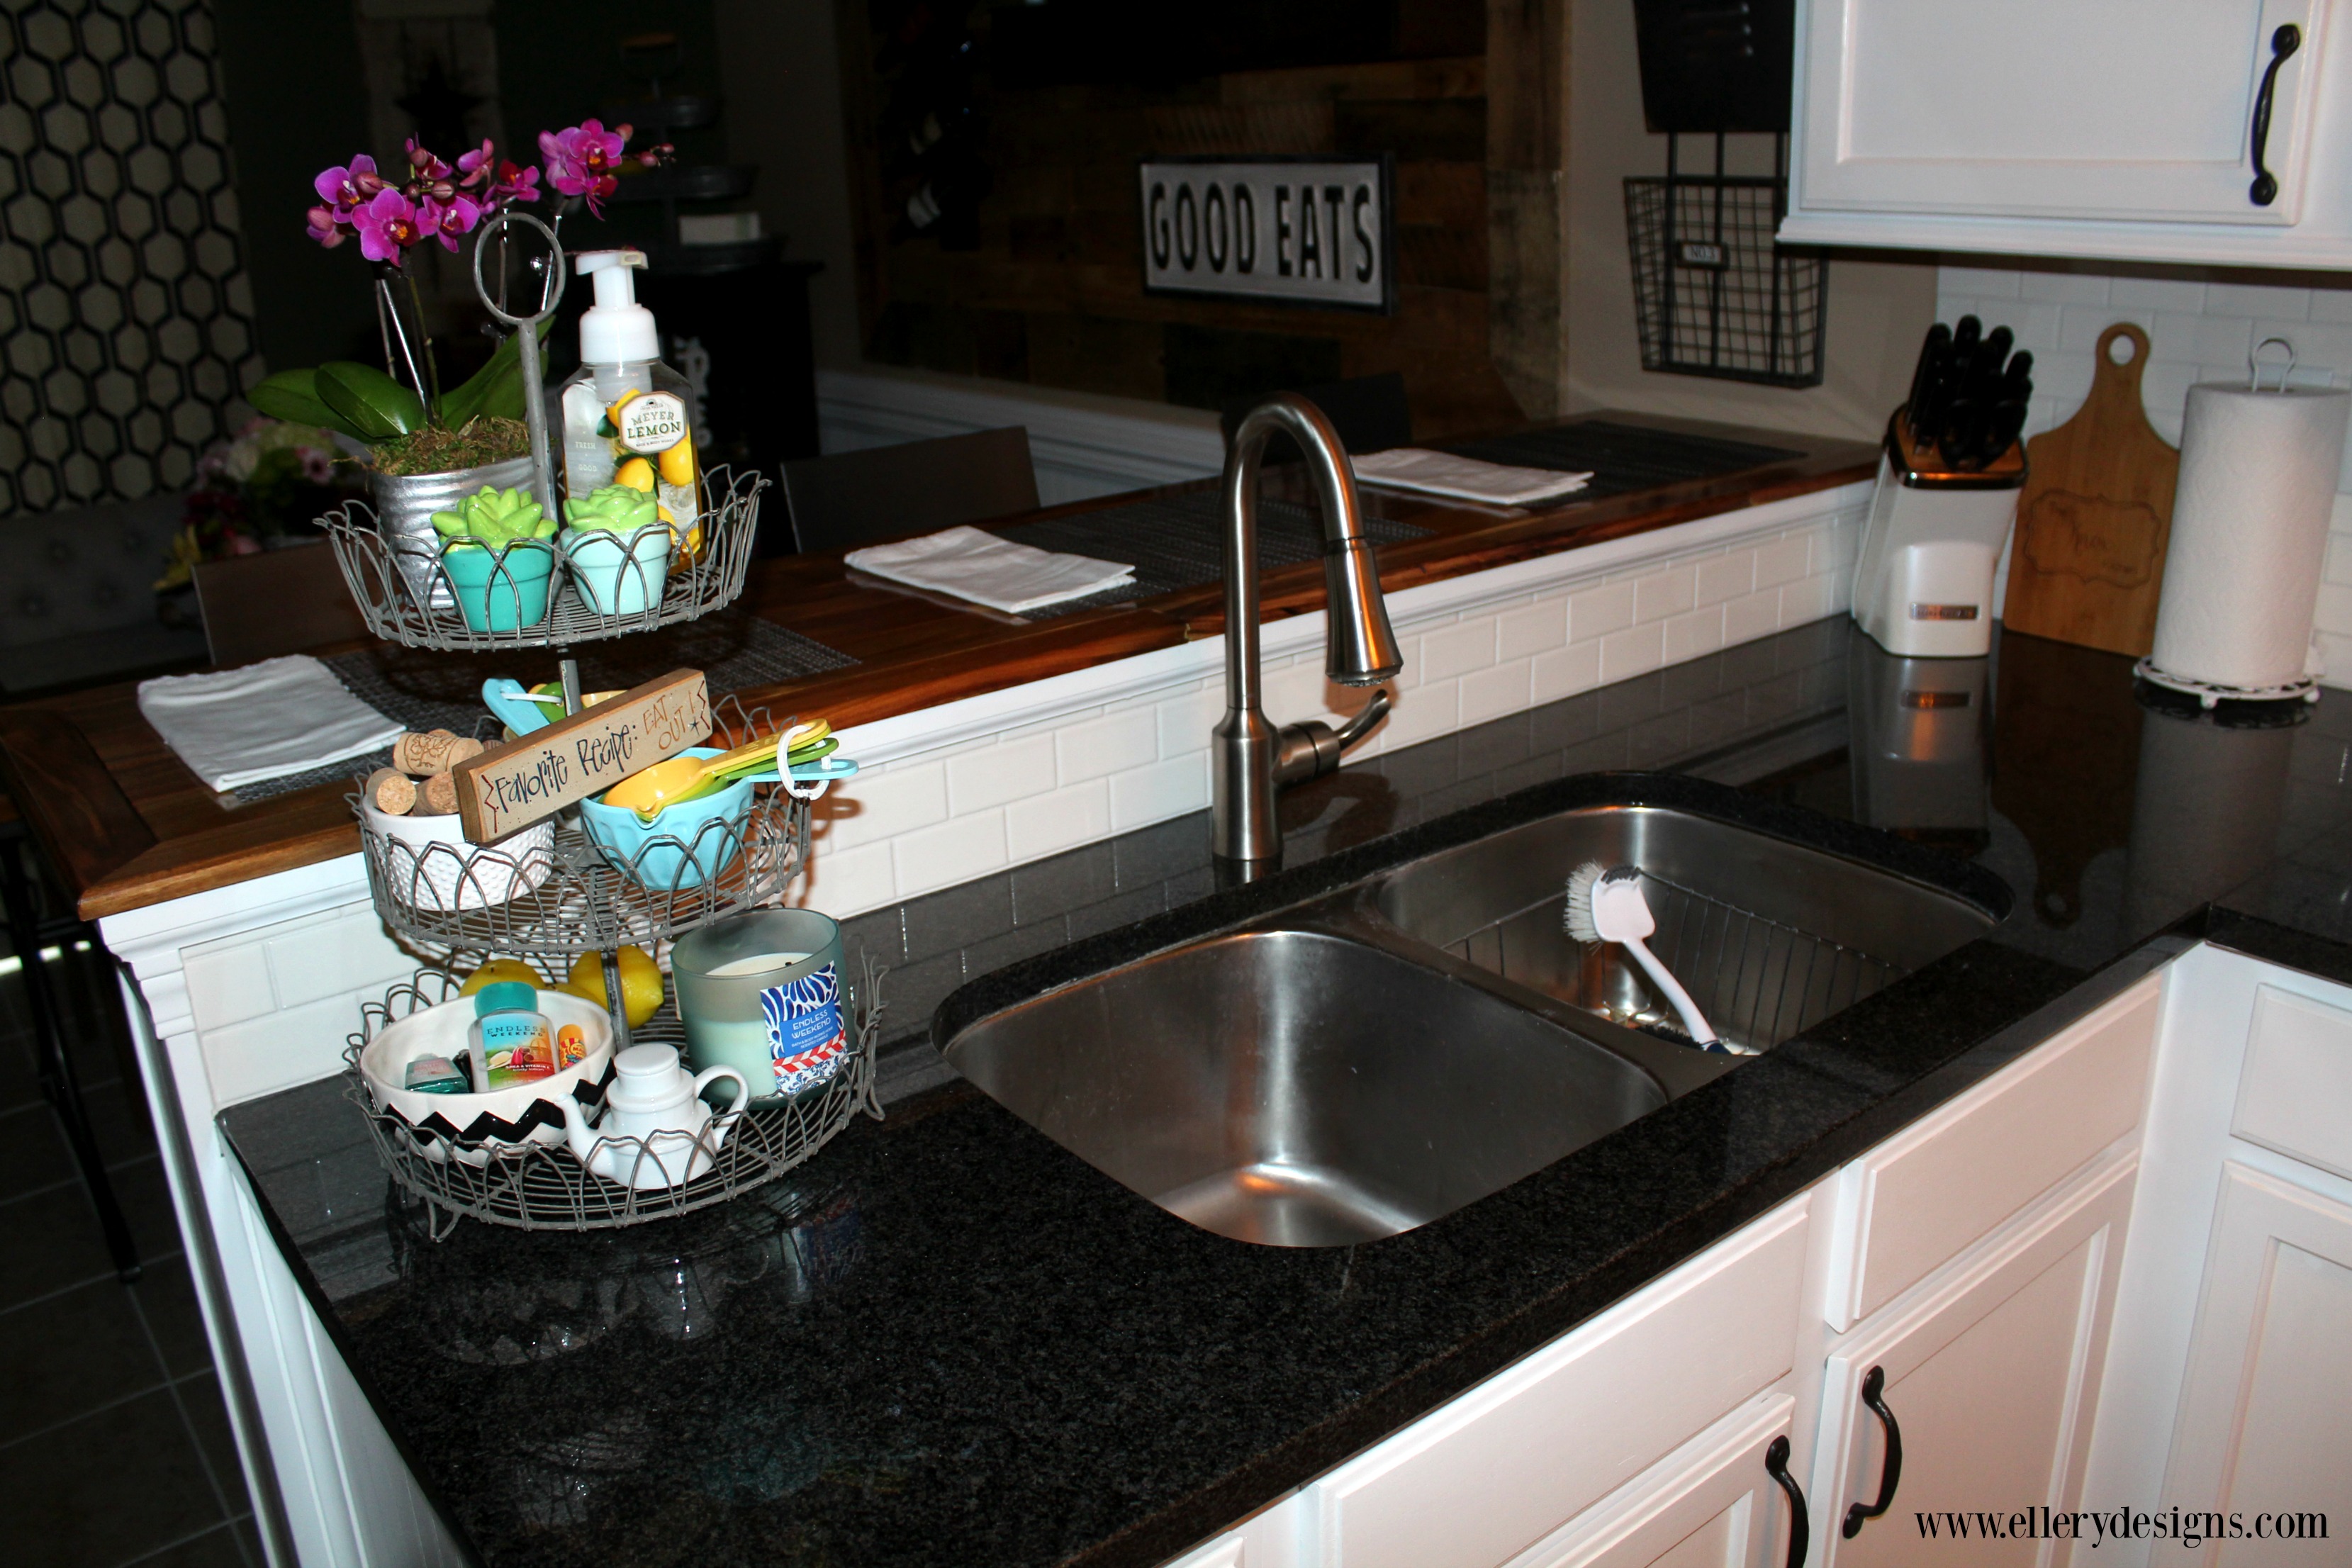
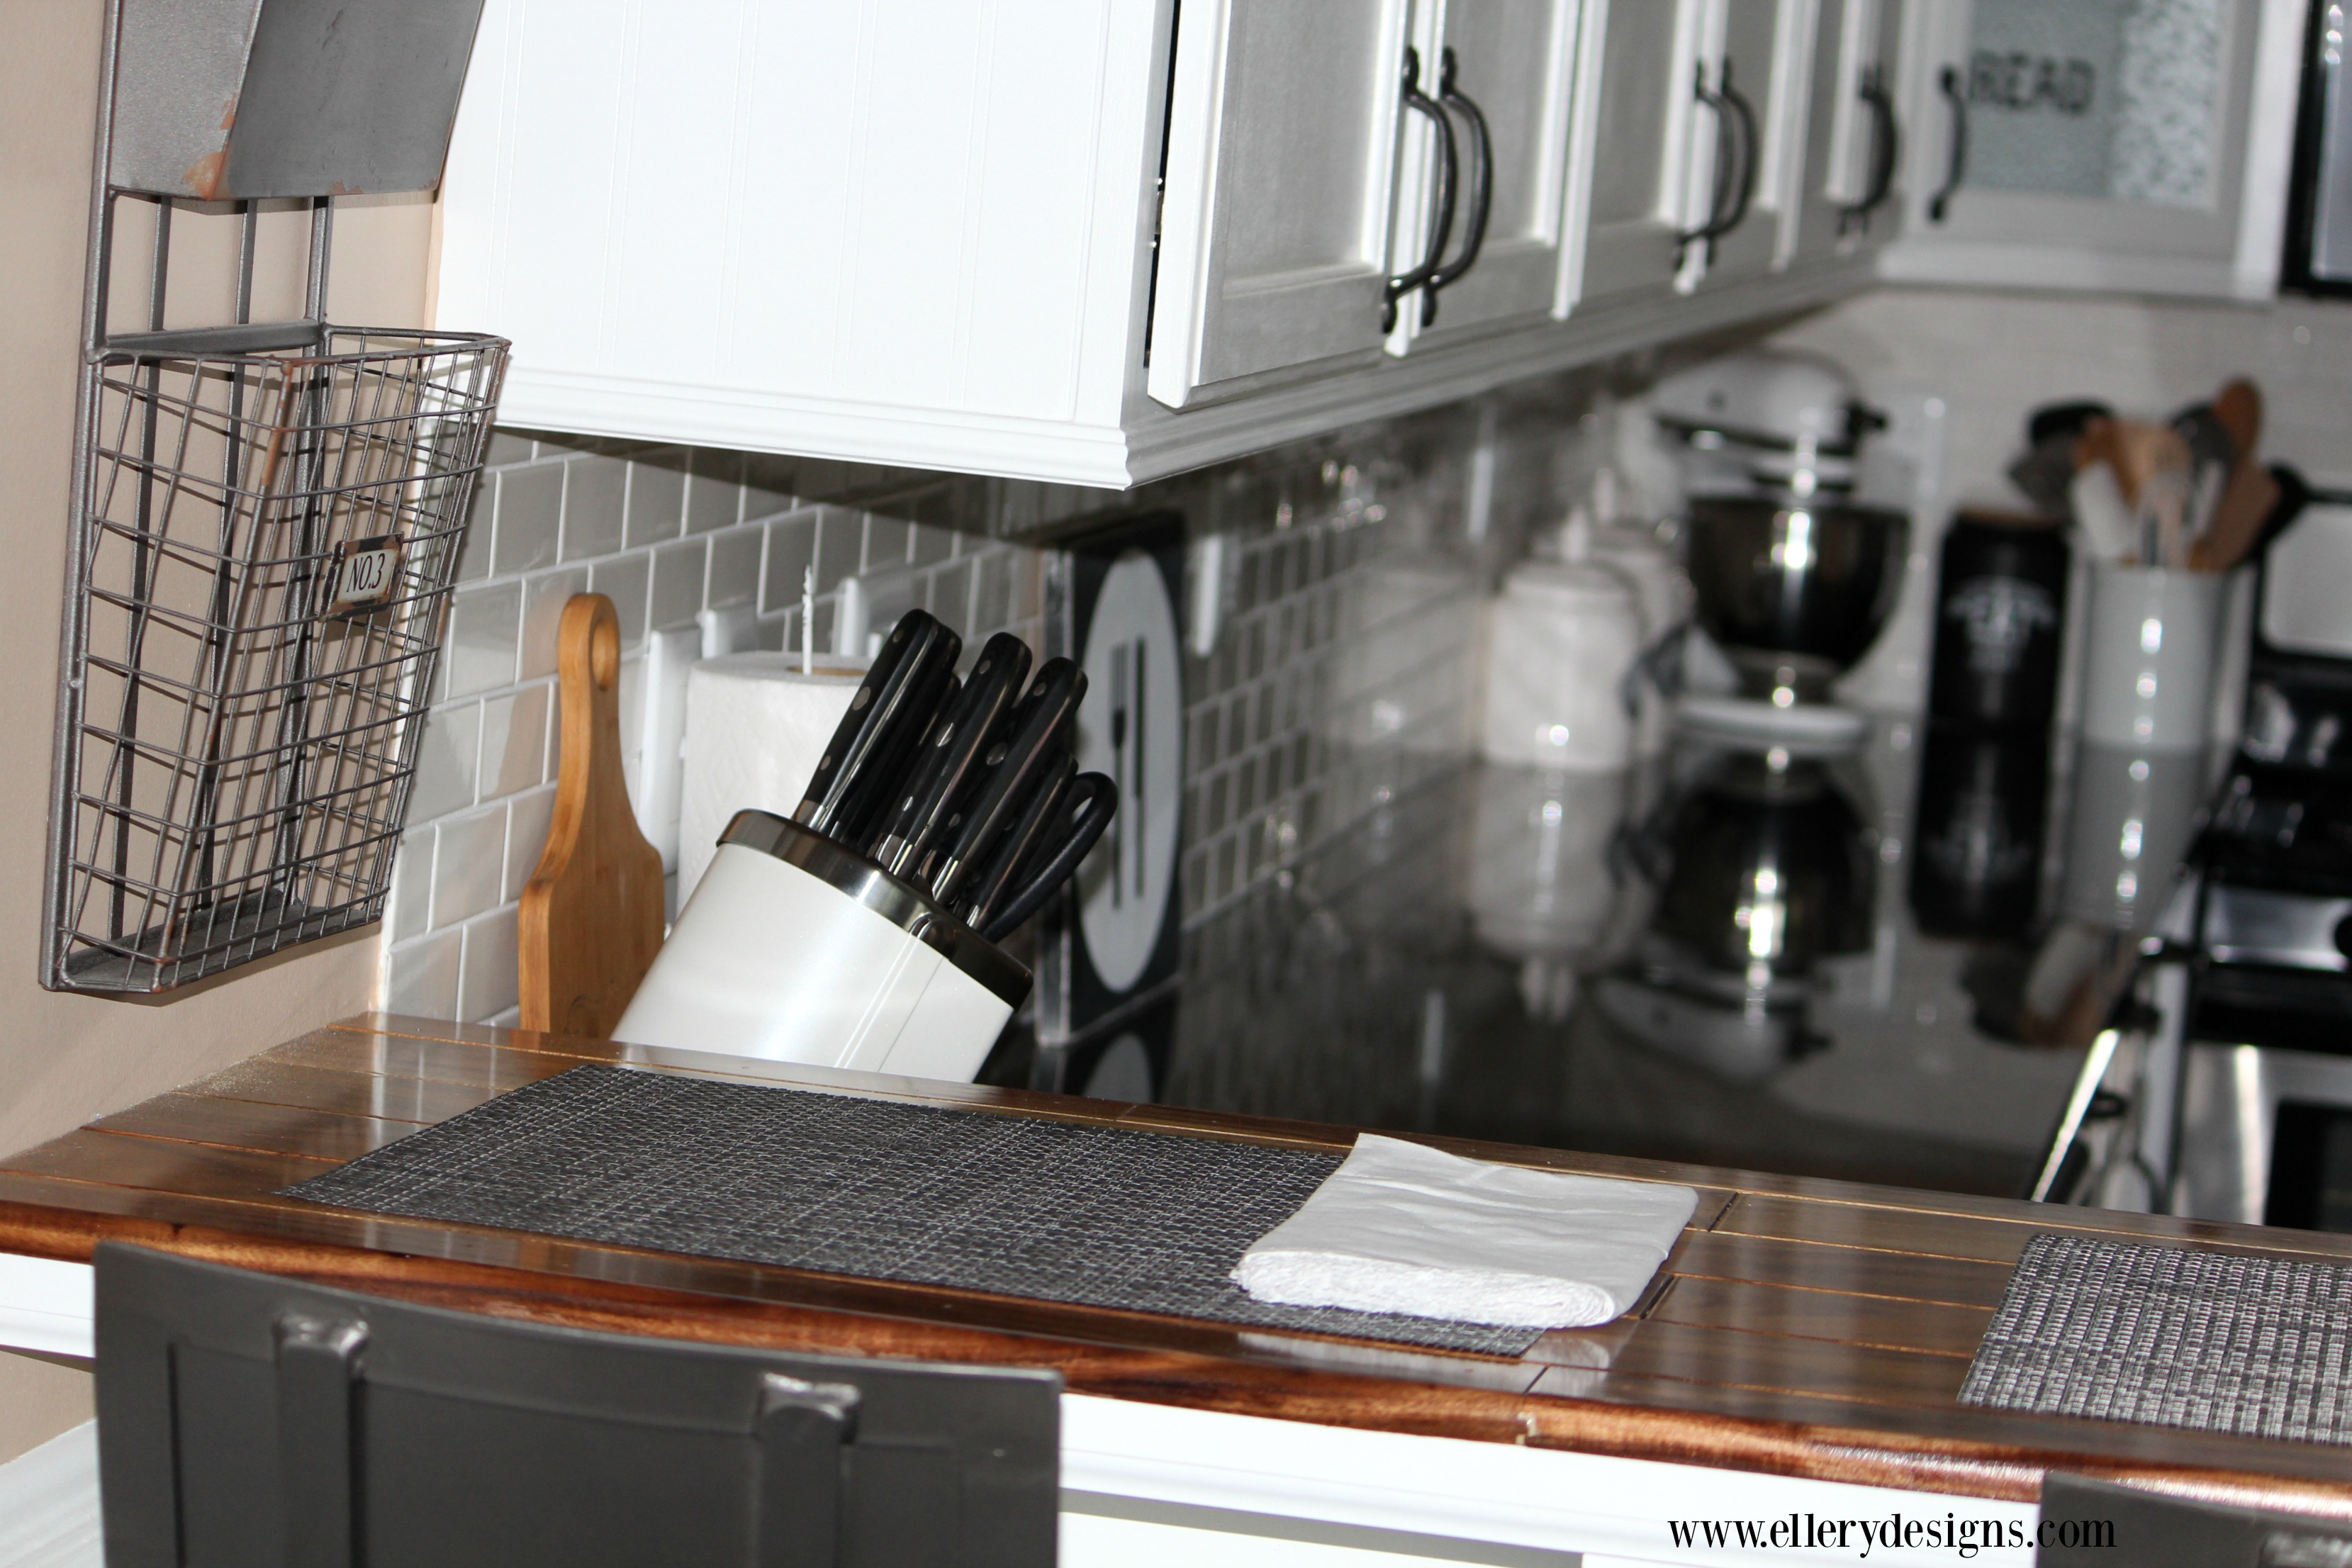
The added breakfast bar is my favorite addition to this room. Not only does it add additional seating, but the details are amazing! He laid acacia wood for the bar top, which is the same type of wood on our dining room table, which ties in perfectly with our pallet wall. Win, win!
After all the woodworking was complete, we filled alllllll the nail holes, sanded and it was ready for paint!! Yay for white and bright! We painted the cabinets using General Finishes Water Based Milk Paint Snow White Gallon.
I’ll be sharing ALL the details of our painted cabinets next week. It’s AMAZING what a coat of paint (or three) does to this room! I’m in LOVE! It is a very time consuming process, but as you’ll see soon – it is SO worth it!
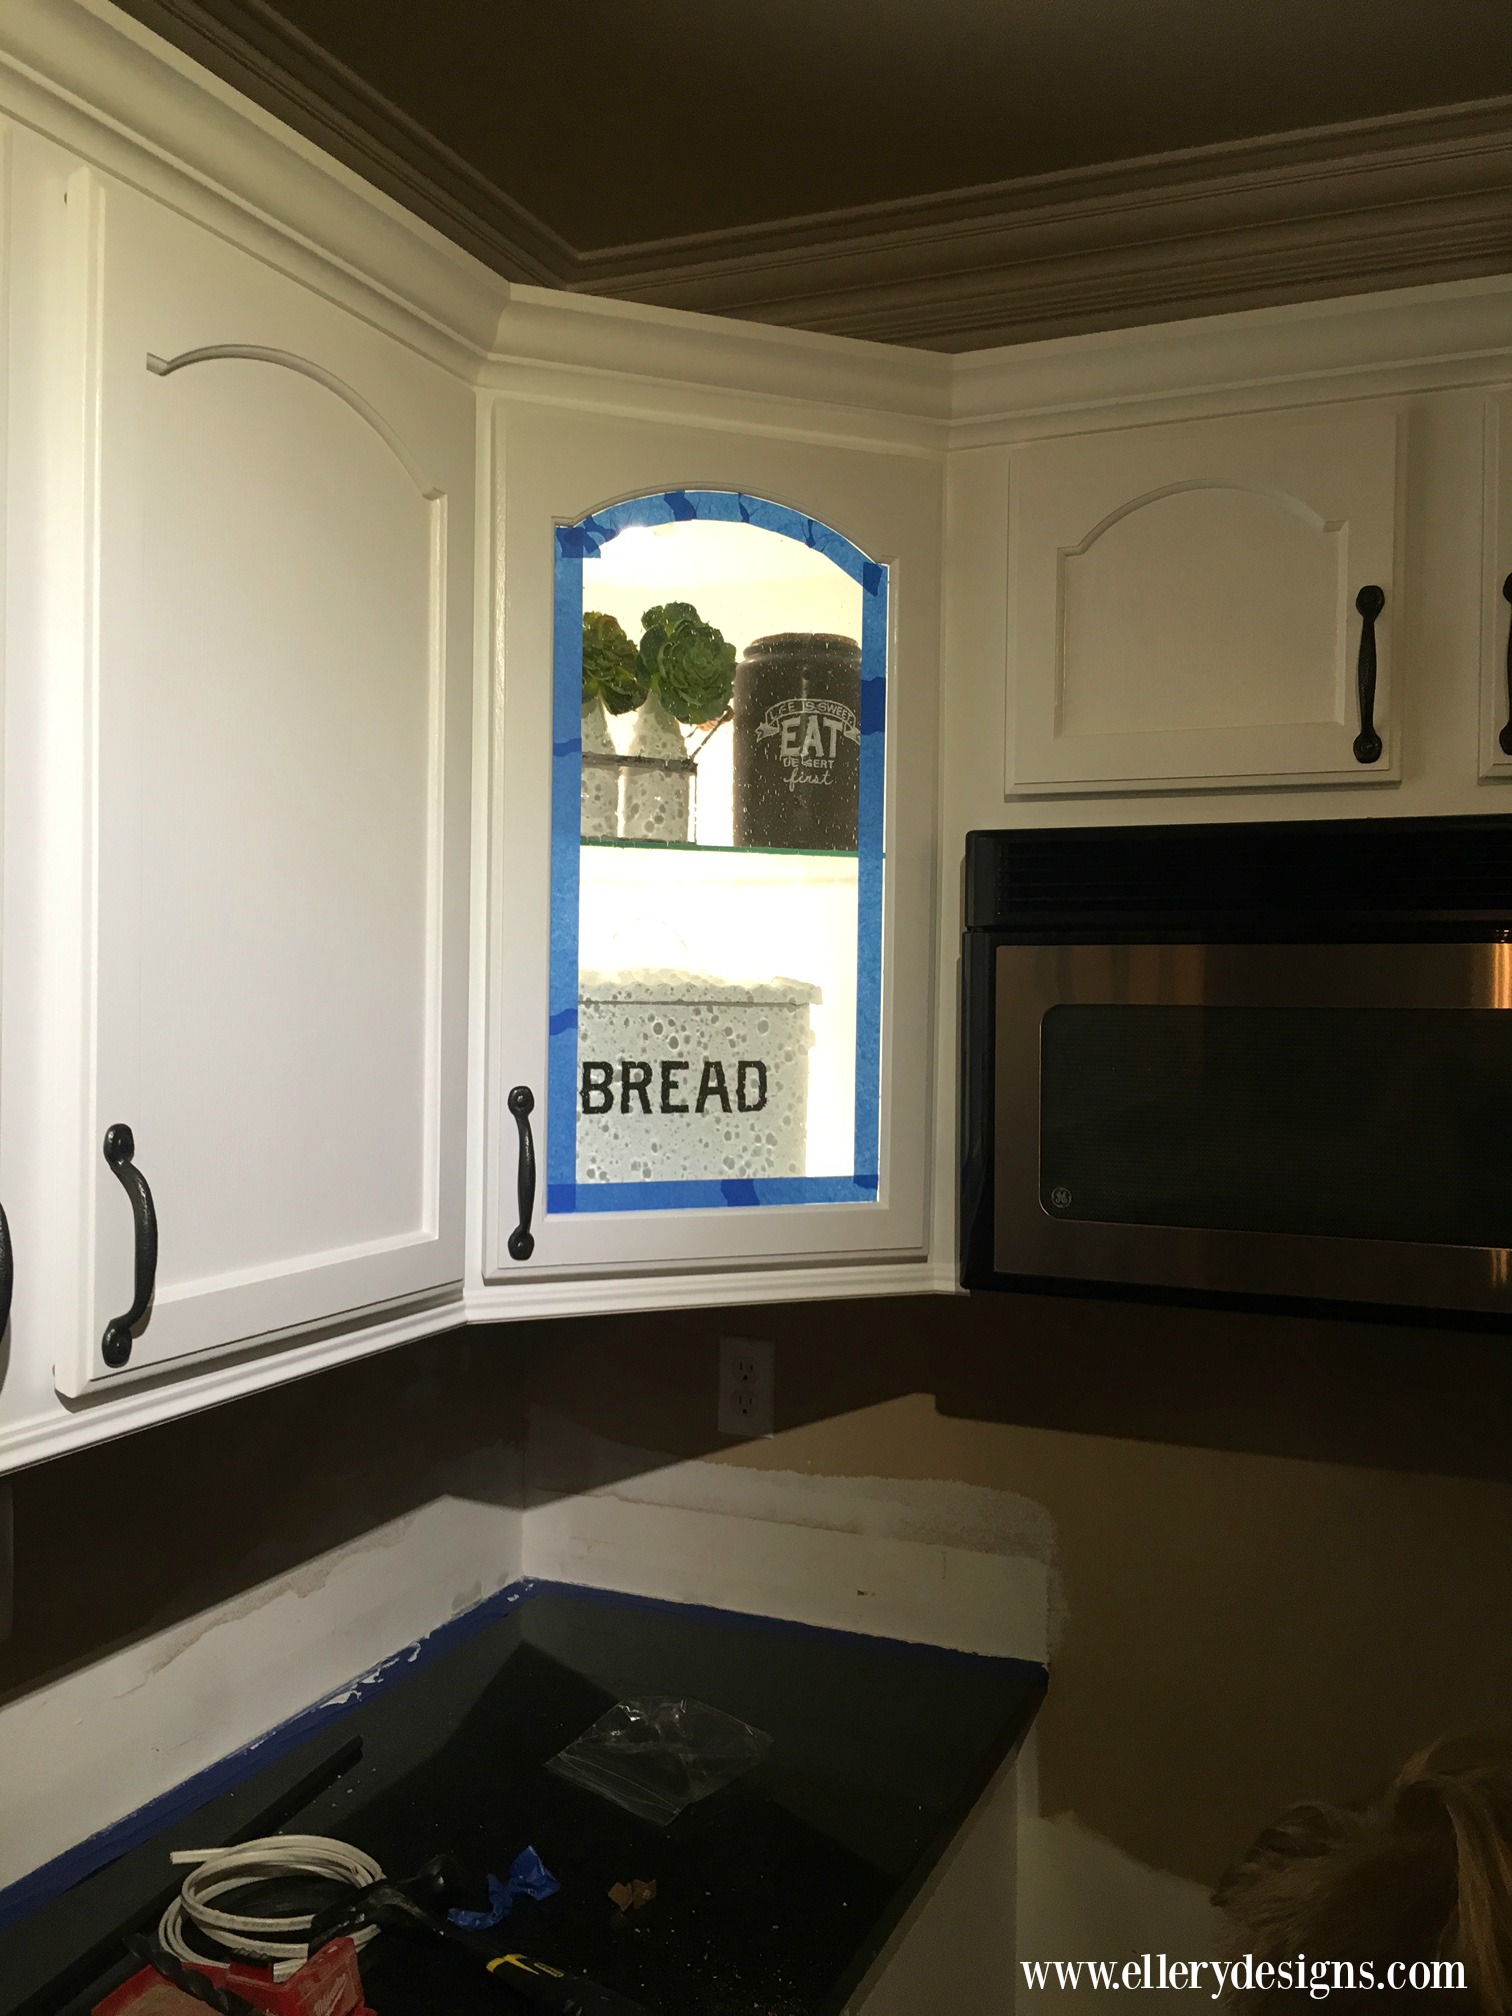
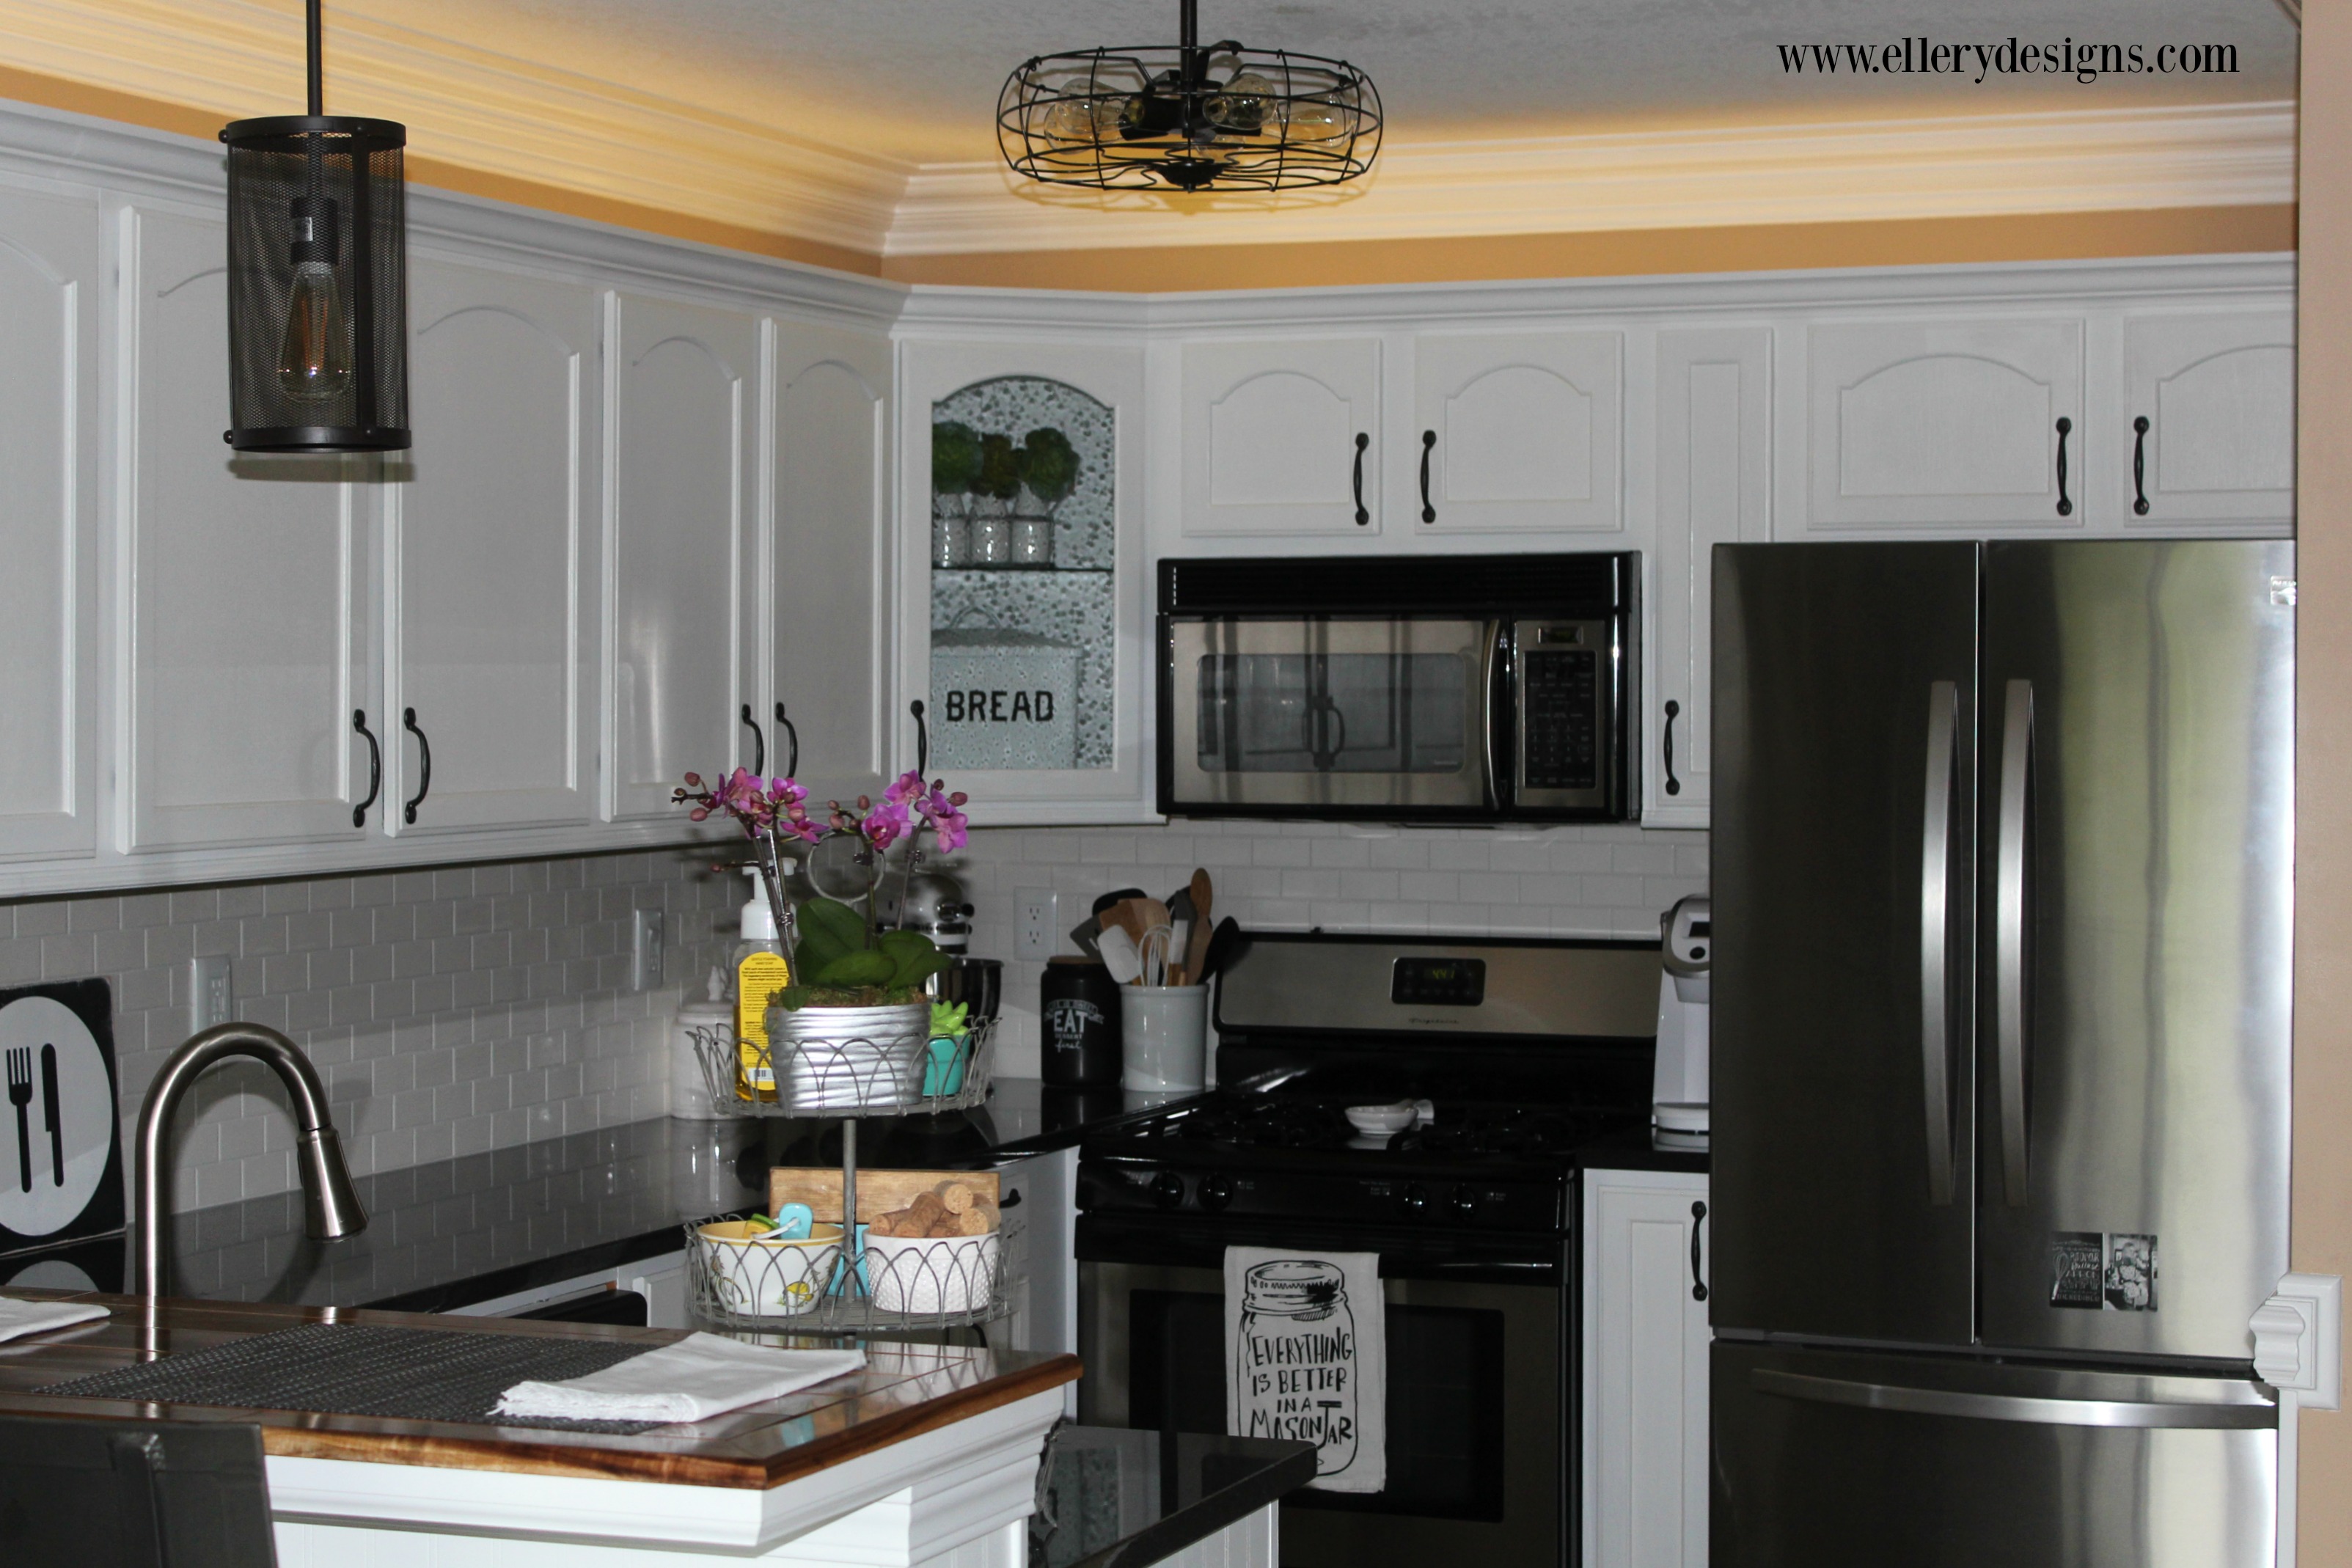
I’m so glad we took the corner cabinet to our local glass shop. They added seeded glass to the door and made a matching glass shelf. I love display cabinets and the hubby added a light and it’s one of my favorite parts of the room! It really breaks up the white and love that it’s a spot I can decorate and change up from season to season. It wasn’t cheap, but really glad we spent the extra money to do this.
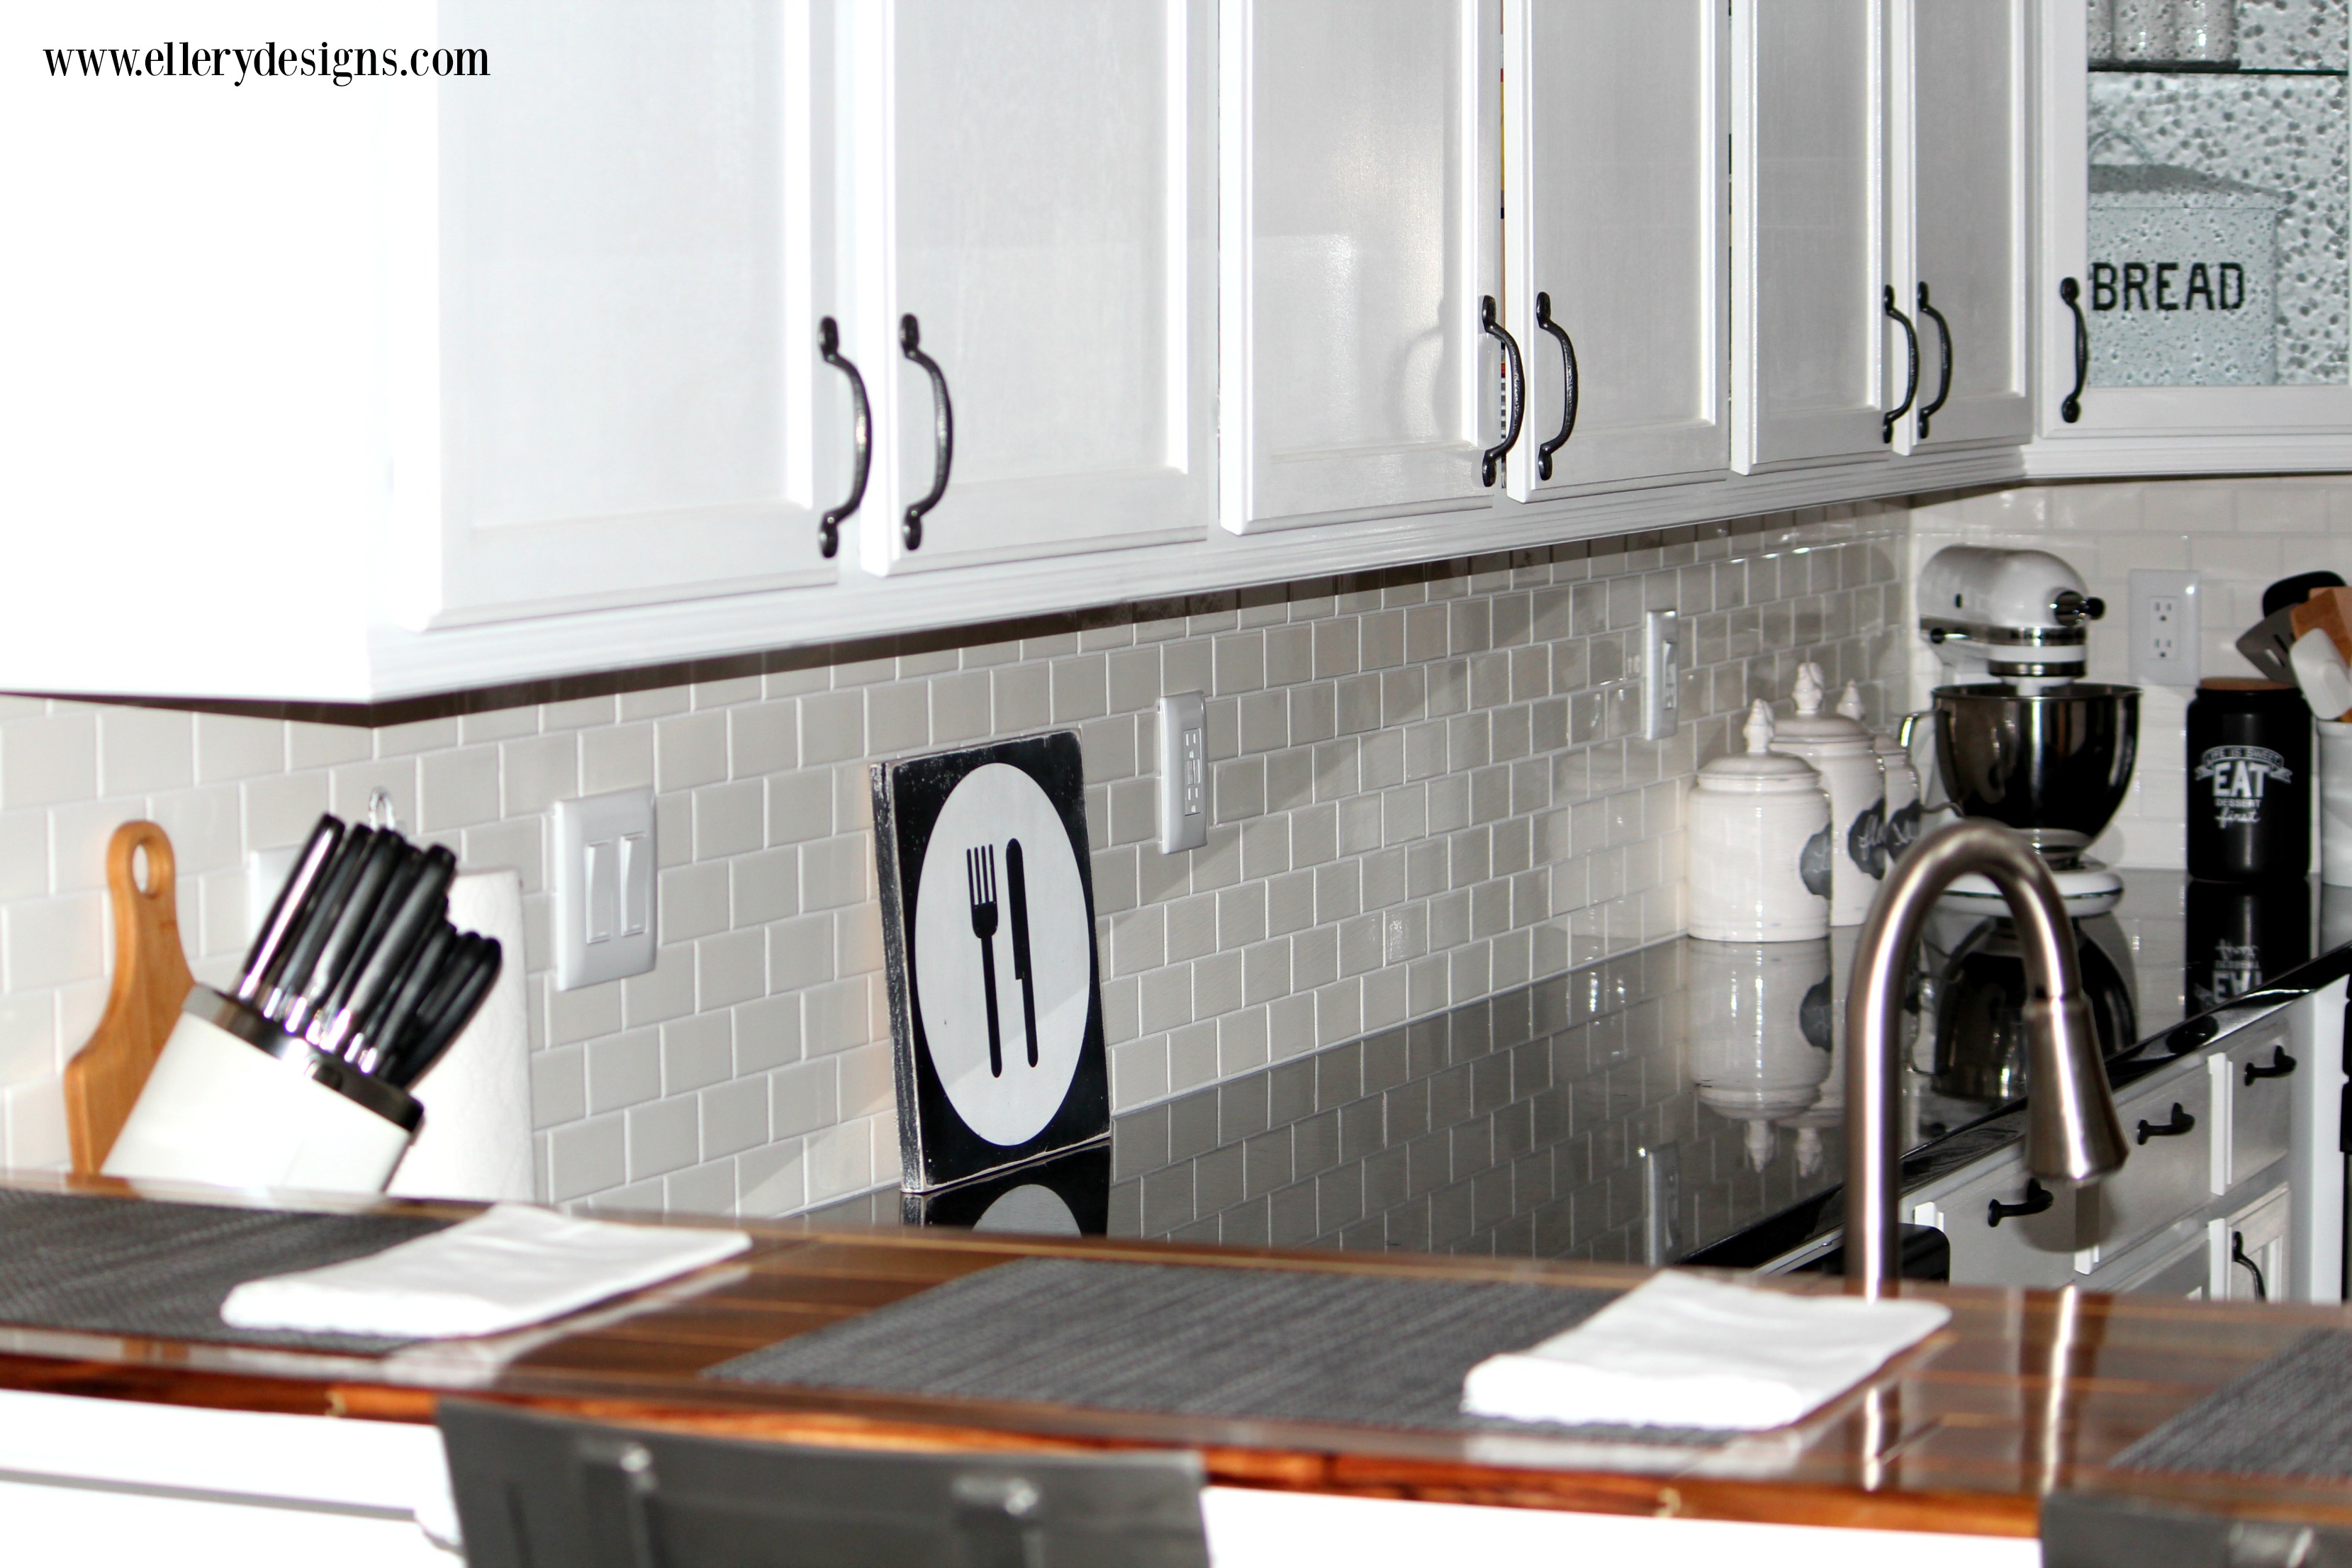
Once everything was painted, he completed the breakfast bar top and moved on to the backsplash. I’m in love with subway tile! We used white grout as well to keep with the light and bright theme of the renovation. We removed the small granite piece that went all the way across the bottom to ensure the new subway tile would be flush with the counters. Ryan was adamant about removing this and I’m glad he did! He’s always right…well, most of the time! 😉 You can see in the above photos where we removed it.
After that was installed, it was really just touching up our walls and installing the light fixtures. He also added LED Cabinet Strip Lighting above and below the cabinets that really highlight the crown and subway tiles when turned on at night. It’s all controlled by a remote and you can pick the percentage of lighting – so worth the extra dollars! More on the lighting coming in a future post. The cabinet hardware I picked out from Menards are gorgeous! It’s a matte black almost dark grey color that really makes the cabinets pop and goes great with our black and galvanized accents throughout the room.
OK, enough with the boring photos! I’m so excited to bring you the FULL REVEAL!! Enjoy….!!
You made it! Yay! 🙂 I would love to know – what is your favorite part of our kitchen remodel? Let me know in the comments! There are many more detailed posts to come regarding this project but hope you are left inspired! It’s amazing what a little time, paint and patience does to a room transformation! Our kitchen has gone from drab to glam and can’t believe it’s mine!
SOURCES LIST:





















over the counter antibiotics: buy antibiotics online uk – buy antibiotics over the counter
Over the counter antibiotics pills: buy antibiotics online uk – buy antibiotics from canada
buy antibiotics for uti [url=https://biotpharm.shop/#]buy antibiotics over the counter[/url] best online doctor for antibiotics
Medications online Australia: PharmAu24 – Licensed online pharmacy AU
buy antibiotics from canada: buy antibiotics online uk – cheapest antibiotics
buy antibiotics over the counter: Biot Pharm – Over the counter antibiotics pills
Ero Pharm Fast: pills for erectile dysfunction online – buy ed meds online
Discount pharmacy Australia [url=https://pharmau24.shop/#]Pharm Au24[/url] Buy medicine online Australia
Online medication store Australia: Pharm Au 24 – Licensed online pharmacy AU
Ero Pharm Fast: online erectile dysfunction pills – Ero Pharm Fast
online pharmacy australia: Medications online Australia – Medications online Australia
https://eropharmfast.com/# Ero Pharm Fast
Ero Pharm Fast: Ero Pharm Fast – generic ed meds online
buy ed meds online [url=https://eropharmfast.shop/#]online ed meds[/url] cheap ed pills
Medications online Australia: Discount pharmacy Australia – Pharm Au24
get antibiotics without seeing a doctor: BiotPharm – buy antibiotics
ed meds online: Ero Pharm Fast – get ed meds online
https://biotpharm.com/# buy antibiotics online
Ero Pharm Fast: edmeds – Ero Pharm Fast
Ero Pharm Fast [url=https://eropharmfast.com/#]online erectile dysfunction[/url] Ero Pharm Fast
Ero Pharm Fast: Ero Pharm Fast – buy erectile dysfunction pills online
Pharm Au24 [url=https://pharmau24.shop/#]Online medication store Australia[/url] Discount pharmacy Australia
Ero Pharm Fast: online erectile dysfunction medication – Ero Pharm Fast
https://eropharmfast.com/# erectile dysfunction online
PharmAu24: Discount pharmacy Australia – online pharmacy australia
zfj5j5
b5ixuy
7rlye8
what is cialis tadalafil used for [url=https://tadalaccess.com/#]cialis for sale over the counter[/url] buy cialis tadalafil
how many 5mg cialis can i take at once: how long does tadalafil take to work – cialis daily dose
https://tadalaccess.com/# cheap t jet 60 cialis online
Thank you, I’ve just been searching for information about this topic for a while and yours is the greatest I have discovered so far. But, what in regards to the conclusion? Are you certain concerning the source?
cialis pharmacy: us pharmacy cialis – cialis used for
where can i get cialis [url=https://tadalaccess.com/#]cialis without prescription[/url] cialis coupon code
https://tadalaccess.com/# no prescription tadalafil
cialis manufacturer coupon free trial: Tadal Access – mambo 36 tadalafil 20 mg
cialis available in walgreens over counter?? [url=https://tadalaccess.com/#]Tadal Access[/url] e-cialis hellocig e-liquid
https://tadalaccess.com/# canadian cialis no prescription
buy cialis in toronto: cialis 40 mg – buy cialis no prescription australia
cialis super active reviews [url=https://tadalaccess.com/#]Tadal Access[/url] cialis as generic
best place to buy generic cialis online: TadalAccess – free samples of cialis
https://tadalaccess.com/# cialis vs sildenafil
natural alternative to cialis [url=https://tadalaccess.com/#]cialis 20 milligram[/url] cheap cialis with dapoxetine
cialis paypal: Tadal Access – online cialis
prescription for cialis [url=https://tadalaccess.com/#]TadalAccess[/url] ordering cialis online
https://tadalaccess.com/# u.s. pharmacy prices for cialis
cialis coupon code: generic cialis vs brand cialis reviews – when to take cialis for best results
cialis dapoxetine [url=https://tadalaccess.com/#]is tadalafil the same as cialis[/url] cialis 100mg review
buy cialis no prescription: Tadal Access – can you purchase tadalafil in the us
https://tadalaccess.com/# cialis w/o perscription
tadalafil long term usage [url=https://tadalaccess.com/#]TadalAccess[/url] when does cialis go generic
cialis india: cialis stories – when does tadalafil go generic
https://tadalaccess.com/# how long does cialis take to work
e-cialis hellocig e-liquid: TadalAccess – canadian pharmacy online cialis
https://tadalaccess.com/# cialis commercial bathtub
buy cialis no prescription australia [url=https://tadalaccess.com/#]cialis 5mg review[/url] cialis tablets
cialis alternative over the counter: TadalAccess – cialis from india online pharmacy
cialis tadalafil 20 mg: vardenafil tadalafil sildenafil – cialis from canada to usa
canada drug cialis [url=https://tadalaccess.com/#]TadalAccess[/url] cialis and nitrates
https://tadalaccess.com/# cialis samples
cialis before and after: cialis canada over the counter – cialis windsor canada
cialis otc 2016: cialis for bph – is tadalafil from india safe
buy cialis overnight shipping [url=https://tadalaccess.com/#]cialis tadalafil discount[/url] tadalafil softsules tuf 20
https://tadalaccess.com/# where can i buy cialis online
cialis tadalafil tablets: TadalAccess – when should i take cialis
which is better cialis or levitra: cialis 5mg review – cialis tadalafil discount
vardenafil tadalafil sildenafil [url=https://tadalaccess.com/#]cialis vs tadalafil[/url] buying cialis
https://tadalaccess.com/# cialis paypal
cialis las vegas: Tadal Access – cialis san diego
cialis trial pack: cialis coupon code – cialis bodybuilding
how much does cialis cost at walmart [url=https://tadalaccess.com/#]best price on cialis[/url] cialis generic overnite
https://tadalaccess.com/# cheapest cialis 20 mg
order cialis online: buy cialis without prescription – buy voucher for cialis daily online
para que sirve las tabletas cialis tadalafil de 5mg: TadalAccess – order cialis canada
cialis manufacturer coupon lilly [url=https://tadalaccess.com/#]Tadal Access[/url] cialis 5 mg tablet
https://tadalaccess.com/# tadalafil pulmonary hypertension
cialis online without prescription: Tadal Access – best price on generic cialis
mint pharmaceuticals tadalafil reviews: tadalafil citrate liquid – what does cialis look like
https://tadalaccess.com/# cialis same as tadalafil
tadalafil how long to take effect [url=https://tadalaccess.com/#]cialis and high blood pressure[/url] cialis free trial voucher
where to buy generic cialis ?: cialis and blood pressure – natural alternative to cialis
how many 5mg cialis can i take at once: TadalAccess – cialis manufacturer
https://tadalaccess.com/# how long does cialis last 20 mg
recreational cialis [url=https://tadalaccess.com/#]Tadal Access[/url] tadalafil citrate research chemical
cialis for daily use reviews: TadalAccess – tamsulosin vs. tadalafil
cialis is for daily use: Tadal Access – tadalafil citrate powder
https://tadalaccess.com/# cialis 100mg from china
tadalafil 5 mg tablet [url=https://tadalaccess.com/#]TadalAccess[/url] best price on generic cialis
side effects of cialis tadalafil: brand cialis – cialis tadalafil 20mg price
https://tadalaccess.com/# mambo 36 tadalafil 20 mg reviews
cialis 50mg: tadalafil dose for erectile dysfunction – cialis coupon code
overnight cialis delivery usa: Tadal Access – evolution peptides tadalafil
cialis otc 2016 [url=https://tadalaccess.com/#]TadalAccess[/url] canadian online pharmacy no prescription cialis dapoxetine
were can i buy cialis: cialis side effects – buy cialis canada
para que sirve las tabletas cialis tadalafil de 5mg: TadalAccess – buy tadalafil cheap
cialis website [url=https://tadalaccess.com/#]TadalAccess[/url] cialis sample request form
https://tadalaccess.com/# when is generic cialis available
why does tadalafil say do not cut pile: cialis tadalafil 20mg kaufen – cialis bodybuilding
truth behind generic cialis: cialis purchase canada – buy generic cialis online
sildenafil vs tadalafil vs vardenafil [url=https://tadalaccess.com/#]cialis drug[/url] cialis daily vs regular cialis
https://tadalaccess.com/# generic cialis super active tadalafil 20mg
cheapest cialis 20 mg: walmart cialis price – cialis 10mg reviews
best price on cialis 20mg: mambo 36 tadalafil 20 mg – cialis effect on blood pressure
buying cialis online canadian order [url=https://tadalaccess.com/#]TadalAccess[/url] best time to take cialis
https://tadalaccess.com/# cialis 50mg
cialis maximum dose: Tadal Access – best research tadalafil 2017
prices of cialis 20 mg: TadalAccess – cialis sales in victoria canada
buying cialis online canadian order [url=https://tadalaccess.com/#]cialis 100mg review[/url] too much cialis
https://tadalaccess.com/# cialis and cocaine
prescription free cialis: Tadal Access – tadalafil citrate powder
cialis milligrams: TadalAccess – tadalafil tablets 20 mg reviews
cialis generico [url=https://tadalaccess.com/#]TadalAccess[/url] how to buy tadalafil online
tadalafil dose for erectile dysfunction: TadalAccess – canadian cialis
how much does cialis cost per pill: cialis free trial phone number – cialis 5mg cost per pill
where to get the best price on cialis [url=https://tadalaccess.com/#]TadalAccess[/url] how to take cialis
https://tadalaccess.com/# buy generic cialis online
cialis dosage for bph: where to buy cialis cheap – cialis discount card
is there a generic cialis available in the us: cialis super active reviews – tadalafil tablets 20 mg global
cialis maximum dose [url=https://tadalaccess.com/#]TadalAccess[/url] buy cialis without prescription
https://tadalaccess.com/# cialis 30 mg dose
order cialis online cheap generic: tadalafil tablets erectafil 20 – cheapest cialis online
find tadalafil: can you drink wine or liquor if you took in tadalafil – buying cialis internet
tadalafil lowest price: typical cialis prescription strength – how to buy cialis
how to take liquid tadalafil [url=https://tadalaccess.com/#]sildenafil vs tadalafil vs vardenafil[/url] cialis savings card
cialis cheap: TadalAccess – cialis none prescription
https://tadalaccess.com/# buy cialis tadalafil
cialis online without prescription: Tadal Access – where can i buy cialis over the counter
liquid tadalafil research chemical [url=https://tadalaccess.com/#]cialis 50mg[/url] how to take cialis
https://tadalaccess.com/# cialis 5mg cost per pill
reliable source cialis: Tadal Access – cialis logo
what does cialis do: Tadal Access – tadalafil vs cialis
order cialis online cheap generic [url=https://tadalaccess.com/#]cialis prices at walmart[/url] cialis precio
viagara cialis levitra: when does cialis patent expire – cialis ingredients
https://tadalaccess.com/# canada cialis
when to take cialis 20mg: Tadal Access – cialis trial pack
price of cialis at walmart [url=https://tadalaccess.com/#]cialis las vegas[/url] poppers and cialis
tadalafil 20mg: TadalAccess – cialis buy without
canadian cialis online: how long does cialis take to work – cialis canadian purchase
https://tadalaccess.com/# is tadalafil from india safe
cialis manufacturer coupon 2018: cialis dapoxetine overnight shipment – cialis efectos secundarios
original cialis online [url=https://tadalaccess.com/#]does medicare cover cialis[/url] cialis for pulmonary hypertension
cialis 800 black canada: what is cialis for – price of cialis
https://tadalaccess.com/# para que sirve las tabletas cialis tadalafil de 5mg
side effects cialis: can tadalafil cure erectile dysfunction – cialis price cvs
cialis black 800 mg pill house [url=https://tadalaccess.com/#]cheap tadalafil no prescription[/url] cialis doesnt work for me
is tadalafil available at cvs: cialis 10mg price – cialis online without a prescription
https://tadalaccess.com/# cialis stories
prices cialis: TadalAccess – cialis generico
buying cialis without prescription [url=https://tadalaccess.com/#]cialis tadalafil tablets[/url] purchasing cialis online
is tadalafil available at cvs: TadalAccess – tadalafil 40 mg india
https://tadalaccess.com/# what is cialis used to treat
tadalafil cost cvs: cialis slogan – where to get the best price on cialis
tadalafil prescribing information: tadalafil troche reviews – whats cialis
tadalafil citrate research chemical [url=https://tadalaccess.com/#]TadalAccess[/url] cialis online no prescription australia
https://tadalaccess.com/# which is better cialis or levitra
how long does cialis take to work: cialis canadian purchase – order cialis canada
cialis com coupons: Tadal Access – generic cialis 20 mg from india
https://tadalaccess.com/# brand cialis australia
snorting cialis [url=https://tadalaccess.com/#]best research tadalafil 2017[/url] vardenafil and tadalafil
tadalafil long term usage: canadian cialis no prescription – cialis paypal canada
cialis what is it: buy cialis canadian – who makes cialis
https://tadalaccess.com/# cialis sublingual
cialis 50mg [url=https://tadalaccess.com/#]TadalAccess[/url] ordering tadalafil online
cialis samples for physicians: Tadal Access – maximum dose of tadalafil
cialis black: cialis super active reviews – cialis indications
https://tadalaccess.com/# cialis substitute
cialis used for [url=https://tadalaccess.com/#]what is cialis good for[/url] uses for cialis
cialis buy australia online: Tadal Access – how long does it take cialis to start working
shop for cialis: TadalAccess – cialis pills pictures
https://tadalaccess.com/# buy liquid cialis online
buy cheap tadalafil online [url=https://tadalaccess.com/#]TadalAccess[/url] tadalafil 20mg
cialis mit paypal bezahlen: TadalAccess – cialis at canadian pharmacy
canadian pharmacy cialis 40 mg: tadalafil generic cialis 20mg – can i take two 5mg cialis at once
https://tadalaccess.com/# when should i take cialis
how to buy cialis [url=https://tadalaccess.com/#]cialis overdose[/url] buy cialis canada paypal
mail order cialis: where can i buy cialis on line – cialis meme
buy cialis usa: cialis free – cialis tablets for sell
https://tadalaccess.com/# sublingual cialis
buy cheap clomid prices: Clom Health – how can i get clomid no prescription
PredniHealth: prednisone 10 mg tablet cost – PredniHealth
50mg prednisone tablet [url=https://prednihealth.shop/#]how to get prednisone without a prescription[/url] PredniHealth
http://clomhealth.com/# how to get generic clomid pill
PredniHealth: buy prednisone 20mg – PredniHealth
Amo Health Care: Amo Health Care – generic for amoxicillin
buy prednisone online without a prescription [url=https://prednihealth.com/#]prednisone without prescription 10mg[/url] PredniHealth
https://amohealthcare.store/# amoxicillin discount coupon
PredniHealth: 400 mg prednisone – PredniHealth
amoxicillin 500mg capsule: where can i buy amoxicillin without prec – Amo Health Care
can you buy prednisone [url=https://prednihealth.com/#]prednisone 5 mg[/url] prednisone 475
http://prednihealth.com/# PredniHealth
Amo Health Care: Amo Health Care – amoxicillin 500mg capsules antibiotic
generic amoxicillin 500mg: amoxicillin tablets in india – buy amoxicillin online cheap
how can i get clomid prices [url=https://clomhealth.com/#]how can i get clomid tablets[/url] can i buy cheap clomid online
https://prednihealth.shop/# PredniHealth
get cheap clomid pills: Clom Health – cost of clomid pill
Amo Health Care: buy cheap amoxicillin – Amo Health Care
prednisone best price: PredniHealth – PredniHealth
cost of clomid pill [url=http://clomhealth.com/#]cost of generic clomid without prescription[/url] where can i get generic clomid without rx
http://prednihealth.com/# PredniHealth
clomid medication: Clom Health – order generic clomid no prescription
amoxicillin 750 mg price: Amo Health Care – buy amoxicillin 500mg online
prednisone oral: PredniHealth – where can i get prednisone over the counter
https://clomhealth.shop/# where can i buy cheap clomid price
prednisone daily use: prednisone pills for sale – buy prednisone online fast shipping
can you get clomid without a prescription [url=https://clomhealth.shop/#]Clom Health[/url] how can i get cheap clomid no prescription
where can i buy clomid: Clom Health – how can i get generic clomid online
amoxicillin 500 mg tablet: where can i buy amoxicillin without prec – Amo Health Care
where to get generic clomid without prescription: Clom Health – clomid
https://amohealthcare.store/# order amoxicillin uk
PredniHealth: PredniHealth – prednisone 80 mg daily
buy prednisone 20mg without a prescription best price [url=http://prednihealth.com/#]PredniHealth[/url] PredniHealth
clomid no prescription: Clom Health – can you buy cheap clomid now
order Cialis online no prescription [url=https://zipgenericmd.com/#]secure checkout ED drugs[/url] buy generic Cialis online
https://maxviagramd.com/# best price for Viagra
discreet shipping ED pills: affordable ED medication – cheap Cialis online
Cialis without prescription: buy generic Cialis online – FDA approved generic Cialis
trusted Viagra suppliers: best price for Viagra – order Viagra discreetly
cheap Viagra online [url=https://maxviagramd.shop/#]fast Viagra delivery[/url] legit Viagra online
modafinil pharmacy: Modafinil for sale – modafinil 2025
best price for Viagra: discreet shipping – no doctor visit required
generic sildenafil 100mg: same-day Viagra shipping – buy generic Viagra online
https://modafinilmd.store/# verified Modafinil vendors
verified Modafinil vendors [url=http://modafinilmd.store/#]modafinil pharmacy[/url] modafinil legality
modafinil legality: doctor-reviewed advice – modafinil pharmacy
modafinil pharmacy: modafinil 2025 – buy modafinil online
order Cialis online no prescription: reliable online pharmacy Cialis – best price Cialis tablets
https://maxviagramd.com/# legit Viagra online
discreet shipping ED pills [url=https://zipgenericmd.com/#]cheap Cialis online[/url] cheap Cialis online
537428
trusted Viagra suppliers: trusted Viagra suppliers – Viagra without prescription
Modafinil for sale: purchase Modafinil without prescription – legal Modafinil purchase
Modafinil for sale: modafinil 2025 – purchase Modafinil without prescription
https://modafinilmd.store/# modafinil pharmacy
verified Modafinil vendors [url=http://modafinilmd.store/#]doctor-reviewed advice[/url] safe modafinil purchase
order Cialis online no prescription: Cialis without prescription – reliable online pharmacy Cialis
reliable online pharmacy Cialis: secure checkout ED drugs – best price Cialis tablets
Viagra without prescription: Viagra without prescription – legit Viagra online
http://modafinilmd.store/# buy modafinil online
order Cialis online no prescription [url=https://zipgenericmd.shop/#]cheap Cialis online[/url] online Cialis pharmacy
buy generic Viagra online: same-day Viagra shipping – no doctor visit required
cheap Viagra online: cheap Viagra online – order Viagra discreetly
discreet shipping ED pills: secure checkout ED drugs – cheap Cialis online
https://maxviagramd.shop/# same-day Viagra shipping
modafinil 2025: modafinil legality – purchase Modafinil without prescription
order Cialis online no prescription [url=https://zipgenericmd.shop/#]order Cialis online no prescription[/url] generic tadalafil
buy modafinil online: modafinil pharmacy – modafinil 2025
fabuloso este conteúdo. Gostei bastante. Aproveitem e vejam este conteúdo. informações, novidades e muito mais. Não deixem de acessar para se informar mais. Obrigado a todos e até mais. 🙂
reliable online pharmacy Cialis: buy generic Cialis online – order Cialis online no prescription
online Cialis pharmacy: secure checkout ED drugs – FDA approved generic Cialis
http://maxviagramd.com/# no doctor visit required
online Cialis pharmacy [url=http://zipgenericmd.com/#]cheap Cialis online[/url] discreet shipping ED pills
modafinil pharmacy: verified Modafinil vendors – safe modafinil purchase
safe modafinil purchase: modafinil pharmacy – doctor-reviewed advice
safe modafinil purchase: safe modafinil purchase – modafinil pharmacy
verified Modafinil vendors: modafinil pharmacy – safe modafinil purchase
discreet shipping ED pills [url=https://zipgenericmd.com/#]online Cialis pharmacy[/url] affordable ED medication
affordable ED medication: secure checkout ED drugs – Cialis without prescription
http://maxviagramd.com/# secure checkout Viagra
order Viagra discreetly: fast Viagra delivery – no doctor visit required
best price for Viagra: cheap Viagra online – no doctor visit required
best price Cialis tablets [url=https://zipgenericmd.com/#]buy generic Cialis online[/url] Cialis without prescription
https://modafinilmd.store/# modafinil 2025
legal Modafinil purchase: doctor-reviewed advice – purchase Modafinil without prescription
legal Modafinil purchase: legal Modafinil purchase – verified Modafinil vendors
reliable online pharmacy Cialis: reliable online pharmacy Cialis – cheap Cialis online
safe online pharmacy [url=https://maxviagramd.shop/#]cheap Viagra online[/url] generic sildenafil 100mg
https://zipgenericmd.com/# secure checkout ED drugs
trusted Viagra suppliers: no doctor visit required – cheap Viagra online
order Cialis online no prescription: secure checkout ED drugs – order Cialis online no prescription
http://maxviagramd.com/# order Viagra discreetly
modafinil legality [url=https://modafinilmd.store/#]modafinil pharmacy[/url] verified Modafinil vendors
discreet shipping: no doctor visit required – Viagra without prescription
https://pinupaz.top/# pin up
вавада: vavada casino – вавада официальный сайт
http://vavadavhod.tech/# вавада казино
pin up [url=https://pinupaz.top/#]pin up[/url] pin-up casino giris
пин ап казино: пинап казино – пинап казино
https://pinupaz.top/# pin up
pin up вход: pin up вход – пин ап зеркало
vavada [url=https://vavadavhod.tech/#]vavada[/url] вавада официальный сайт
вавада казино: вавада официальный сайт – вавада
vavada вход: vavada casino – vavada
pin-up [url=http://pinupaz.top/#]pinup az[/url] pin-up casino giris
пин ап вход: pin up вход – пин ап зеркало
https://vavadavhod.tech/# вавада зеркало
pin up casino: pin up casino – pin up casino
vavada: вавада официальный сайт – вавада казино
pin-up casino giris [url=http://pinupaz.top/#]pin up azerbaycan[/url] pin-up casino giris
http://pinupaz.top/# pin up casino
pin up: pin-up casino giris – pin-up
vavada вход [url=https://vavadavhod.tech/#]vavada casino[/url] vavada вход
https://vavadavhod.tech/# vavada
пин ап вход: пин ап казино – пин ап казино
vavada: вавада официальный сайт – вавада зеркало
vavada вход [url=http://vavadavhod.tech/#]vavada[/url] vavada
https://vavadavhod.tech/# vavada вход
пин ап зеркало: пин ап вход – пин ап казино официальный сайт
пинап казино: пин ап казино – пин ап казино
вавада [url=http://vavadavhod.tech/#]вавада казино[/url] vavada casino
http://pinupaz.top/# pin-up
пинап казино: pin up вход – пин ап вход
пинап казино: пинап казино – пин ап зеркало
vavada casino [url=https://vavadavhod.tech/#]вавада зеркало[/url] вавада зеркало
pin up casino: pin up casino – pin up azerbaycan
https://vavadavhod.tech/# vavada вход
pin up azerbaycan [url=http://pinupaz.top/#]pin up[/url] pin-up
pin up casino: pin up az – pin-up casino giris
http://pinuprus.pro/# пинап казино
pin up вход [url=https://pinuprus.pro/#]пин ап казино официальный сайт[/url] пин ап вход
pin-up casino giris: pin-up casino giris – pinup az
pin up casino: pin-up casino giris – pin up
http://pinuprus.pro/# пин ап казино официальный сайт
pin up az [url=http://pinupaz.top/#]pin-up casino giris[/url] pinup az
пин ап зеркало: пин ап казино – pin up вход
вавада зеркало: вавада зеркало – вавада официальный сайт
вавада казино [url=https://vavadavhod.tech/#]vavada вход[/url] вавада зеркало
пин ап казино официальный сайт: пин ап казино – пин ап казино официальный сайт
http://pinupaz.top/# pin-up
pinup az [url=https://pinupaz.top/#]pin up[/url] pin up az
vavada: вавада – vavada
http://pinupaz.top/# pin-up
пин ап зеркало: пин ап казино – пин ап казино
вавада казино: vavada casino – вавада
пин ап вход [url=https://pinuprus.pro/#]пин ап вход[/url] пин ап вход
https://pinuprus.pro/# пин ап вход
pin-up casino giris: pin up azerbaycan – pin up
пин ап вход [url=https://pinuprus.pro/#]пин ап казино официальный сайт[/url] pin up вход
http://pinupaz.top/# pin-up casino giris
пин ап казино официальный сайт: pin up вход – пин ап казино официальный сайт
вавада официальный сайт: vavada casino – vavada casino
pin up az [url=https://pinupaz.top/#]pin-up casino giris[/url] pin up casino
http://pinuprus.pro/# pin up вход
вавада казино: vavada casino – vavada вход
пин ап казино: пин ап казино – пин ап казино
http://pinupaz.top/# pin up az
pin up az [url=http://pinupaz.top/#]pin up[/url] pin up casino
пин ап зеркало: pin up вход – пинап казино
pin-up: pin-up casino giris – pin up azerbaycan
https://pinuprus.pro/# пинап казино
пин ап казино официальный сайт [url=https://pinuprus.pro/#]pin up вход[/url] пин ап зеркало
пинап казино: пин ап вход – пинап казино
vavada: vavada casino – вавада казино
https://vavadavhod.tech/# вавада
pin-up casino giris [url=http://pinupaz.top/#]pin up az[/url] pin up casino
пин ап вход: пин ап зеркало – пинап казино
pin up: pinup az – pin up casino
http://pinupaz.top/# pin-up
пин ап зеркало: пин ап казино – пин ап казино официальный сайт
http://vavadavhod.tech/# vavada casino
pin up azerbaycan: pinup az – pin up
вавада официальный сайт [url=http://vavadavhod.tech/#]vavada вход[/url] вавада зеркало
http://pinuprus.pro/# пинап казино
pin up casino: pin up casino – pin up azerbaycan
pin up casino [url=http://pinupaz.top/#]pin up az[/url] pinup az
http://pinuprus.pro/# пин ап казино официальный сайт
pin up: pin up azerbaycan – pin up azerbaycan
пинап казино: пин ап зеркало – пин ап казино
vavada casino [url=https://vavadavhod.tech/#]вавада[/url] vavada
https://pinupaz.top/# pin up azerbaycan
pin up az: pin up az – pin up
пин ап вход [url=https://pinuprus.pro/#]pin up вход[/url] пинап казино
pin up azerbaycan: pin up casino – pin up azerbaycan
https://vavadavhod.tech/# vavada casino
pinup az: pin up az – pin up casino
вавада казино: вавада казино – вавада официальный сайт
пин ап зеркало [url=https://pinuprus.pro/#]пин ап зеркало[/url] пин ап казино
пин ап зеркало: pin up вход – пин ап вход
http://vavadavhod.tech/# vavada вход
pin up: pin up – pin up
vavada: vavada casino – вавада казино
пин ап вход: pin up вход – пин ап казино
pin-up [url=http://pinupaz.top/#]pin up casino[/url] pin up casino
http://pinupaz.top/# pin up azerbaycan
пинап казино: пинап казино – пин ап вход
pin up azerbaycan: pin up casino – pin up az
вавада официальный сайт: вавада казино – вавада
https://pinupaz.top/# pin up casino
pin-up casino giris [url=http://pinupaz.top/#]pin-up[/url] pin up az
пин ап вход: пин ап казино официальный сайт – пин ап казино официальный сайт
https://pinupaz.top/# pin up az
pin up casino: pin up – pin-up casino giris
pin up [url=https://pinupaz.top/#]pin-up[/url] pin up az
pin up: pin up az – pin-up
vavada casino: vavada – vavada вход
https://pinuprus.pro/# пин ап вход
vavada вход: vavada – vavada
вавада официальный сайт: vavada вход – вавада официальный сайт
вавада: vavada вход – вавада официальный сайт
vavada вход: vavada casino – vavada casino
пин ап вход: пин ап казино – пинап казино
http://pinupaz.top/# pin-up casino giris
пинап казино: пин ап вход – пин ап вход
vavada: вавада казино – вавада
vavada casino: вавада зеркало – vavada вход
http://pinupaz.top/# pin-up
vavada: вавада – вавада официальный сайт
вавада: вавада официальный сайт – вавада зеркало
вавада зеркало: вавада официальный сайт – vavada
https://pinupaz.top/# pin-up
пинап казино: пин ап казино официальный сайт – пин ап казино
vavada: vavada вход – vavada casino
https://pinupaz.top/# pin-up
пин ап казино официальный сайт: пин ап казино – пин ап казино
pin up az: pin up azerbaycan – pin up az
вавада казино [url=https://vavadavhod.tech/#]vavada вход[/url] vavada
https://vavadavhod.tech/# vavada casino
пин ап зеркало: пинап казино – пин ап вход
вавада казино: vavada – vavada
https://vavadavhod.tech/# vavada casino
пинап казино [url=http://pinuprus.pro/#]пин ап вход[/url] пинап казино
пин ап вход: пинап казино – pin up вход
http://pinupaz.top/# pin up casino
пин ап вход: pin up вход – пин ап казино
пин ап казино [url=http://pinuprus.pro/#]пин ап зеркало[/url] пин ап зеркало
pin up: pin-up casino giris – pin-up
medicine courier from India to USA: Medicine From India – Medicine From India
https://rxexpressmexico.com/# Rx Express Mexico
best canadian pharmacy: Express Rx Canada – canadian pharmacy 24h com
mexico drug stores pharmacies [url=https://rxexpressmexico.shop/#]best online pharmacies in mexico[/url] mexican rx online
Rx Express Mexico: mexican online pharmacy – mexican online pharmacy
https://expressrxcanada.com/# canadian pharmacies
indian pharmacy online shopping: MedicineFromIndia – MedicineFromIndia
mexican rx online [url=https://rxexpressmexico.com/#]mexico pharmacies prescription drugs[/url] mexico pharmacies prescription drugs
global pharmacy canada: ExpressRxCanada – best canadian pharmacy online
mexican online pharmacy: RxExpressMexico – mexican mail order pharmacies
https://expressrxcanada.com/# my canadian pharmacy
indian pharmacy online: Medicine From India – Medicine From India
Medicine From India: indian pharmacy – indian pharmacy
indian pharmacy online shopping [url=https://medicinefromindia.com/#]indian pharmacy[/url] Medicine From India
https://expressrxcanada.com/# reliable canadian pharmacy
indian pharmacy online: indian pharmacy online shopping – reputable indian pharmacies
certified canadian international pharmacy: Canadian pharmacy shipping to USA – reliable canadian pharmacy
canadian pharmacy online reviews: Canadian pharmacy shipping to USA – canadian online drugs
mexico pharmacy order online [url=http://rxexpressmexico.com/#]medicine in mexico pharmacies[/url] mexican rx online
http://rxexpressmexico.com/# mexico drug stores pharmacies
canadian drug: ExpressRxCanada – reliable canadian online pharmacy
best canadian online pharmacy: Express Rx Canada – canadian pharmacies online
best canadian pharmacy: Express Rx Canada – canadian pharmacy online reviews
https://expressrxcanada.com/# canadian pharmacy antibiotics
online canadian pharmacy [url=https://expressrxcanada.shop/#]canadian pharmacy mall[/url] best canadian pharmacy
indian pharmacy online: MedicineFromIndia – indian pharmacy online
mexico drug stores pharmacies: mexico pharmacies prescription drugs – mexican online pharmacy
https://medicinefromindia.com/# Medicine From India
indian pharmacy online: indian pharmacy online – indian pharmacy online shopping
legal canadian pharmacy online: Express Rx Canada – drugs from canada
indian pharmacy online shopping [url=https://medicinefromindia.com/#]indian pharmacy online shopping[/url] Medicine From India
medicine courier from India to USA: indian pharmacy online shopping – Medicine From India
http://medicinefromindia.com/# indian pharmacy online
canadian pharmacy ed medications: Express Rx Canada – canadian pharmacies online
mexican online pharmacy: Rx Express Mexico – Rx Express Mexico
Medicine From India [url=https://medicinefromindia.shop/#]Medicine From India[/url] Medicine From India
pharmacy website india: indian pharmacy online – MedicineFromIndia
http://medicinefromindia.com/# best india pharmacy
mail order pharmacy india: online pharmacy india – medicine courier from India to USA
mexico pharmacy order online: mexican online pharmacy – RxExpressMexico
RxExpressMexico: mexico drug stores pharmacies – mexican rx online
http://pharmafst.com/# acheter mГ©dicament en ligne sans ordonnance
Kamagra Commander maintenant [url=https://kamagraprix.com/#]Kamagra Commander maintenant[/url] kamagra 100mg prix
Achat Cialis en ligne fiable: Pharmacie en ligne Cialis sans ordonnance – Cialis sans ordonnance 24h tadalmed.shop
cialis sans ordonnance: Tadalafil 20 mg prix en pharmacie – cialis prix tadalmed.shop
kamagra livraison 24h: kamagra 100mg prix – kamagra en ligne
http://pharmafst.com/# pharmacie en ligne france fiable
acheter kamagra site fiable [url=http://kamagraprix.com/#]Kamagra Oral Jelly pas cher[/url] Achetez vos kamagra medicaments
Acheter Viagra Cialis sans ordonnance: Acheter Cialis 20 mg pas cher – Acheter Cialis tadalmed.shop
http://pharmafst.com/# pharmacie en ligne france livraison belgique
pharmacie en ligne avec ordonnance: pharmacie en ligne france livraison internationale – acheter mГ©dicament en ligne sans ordonnance pharmafst.com
Kamagra Oral Jelly pas cher: kamagra en ligne – kamagra 100mg prix
http://kamagraprix.com/# achat kamagra
Cialis sans ordonnance pas cher: Cialis sans ordonnance 24h – Cialis generique prix tadalmed.shop
https://pharmafst.com/# pharmacie en ligne france livraison belgique
kamagra pas cher: acheter kamagra site fiable – kamagra oral jelly
https://tadalmed.shop/# Acheter Viagra Cialis sans ordonnance
Tadalafil achat en ligne: Acheter Cialis – Tadalafil 20 mg prix sans ordonnance tadalmed.shop
pharmacie en ligne: Meilleure pharmacie en ligne – pharmacie en ligne sans ordonnance pharmafst.com
http://pharmafst.com/# Pharmacie Internationale en ligne
Cialis sans ordonnance 24h: Tadalafil 20 mg prix en pharmacie – Tadalafil 20 mg prix en pharmacie tadalmed.shop
kamagra oral jelly [url=http://kamagraprix.com/#]Acheter Kamagra site fiable[/url] kamagra oral jelly
Kamagra Commander maintenant: kamagra en ligne – kamagra gel
kamagra gel: Kamagra Oral Jelly pas cher – acheter kamagra site fiable
http://tadalmed.com/# Tadalafil 20 mg prix sans ordonnance
pharmacie en ligne france livraison internationale: Meilleure pharmacie en ligne – pharmacie en ligne sans ordonnance pharmafst.com
pharmacie en ligne avec ordonnance [url=https://pharmafst.shop/#]Meilleure pharmacie en ligne[/url] Pharmacie Internationale en ligne pharmafst.shop
Acheter Viagra Cialis sans ordonnance: cialis prix – Tadalafil 20 mg prix sans ordonnance tadalmed.shop
Pharmacie sans ordonnance: pharmacie en ligne sans ordonnance – pharmacie en ligne france pas cher pharmafst.com
Kamagra Oral Jelly pas cher: Achetez vos kamagra medicaments – Kamagra pharmacie en ligne
https://pharmafst.shop/# pharmacie en ligne fiable
pharmacie en ligne france livraison belgique: Pharmacie Internationale en ligne – pharmacie en ligne sans ordonnance pharmafst.com
pharmacie en ligne france livraison internationale [url=http://pharmafst.com/#]pharmacie en ligne[/url] pharmacie en ligne livraison europe pharmafst.shop
kamagra pas cher: Achetez vos kamagra medicaments – Kamagra Oral Jelly pas cher
http://pharmafst.com/# pharmacie en ligne france livraison belgique
Tadalafil sans ordonnance en ligne: Tadalafil 20 mg prix en pharmacie – Cialis sans ordonnance pas cher tadalmed.shop
pharmacie en ligne france livraison belgique: pharmacie en ligne – pharmacie en ligne france fiable pharmafst.com
Pharmacie Internationale en ligne [url=http://pharmafst.com/#]pharmacie en ligne[/url] pharmacie en ligne france pas cher pharmafst.shop
https://kamagraprix.shop/# Kamagra pharmacie en ligne
Kamagra Commander maintenant: Acheter Kamagra site fiable – kamagra gel
Achetez vos kamagra medicaments: kamagra oral jelly – Kamagra pharmacie en ligne
Achat mГ©dicament en ligne fiable [url=http://pharmafst.com/#]Pharmacie en ligne France[/url] pharmacie en ligne sans ordonnance pharmafst.shop
http://pharmafst.com/# п»їpharmacie en ligne france
Achetez vos kamagra medicaments: Kamagra pharmacie en ligne – kamagra livraison 24h
pharmacie en ligne sans ordonnance: pharmacie en ligne pas cher – Pharmacie sans ordonnance pharmafst.com
Cialis generique prix: Tadalafil sans ordonnance en ligne – Tadalafil achat en ligne tadalmed.shop
Tadalafil 20 mg prix en pharmacie [url=https://tadalmed.com/#]Cialis sans ordonnance pas cher[/url] Pharmacie en ligne Cialis sans ordonnance tadalmed.com
http://kamagraprix.com/# Kamagra pharmacie en ligne
Tadalafil 20 mg prix sans ordonnance: Acheter Cialis 20 mg pas cher – Acheter Viagra Cialis sans ordonnance tadalmed.shop
pharmacie en ligne: Meilleure pharmacie en ligne – pharmacie en ligne fiable pharmafst.com
kamagra gel: Kamagra pharmacie en ligne – acheter kamagra site fiable
https://kamagraprix.com/# kamagra 100mg prix
Cialis generique prix [url=https://tadalmed.com/#]Cialis sans ordonnance 24h[/url] cialis sans ordonnance tadalmed.com
kamagra livraison 24h: kamagra en ligne – achat kamagra
Cialis sans ordonnance 24h: Cialis en ligne – Cialis sans ordonnance 24h tadalmed.shop
pharmacie en ligne fiable: Pharmacies en ligne certifiees – pharmacie en ligne france fiable pharmafst.com
http://tadalmed.com/# Acheter Viagra Cialis sans ordonnance
Acheter Cialis 20 mg pas cher: cialis prix – Acheter Cialis tadalmed.shop
vente de mГ©dicament en ligne [url=https://pharmafst.shop/#]pharmacie en ligne pas cher[/url] pharmacie en ligne fiable pharmafst.shop
kamagra 100mg prix: kamagra en ligne – kamagra 100mg prix
kamagra en ligne: Kamagra Commander maintenant – Kamagra pharmacie en ligne
Good write-up, I am normal visitor of one?¦s website, maintain up the nice operate, and It’s going to be a regular visitor for a lengthy time.
You should take part in a contest for one of the best blogs on the web. I will recommend this site!
Great beat ! I would like to apprentice while you amend your web site, how could i subscribe for a blog site?
The account helped me a appropriate deal. I have been tiny bit acquainted
of this your broadcast offered vibrant transparent idea.
Thank you, I’ve recently been searching for info about this subject for ages and yours is the best I have discovered till now. But, what about the conclusion? Are you sure about the source?
If you desire to grow your knoqledge simply keep visiting
this web page and be updated with the most up-to-date news update
posted here. https://neejobs.com/employer/history-essay-writer/
wv8h1p
Greate article. Keep posting such kind of info
on your blog. Im really impressed by your site.
Hey there, You have done an incrredible job. I’ll certainly digg it and individually recommend
to my friends.I am sure they wwill be benefited
from this web site. https://menbehealth.wordpress.com/
Hi there, I found your blog by way of Google
even as searching for a comparable topic, your website came up, it appears to be like good.
I have bookmarked it in my google bookmarks.[X-N-E-W-L-I-N-S-P-I-N-X]Hello
there, just turned into aware of your weblog thru Google, and located
that it’s really informative. I am gonna watch out for brussels.
I’ll be grateful when you continue this in future.
A lot of other people will likely be benefited out of your writing.
Cheers!
khqx5f
https://winnita-promocode.com/
oa2101
I am currently painting my kitchen Snow White by General Finishes. Have you had any problems with the white so far? Bleed through? Yellowing? I’m so worried about yellowing. 😬
Hi Jen, did you apply a top coat to your kitchen? Did you experience any yellowing? I’m getting so many mixed reviews – to apply a top coat to white painted cabinets or to not apply a top coat. It’s been rough trying to find information.