Hi, Brianna here with Hang the Moon Designs sharing my DIY Jewelry Stand. Here is a DIY that I bet doesn’t even require a trip to the hardware store for the basic pieces…but maybe to upgrade this project you might want to take a short trip.
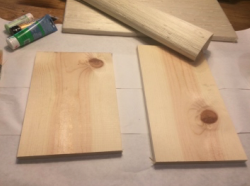
Basic supplies and tools:
Scrap wood (or wood cutting board)
Hammer
Nails
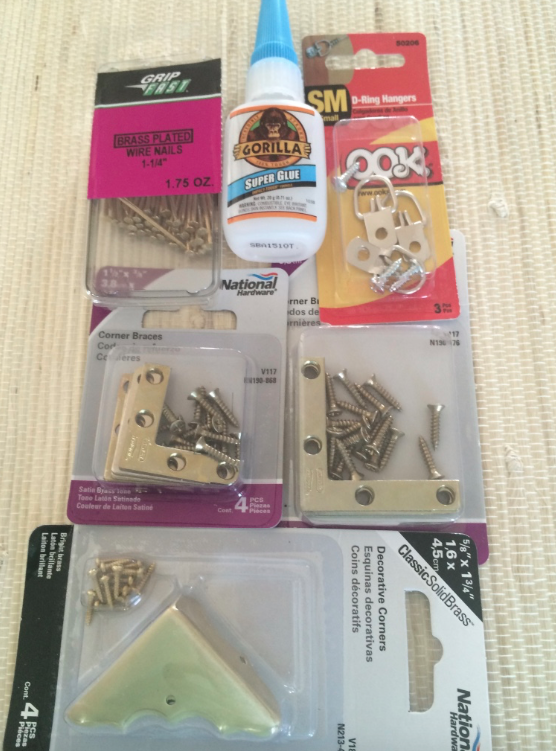
Upgraded supplies: (Note: You do NOT need all of these so look at the finished products to decide what works best for you.)
Pretty thumb tacks
Gold nails with a wide flat head
Paint and paint brush OR
Scrap wallpaper
Gold brackets or decorative corners
Super glue
Wire cutters
Drill
Eye hooks
Leather/twine or some kind of hanging material
Choose your overall design. I have three examples here:
- Beach vibe with a touch of glam

2. Kate Spade inspired

3. Simple and Chic

For the beach vibe I used scrap grasscloth wallpaper from a previous project and wallpapered onto my scrap wood.
For the Kate Spade inspired piece I chose green acrylic paint and for the simple and chic I used left over Sherwin Williams sea salt, one of my favorite paint colors. You can you anything as the back ground but I encourage you to keep it simple because when it’s all finished your jewelry will the be the star.
2. The background: Paint, stain or wallpaper your wood piece 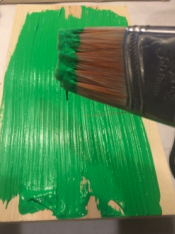
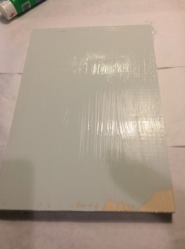
3. Decide on hardware, if any, and attach. This will probably require a drill.

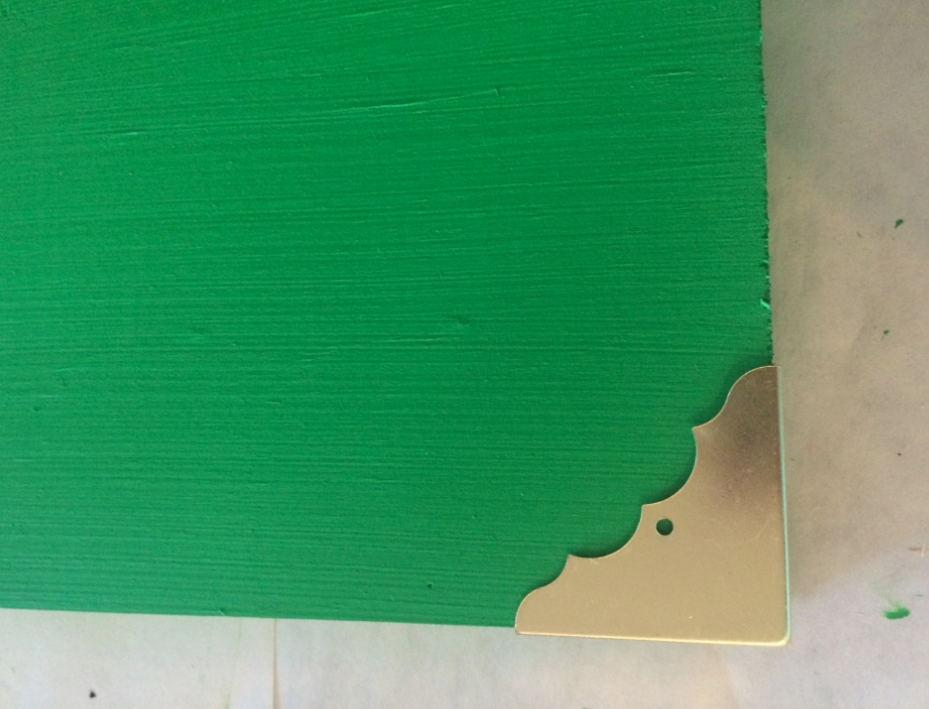
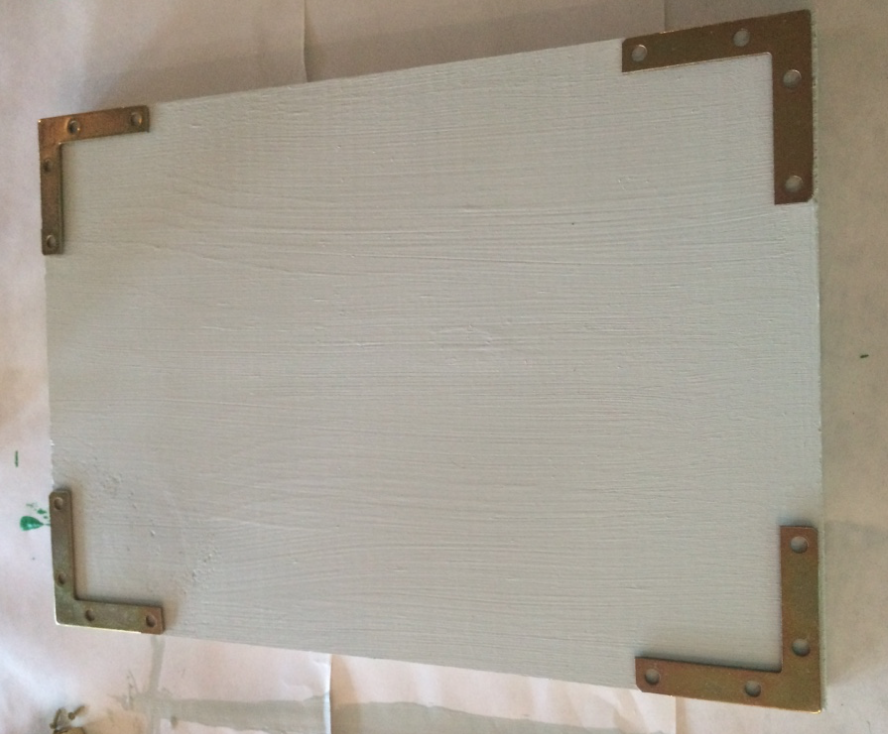
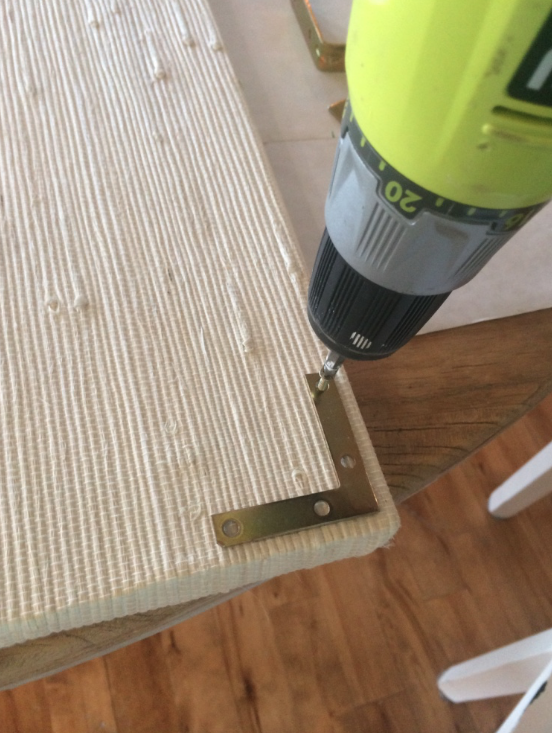
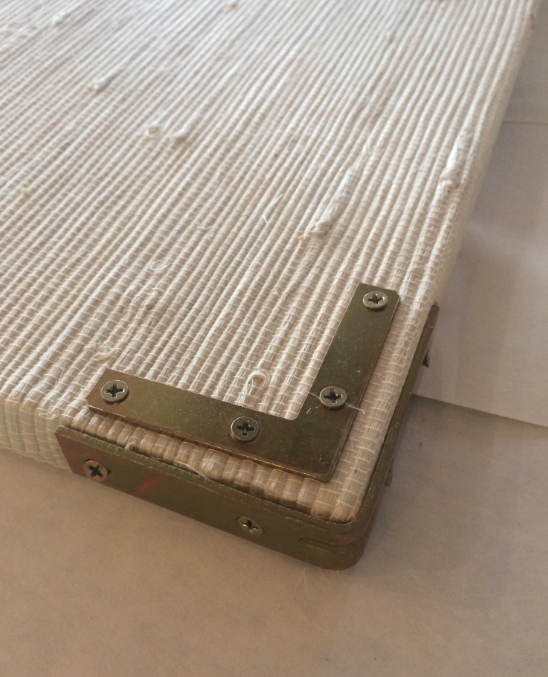
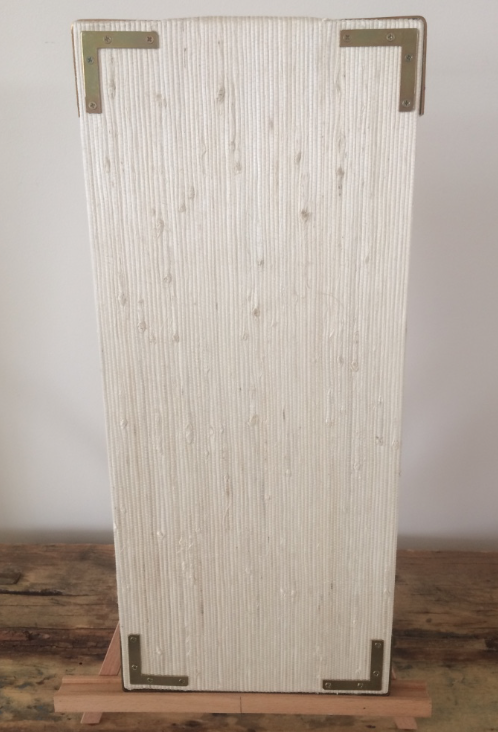
4. CRITICAL: Decide how you’re hanging your piece, or you could set on an easel. This is important to know now because if you’re hanging with brackets on the back ATTACH NOW (decide vertical or horizontal). This will be difficult when all the nails are in. If you decide to hang from the top with eye hooks and leather/twine you can move on.
5. Using wire cutters cut off the backs of tacks. I would do this over a small box and cover with your hand so the backs don’t fly everywhere.
6. Decide placement of your nails and hammer them in. Keep in mind what kind of jewelry: long and short necklaces, bracelets, dangle earrings, studs. You might want to grab a couple bracelets so you can see how they’re going to fall. I make sure there are two apart to link together with wire for dangle earrings.
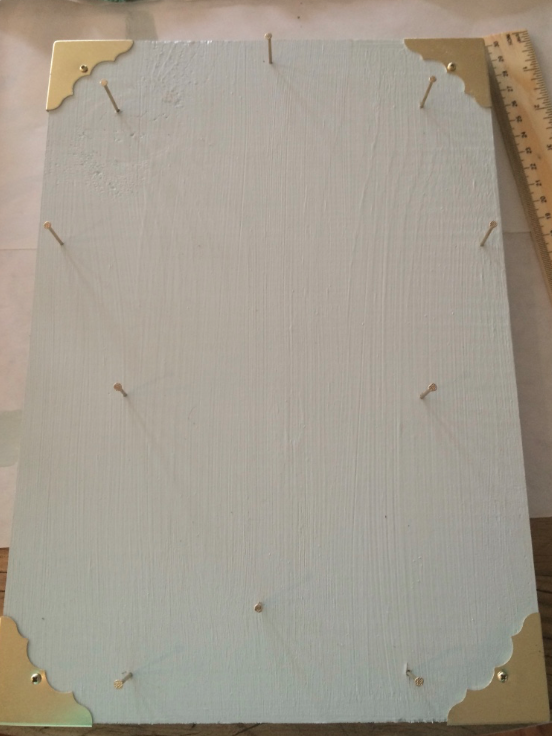
7. ALL at once, so the superglue keeps flowing, attach your pretty tack heads to the nail heads. This takes a big of patience. If you went with the cute animal tacks from Target you need to drill a tiny hole in the back and then put glue in that and thread over the nail. Let it dry!

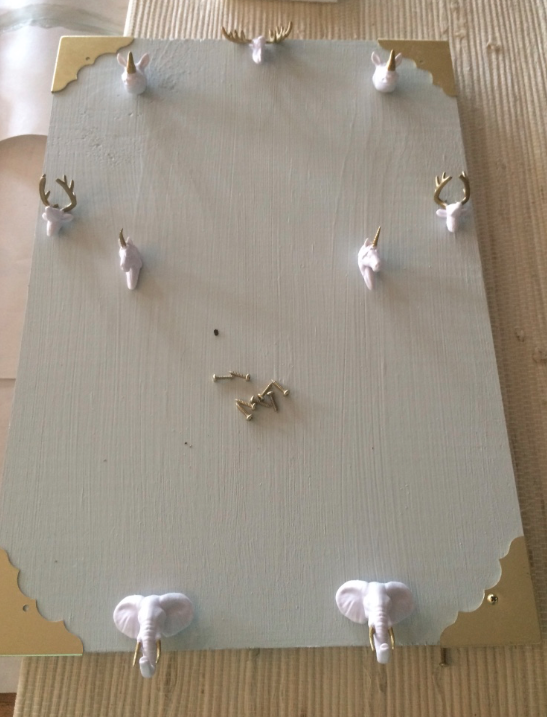


8. If you have decided to use eye hooks to hang your piece then attach those now by drilling in a tiny hole on either side, about 1 inch from the edge, and screw them in.
9. ADD your pretty pieces or sign the back with a little note and wrap it in a garment box and get ready to give away!



Meds From Mexico: mexican drugstore online – Meds From Mexico
indianpharmacy com: п»їlegitimate online pharmacies india – best online pharmacy india
mexican mail order pharmacies [url=http://medsfrommexico.com/#]mexico drug stores pharmacies[/url] Meds From Mexico
https://medsfrommexico.com/# mexican mail order pharmacies
http://indiapharmglobal.com/# India Pharm Global
online shopping pharmacy india: cheapest online pharmacy india – indian pharmacy online
India Pharm Global: India Pharm Global – reputable indian online pharmacy
best india pharmacy [url=http://indiapharmglobal.com/#]reputable indian online pharmacy[/url] India Pharm Global
Meds From Mexico: mexican pharmaceuticals online – mexican mail order pharmacies
п»їbest mexican online pharmacies: Meds From Mexico – buying prescription drugs in mexico online
https://canadapharmglobal.shop/# canadian pharmacy
https://canadapharmglobal.com/# canadian drugs
India Pharm Global: India Pharm Global – best india pharmacy
world pharmacy india: indian pharmacy paypal – India Pharm Global
online shopping pharmacy india [url=http://indiapharmglobal.com/#]top 10 pharmacies in india[/url] pharmacy website india
http://canadapharmglobal.com/# canadianpharmacyworld com
Meds From Mexico: purple pharmacy mexico price list – Meds From Mexico
India Pharm Global: India Pharm Global – India Pharm Global
reputable mexican pharmacies online [url=https://medsfrommexico.shop/#]buying from online mexican pharmacy[/url] mexican pharmaceuticals online
https://medsfrommexico.shop/# mexico pharmacies prescription drugs
Meds From Mexico: Meds From Mexico – Meds From Mexico
reputable canadian pharmacy: canadian drug – canadian drug prices
pharmacy website india [url=https://indiapharmglobal.com/#]best online pharmacy india[/url] India Pharm Global
canadian pharmacy king reviews: Canada Pharm Global – online canadian pharmacy review
https://medsfrommexico.shop/# Meds From Mexico
buy medicines online in india: India Pharm Global – India Pharm Global
India Pharm Global [url=http://indiapharmglobal.com/#]India Pharm Global[/url] best india pharmacy
best canadian online pharmacy: Canada Pharm Global – northern pharmacy canada
п»їBuy Crestor without prescription: Crestor Pharm – rosuvastatin side effects itching
prednisone for cheap [url=https://prednipharm.shop/#]prednisone 20mg for sale[/url] how to buy prednisone
Semaglutide tablets without prescription: SemagluPharm – SemagluPharm
https://semaglupharm.com/# mounjaro vs semaglutide
Semaglu Pharm: No prescription diabetes meds online – side effects of rybelsus 14 mg
https://crestorpharm.com/# Crestor Pharm
what’s lipitor [url=https://lipipharm.com/#]FDA-approved generic statins online[/url] п»їBuy Lipitor without prescription USA
Lipi Pharm: can lipitor cause ed – atorvastatin tier level
https://semaglupharm.com/# when is the best time to take rybelsus
rybelsus online pharmacy: SemagluPharm – Order Rybelsus discreetly
SemagluPharm [url=https://semaglupharm.com/#]SemagluPharm[/url] Order Rybelsus discreetly
Semaglu Pharm: Semaglu Pharm – Rybelsus 3mg 7mg 14mg
http://semaglupharm.com/# Semaglu Pharm
Lipi Pharm: Lipi Pharm – No RX Lipitor online
prednisone 10 [url=https://prednipharm.shop/#]cost of prednisone[/url] prednisone tablets india
Semaglutide tablets without prescription: Where to buy Semaglutide legally – semaglutide before and after
https://crestorpharm.com/# п»їBuy Crestor without prescription
Semaglu Pharm [url=https://semaglupharm.com/#]Semaglu Pharm[/url] Affordable Rybelsus price
Predni Pharm: apo prednisone – PredniPharm
https://semaglupharm.com/# SemagluPharm
SemagluPharm: semaglutide injection vs oral – Rybelsus 3mg 7mg 14mg
PredniPharm [url=https://prednipharm.com/#]Predni Pharm[/url] PredniPharm
Lipi Pharm: Lipi Pharm – LipiPharm
PredniPharm: price of prednisone tablets – prednisone 5 50mg tablet price
https://lipipharm.com/# what time of day should you take atorvastatin
https://semaglupharm.com/# sublingual semaglutide reviews
does lipitor cause weight gain [url=https://lipipharm.shop/#]Lipi Pharm[/url] LipiPharm
Predni Pharm: PredniPharm – PredniPharm
can i take magnesium glycinate with atorvastatin: Lipi Pharm – what foods should be avoided when taking atorvastatin?
https://semaglupharm.com/# semaglutide cost with insurance
rybelsus and metformin [url=https://semaglupharm.com/#]does semaglutide lower blood sugar[/url] Rybelsus 3mg 7mg 14mg
prednisone over the counter south africa: prednisone 5 mg tablet cost – prednisone price australia
SemagluPharm: Semaglu Pharm – Semaglu Pharm
https://semaglupharm.com/# Rybelsus for blood sugar control
https://semaglupharm.shop/# Semaglutide tablets without prescription
Semaglu Pharm [url=https://semaglupharm.com/#]semaglutide joint pain[/url] rybelsus what is it used for
Lipi Pharm: Lipi Pharm – lipitor vs zocor
prednisone buy without prescription: Predni Pharm – Predni Pharm
п»їBuy Lipitor without prescription USA [url=http://lipipharm.com/#]atorvastatin calcium 40 mg[/url] Generic Lipitor fast delivery
Lipi Pharm: LipiPharm – can lipitor cause weight loss
prednisone 10mg price in india: PredniPharm – PredniPharm
http://semaglupharm.com/# Semaglu Pharm
https://prednipharm.shop/# order prednisone 10 mg tablet
rybelsus patient information: rybelsusжЇд»Ђд№€иЌЇ – SemagluPharm
where to get prednisone: compare prednisone prices – prednisone online for sale
https://semaglupharm.com/# Semaglu Pharm
is atorvastatin the same as rosuvastatin: LipiPharm – does atorvastatin cause dementia
CrestorPharm [url=http://crestorpharm.com/#]Order rosuvastatin online legally[/url] CrestorPharm
LipiPharm: Affordable Lipitor alternatives USA – LipiPharm
https://crestorpharm.shop/# Crestor Pharm
Predni Pharm [url=http://prednipharm.com/#]Predni Pharm[/url] prednisone 20mg online
Cheap Lipitor 10mg / 20mg / 40mg: Lipi Pharm – LipiPharm
prednisone 200 mg tablets [url=https://prednipharm.com/#]Predni Pharm[/url] 25 mg prednisone
buy prednisone 40 mg: can you buy prednisone over the counter in canada – cheapest prednisone no prescription
prednisone 25mg from canada: Predni Pharm – can you buy prednisone in canada
CrestorPharm [url=http://crestorpharm.com/#]CrestorPharm[/url] Crestor Pharm
http://prednipharm.com/# 5mg prednisone
prednisone 20 mg in india: Predni Pharm – PredniPharm
LipiPharm: Affordable Lipitor alternatives USA – LipiPharm
LipiPharm [url=https://lipipharm.com/#]LipiPharm[/url] Lipi Pharm
LipiPharm: lipitor foods to avoid – Lipi Pharm
CrestorPharm: what is rosuvastatin used for – Safe online pharmacy for Crestor
Semaglu Pharm [url=http://semaglupharm.com/#]can semaglutide cause diarrhea[/url] Order Rybelsus discreetly
prednisone otc uk: where can i order prednisone 20mg – PredniPharm
cost of prednisone 5mg tablets: PredniPharm – prednisone 10mg for sale
CrestorPharm: Over-the-counter Crestor USA – rosuvastatin natural alternatives
Semaglutide tablets without prescription [url=https://semaglupharm.shop/#]Semaglu Pharm[/url] Semaglu Pharm
LipiPharm: Lipi Pharm – atorvastatin vs rosuvastatin
п»їBuy Crestor without prescription: Crestor Pharm – rosuvastatin 10 mg vs atorvastatin 20 mg
Affordable Rybelsus price [url=https://semaglupharm.com/#]Semaglu Pharm[/url] Online pharmacy Rybelsus
Over-the-counter Crestor USA: Crestor Pharm – CrestorPharm
http://crestorpharm.com/# CrestorPharm
prednisone: Predni Pharm – Predni Pharm
CrestorPharm: Crestor Pharm – Generic Crestor for high cholesterol
Crestor Pharm: Safe online pharmacy for Crestor – Crestor Pharm
prednisone 25mg from canada: PredniPharm – Predni Pharm
Buy statins online discreet shipping: CrestorPharm – п»їBuy Crestor without prescription
Crestor Pharm [url=http://crestorpharm.com/#]Crestor Pharm[/url] CrestorPharm
https://lipipharm.com/# Order cholesterol medication online
atorvastatin webmd: Lipi Pharm – FDA-approved generic statins online
can you stop atorvastatin cold turkey [url=https://lipipharm.shop/#]LipiPharm[/url] Affordable Lipitor alternatives USA
lipitor vs crestor: Safe atorvastatin purchase without RX – Online statin drugs no doctor visit
buy prednisone without a prescription best price: buy prednisone online no prescription – PredniPharm
PredniPharm: buy prednisone nz – prednisone 12 mg
lipitor beta blocker: Atorvastatin online pharmacy – Lipi Pharm
livalo vs lipitor [url=https://lipipharm.shop/#]Lipi Pharm[/url] LipiPharm
https://prednipharm.com/# prednisone rx coupon
Lipi Pharm: lipitor vs statin – LipiPharm
PredniPharm: 60 mg prednisone daily – PredniPharm
Semaglu Pharm: SemagluPharm – rybelsus para bajar de peso
prednisone 20 mg prices [url=http://prednipharm.com/#]PredniPharm[/url] prednisone steroids
cost of prednisone in canada: Predni Pharm – Predni Pharm
LipiPharm: Online statin drugs no doctor visit – Lipi Pharm
http://crestorpharm.com/# Affordable cholesterol-lowering pills
LipiPharm: Generic Lipitor fast delivery – Lipi Pharm
SemagluPharm [url=http://semaglupharm.com/#]SemagluPharm[/url] Where to buy Semaglutide legally
semaglutide cancer: Semaglu Pharm – weight loss medication rybelsus
generic viagra online from india: brand viagra 100mg price – cheap brand viagra
can i buy viagra online without a prescription: sildenafil 110 mg – online generic sildenafil
viagra for sale paypal: buy women viagra online – viagra 10mg price in india
how to purchase viagra in uk [url=https://vgrsources.com/#]VGR Sources[/url] cheap viagra 100
best viagra price in india: VGR Sources – where to order real viagra
https://vgrsources.com/# real viagra for sale
best price brand viagra: sildenafil brand name in india – real viagra pills online
viagra costa rica: us online viagra prescription – viagra price comparison usa
buy online viagra tablet [url=https://vgrsources.com/#]sildenafil otc nz[/url] sildenafil 100mg tablets canada
real viagra no prescription: VGR Sources – viagra online generic canada
how to buy generic viagra online: how to buy viagra online in canada – viagra without a rx
buy viagra online without a prescription: VGR Sources – sildenafil 100
female viagra medicine price in india [url=https://vgrsources.com/#]sublingual viagra[/url] 30 mg sildenafil
20 mg viagra daily: viagra natural – viagra 100mg online australia
https://vgrsources.com/# cialis vs viagra
viagra for sale: VGR Sources – where to order real viagra
how to get viagra online in usa [url=https://vgrsources.com/#]sildenafil discount prices[/url] generic viagra 25
buy brand name viagra online: VGR Sources – canadian pharmacy cheap sildenafil
female viagra pills uk: VGR Sources – cheap discount viagra
sildenafil online purchase india: VGR Sources – generic viagra 150 mg
generic sildenafil 20mg cost: VGR Sources – purchase viagra online australia
viagra price in usa [url=https://vgrsources.com/#]VGR Sources[/url] sildenafil discount price
average cost sildenafil 20mg: genuine viagra – viagra kaufen
https://vgrsources.com/# otc viagra 2018
buy generic viagra from india: VGR Sources – viagra discount online
sildenafil 20mg coupon discount: sildenafil 220 – generic viagra from canada online
30 mg sildenafil [url=https://vgrsources.com/#]VGR Sources[/url] viagra 50 mg online
generic sildenafil us: price of viagra 100mg in usa – canada brand viagra
average cost of viagra 50mg: VGR Sources – cheapest online viagra
viagra brand name generic drug: best site to buy viagra – sildenafil chewable tablets
sildenafil prices [url=https://vgrsources.com/#]viagra prescription online usa[/url] where to buy sildenafil in south africa
viagra 6 pills: VGR Sources – can you buy viagra online safely
sildenafil 100 canada: VGR Sources – real viagra online no prescription
viagra 2: viagra capsule – where can you get viagra over the counter
https://vgrsources.com/# sildenafil price canada
sildenafil gel [url=https://vgrsources.com/#]VGR Sources[/url] where to buy female viagra pill
viagra europe online: VGR Sources – preГ§o do viagra 50mg
sildenafil 220: buy viagra new york – viagra 100 mg best price in india
viagra soft tabs online: female viagra online uk – buying viagra online illegal
female viagra uk pharmacy [url=https://vgrsources.com/#]VGR Sources[/url] cheap viagra online fast delivery
buy cheap viagra tablets: VGR Sources – canadian pharmacy generic viagra 100mg
sildenafil pills from mexico: VGR Sources – sildenafil 50mg prices
order viagra online canada mastercard: generic viagra pills for sale – sildenafil citrate 50mg tab
https://vgrsources.com/# viagra online safe
best online viagra site [url=https://vgrsources.com/#]VGR Sources[/url] sildenafil 100mg price canada
generic viagra usa: viagra 50 mg price in usa – cheap viagra
100mg viagra price in india: 100mg viagra price – viagra 200mg price
generic viagra united states: VGR Sources – 60 mg viagra
generic sildenafil canada [url=https://vgrsources.com/#]women viagra pills[/url] sildenafil 100 mg tablets coupon
cheap generic viagra 25mg: cheap generic viagra 50mg – how much is viagra online
viagra pills for sale canada: how to get female viagra pill – order viagra united states
Wo kann ich generisches Viagra online bestellen?: VGR Sources – viagra 300mg
https://vgrsources.com/# sildenafil citrate 100 mg
generic viagra without a prescription: VGR Sources – how to get over the counter viagra
generic sildenafil us [url=https://vgrsources.com/#]buy viagra online 100mg[/url] viagra online without prescription usa
female viagra online buy: buy viagra online in us – viagra 150 mg price
viagra 100mg cost in usa: VGR Sources – how to buy sildenafil
sildenafil 50mg: where can i get viagra – buy cheap viagra online canadian pharmacy
sildenafil brand name in india [url=https://vgrsources.com/#]viagra generics[/url] cheap viagra generic canada
how much is viagra in australia: online pharmacy uk viagra – best women viagra
https://vgrsources.com/# female viagra for sale
female viagra pills online: VGR Sources – brand viagra for sale
pharmacy viagra price: female viagra australia – viagra for women
viagra tablet online order [url=https://vgrsources.com/#]VGR Sources[/url] generic viagra for daily use
order viagra by phone: VGR Sources – cheap generic india viagra
https://inpharm24.shop/# pharmacy india online
is tramadol otc in mexico: mexican amoxicillin – ozempic mexico pharmacy
online pharmacy domperidone no prescription [url=https://pharmexpress24.shop/#]pharmacy rx one legit[/url] northwest pharmacy domperidone
dandruff shampoo india pharmacy: india medicine – pharmacy franchises in india
buy drugs from india: best online pharmacy – b pharmacy salary in india
is prednisone available over the counter in mexico [url=https://pharmmex.shop/#]Pharm Mex[/url] what can i buy in mexican pharmacy
india pharmacy website: buy medicines online in india – reliable pharmacy india
kroger pharmacy gabapentin [url=https://pharmexpress24.shop/#]Pharm Express 24[/url] online pharmacy sildenafil citrate
https://pharmexpress24.shop/# anti fungal
walgreen store hours pharmacy: Pharm Express 24 – top mail order pharmacies
top mail-order pharmacies in usa: Pharm Mex – mexican pain relief
ordering prescription drugs online [url=https://pharmmex.shop/#]international pharmacies[/url] is zepbound available in mexico
pharmacy store near me: new at your publix pharmacy free lisinopril – propecia online pharmacy reviews
dandruff shampoo india pharmacy: InPharm24 – india pharmacy delivery to usa
pharmacy in india [url=http://inpharm24.com/#]e pharmacy india[/url] online pharmacy india ship to usa
http://pharmexpress24.com/# kamagra oral jelly online pharmacy
apollo pharmacy india: buy medicines online india – india online pharmacy
indocin online pharmacy: Pharm Express 24 – value generic pharmacy adipex
medicine online shopping [url=https://inpharm24.com/#]InPharm24[/url] ivermectin india pharmacy
spanish pharmacy online: jewel osco pharmacy – total rx pharmacy
publix pharmacy amoxicillin: rx pharmacy shop reviews – online pharmacy viagra
diflucan online pharmacy [url=http://pharmexpress24.com/#]Pharm Express 24[/url] levofloxacin online pharmacy
online pharmacy in usa: Pharm Mex – buying prozac online
https://inpharm24.shop/# online pharmacy in india
online medicine order: india drug store – god of pharmacy in india
wg online pharmacy [url=https://pharmexpress24.com/#]best online pharmacy usa[/url] paxil pharmacy
india prescription drugs: InPharm24 – first online pharmacy in india
wegmans pharmacy free lipitor: lamictal online pharmacy – 24 hour pharmacy near me
doctor of pharmacy in india: InPharm24 – all day pharmacy india
colorado pharmacy error methotrexate [url=https://pharmexpress24.com/#]anabolic steroids online pharmacy reviews[/url] percocet online pharmacy without prescriptions
https://inpharm24.com/# medicine online shopping
phentermine over the counter in mexico: pharmacy in mexico city – reputable mexican pharmacy
mexican prednisone [url=https://pharmmex.com/#]mexican pharmacy no prescription[/url] can you buy prednisone over the counter in mexico
india online pharmacy: buy viagra online india – medicines online india
online pharmacy india: InPharm24 – pharmacy store in india
rite aid pharmacy benadryl [url=http://pharmexpress24.com/#]pharmacy[/url] venlafaxine online pharmacy
https://inpharm24.com/# india medicine
buy meds online: Pharm Mex – buy adderall in cancun
riteaid pharmacy: albendazole online pharmacy – Prometrium
india pharmacy delivery [url=https://inpharm24.com/#]buy viagra online india[/url] pharmacy education in india
viagra pharmacy rx one: ibuprofen pharmacy only – plavix pharmacy coupon
http://pharmexpress24.com/# express rx pharmacy services
comprar yurelax sin receta: Confia Pharma – comprar antabus sin receta
test coqueluche pharmacie sans ordonnance: lactibiane sans ordonnance – vitamine a en pharmacie sans ordonnance
suspiria gocce: farmacia bonola – bentelan per cani
dirahist a cosa serve [url=https://farmaciasubito.shop/#]talofen gocce[/url] foster polvere prezzo
http://confiapharma.com/# penicilina se puede comprar sin receta
miglior sito farmacia online: afilaria compresse – solaraze gel prezzo
sildenafil 100mg price: Pharmacie Express – nurofen ordonnance
se puede comprar viagra sin receta: fp farmacia online – farmacia cartagena online
avГЁne cleanance hydra crГЁme lavante [url=http://pharmacieexpress.com/#]antibio cystite sans ordonnance[/url] colchimax sans ordonnance
clensia senza ricetta: Farmacia Subito – squarti farmacia
https://farmaciasubito.com/# fluimucil 500 aerosol prezzo
coefferalgan senza ricetta [url=https://farmaciasubito.com/#]monurelle plus ГЁ un antibiotico[/url] riopan prezzo
indom collirio monodose prezzo: brufecod a cosa serve – dibase 25.000 prezzo
comprar bactroban pomada sin receta: comprar viagra generico en farmacia sin receta – farmacia a5 online
farmacia salofarm online [url=https://confiapharma.shop/#]comprar tranquilizantes sin receta[/url] vitamina c farmacia online
tu farmacia online madrid: comprar antibiotico sin receta – farmacia espaГ±a online cialis
acheter tadalafil 5mg en ligne avec ordonnance: cachet pour infection urinaire sans ordonnance – consulter orl sans ordonnance
quantico farmaco: simeticone bustine – glucophage unidie 750
ar ordonnance: traitement infection urinaire chien en pharmacie sans ordonnance – diprosone prix sans ordonnance
peut on acheter du viagra en pharmacie sans ordonnance en belgique: peut on acheter en pharmacie sans ordonnance – aller chez l’orl sans ordonnance
spedra 200 [url=http://pharmacieexpress.com/#]bacterix 200 mg sans ordonnance[/url] a derma pain surgras
comprar cialis sin receta en usa: mascarillas ffp2 en farmacia online – farmacia goyache online
bentelan fiale intramuscolo: augmentin bustine – pantorc 40 mg
http://pharmacieexpress.com/# viagra generico
angine pharmacie sans ordonnance [url=http://pharmacieexpress.com/#]ketum gel[/url] amoxicilline 1g sans ordonnance
comprar prednisone sin receta: se puede comprar bilaxten sin receta – puedo comprar codeina sin receta
solupred ordonnance: uriage serum – prix atovaquone proguanil
puedo comprar nasonex sin receta [url=http://confiapharma.com/#]mascarilla 3m farmacia online[/url] puedo comprar anillo anticonceptivo sin receta
farmacia consegna a domicilio: farmacia online affidabili – normix 200 prezzo
comprar tadalafil sin receta: farmacia online barakaldo – farmacia online seria
farmacia de guardia serie ver online [url=https://confiapharma.com/#]Confia Pharma[/url] como comprar ritalin sin receta
https://pharmacieexpress.shop/# aphrodisiaque pour femme en pharmacie sans ordonnance
ultraproct sans ordonnance: a derma epitheliale duo – solacy sans ordonnance
parfum roger gallet fleur d’osmanthus: prix tadalafil 5mg – acupan sans ordonnance
se faire vacciner en pharmacie sans ordonnance [url=https://pharmacieexpress.com/#]traitement infection urinaire pharmacie sans ordonnance[/url] sildenafil 100mg prix
farmacia online veterinaria.com: Confia Pharma – farmacia online galileo 61 | envÃo mismo dÃa madrid y alrededores.
opinion farmacia en casa online: Confia Pharma – las pastillas para dormir se pueden comprar sin receta
pharmacie en ligne france avec ordonnance [url=https://pharmacieexpress.com/#]antibiotique infection urinaire sans ordonnance pharmacie[/url] mГ©dicament sans ordonnance pour cystite
uriage serum: sildenafil 100mg achat – cetirizine sans ordonnance
tadalafil 10 mg boГ®te de 24 prix: acheter insuline sans ordonnance – amoxicilline faut il une ordonnance
https://pharmacieexpress.com/# viagra prix
mascarillas negras farmacia online: se puede comprar cialis sin receta – venta chupetes farmacia online
quel mГ©dicament pour une infection urinaire sans ordonnance [url=https://pharmacieexpress.com/#]cystite ordonnance en ligne[/url] delivrance monuril sans ordonnance
descuento mi farmacia online: Confia Pharma – como comprar orfidal sin receta
zodon gatto: Farmacia Subito – siler 75 prezzo
kamagra gel pharmacie sans ordonnance: estreva gel sans ordonnance – ordonnance mГ©dicale en ligne
kijimea stomaco irritabile [url=http://farmaciasubito.com/#]asamax 800[/url] cialis 5mg
https://confiapharma.shop/# farmainstant.com tu farmacia online al instante salt
femannose en pharmacie sans ordonnance: durex feeling sensual – avene creme lavante
se puede comprar fluoxetina sin receta medica: Confia Pharma – comprar emla crema sin receta
se puede comprar arcoxia sin receta: comprar redotex sin receta – comprar augmentine 500 sin receta
farmacia altamira farmacia online elche [url=http://confiapharma.com/#]Confia Pharma[/url] farmacia online italiana
viagra in france: peut on acheter du viagra en pharmacie sans ordonnance au quebec – ketum gel
peut on acheter alli en pharmacie sans ordonnance: antibiotique pharmacie sans ordonnance – propalin sans ordonnance
https://pharmacieexpress.shop/# vente de viagra pharmacie sans ordonnance
testoviron 250 prezzo [url=https://farmaciasubito.com/#]lixiana 60 mg prezzo[/url] farmacia online sicilia
emortrofine crema: Farmacia Subito – punture pappataci gentalyn beta
pommade antibiotique sans ordonnance bouton: Pharmacie Express – pilule contraceptive en pharmacie sans ordonnance
comprar viagra en farmacia online: Confia Pharma – se puede comprar varidasa sin receta
farmacia online sicilia: vicks flu tripla azione prezzo – endodien prezzo
peut on acheter de l ibuprofГЁne sans ordonnance [url=http://pharmacieexpress.com/#]caudalie rose[/url] le sildГ©nafil
pharmacie en ligne medicament sans ordonnance: Pharmacie Express – quel mГ©dicament pour infection urinaire sans ordonnance
pharmacie en ligne pas cher: pharmacie en ligne pas cher – pharmacie en ligne france livraison internationale
Viagra sans ordonnance 24h [url=http://viasansordonnance.com/#]Acheter du Viagra sans ordonnance[/url] acheter Viagra sans ordonnance
kamagra en ligne: pharmacie en ligne – kamagra 100mg prix
acheter Cialis sans ordonnance [url=https://ciasansordonnance.com/#]commander Cialis en ligne sans prescription[/url] cialis prix
commander sans consultation medicale: Medicaments en ligne livres en 24h – Achat mГ©dicament en ligne fiable
cialis prix [url=https://ciasansordonnance.shop/#]acheter Cialis sans ordonnance[/url] pharmacie en ligne livraison europe
http://kampascher.com/# achat kamagra
acheter Kamagra sans ordonnance: acheter kamagra site fiable – livraison discrete Kamagra
cialis prix [url=http://ciasansordonnance.com/#]acheter Cialis sans ordonnance[/url] Acheter Cialis
Prix du Viagra 100mg en France: Viagra sans ordonnance 24h – Viagra generique en pharmacie
pharmacie en ligne france fiable [url=http://pharmsansordonnance.com/#]pharmacie en ligne pas cher[/url] pharmacie en ligne france pas cher
traitement ED discret en ligne: cialis generique – Cialis sans ordonnance 24h
https://pharmsansordonnance.shop/# pharmacie en ligne france livraison internationale
pharmacie en ligne [url=https://pharmsansordonnance.com/#]acheter medicaments sans ordonnance[/url] п»їpharmacie en ligne france
commander Kamagra en ligne: kamagra 100mg prix – Kamagra oral jelly pas cher
pharmacies en ligne certifiГ©es [url=https://ciasansordonnance.shop/#]Acheter Cialis 20 mg pas cher[/url] vente de mГ©dicament en ligne
livraison discrete Kamagra: kamagra oral jelly – pharmacie en ligne pas cher
Cialis generique sans ordonnance [url=https://ciasansordonnance.com/#]Cialis generique sans ordonnance[/url] Cialis sans ordonnance 24h
Acheter Cialis 20 mg pas cher: acheter Cialis sans ordonnance – acheter Cialis sans ordonnance
https://kampascher.com/# kamagra gel
kamagra 100mg prix: achat kamagra – kamagra en ligne
kamagra pas cher [url=https://kampascher.com/#]pharmacie en ligne pas cher[/url] kamagra en ligne
Cialis generique sans ordonnance: Cialis sans ordonnance 24h – Acheter Cialis 20 mg pas cher
kamagra oral jelly [url=http://kampascher.com/#]kamagra en ligne[/url] acheter Kamagra sans ordonnance
traitement ED discret en ligne: Cialis pas cher livraison rapide – acheter Cialis sans ordonnance
kamagra pas cher: commander Kamagra en ligne – kamagra 100mg prix
https://kampascher.shop/# pharmacie en ligne fiable
cialis generique [url=http://ciasansordonnance.com/#]Cialis generique sans ordonnance[/url] Acheter Cialis 20 mg pas cher
livraison discrete Kamagra: kamagra 100mg prix – achat kamagra
acheter Cialis sans ordonnance: Cialis sans ordonnance 24h – Cialis generique sans ordonnance
kamagra 100mg prix: Kamagra oral jelly pas cher – kamagra en ligne
kamagra en ligne: kamagra livraison 24h – acheter Kamagra sans ordonnance
kamagra en ligne [url=https://kampascher.com/#]achat kamagra[/url] kamagra livraison 24h
acheter kamagra site fiable: kamagra 100mg prix – kamagra pas cher
https://kampascher.shop/# commander Kamagra en ligne
Meilleur Viagra sans ordonnance 24h: Viagra sans ordonnance 24h – Viagra generique en pharmacie
Viagra generique en pharmacie [url=https://viasansordonnance.com/#]Acheter du Viagra sans ordonnance[/url] commander Viagra discretement
Medicaments en ligne livres en 24h: pharmacie en ligne fiable – acheter mГ©dicament en ligne sans ordonnance
commander Kamagra en ligne: kamagra gel – kamagra 100mg prix
Cialis sans ordonnance 24h [url=https://ciasansordonnance.com/#]cialis sans ordonnance[/url] cialis generique
commander Viagra discretement: commander Viagra discretement – Viagra sans ordonnance 24h
Acheter Cialis: Cialis pas cher livraison rapide – acheter Cialis sans ordonnance
pharmacie en ligne sans ordonnance: Acheter Cialis 20 mg pas cher – cialis generique
commander sans consultation medicale: pharmacie en ligne sans prescription – pharmacies en ligne certifiГ©es
viagra sans ordonnance [url=https://viasansordonnance.com/#]Viagra sans ordonnance 24h[/url] SildГ©nafil Teva 100 mg acheter
cialis generique: Acheter Cialis – cialis prix
Meilleur Viagra sans ordonnance 24h: Viagra homme prix en pharmacie sans ordonnance – Meilleur Viagra sans ordonnance 24h
livraison rapide Viagra en France: viagra en ligne – prix bas Viagra generique
Medicaments en ligne livres en 24h [url=http://pharmsansordonnance.com/#]pharmacie en ligne sans ordonnance[/url] Pharmacie en ligne livraison Europe
pharmacie en ligne sans ordonnance: pharmacie internet fiable France – Pharmacie en ligne livraison Europe
Viagra pas cher inde: acheter Viagra sans ordonnance – Viagra generique en pharmacie
kamagra pas cher [url=http://kampascher.com/#]kamagra gel[/url] kamagra en ligne
kamagra livraison 24h: commander Kamagra en ligne – kamagra gel
acheter Cialis sans ordonnance: acheter Cialis sans ordonnance – Acheter Cialis 20 mg pas cher
livraison rapide Viagra en France: viagra en ligne – Acheter du Viagra sans ordonnance
Pharmacie Internationale en ligne [url=https://ciasansordonnance.shop/#]Pharmacie Internationale en ligne[/url] cialis prix
livraison discrète Kamagra: acheter kamagra site fiable – pharmacie en ligne pas cher
Cialis generique sans ordonnance: cialis prix – pharmacie en ligne
commander Kamagra en ligne: livraison discrete Kamagra – acheter kamagra site fiable
Meilleur Viagra sans ordonnance 24h: acheter Viagra sans ordonnance – acheter Viagra sans ordonnance
kamagra livraison 24h [url=https://kampascher.shop/#]kamagra gel[/url] acheter Kamagra sans ordonnance
commander Cialis en ligne sans prescription: cialis generique – commander Cialis en ligne sans prescription
Acheter Cialis 20 mg pas cher: cialis generique – cialis sans ordonnance
acheter Viagra sans ordonnance: Acheter du Viagra sans ordonnance – Viagra générique en pharmacie
pharmacie en ligne [url=http://pharmsansordonnance.com/#]pharmacie en ligne sans prescription[/url] acheter mГ©dicament en ligne sans ordonnance
commander Cialis en ligne sans prescription: traitement ED discret en ligne – cialis sans ordonnance
kamagra pas cher: commander Kamagra en ligne – kamagra 100mg prix
acheter Viagra sans ordonnance: livraison rapide Viagra en France – Viagra generique en pharmacie
Cialis sans ordonnance 24h [url=http://ciasansordonnance.com/#]Cialis sans ordonnance 24h[/url] acheter Cialis sans ordonnance
pharmacie en ligne sans ordonnance: Medicaments en ligne livres en 24h – vente de mГ©dicament en ligne
Acheter Cialis: Acheter Cialis 20 mg pas cher – acheter Cialis sans ordonnance
traitement ED discret en ligne: Cialis generique sans ordonnance – cialis prix
Viagra generique en pharmacie [url=https://viasansordonnance.com/#]Acheter du Viagra sans ordonnance[/url] acheter Viagra sans ordonnance
Pharmacie en ligne livraison Europe: cialis prix – Cialis pas cher livraison rapide
prix bas Viagra générique: Meilleur Viagra sans ordonnance 24h – Acheter du Viagra sans ordonnance
cialis generique: Cialis generique sans ordonnance – Acheter Cialis 20 mg pas cher
acheter Cialis sans ordonnance [url=https://ciasansordonnance.com/#]cialis sans ordonnance[/url] Acheter Cialis
pharmacie internet fiable France: Medicaments en ligne livres en 24h – pharmacie en ligne sans ordonnance
Viagra générique en pharmacie: viagra sans ordonnance – livraison rapide Viagra en France
buy antibiotics for uti: buy antibiotics online – buy antibiotics
buy antibiotics over the counter [url=https://biotpharm.shop/#]BiotPharm[/url] buy antibiotics from canada
Ero Pharm Fast: ed medications online – Ero Pharm Fast
Pharm Au 24 [url=https://pharmau24.shop/#]PharmAu24[/url] Buy medicine online Australia
Ero Pharm Fast: cheap ed medication – Ero Pharm Fast
cheapest antibiotics [url=https://biotpharm.com/#]Biot Pharm[/url] get antibiotics quickly
buy antibiotics for uti: buy antibiotics online – antibiotic without presription
buy antibiotics from india [url=https://biotpharm.shop/#]buy antibiotics online[/url] buy antibiotics for uti
Online medication store Australia: Pharm Au24 – Medications online Australia
online pharmacy australia [url=http://pharmau24.com/#]Pharm Au24[/url] Licensed online pharmacy AU
get ed meds online: Ero Pharm Fast – Ero Pharm Fast
Licensed online pharmacy AU [url=https://pharmau24.shop/#]Buy medicine online Australia[/url] Discount pharmacy Australia
Ero Pharm Fast: buying ed pills online – Ero Pharm Fast
get antibiotics quickly [url=http://biotpharm.com/#]BiotPharm[/url] best online doctor for antibiotics
erectile dysfunction pills online: Ero Pharm Fast – Ero Pharm Fast
get antibiotics quickly: Over the counter antibiotics pills – get antibiotics quickly
ed pills for sale: online ed drugs – how to get ed meds online
ed meds on line: Ero Pharm Fast – Ero Pharm Fast
Licensed online pharmacy AU: Licensed online pharmacy AU – Discount pharmacy Australia
cheap ed meds online: Ero Pharm Fast – cheapest online ed meds
buy antibiotics over the counter: buy antibiotics online uk – buy antibiotics
buy antibiotics online: Biot Pharm – Over the counter antibiotics for infection
cheapest online ed treatment: ed drugs online – Ero Pharm Fast
Discount pharmacy Australia: Online medication store Australia – Pharm Au 24
boner pills online: erectile dysfunction pills online – what is the cheapest ed medication
Discount pharmacy Australia [url=https://pharmau24.com/#]Online medication store Australia[/url] Licensed online pharmacy AU
cheapest online ed meds: Ero Pharm Fast – Ero Pharm Fast
http://biotpharm.com/# buy antibiotics from canada
cheapest online ed meds: online ed drugs – Ero Pharm Fast
Ero Pharm Fast: order ed meds online – Ero Pharm Fast
cheapest antibiotics: buy antibiotics online uk – buy antibiotics over the counter
Ero Pharm Fast: Ero Pharm Fast – Ero Pharm Fast
https://eropharmfast.com/# Ero Pharm Fast
Over the counter antibiotics for infection: buy antibiotics online uk – buy antibiotics
where to get ed pills: Ero Pharm Fast – Ero Pharm Fast
Over the counter antibiotics for infection: Biot Pharm – buy antibiotics from india
https://tadalaccess.com/# tadalafil tablets 40 mg
price comparison tadalafil: Tadal Access – cialis 5mg price cvs
https://tadalaccess.com/# cialis for prostate
canadian pharmacy tadalafil 20mg: brand cialis with prescription – cialis patent expiration
cialis amazon: does cialis shrink the prostate – best time to take cialis
https://tadalaccess.com/# buying cialis without prescription
peptide tadalafil reddit: walmart cialis price – free samples of cialis
https://tadalaccess.com/# cialis coupon free trial
https://tadalaccess.com/# sildenafil vs tadalafil which is better
difference between cialis and tadalafil: Tadal Access – tadalafil long term usage
https://tadalaccess.com/# cialis prostate
https://tadalaccess.com/# ordering tadalafil online
buy cialis in las vegas: Tadal Access – cialis and melanoma
cialis no prescription overnight delivery: cialis strength – cialis 20 mg best price
https://tadalaccess.com/# cialis walmart
cialis daily review: Tadal Access – best price on cialis
where can i buy cialis on line [url=https://tadalaccess.com/#]TadalAccess[/url] cialis daily
cialis australia online shopping: cialis online without a prescription – pharmacy 365 cialis
https://tadalaccess.com/# buy cialis 20 mg online
what is cialis taken for: Tadal Access – buy cialis online overnight shipping
cialis package insert: cialis tadalafil 20mg kaufen – cialis mit paypal bezahlen
https://tadalaccess.com/# buy cialis without a prescription
sildenafil and tadalafil [url=https://tadalaccess.com/#]TadalAccess[/url] cialis from canada to usa
buy cialis/canada: cialis for blood pressure – cialis 100mg from china
active ingredient in cialis: tadalafil eli lilly – buying cialis online safe
https://tadalaccess.com/# cialis tablets for sell
cialis soft tabs canadian pharmacy: difference between cialis and tadalafil – buy generic cialis 5mg
what is the normal dose of cialis: can you purchase tadalafil in the us – buy cialis in las vegas
https://tadalaccess.com/# achats produit tadalafil pour femme en ligne
cialis with dapoxetine 60mg: best place to buy liquid tadalafil – oryginal cialis
cialis information: buy tadalafil reddit – canada drugs cialis
were can i buy cialis: how to take liquid tadalafil – generic cialis super active tadalafil 20mg
https://tadalaccess.com/# can you purchase tadalafil in the us
best price for cialis: Tadal Access – when does the cialis patent expire
cheaper alternative to cialis: super cialis – buy tadalafil cheap online
https://tadalaccess.com/# us pharmacy cialis
best place to get cialis without pesricption: TadalAccess – cialis sample
cialis company: Tadal Access – cialis using paypal in australia
https://tadalaccess.com/# cialis payment with paypal
buying cialis online usa: TadalAccess – cialis advertisement
cialis patient assistance: e20 pill cialis – how much is cialis without insurance
https://tadalaccess.com/# cialis for daily use reviews
teva generic cialis: Tadal Access – cialis online canada
is tadalafil as effective as cialis: cialis prices in mexico – cialis store in philippines
https://tadalaccess.com/# when is generic cialis available
online cialis no prescription: Tadal Access – cialis prescription cost
cialis payment with paypal: TadalAccess – cialis not working first time
https://tadalaccess.com/# cheap tadalafil 10mg
cialis vs sildenafil: TadalAccess – cialis with out a prescription
cialis manufacturer: buy cialis 20mg – cialis sample
https://tadalaccess.com/# cialis pricing
overnight cialis delivery usa: how long does tadalafil take to work – order generic cialis online
cialis precio: TadalAccess – generic tadalafil 40 mg
https://tadalaccess.com/# buy cialis usa
nebenwirkungen tadalafil: tadalafil tablets erectafil 20 – where to buy generic cialis
tadalafil online canadian pharmacy: Tadal Access – what is cialis used for
https://tadalaccess.com/# cialis purchase
price of cialis at walmart: Tadal Access – buy cialis usa
https://tadalaccess.com/# cialis price
san antonio cialis doctor: Tadal Access – generic cialis tadalafil 20mg reviews
cialis professional ingredients: cheap cialis pills – cialis dapoxetine australia
https://tadalaccess.com/# is generic tadalafil as good as cialis
when should i take cialis: TadalAccess – cialis daily vs regular cialis
cialis brand no prescription 365: canadian pharmacy online cialis – best price on cialis 20mg
https://tadalaccess.com/# tadalafil best price 20 mg
wallmart cialis: what to do when cialis stops working – cialis para que sirve
cialis las vegas: cialis price walgreens – cialis generic best price that accepts mastercard
https://tadalaccess.com/# cialis and blood pressure
cialis drug interactions: cialis free samples – most recommended online pharmacies cialis
cialis and alcohol: tadalafil price insurance – cialis coupon rite aid
https://tadalaccess.com/# cialis 80 mg dosage
cialis 20 milligram: cialis one a day – does medicare cover cialis for bph
cialis dosage 40 mg: Tadal Access – does cialis really work
https://tadalaccess.com/# does cialis really work
best research tadalafil 2017: cheapest cialis online – cialis dapoxetine australia
cialis review: TadalAccess – can you drink wine or liquor if you took in tadalafil
https://tadalaccess.com/# tadalafil generic cialis 20mg
cheap cialis with dapoxetine: generic cialis vs brand cialis reviews – cheap cialis
cialis before and after: cialis for sale brand – cialis indien bezahlung mit paypal
https://tadalaccess.com/# cialis alcohol
vardenafil tadalafil sildenafil: TadalAccess – where can i buy cialis
buy cialis no prescription overnight: what is cialis used for – what is the difference between cialis and tadalafil
https://tadalaccess.com/# cialis vs flomax
cialis dosage side effects: cialis website – tadalafil oral jelly
cialis medicare: Tadal Access – combitic global caplet pvt ltd tadalafil
https://tadalaccess.com/# mint pharmaceuticals tadalafil
can tadalafil cure erectile dysfunction: Tadal Access – best price on generic tadalafil
https://tadalaccess.com/# can cialis cause high blood pressure
purchase generic cialis: TadalAccess – cialis online without perscription
cialis tadalafil 10 mg: cialis free trial – what doe cialis look like
https://tadalaccess.com/# cialis 20 mg coupon
where can i buy cialis online in australia: Tadal Access – overnight cialis delivery usa
cialis daily review: best price on generic tadalafil – cialis from india online pharmacy
https://tadalaccess.com/# cheap cialis dapoxitine cheap online
cialis recommended dosage: cialis price per pill – cialis manufacturer coupon
canadian cialis 5mg: TadalAccess – cialis mexico
https://tadalaccess.com/# cialis manufacturer coupon free trial
order cialis online: cialis 20 mg – cialis dosages
where to buy tadalafil in singapore: TadalAccess – how much does cialis cost with insurance
https://tadalaccess.com/# tadalafil tablets 40 mg
buy cialis in las vegas: Tadal Access – cialis picture
purchase cialis: TadalAccess – how many 5mg cialis can i take at once
https://tadalaccess.com/# buy tadalafil powder
canadian cialis no prescription: tadalafil oral jelly – us pharmacy prices for cialis
cialis prices: cialis 5mg daily how long before it works – best price on generic tadalafil
https://tadalaccess.com/# reliable source cialis
buy cheap tadalafil online: Tadal Access – cialis generic for sale
buy liquid cialis online: TadalAccess – buy tadalafil reddit
https://tadalaccess.com/# tadalafil liquid fda approval date
cialis medicine: difference between sildenafil and tadalafil – how long does tadalafil take to work
cialis for sale: TadalAccess – cialis online reviews
https://tadalaccess.com/# cialis 10 mg
cialis price walgreens: Tadal Access – sildalis sildenafil tadalafil
cialis canada pharmacy no prescription required: cialis sales in victoria canada – cialis none prescription
https://tadalaccess.com/# cialis com free sample
does cialis make you last longer in bed: cialis tablets – cialis drug
cialis generic timeline: does cialis lowers blood pressure – prices cialis
prednisone cream: PredniHealth – prednisone for sale in canada
Amo Health Care: amoxicillin 775 mg – Amo Health Care
https://clomhealth.shop/# where to get clomid now
can i get generic clomid prices: Clom Health – how can i get generic clomid without insurance
https://clomhealth.shop/# cheap clomid pill
Amo Health Care: Amo Health Care – Amo Health Care
can i order generic clomid for sale: Clom Health – where can i get cheap clomid without a prescription
http://clomhealth.com/# where to buy generic clomid without prescription
antibiotic amoxicillin: amoxicillin 500mg capsules – Amo Health Care
clomid generic: cheap clomid without dr prescription – where to buy cheap clomid online
order generic clomid pill: cost of generic clomid without dr prescription – where buy cheap clomid without insurance
https://prednihealth.com/# 80 mg prednisone daily
order cheap clomid without dr prescription: can i buy clomid without rx – buy generic clomid
Amo Health Care: amoxicillin price canada – Amo Health Care
prednisone uk over the counter: PredniHealth – PredniHealth
https://amohealthcare.store/# buy amoxicillin 250mg
cost of clomid pill: Clom Health – where to buy clomid without insurance
generic prednisone tablets: prednisone in canada – buy prednisone online australia
Amo Health Care: Amo Health Care – Amo Health Care
https://clomhealth.shop/# can i get cheap clomid without rx
PredniHealth: PredniHealth – mail order prednisone
where to buy clomid without prescription: Clom Health – cheap clomid pill
buying amoxicillin in mexico: Amo Health Care – Amo Health Care
http://prednihealth.com/# PredniHealth
PredniHealth: PredniHealth – prednisone 50 mg coupon
prednisone best price: PredniHealth – PredniHealth
prednisone 40 mg daily: buy prednisone 10mg – PredniHealth
http://clomhealth.com/# can you get clomid tablets
purchase Modafinil without prescription: safe modafinil purchase – buy modafinil online
best price Cialis tablets: FDA approved generic Cialis – cheap Cialis online
best price Cialis tablets: secure checkout ED drugs – Cialis without prescription
https://zipgenericmd.shop/# affordable ED medication
buy generic Cialis online: online Cialis pharmacy – order Cialis online no prescription
generic tadalafil: Cialis without prescription – buy generic Cialis online
http://modafinilmd.store/# Modafinil for sale
buy modafinil online: Modafinil for sale – legal Modafinil purchase
modafinil 2025: legal Modafinil purchase – verified Modafinil vendors
buy generic Cialis online: generic tadalafil – affordable ED medication
https://zipgenericmd.com/# affordable ED medication
Cialis without prescription: secure checkout ED drugs – online Cialis pharmacy
generic sildenafil 100mg: trusted Viagra suppliers – discreet shipping
discreet shipping ED pills: buy generic Cialis online – order Cialis online no prescription
affordable ED medication: buy generic Cialis online – online Cialis pharmacy
discreet shipping: safe online pharmacy – trusted Viagra suppliers
modafinil legality: doctor-reviewed advice – legal Modafinil purchase
http://maxviagramd.com/# generic sildenafil 100mg
purchase Modafinil without prescription: modafinil pharmacy – modafinil 2025
safe modafinil purchase: verified Modafinil vendors – buy modafinil online
modafinil 2025: buy modafinil online – verified Modafinil vendors
http://modafinilmd.store/# safe modafinil purchase
modafinil legality: buy modafinil online – safe modafinil purchase
trusted Viagra suppliers: buy generic Viagra online – discreet shipping
online Cialis pharmacy: affordable ED medication – Cialis without prescription
https://modafinilmd.store/# purchase Modafinil without prescription
cheap Cialis online: online Cialis pharmacy – discreet shipping ED pills
reliable online pharmacy Cialis: reliable online pharmacy Cialis – online Cialis pharmacy
modafinil 2025: buy modafinil online – Modafinil for sale
fast Viagra delivery: order Viagra discreetly – cheap Viagra online
Modafinil for sale: buy modafinil online – modafinil 2025
cheap Viagra online: cheap Viagra online – generic sildenafil 100mg
https://zipgenericmd.com/# FDA approved generic Cialis
same-day Viagra shipping: trusted Viagra suppliers – secure checkout Viagra
best price for Viagra: discreet shipping – best price for Viagra
https://modafinilmd.store/# buy modafinil online
buy generic Cialis online: buy generic Cialis online – best price Cialis tablets
legit Viagra online: Viagra without prescription – best price for Viagra
secure checkout ED drugs: order Cialis online no prescription – affordable ED medication
https://maxviagramd.shop/# order Viagra discreetly
no doctor visit required: cheap Viagra online – no doctor visit required
secure checkout ED drugs [url=https://zipgenericmd.shop/#]secure checkout ED drugs[/url] FDA approved generic Cialis
same-day Viagra shipping: best price for Viagra – legit Viagra online
same-day Viagra shipping: Viagra without prescription – legit Viagra online
https://zipgenericmd.shop/# reliable online pharmacy Cialis
safe modafinil purchase [url=http://modafinilmd.store/#]modafinil 2025[/url] modafinil 2025
buy generic Cialis online: discreet shipping ED pills – order Cialis online no prescription
order Viagra discreetly: same-day Viagra shipping – secure checkout Viagra
http://modafinilmd.store/# modafinil pharmacy
https://pinupaz.top/# pin up casino
вавада официальный сайт: вавада зеркало – vavada casino
pin-up [url=http://pinupaz.top/#]pinup az[/url] pin-up
пин ап казино официальный сайт: пин ап казино официальный сайт – пин ап казино
https://vavadavhod.tech/# vavada вход
pin up: pin up – pin up casino
vavada вход: вавада официальный сайт – вавада официальный сайт
пин ап казино официальный сайт [url=https://pinuprus.pro/#]pin up вход[/url] pin up вход
vavada casino: вавада – вавада официальный сайт
vavada: вавада казино – vavada casino
http://pinupaz.top/# pinup az
pin-up: pin-up casino giris – pin-up casino giris
vavada вход: vavada casino – вавада официальный сайт
http://pinuprus.pro/# пин ап зеркало
vavada вход [url=https://vavadavhod.tech/#]вавада зеркало[/url] vavada вход
pin-up: pinup az – pin-up
https://pinupaz.top/# pinup az
vavada casino [url=http://vavadavhod.tech/#]vavada casino[/url] вавада
pin-up: pin-up casino giris – pin up azerbaycan
http://pinupaz.top/# pin-up casino giris
vavada [url=https://vavadavhod.tech/#]vavada casino[/url] vavada casino
pin up вход: пин ап зеркало – пин ап казино официальный сайт
https://vavadavhod.tech/# vavada вход
pinup az: pin up – pin up casino
пин ап казино [url=https://pinuprus.pro/#]пин ап зеркало[/url] pin up вход
http://vavadavhod.tech/# vavada casino
pin-up casino giris [url=http://pinupaz.top/#]pin up azerbaycan[/url] pin up
https://pinuprus.pro/# пинап казино
пин ап казино официальный сайт: пин ап вход – пин ап казино
vavada: вавада казино – вавада зеркало
вавада [url=https://vavadavhod.tech/#]vavada[/url] вавада
http://pinupaz.top/# pin up
вавада зеркало: вавада казино – vavada
pin-up [url=https://pinupaz.top/#]pin up azerbaycan[/url] pin-up casino giris
http://pinupaz.top/# pin up azerbaycan
vavada: вавада – вавада зеркало
pin-up: pin up azerbaycan – pinup az
https://vavadavhod.tech/# вавада казино
пин ап зеркало: пинап казино – пинап казино
vavada вход: vavada – вавада
пинап казино [url=http://pinuprus.pro/#]пин ап вход[/url] пин ап зеркало
pin up azerbaycan: pin-up – pin up az
http://pinuprus.pro/# пинап казино
пин ап казино официальный сайт: пин ап казино – пин ап вход
vavada: вавада официальный сайт – vavada
pin up [url=http://pinupaz.top/#]pin up azerbaycan[/url] pin up
пин ап зеркало: pin up вход – пин ап зеркало
пин ап казино: пинап казино – pin up вход
vavada вход: вавада зеркало – vavada вход
vavada casino [url=http://vavadavhod.tech/#]вавада казино[/url] vavada
pinup az: pin up azerbaycan – pin up casino
https://vavadavhod.tech/# вавада официальный сайт
пин ап казино официальный сайт [url=https://pinuprus.pro/#]пин ап казино[/url] пинап казино
пин ап казино официальный сайт: пин ап казино официальный сайт – pin up вход
пин ап казино официальный сайт: пин ап зеркало – pin up вход
https://pinuprus.pro/# пин ап вход
пин ап казино [url=https://pinuprus.pro/#]пин ап казино официальный сайт[/url] пин ап казино официальный сайт
пин ап зеркало: пин ап вход – pin up вход
https://vavadavhod.tech/# вавада официальный сайт
pin up casino: pinup az – pin-up casino giris
pin up [url=https://pinupaz.top/#]pinup az[/url] pin-up casino giris
pin-up: pin up azerbaycan – pin up azerbaycan
http://pinupaz.top/# pin-up casino giris
пин ап вход: пинап казино – пинап казино
вавада казино [url=https://vavadavhod.tech/#]вавада[/url] вавада казино
https://pinupaz.top/# pin up azerbaycan
pin up: pin-up casino giris – pin up azerbaycan
pin-up casino giris [url=http://pinupaz.top/#]pin up casino[/url] pin up
https://pinuprus.pro/# пинап казино
pin up azerbaycan: pin up – pin up casino
вавада официальный сайт: вавада – вавада
пин ап казино [url=http://pinuprus.pro/#]пин ап казино официальный сайт[/url] пин ап казино официальный сайт
https://pinuprus.pro/# pin up вход
pin-up: pin up azerbaycan – pin-up casino giris
vavada: вавада – vavada вход
http://vavadavhod.tech/# vavada
pin-up [url=http://pinupaz.top/#]pin-up casino giris[/url] pin up
pin up az: pinup az – pinup az
пин ап вход: пинап казино – пин ап казино официальный сайт
http://pinuprus.pro/# пин ап казино официальный сайт
pin up azerbaycan [url=http://pinupaz.top/#]pinup az[/url] pin-up casino giris
пин ап вход: пин ап вход – пин ап вход
pin up: pin up casino – pin up
vavada вход [url=http://vavadavhod.tech/#]vavada[/url] вавада зеркало
pin up azerbaycan: pin-up – pin-up casino giris
https://pinupaz.top/# pin up azerbaycan
пин ап казино официальный сайт: пин ап казино официальный сайт – пин ап казино официальный сайт
pin up azerbaycan [url=http://pinupaz.top/#]pin up[/url] pin up az
пин ап казино: пин ап казино – пин ап казино
pin up casino: pin-up – pin up az
пин ап казино официальный сайт: пин ап казино – пин ап казино официальный сайт
вавада казино [url=https://vavadavhod.tech/#]вавада зеркало[/url] vavada casino
pin up: pin up az – pin up
пин ап зеркало: пин ап казино – pin up вход
пинап казино: пинап казино – pin up вход
вавада официальный сайт: вавада – vavada вход
вавада официальный сайт: вавада казино – vavada
http://pinuprus.pro/# пин ап казино
pin up az: pin up casino – pin up azerbaycan
пин ап вход [url=http://pinuprus.pro/#]пин ап казино[/url] пин ап вход
vavada: vavada вход – vavada casino
https://pinupaz.top/# pin-up
pin up az: pin up – pin up az
vavada: vavada – вавада казино
вавада официальный сайт [url=https://vavadavhod.tech/#]vavada casino[/url] вавада зеркало
http://pinupaz.top/# pinup az
пин ап вход: пин ап казино – пин ап казино официальный сайт
pin-up: pin up – pin-up
pin-up casino giris [url=http://pinupaz.top/#]pin-up casino giris[/url] pinup az
pin up вход: пинап казино – пинап казино
http://pinupaz.top/# pin up casino
пинап казино: pin up вход – пин ап вход
вавада официальный сайт: вавада – vavada casino
pin-up: pinup az – pin up azerbaycan
http://pinuprus.pro/# пин ап зеркало
pin up [url=http://pinupaz.top/#]pin-up[/url] pin up casino
пин ап вход: пин ап казино – пин ап казино
вавада казино: вавада – вавада казино
pin-up casino giris: pin-up casino giris – pin up casino
vavada casino [url=http://vavadavhod.tech/#]вавада казино[/url] вавада казино
вавада зеркало: vavada casino – vavada вход
пин ап зеркало: пин ап казино официальный сайт – пин ап вход
pin up az: pin up – pin-up casino giris
vavada casino [url=http://vavadavhod.tech/#]вавада официальный сайт[/url] vavada
вавада казино: vavada вход – вавада
pin up вход: пин ап вход – пин ап казино
https://vavadavhod.tech/# вавада официальный сайт
pin up вход: пин ап казино – пин ап зеркало
пин ап казино [url=https://pinuprus.pro/#]пин ап казино[/url] пин ап казино
пинап казино: пин ап зеркало – пин ап вход
https://vavadavhod.tech/# вавада зеркало
pin-up casino giris: pin up – pin up azerbaycan
вавада зеркало: vavada вход – вавада зеркало
http://vavadavhod.tech/# vavada casino
pin-up casino giris: pin up – pin-up casino giris
вавада зеркало [url=https://vavadavhod.tech/#]вавада[/url] vavada
https://pinupaz.top/# pinup az
вавада зеркало: вавада официальный сайт – vavada вход
пин ап вход [url=http://pinuprus.pro/#]пинап казино[/url] пин ап зеркало
canadian pharmacy uk delivery: canada rx pharmacy world – cheapest pharmacy canada
http://rxexpressmexico.com/# mexican mail order pharmacies
mexican online pharmacy: Rx Express Mexico – Rx Express Mexico
Medicine From India [url=http://medicinefromindia.com/#]world pharmacy india[/url] Medicine From India
https://medicinefromindia.shop/# india pharmacy
canadian pharmacy reviews: ordering drugs from canada – ed drugs online from canada
RxExpressMexico: medicine in mexico pharmacies – mexico drug stores pharmacies
indian pharmacy: indian pharmacy online shopping – indian pharmacy online
http://expressrxcanada.com/# canada drugs online
my canadian pharmacy review [url=https://expressrxcanada.shop/#]Buy medicine from Canada[/url] reputable canadian pharmacy
RxExpressMexico: mexican online pharmacy – Rx Express Mexico
indian pharmacy online shopping: Medicine From India – Medicine From India
reputable canadian pharmacy: ExpressRxCanada – canadian online pharmacy
https://medicinefromindia.com/# medicine courier from India to USA
buy prescription drugs from canada cheap [url=https://expressrxcanada.shop/#]Express Rx Canada[/url] online canadian pharmacy
Rx Express Mexico: mexico pharmacies prescription drugs – mexico pharmacy order online
mexico pharmacy order online: RxExpressMexico – mexican rx online
Medicine From India: Medicine From India – indian pharmacy online shopping
https://rxexpressmexico.com/# Rx Express Mexico
mexican rx online: mexico drug stores pharmacies – buying prescription drugs in mexico
indian pharmacy online shopping: MedicineFromIndia – indian pharmacy online
indian pharmacy online [url=https://medicinefromindia.com/#]indian pharmacy online[/url] indian pharmacy
Medicine From India: best online pharmacy india – indian pharmacy online shopping
https://rxexpressmexico.com/# RxExpressMexico
indian pharmacy online: indian pharmacy online shopping – india online pharmacy
is canadian pharmacy legit: Canadian pharmacy shipping to USA – canadian pharmacy in canada
п»їbest mexican online pharmacies [url=https://rxexpressmexico.com/#]mexico pharmacies prescription drugs[/url] mexican online pharmacy
indian pharmacy online shopping: indian pharmacy online shopping – indian pharmacy online
https://medicinefromindia.com/# Medicine From India
Medicine From India: indian pharmacy – Medicine From India
mexican online pharmacies prescription drugs: mexico pharmacies prescription drugs – mexico pharmacies prescription drugs
RxExpressMexico [url=http://rxexpressmexico.com/#]mexican rx online[/url] mexico pharmacy order online
ed meds online canada: Express Rx Canada – canadian 24 hour pharmacy
https://medicinefromindia.shop/# indian pharmacy online shopping
Medicine From India: medicine courier from India to USA – indian pharmacy online shopping
Medicine From India: india online pharmacy – medicine courier from India to USA
canadian pharmacy 24: Buy medicine from Canada – canadian online drugstore
RxExpressMexico [url=https://rxexpressmexico.shop/#]mexico pharmacies prescription drugs[/url] mexico drug stores pharmacies
https://expressrxcanada.shop/# best online canadian pharmacy
canadian world pharmacy: Express Rx Canada – canada rx pharmacy world
mexican online pharmacy: buying from online mexican pharmacy – mexico drug stores pharmacies
http://tadalmed.com/# Acheter Viagra Cialis sans ordonnance
kamagra gel: Kamagra pharmacie en ligne – Achetez vos kamagra medicaments
Acheter Cialis: Acheter Cialis – Cialis en ligne tadalmed.shop
cialis generique [url=https://tadalmed.com/#]Acheter Cialis 20 mg pas cher[/url] Cialis en ligne tadalmed.com
Cialis sans ordonnance 24h: Cialis en ligne – cialis sans ordonnance tadalmed.shop
https://pharmafst.com/# pharmacie en ligne france livraison internationale
pharmacie en ligne sans ordonnance: Pharmacie en ligne France – pharmacie en ligne pharmafst.com
pharmacie en ligne france livraison belgique: pharmacie en ligne sans ordonnance – pharmacie en ligne pas cher pharmafst.com
Pharmacie sans ordonnance: pharmacie en ligne – pharmacie en ligne livraison europe pharmafst.com
http://tadalmed.com/# Tadalafil achat en ligne
kamagra oral jelly: achat kamagra – kamagra gel
pharmacie en ligne france fiable: pharmacie en ligne france pas cher – Pharmacie Internationale en ligne pharmafst.com
https://tadalmed.com/# Acheter Cialis
pharmacie en ligne fiable: Medicaments en ligne livres en 24h – pharmacie en ligne pharmafst.com
https://pharmafst.com/# Pharmacie sans ordonnance
Acheter Cialis 20 mg pas cher: Tadalafil achat en ligne – Cialis sans ordonnance pas cher tadalmed.shop
http://pharmafst.com/# Pharmacie sans ordonnance
Pharmacie en ligne Cialis sans ordonnance: Cialis en ligne – Acheter Viagra Cialis sans ordonnance tadalmed.shop
Cialis generique prix [url=https://tadalmed.com/#]Cialis generique prix[/url] Achat Cialis en ligne fiable tadalmed.com
Acheter Viagra Cialis sans ordonnance: cialis prix – cialis generique tadalmed.shop
https://pharmafst.shop/# pharmacie en ligne pas cher
Pharmacie Internationale en ligne: Medicaments en ligne livres en 24h – pharmacie en ligne fiable pharmafst.com
Acheter Kamagra site fiable: Acheter Kamagra site fiable – Kamagra pharmacie en ligne
pharmacie en ligne france livraison belgique: Pharmacies en ligne certifiees – pharmacie en ligne pharmafst.com
pharmacie en ligne sans ordonnance [url=https://pharmafst.shop/#]pharmacie en ligne sans ordonnance[/url] Pharmacie Internationale en ligne pharmafst.shop
http://tadalmed.com/# Cialis en ligne
achat kamagra: kamagra livraison 24h – kamagra livraison 24h
cialis generique: Cialis sans ordonnance 24h – Pharmacie en ligne Cialis sans ordonnance tadalmed.shop
Cialis sans ordonnance pas cher: Acheter Viagra Cialis sans ordonnance – cialis prix tadalmed.shop
Acheter Cialis 20 mg pas cher: cialis sans ordonnance – Tadalafil 20 mg prix sans ordonnance tadalmed.shop
cialis generique [url=http://tadalmed.com/#]cialis generique[/url] Tadalafil sans ordonnance en ligne tadalmed.com
https://pharmafst.com/# pharmacie en ligne france livraison belgique
pharmacie en ligne france pas cher: Livraison rapide – pharmacie en ligne pas cher pharmafst.com
Achat Cialis en ligne fiable: Acheter Cialis 20 mg pas cher – Pharmacie en ligne Cialis sans ordonnance tadalmed.shop
Pharmacie Internationale en ligne: Meilleure pharmacie en ligne – Pharmacie sans ordonnance pharmafst.com
Achat Cialis en ligne fiable [url=http://tadalmed.com/#]Tadalafil 20 mg prix en pharmacie[/url] Tadalafil sans ordonnance en ligne tadalmed.com
cialis prix: Cialis sans ordonnance pas cher – Acheter Viagra Cialis sans ordonnance tadalmed.shop
achat kamagra: kamagra 100mg prix – kamagra pas cher
pharmacie en ligne france livraison belgique: pharmacie en ligne – pharmacie en ligne france pas cher pharmafst.com
https://pharmafst.shop/# Pharmacie Internationale en ligne
Cialis sans ordonnance 24h [url=https://tadalmed.com/#]Cialis sans ordonnance 24h[/url] Pharmacie en ligne Cialis sans ordonnance tadalmed.com
Tadalafil achat en ligne: Cialis en ligne – cialis generique tadalmed.shop
Acheter Cialis: Cialis sans ordonnance 24h – Cialis sans ordonnance pas cher tadalmed.shop
Achetez vos kamagra medicaments: kamagra gel – achat kamagra
https://pharmafst.shop/# trouver un mГ©dicament en pharmacie
Achat Cialis en ligne fiable: Acheter Cialis – cialis prix tadalmed.shop
kamagra 100mg prix [url=https://kamagraprix.com/#]achat kamagra[/url] Acheter Kamagra site fiable
pharmacie en ligne fiable: Pharmacie en ligne France – pharmacie en ligne france livraison belgique pharmafst.com
Kamagra Oral Jelly pas cher: kamagra en ligne – achat kamagra
cialis sans ordonnance: Cialis en ligne – Cialis sans ordonnance pas cher tadalmed.shop
https://tadalmed.shop/# Pharmacie en ligne Cialis sans ordonnance
Pharmacie Internationale en ligne: Pharmacies en ligne certifiees – pharmacie en ligne fiable pharmafst.com
kamagra gel: kamagra oral jelly – Kamagra Commander maintenant
http://pharmafst.com/# pharmacie en ligne pas cher
kamagra livraison 24h [url=https://kamagraprix.shop/#]kamagra gel[/url] Kamagra pharmacie en ligne
Tadalafil sans ordonnance en ligne: Achat Cialis en ligne fiable – Achat Cialis en ligne fiable tadalmed.shop
Kamagra Oral Jelly pas cher: kamagra en ligne – Kamagra Commander maintenant
https://kamagraprix.com/# kamagra 100mg prix
Kamagra Commander maintenant: kamagra livraison 24h – kamagra en ligne
Achetez vos kamagra medicaments: Achetez vos kamagra medicaments – kamagra livraison 24h