UPDATE 2017: PURCHASE OUR NEW AND IMPROVED, SMALLER MONOGRAM PLANTER HERE.
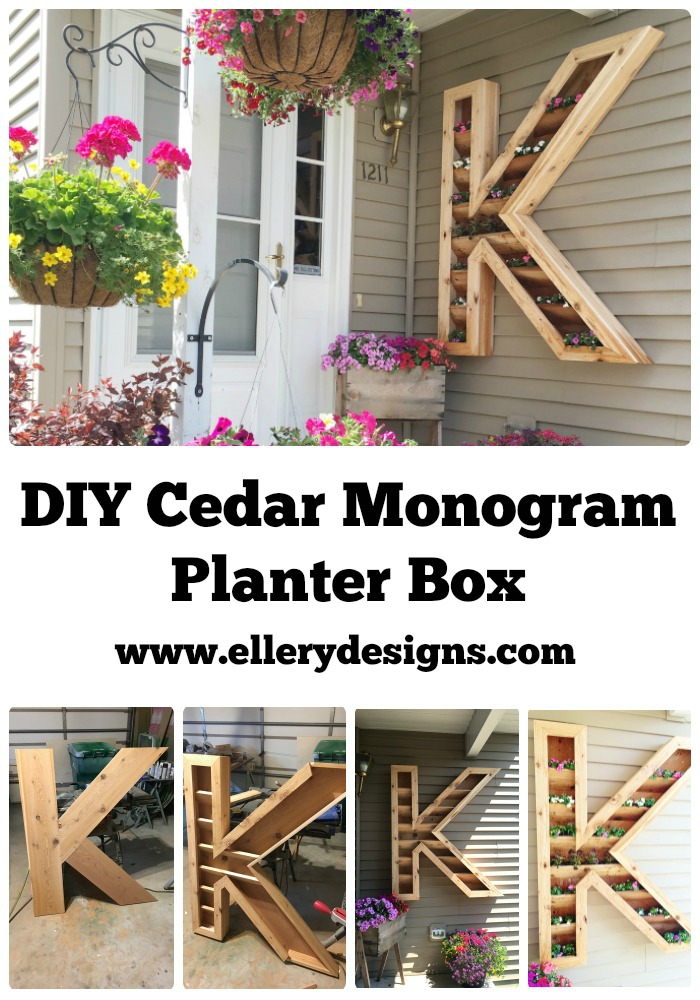
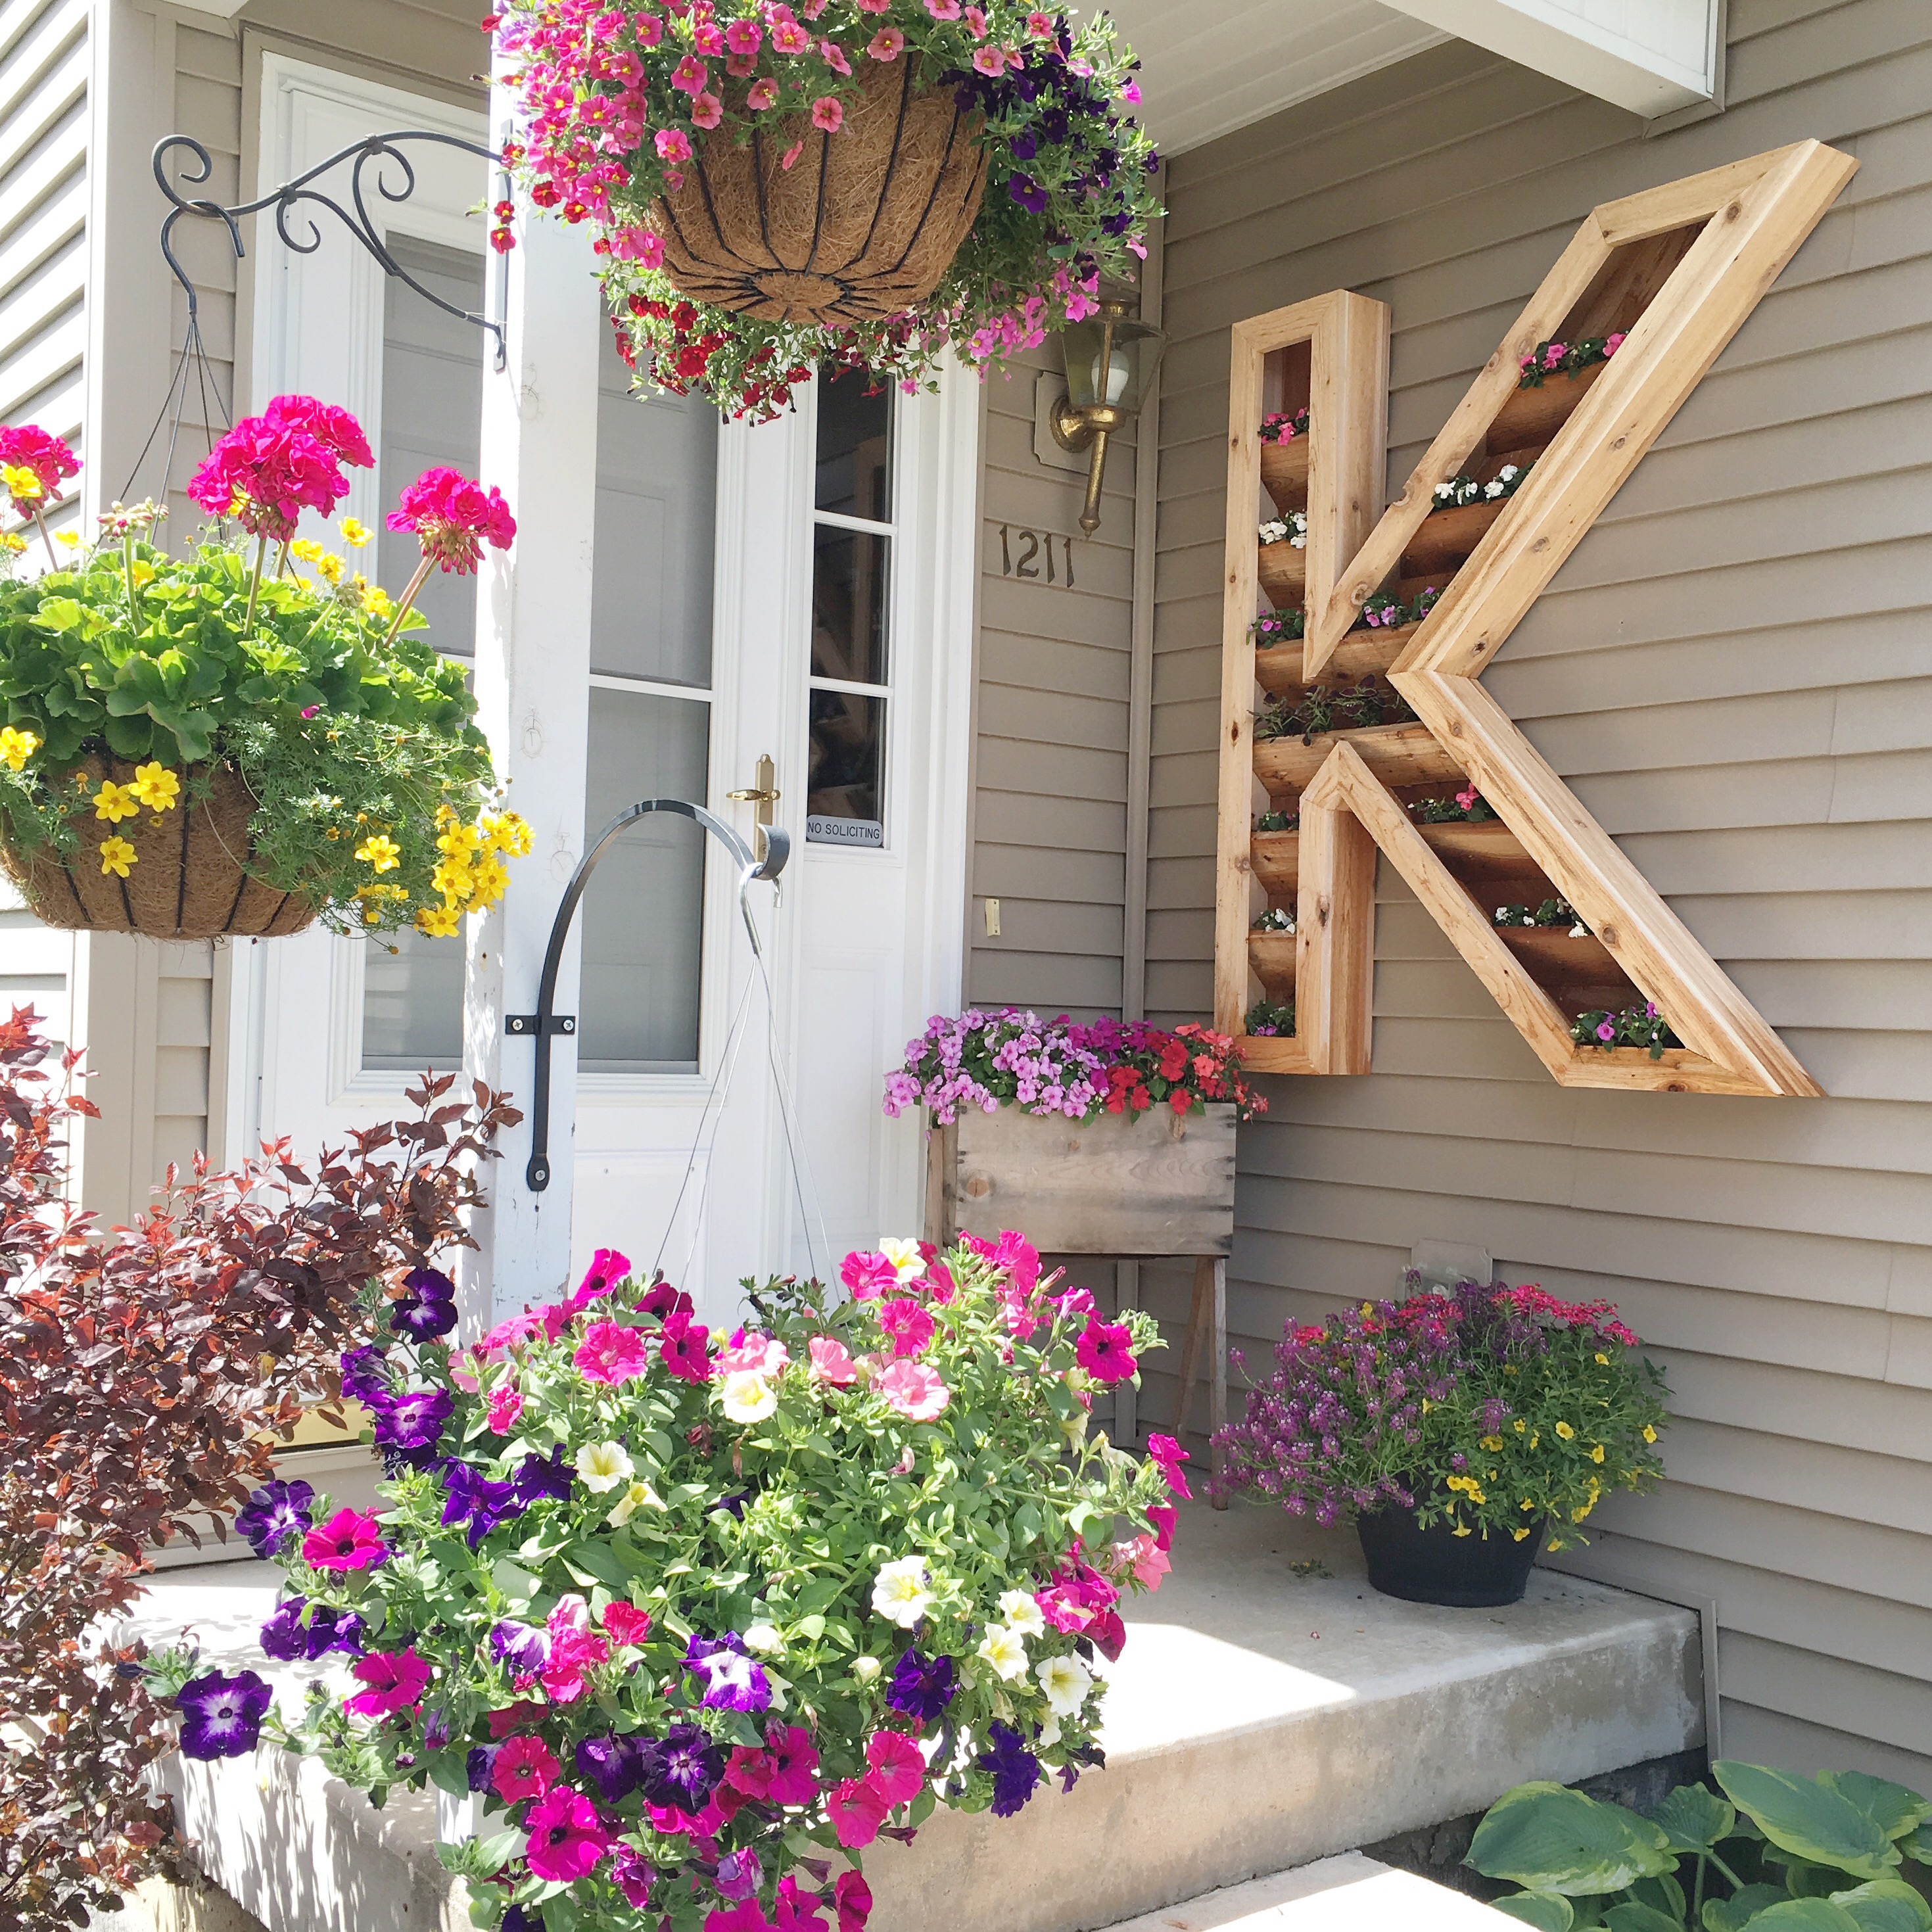
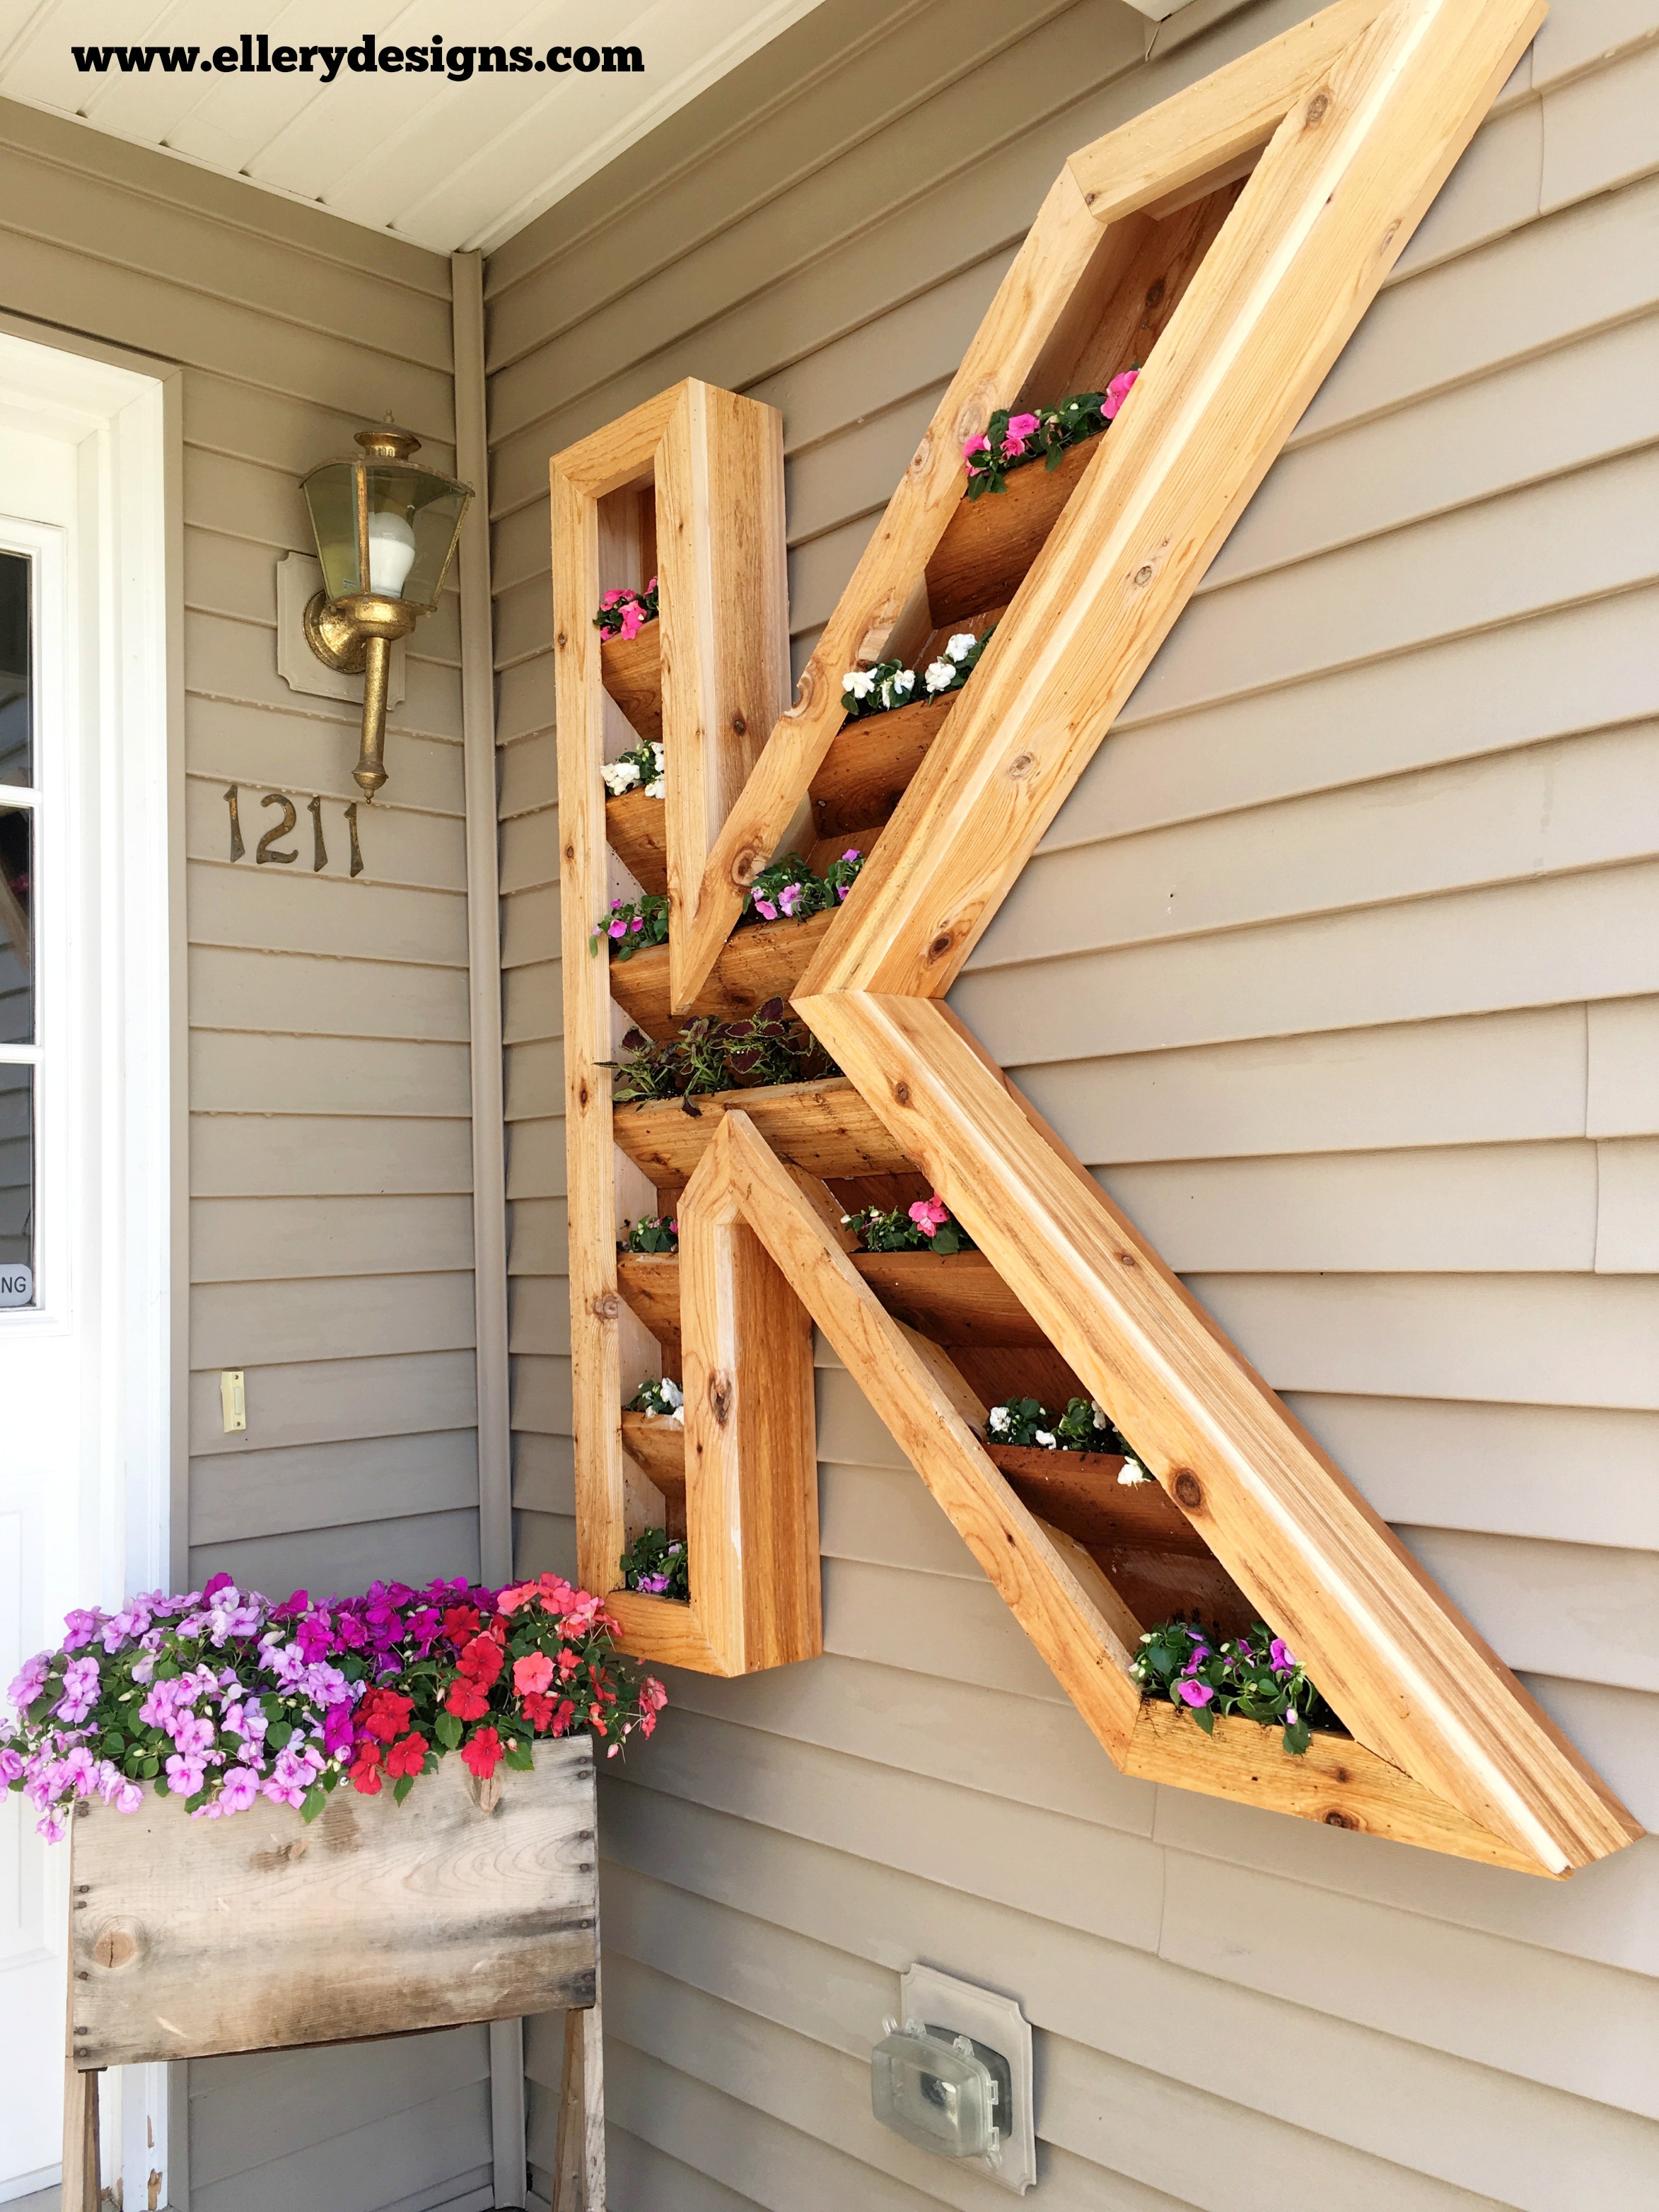
Our DIY Monogram Planter has had such a positive response on Instagram and I’m so excited to share the details with you today. This initial is HUGE! 4 ft x 4.5 ft x 5 inches deep to be exact. My hubby built this and came up with the fantastic idea all on his own – yay for handy hubbies and creative minds! I cannot wait for the blooms to start growing to see this baby fill out! The options are endless – I can’t wait to decorate it with mini pumpkins and fake cobwebs for fall and have some fun things planned for Christmas. We used cedar since it is ideal for exterior projects and has great weather resistance.
Materials:
-Cedar purchased at Menards
- 1×12 cedar for the back of the letter.
- 1×4 cedar for the sides
- 1×3 cedar for the front
- 1×6 cedar for the planter slats
–18 gauge 1 3/4 brad nails (and nail gun)
–Gorilla Wood Glue (Used on all of the joints with the brads)
-Compound Miter Saw
-Flowers (We used impatiens since this is a shaded area)
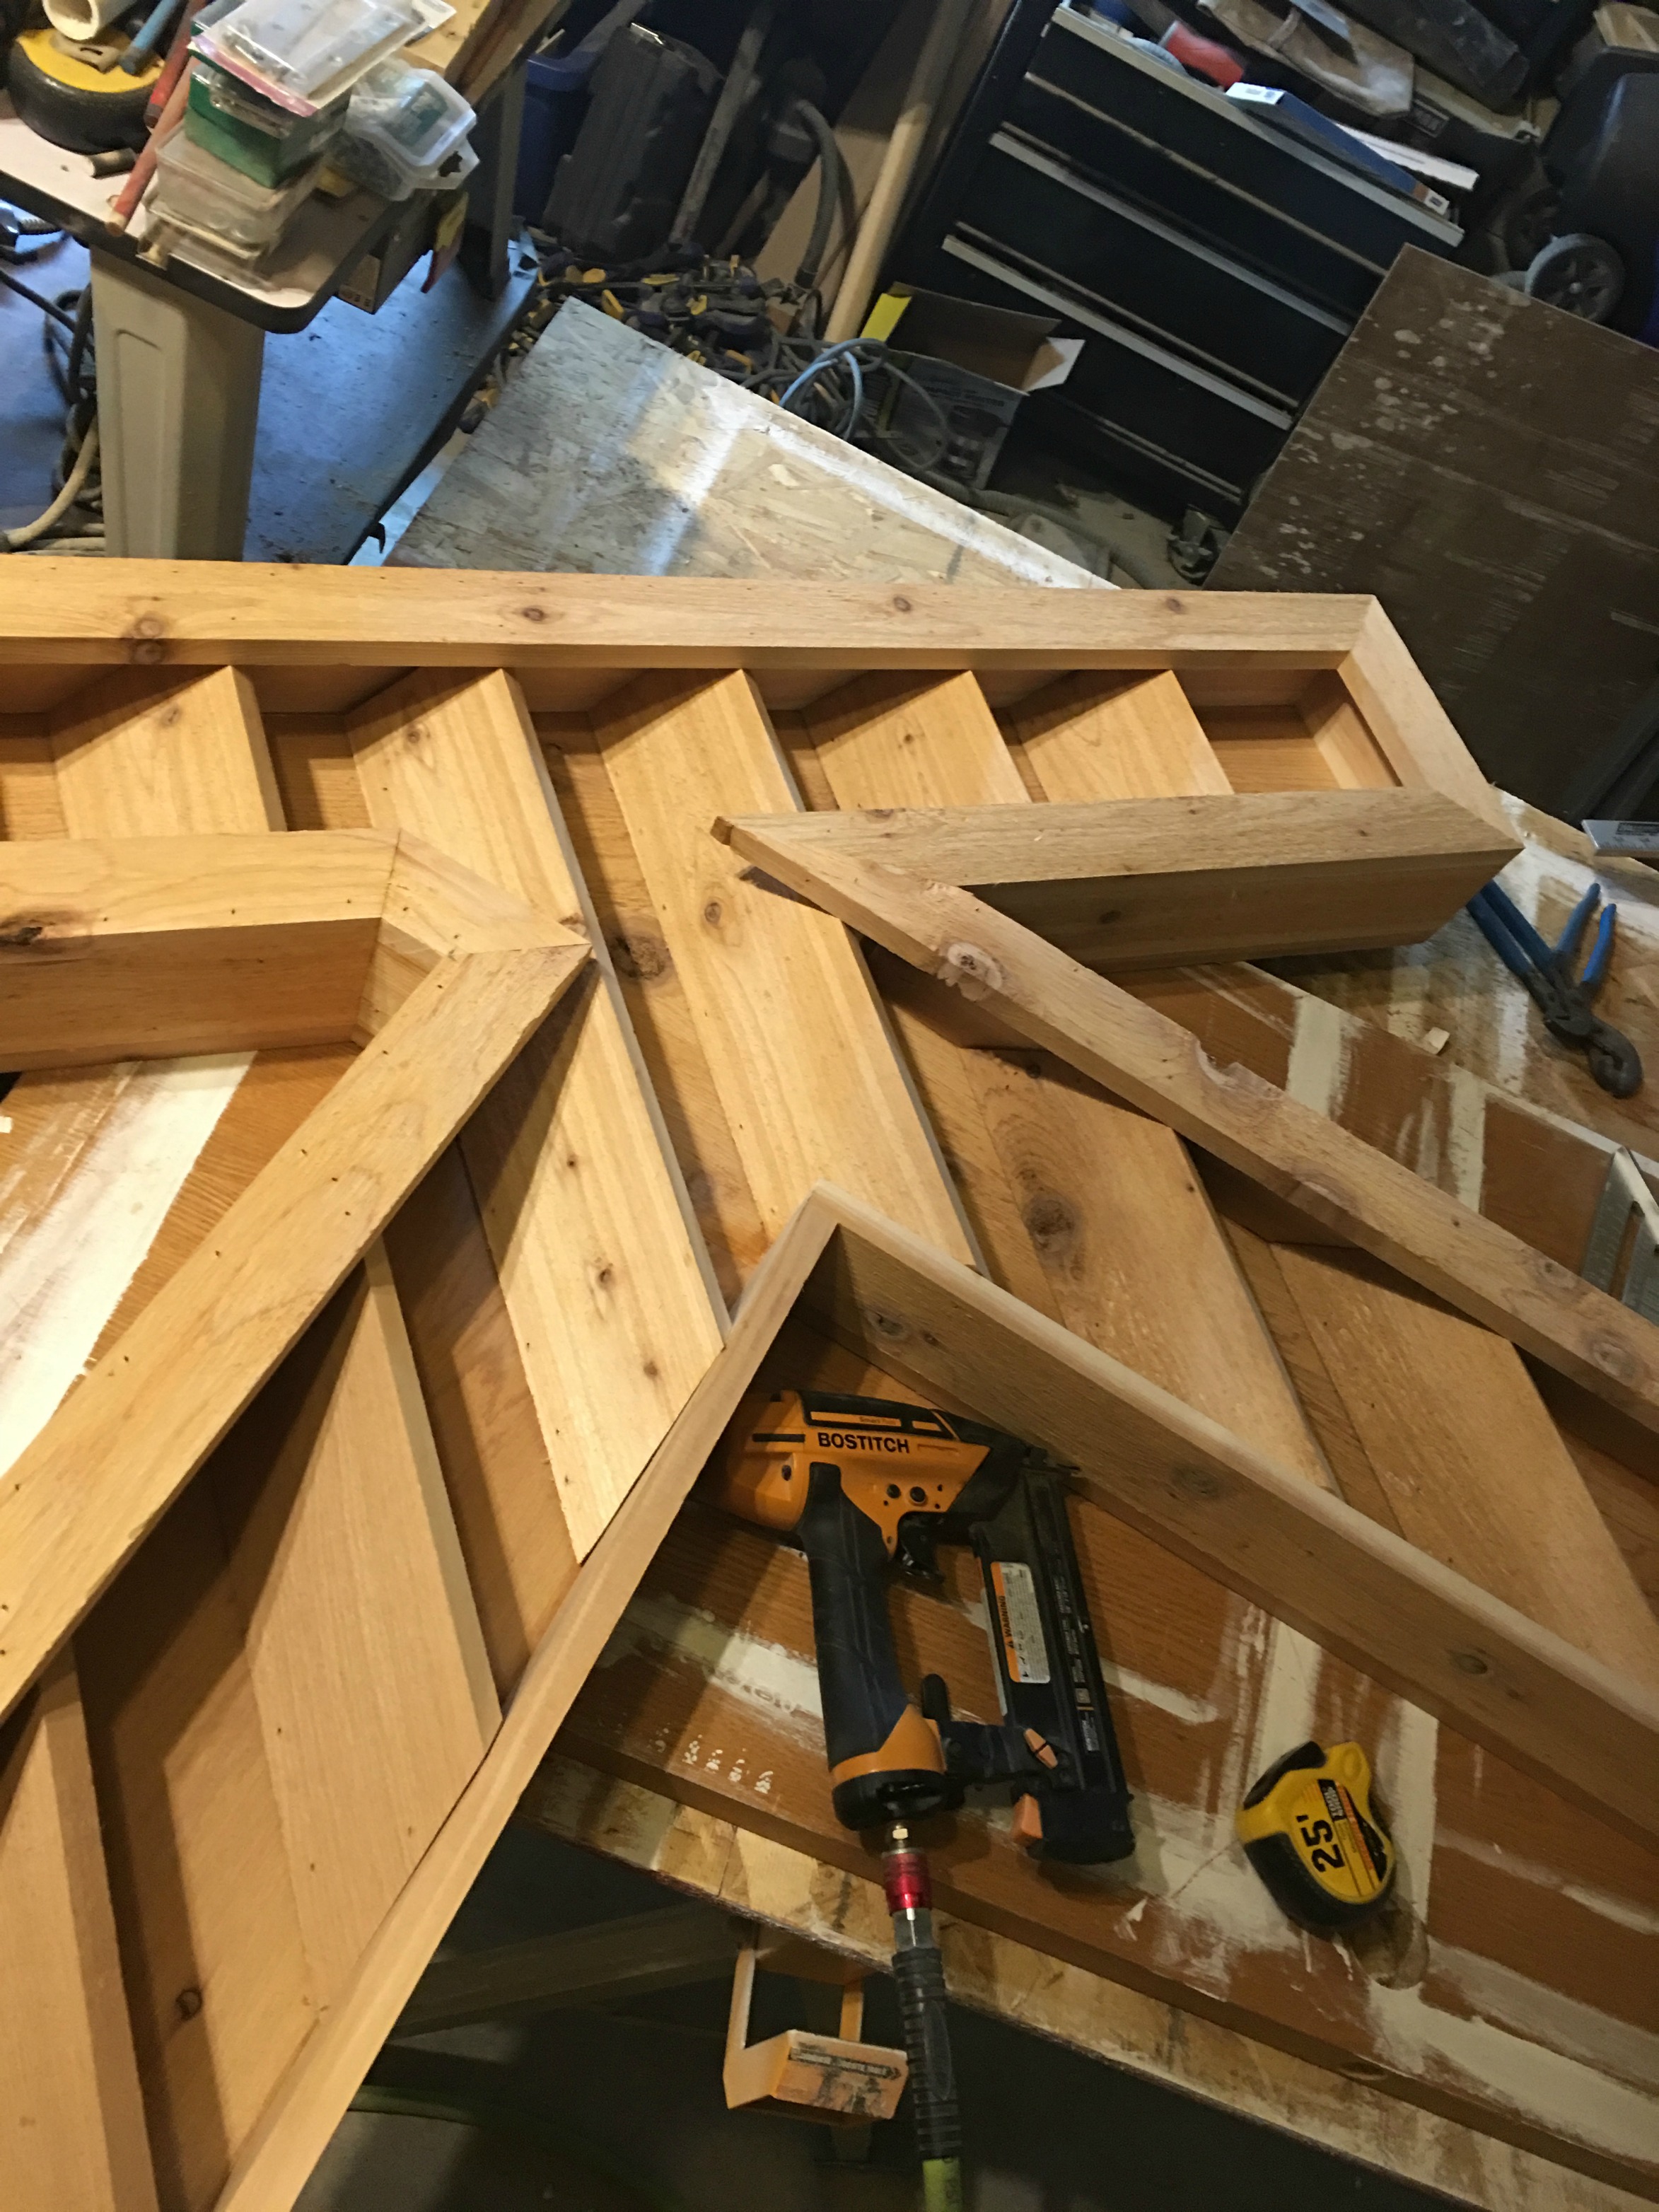
Obviously the materials will vary depending on how large your initial is and what letter you will be building. Like I mentioned earlier, our K is really large so it wasn’t a cheap project. First, he built the base/backside of the K – no, he didn’t trace anything just kind of created it as he went. Some letters will obviously be more intrusive than others.
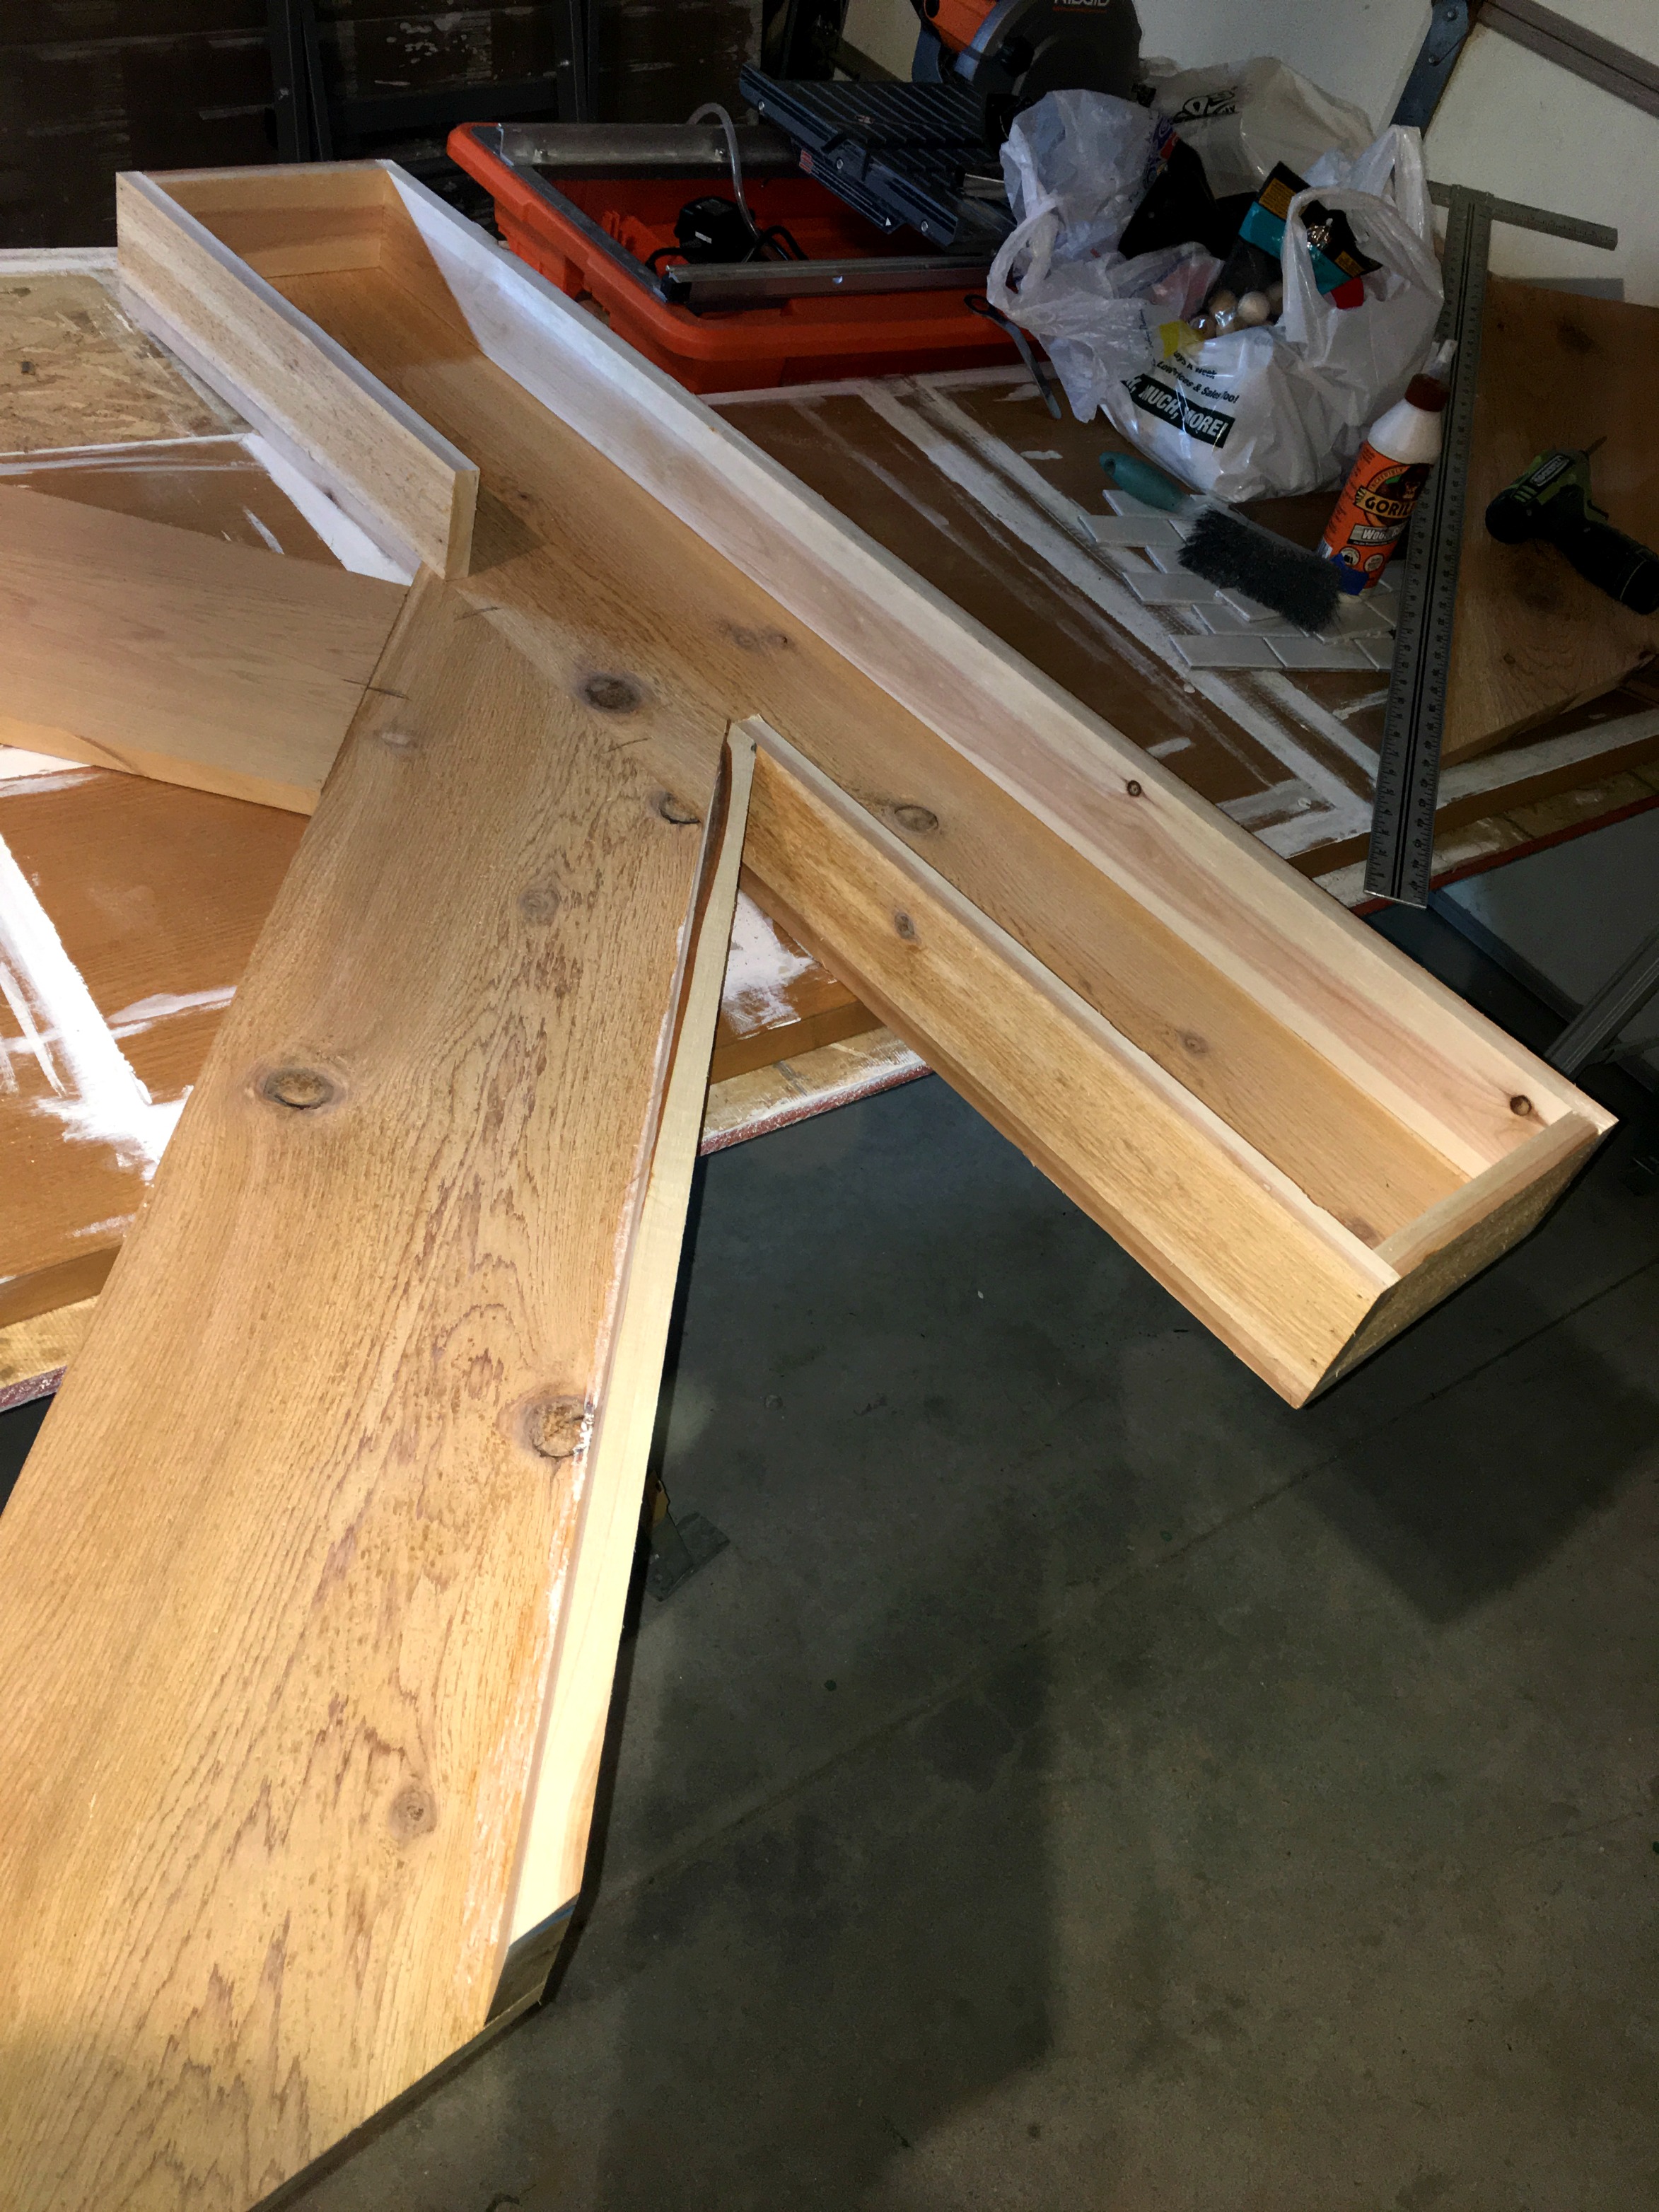
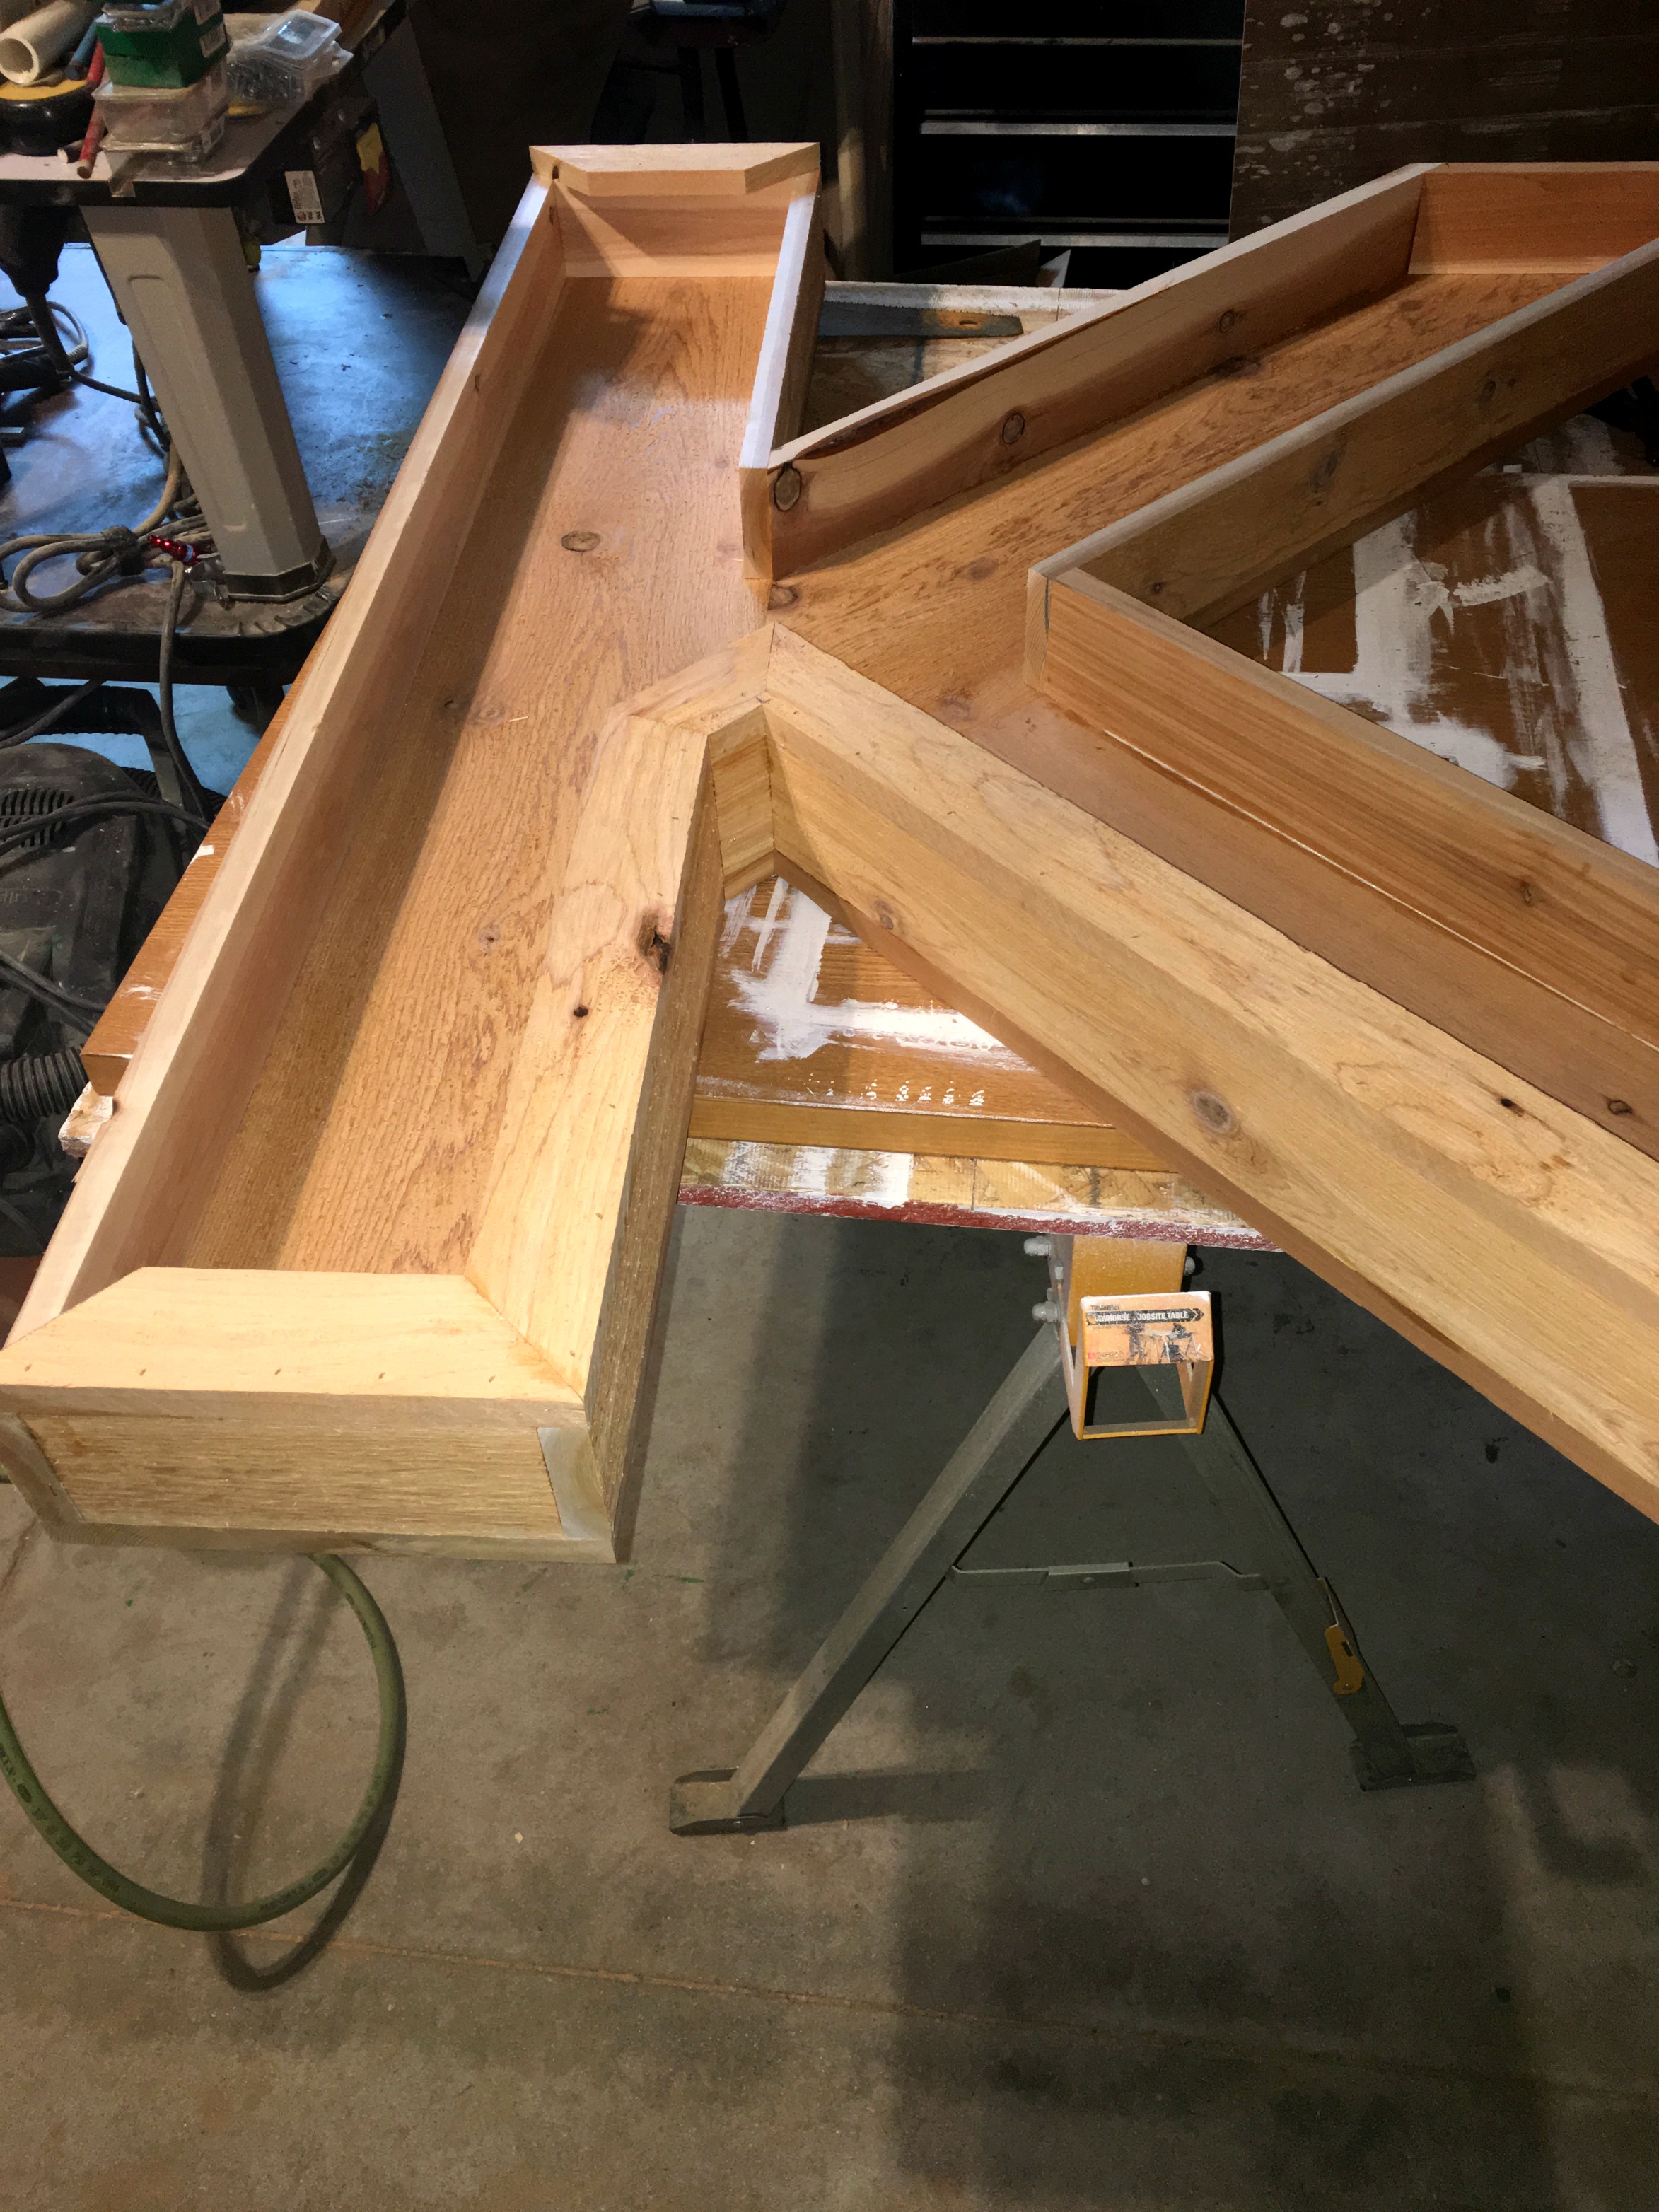
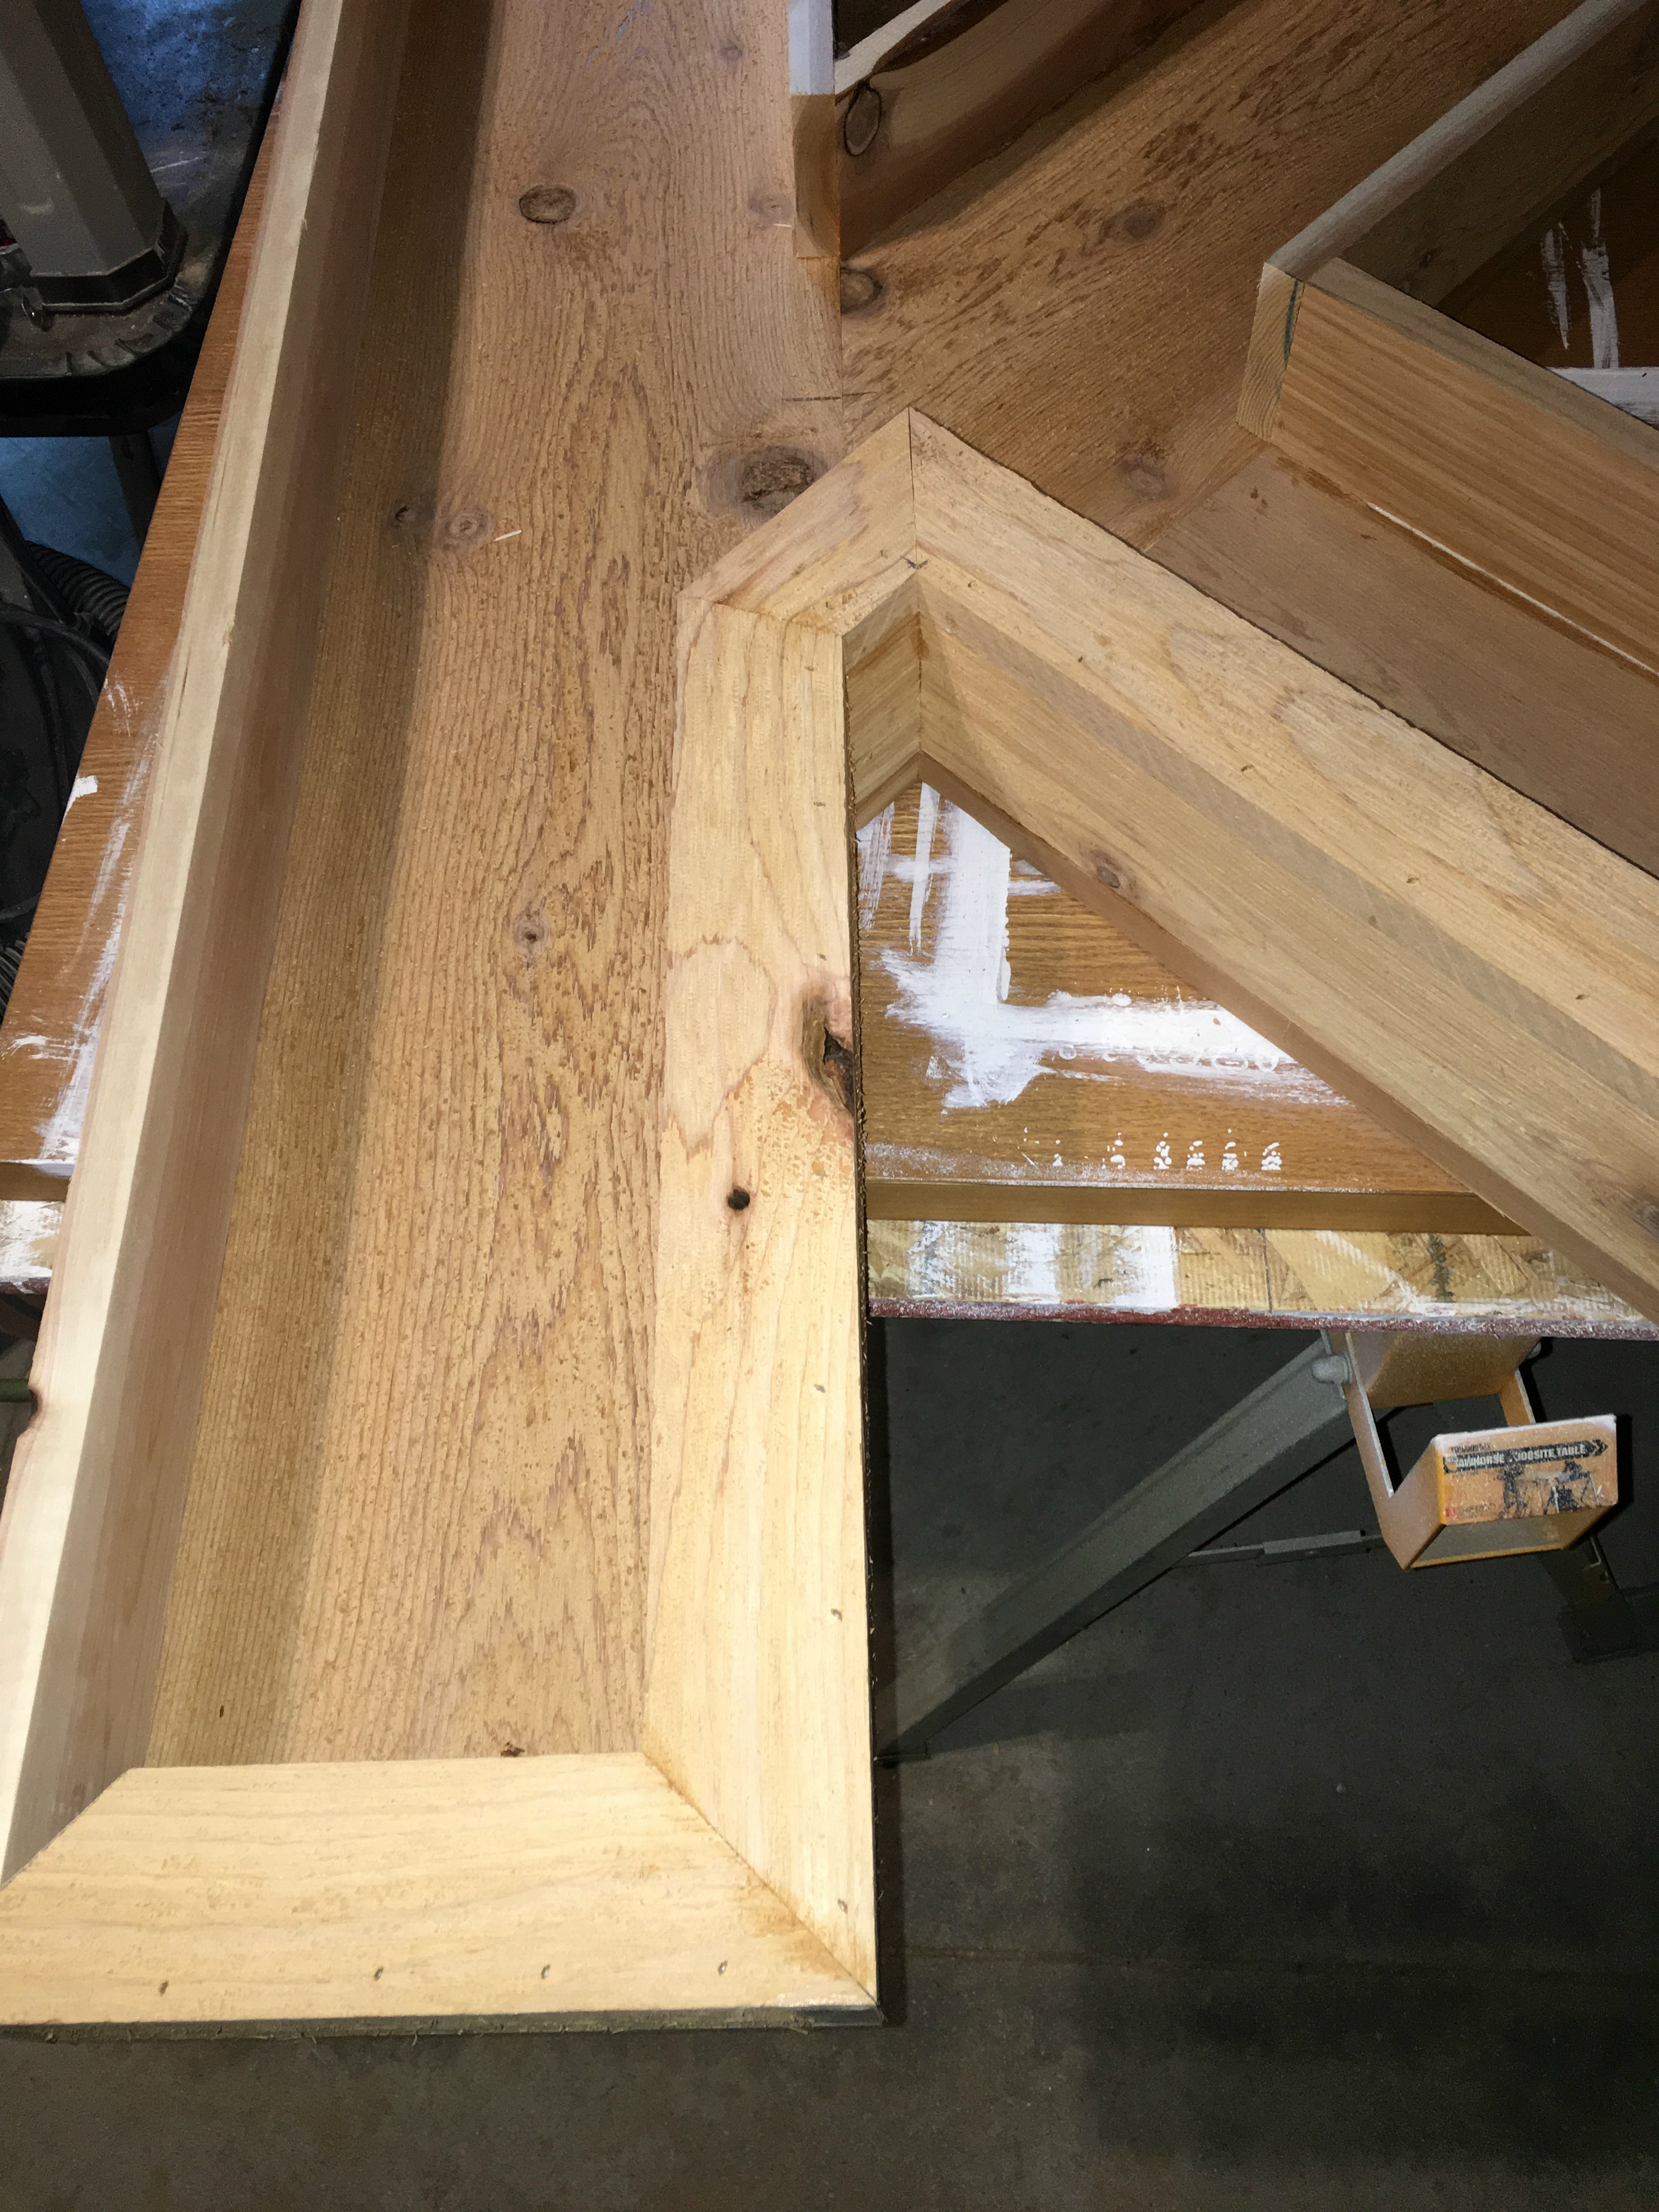
First, he made the base of the K using 1×12’s.
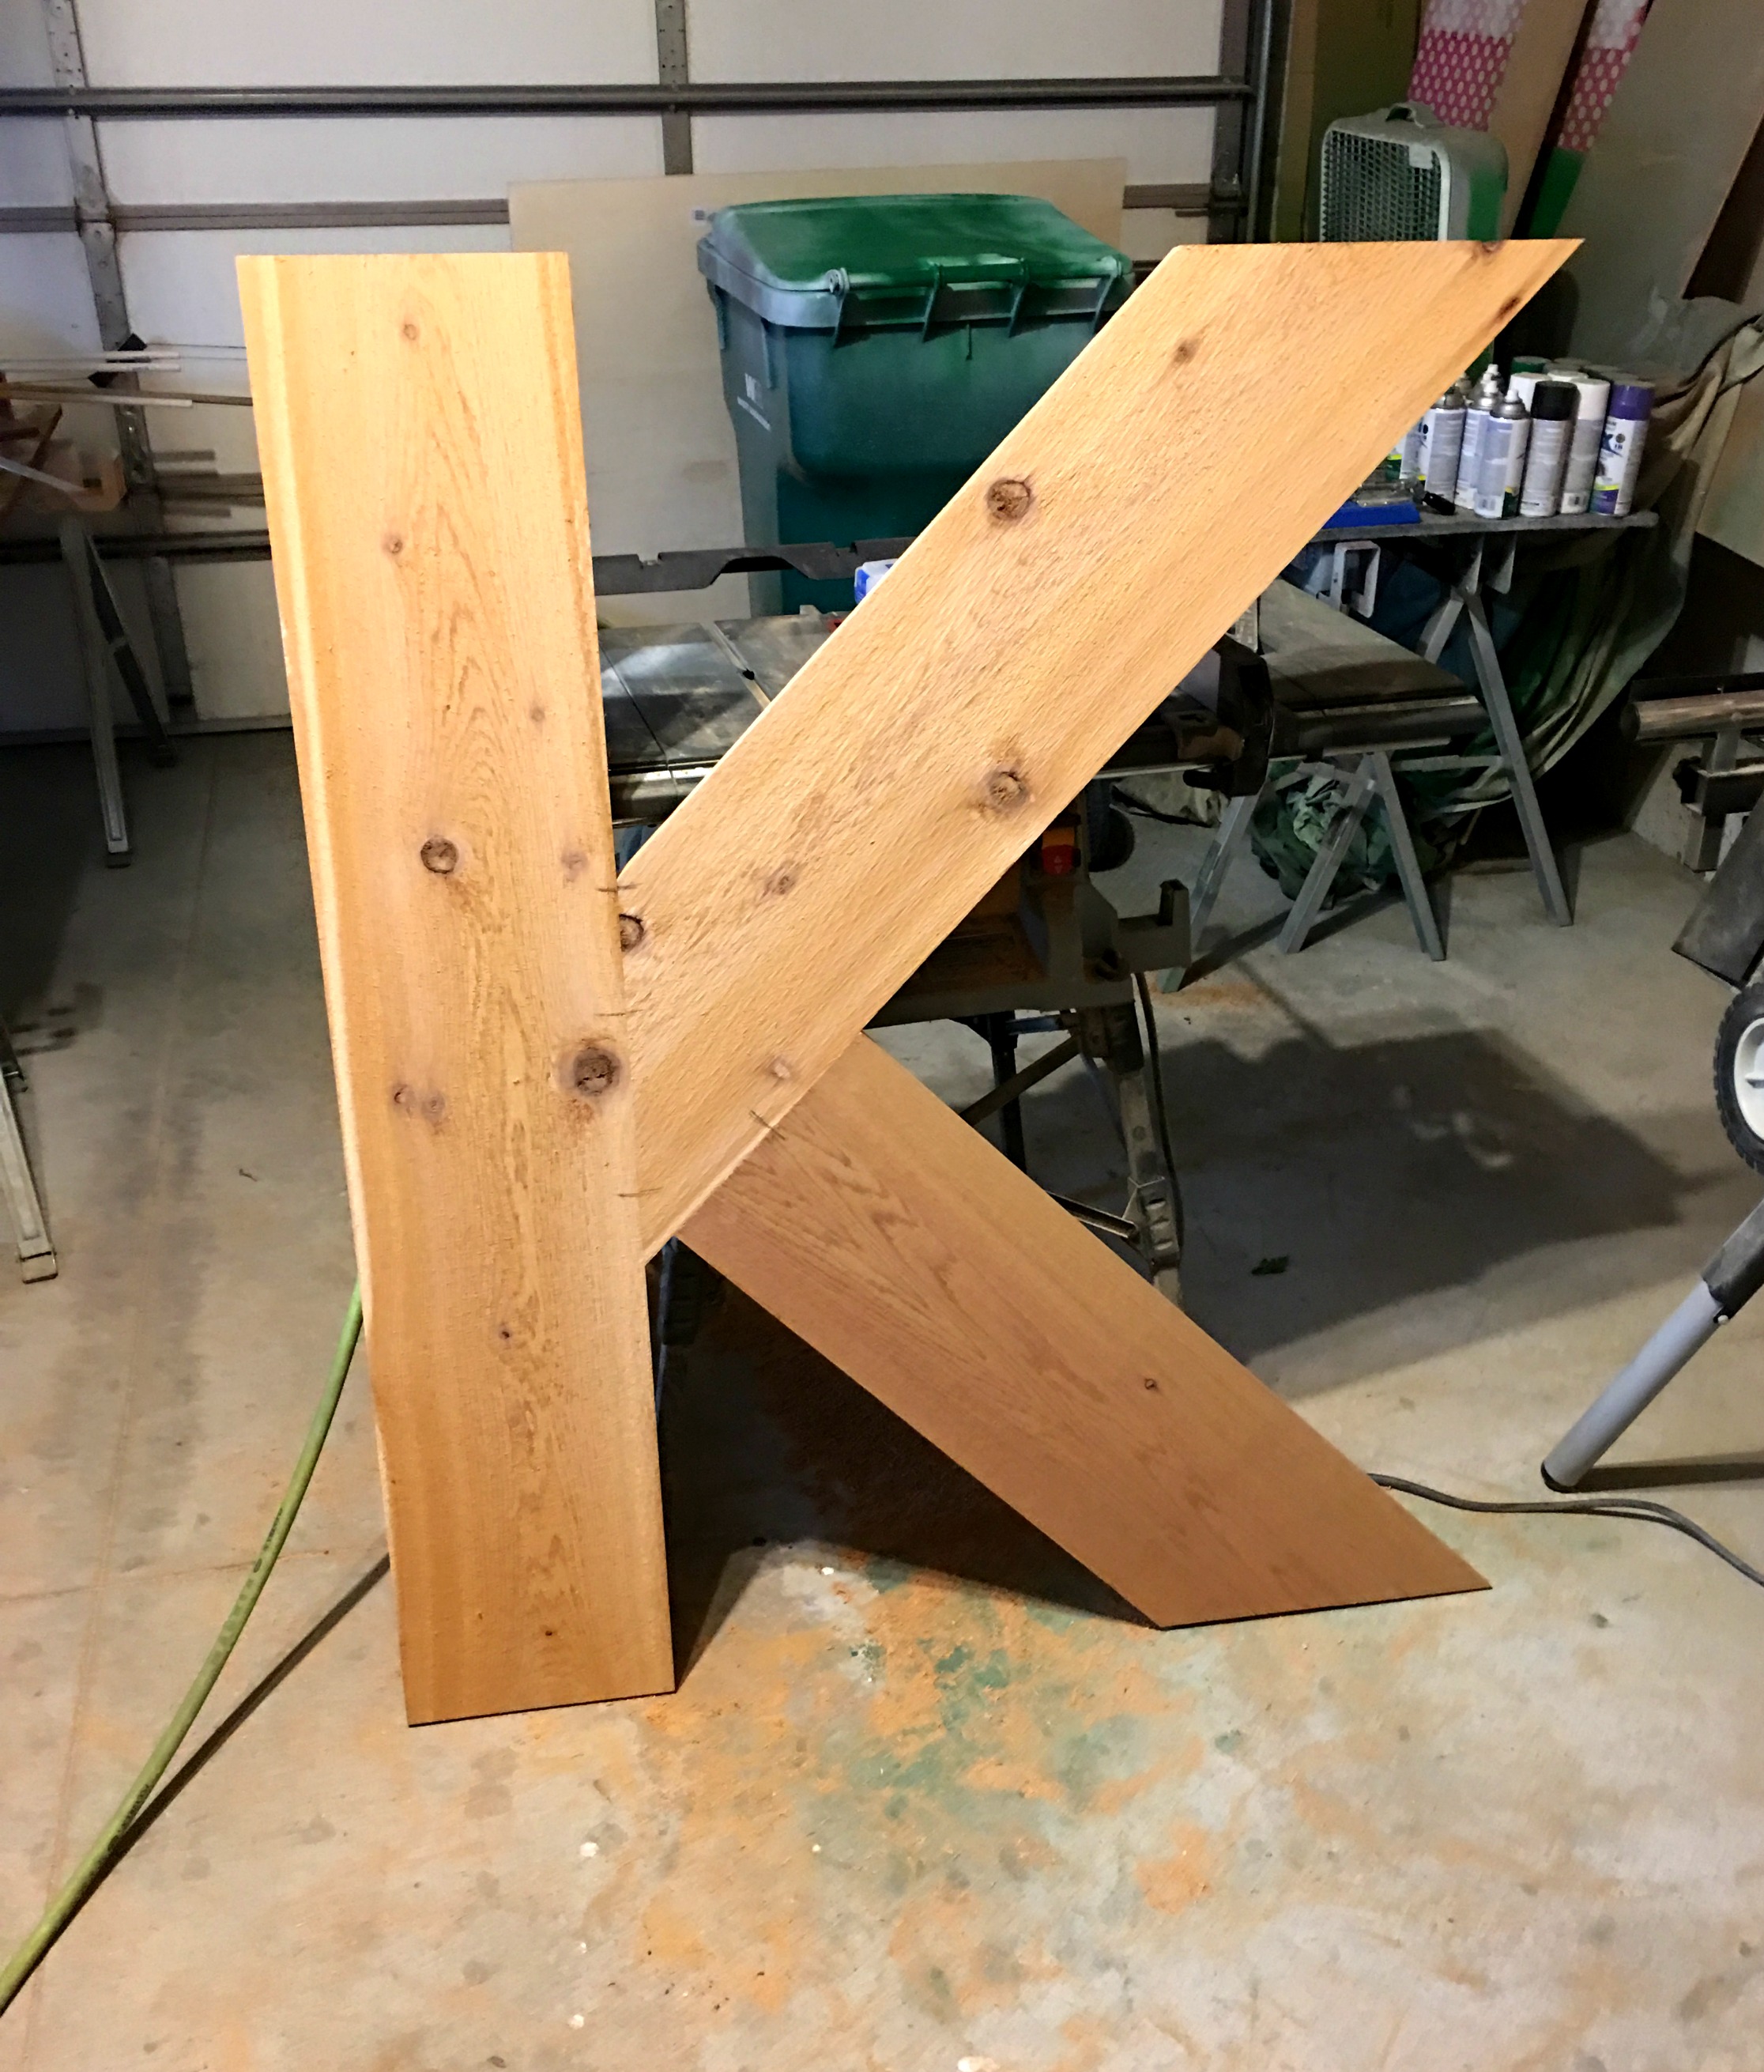
He used his kreg jig to piece this together as seen below.
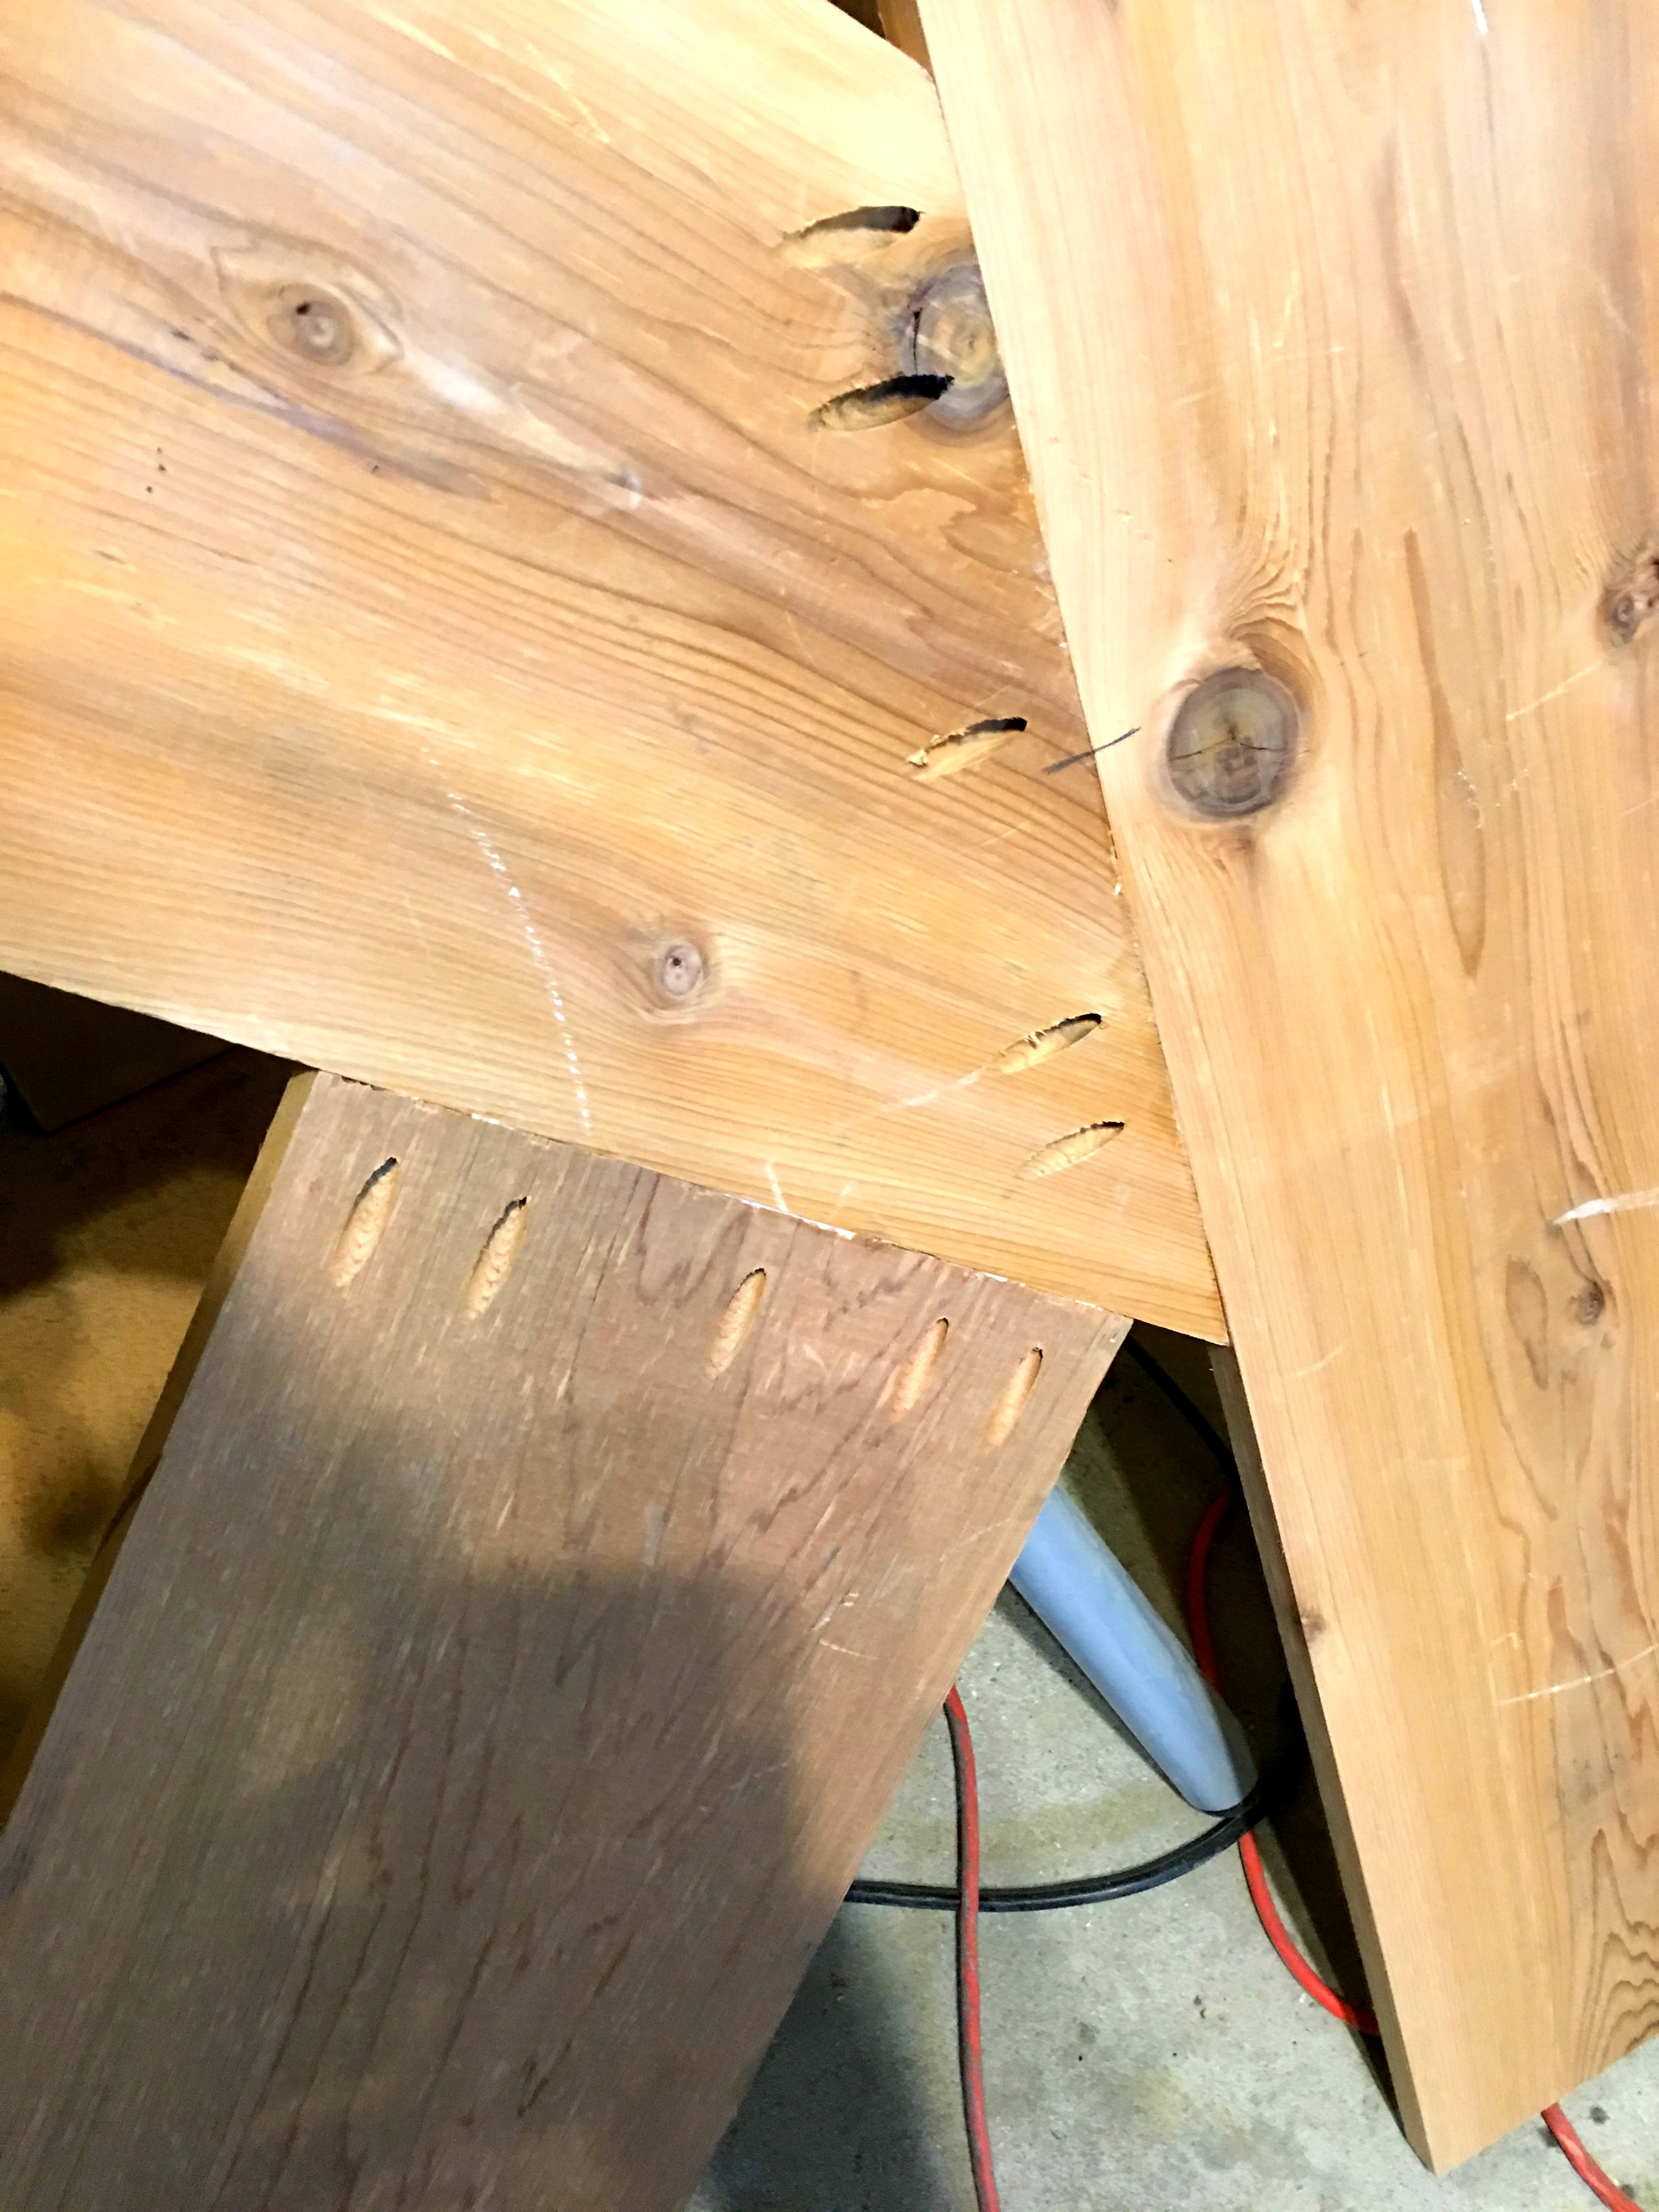
Next, he used the 1×4 pieces of cedar to complete the sides. Yes, it’s a lot of cuts and patience. He used his compound miter saw to cut everything.
After the sides are complete, next are 1×3’s for the front pieces. Again, a lot more cuts!
Next, he completed the inside planter slats using 1×6 cedar, using brad nails to secure in place. Once the slats were complete, he drilled small holes on the bottom of each one to allow for water to drain properly.
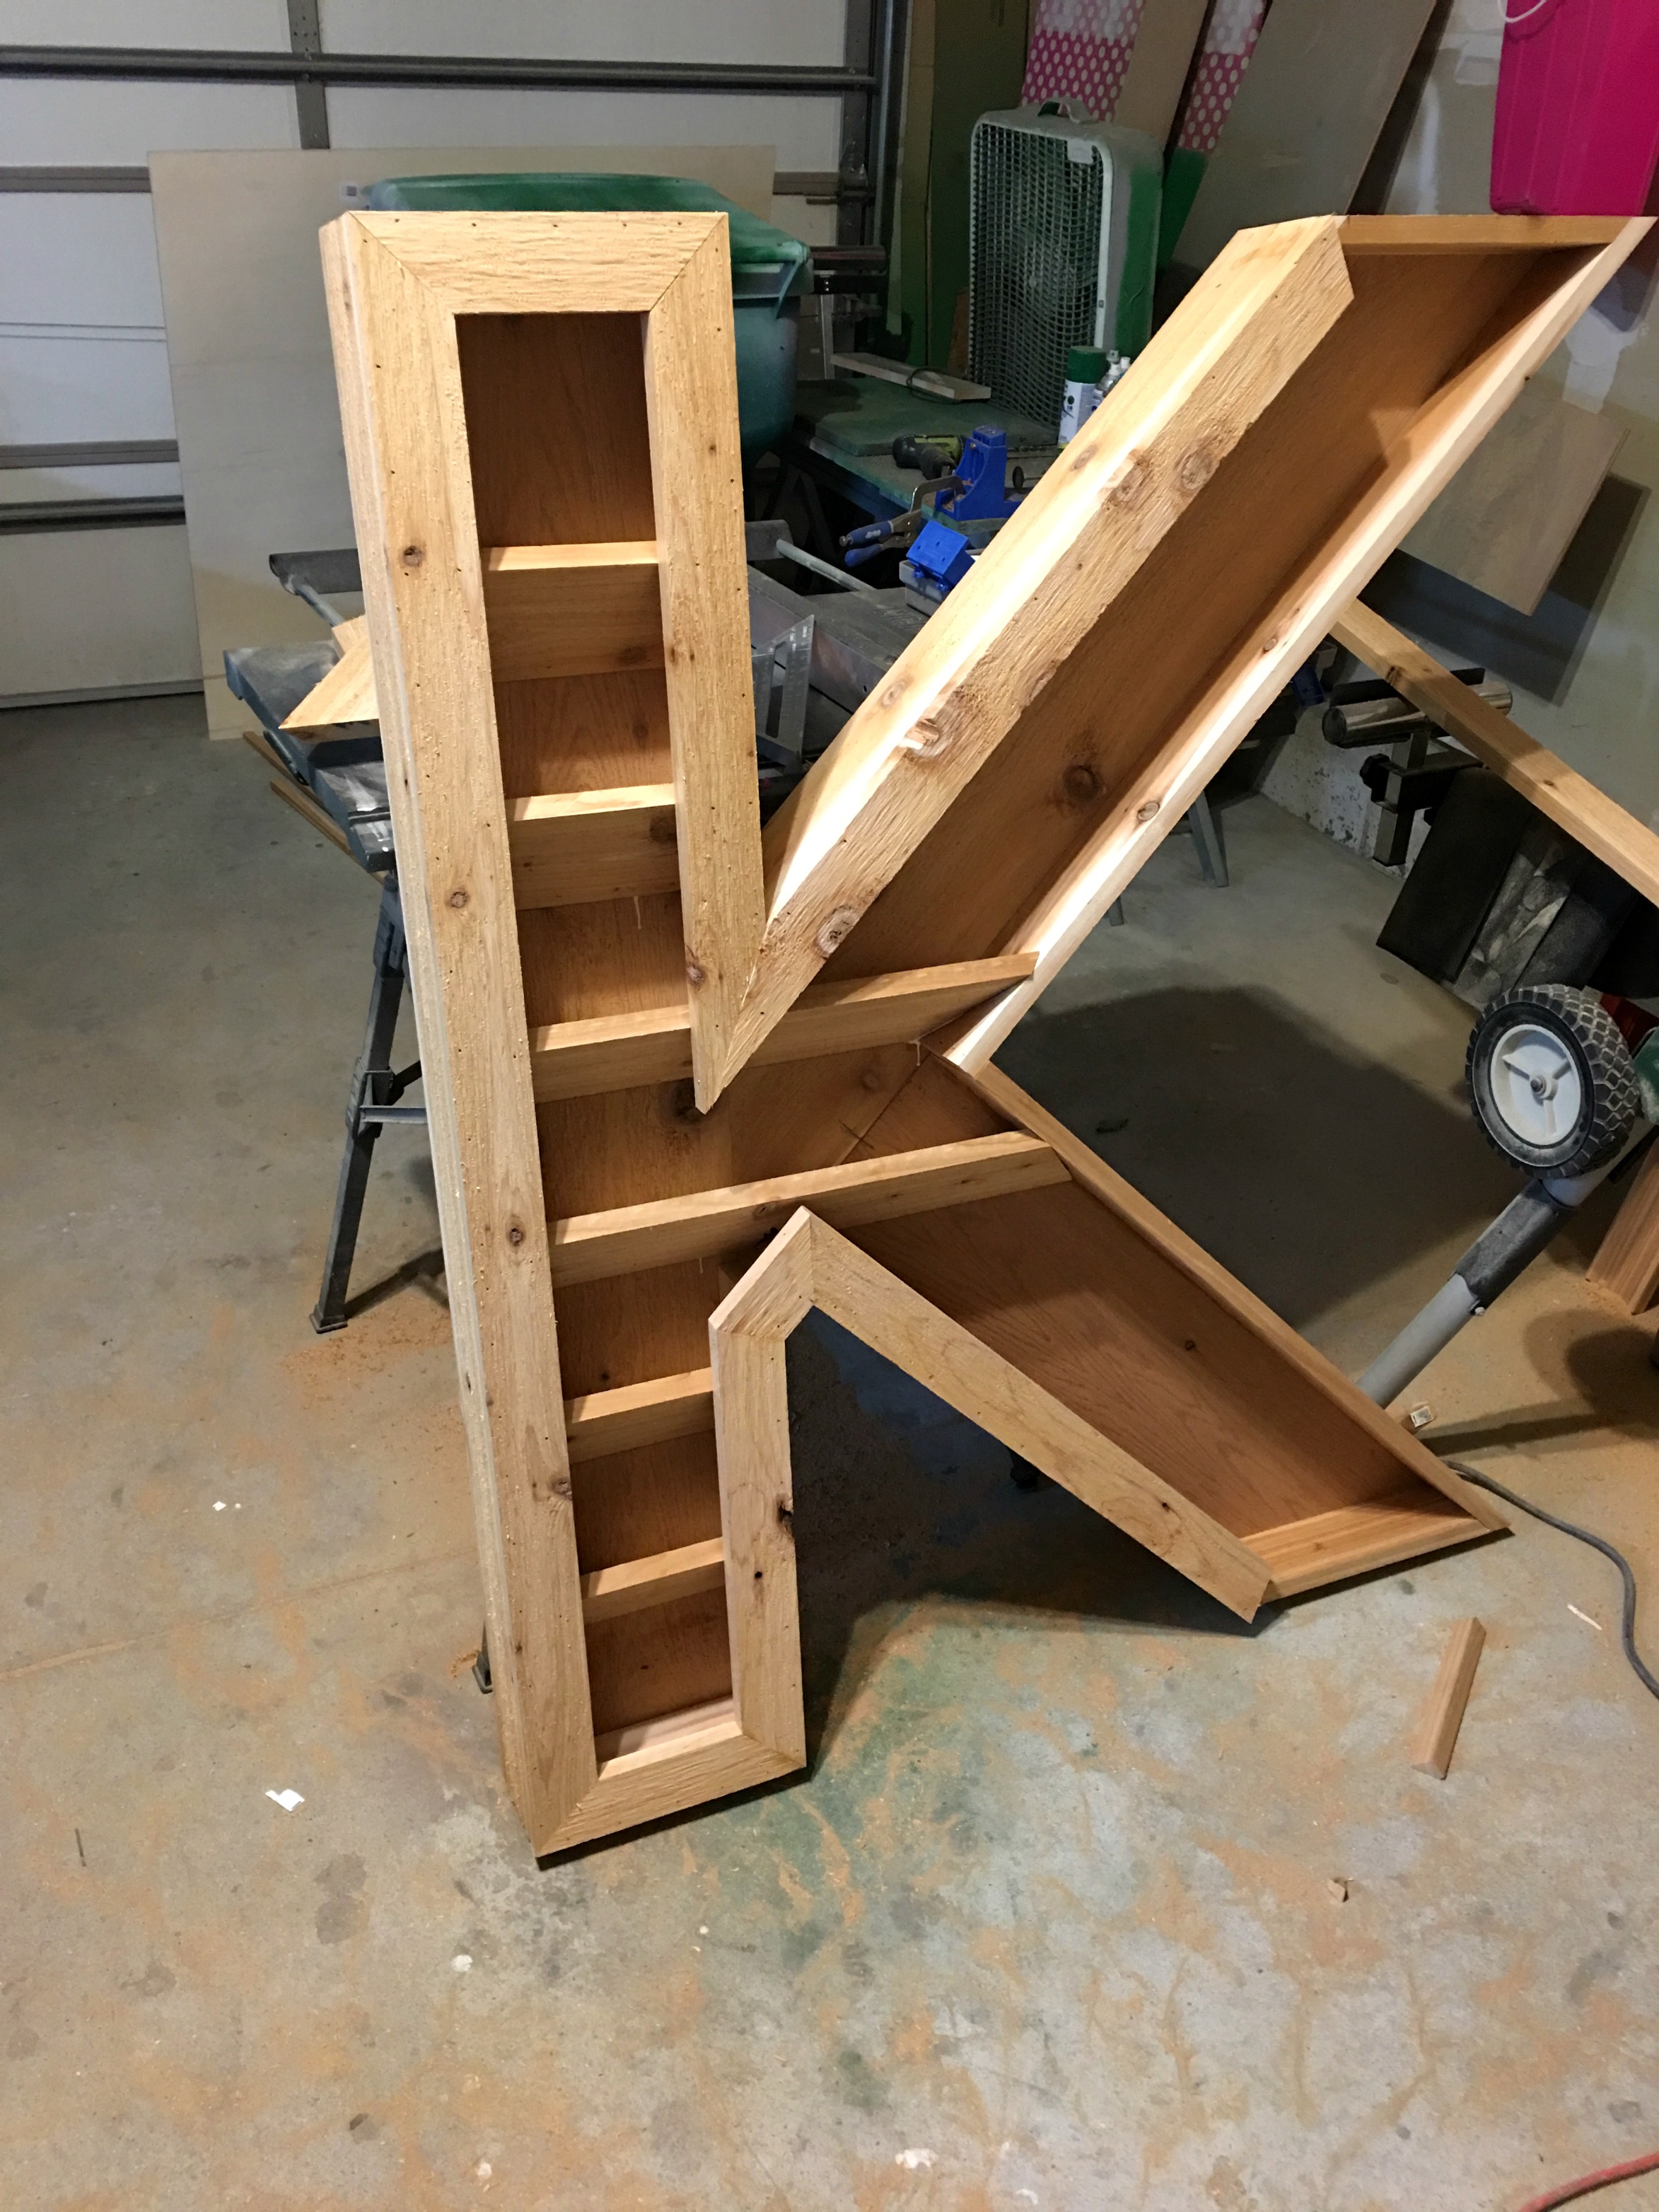
Lastly, he hung it up by screwing it directly into the siding using extra long screws.
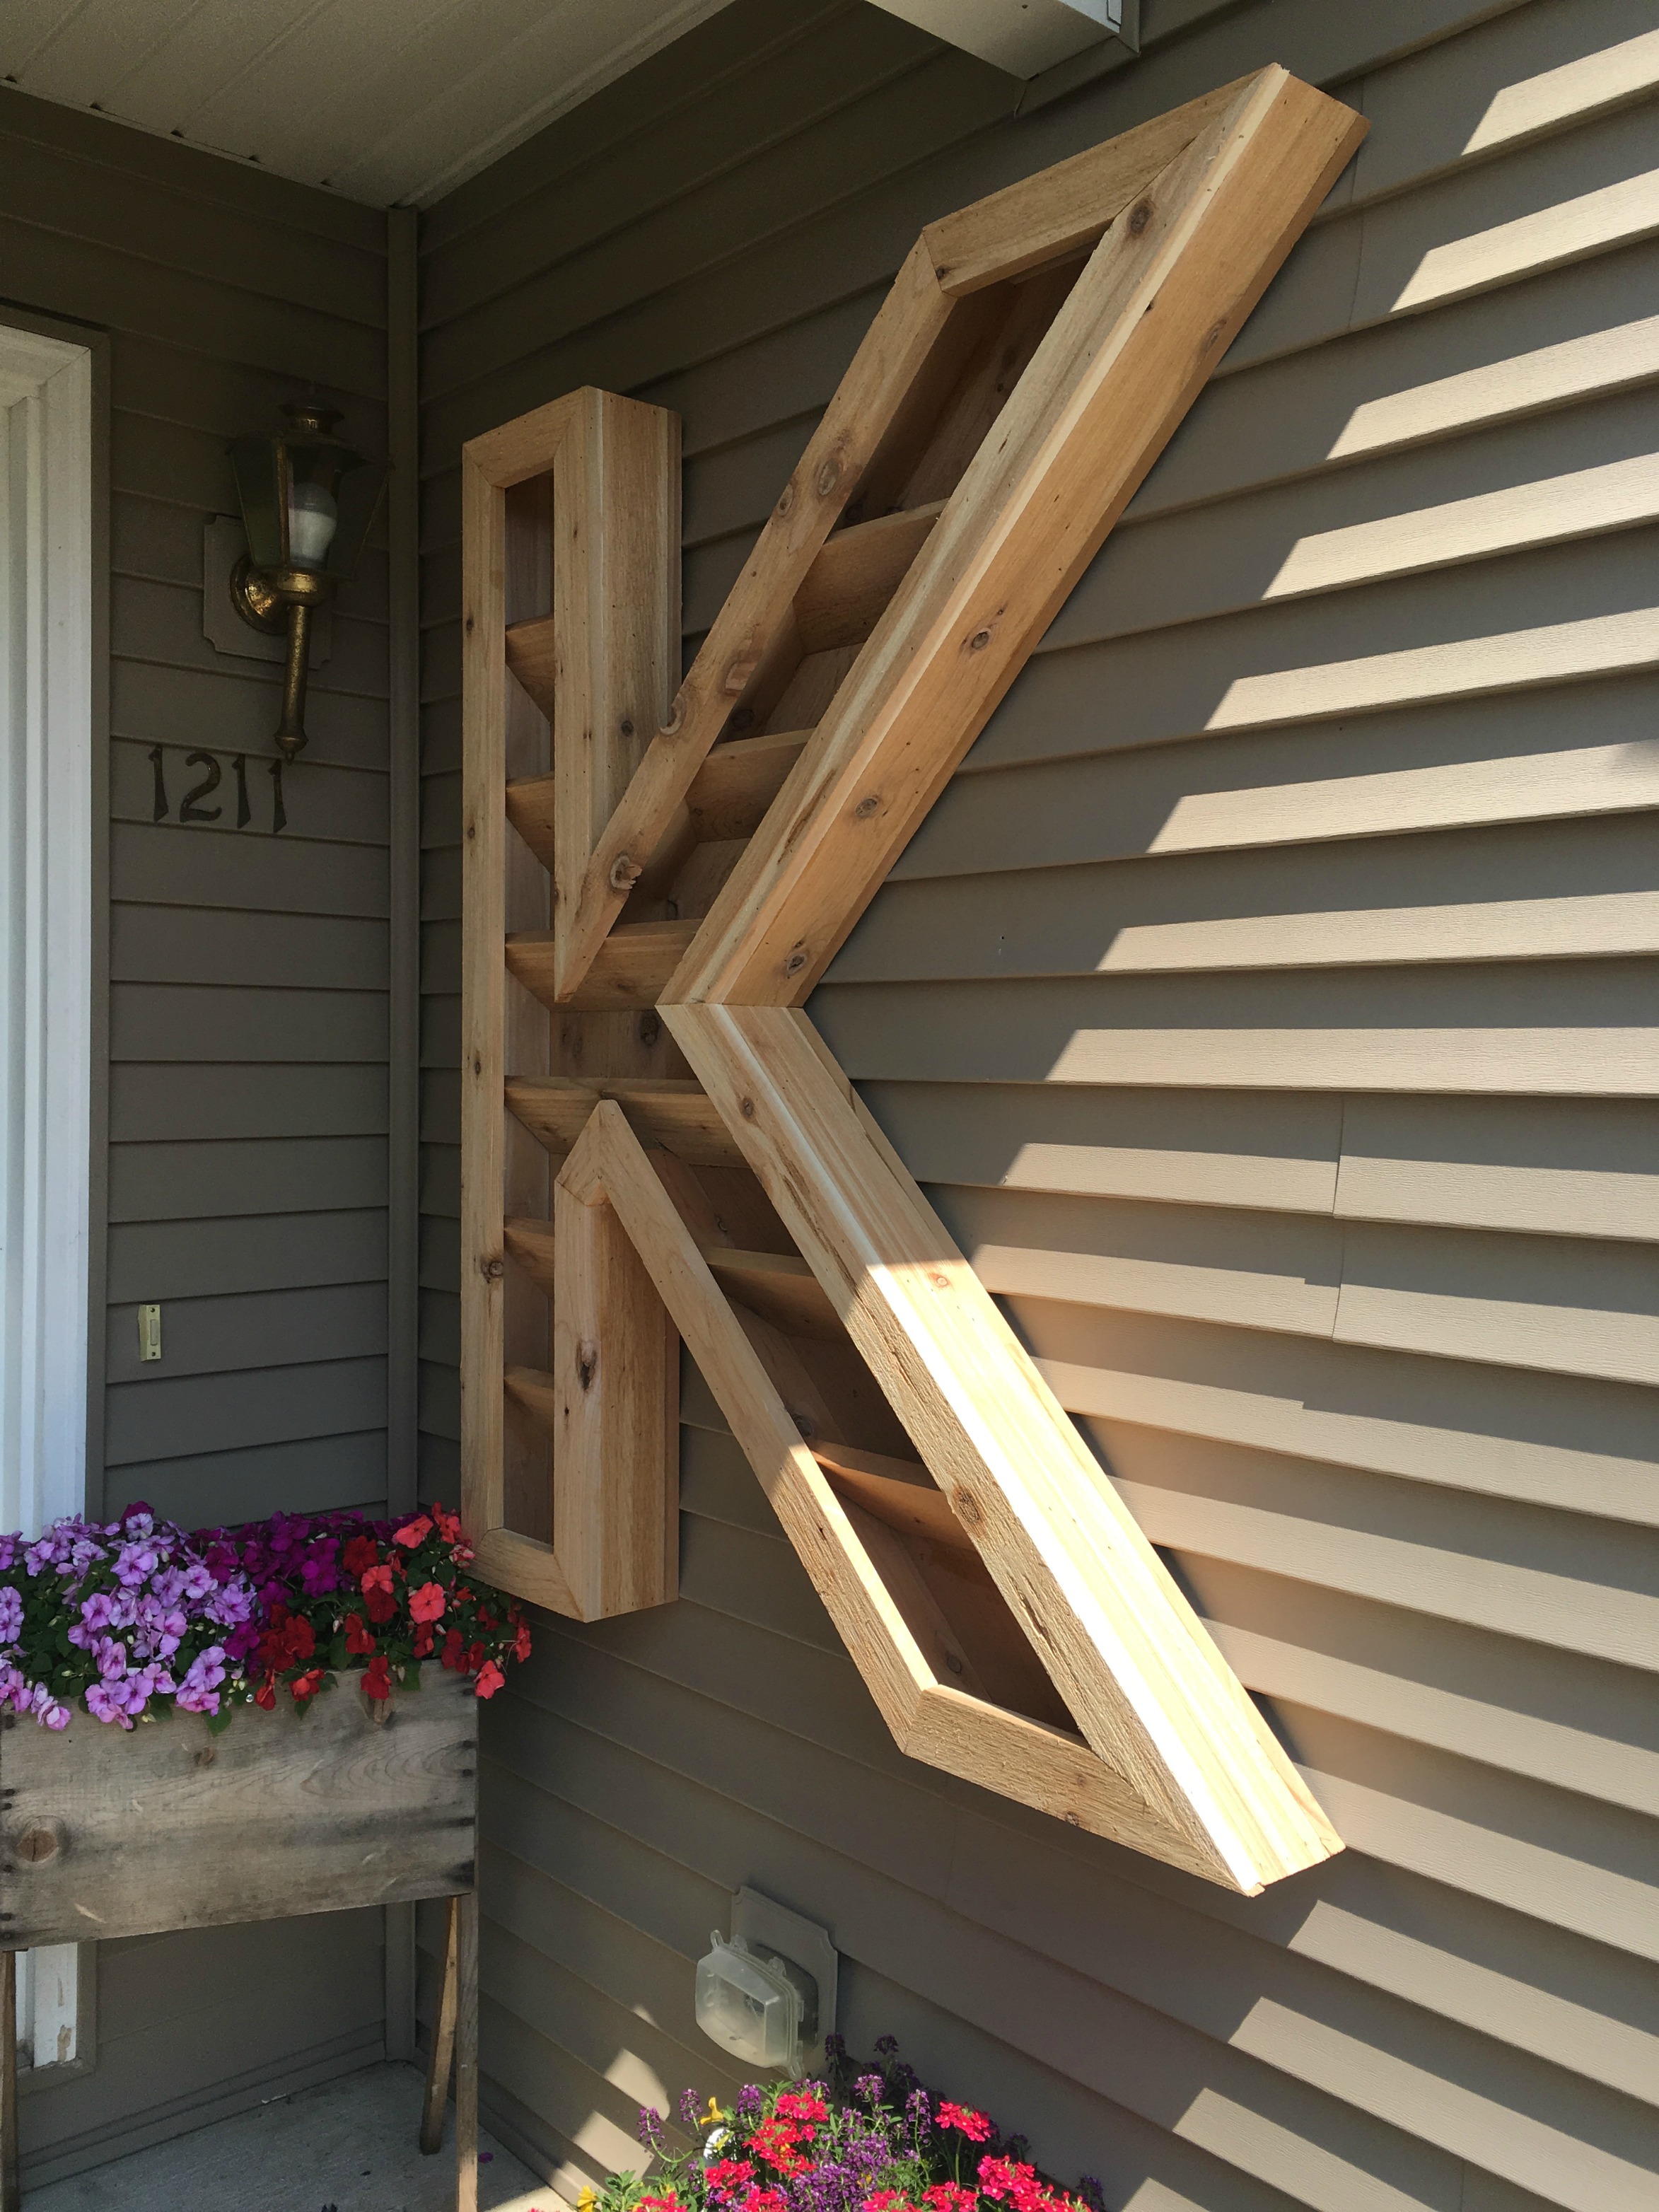

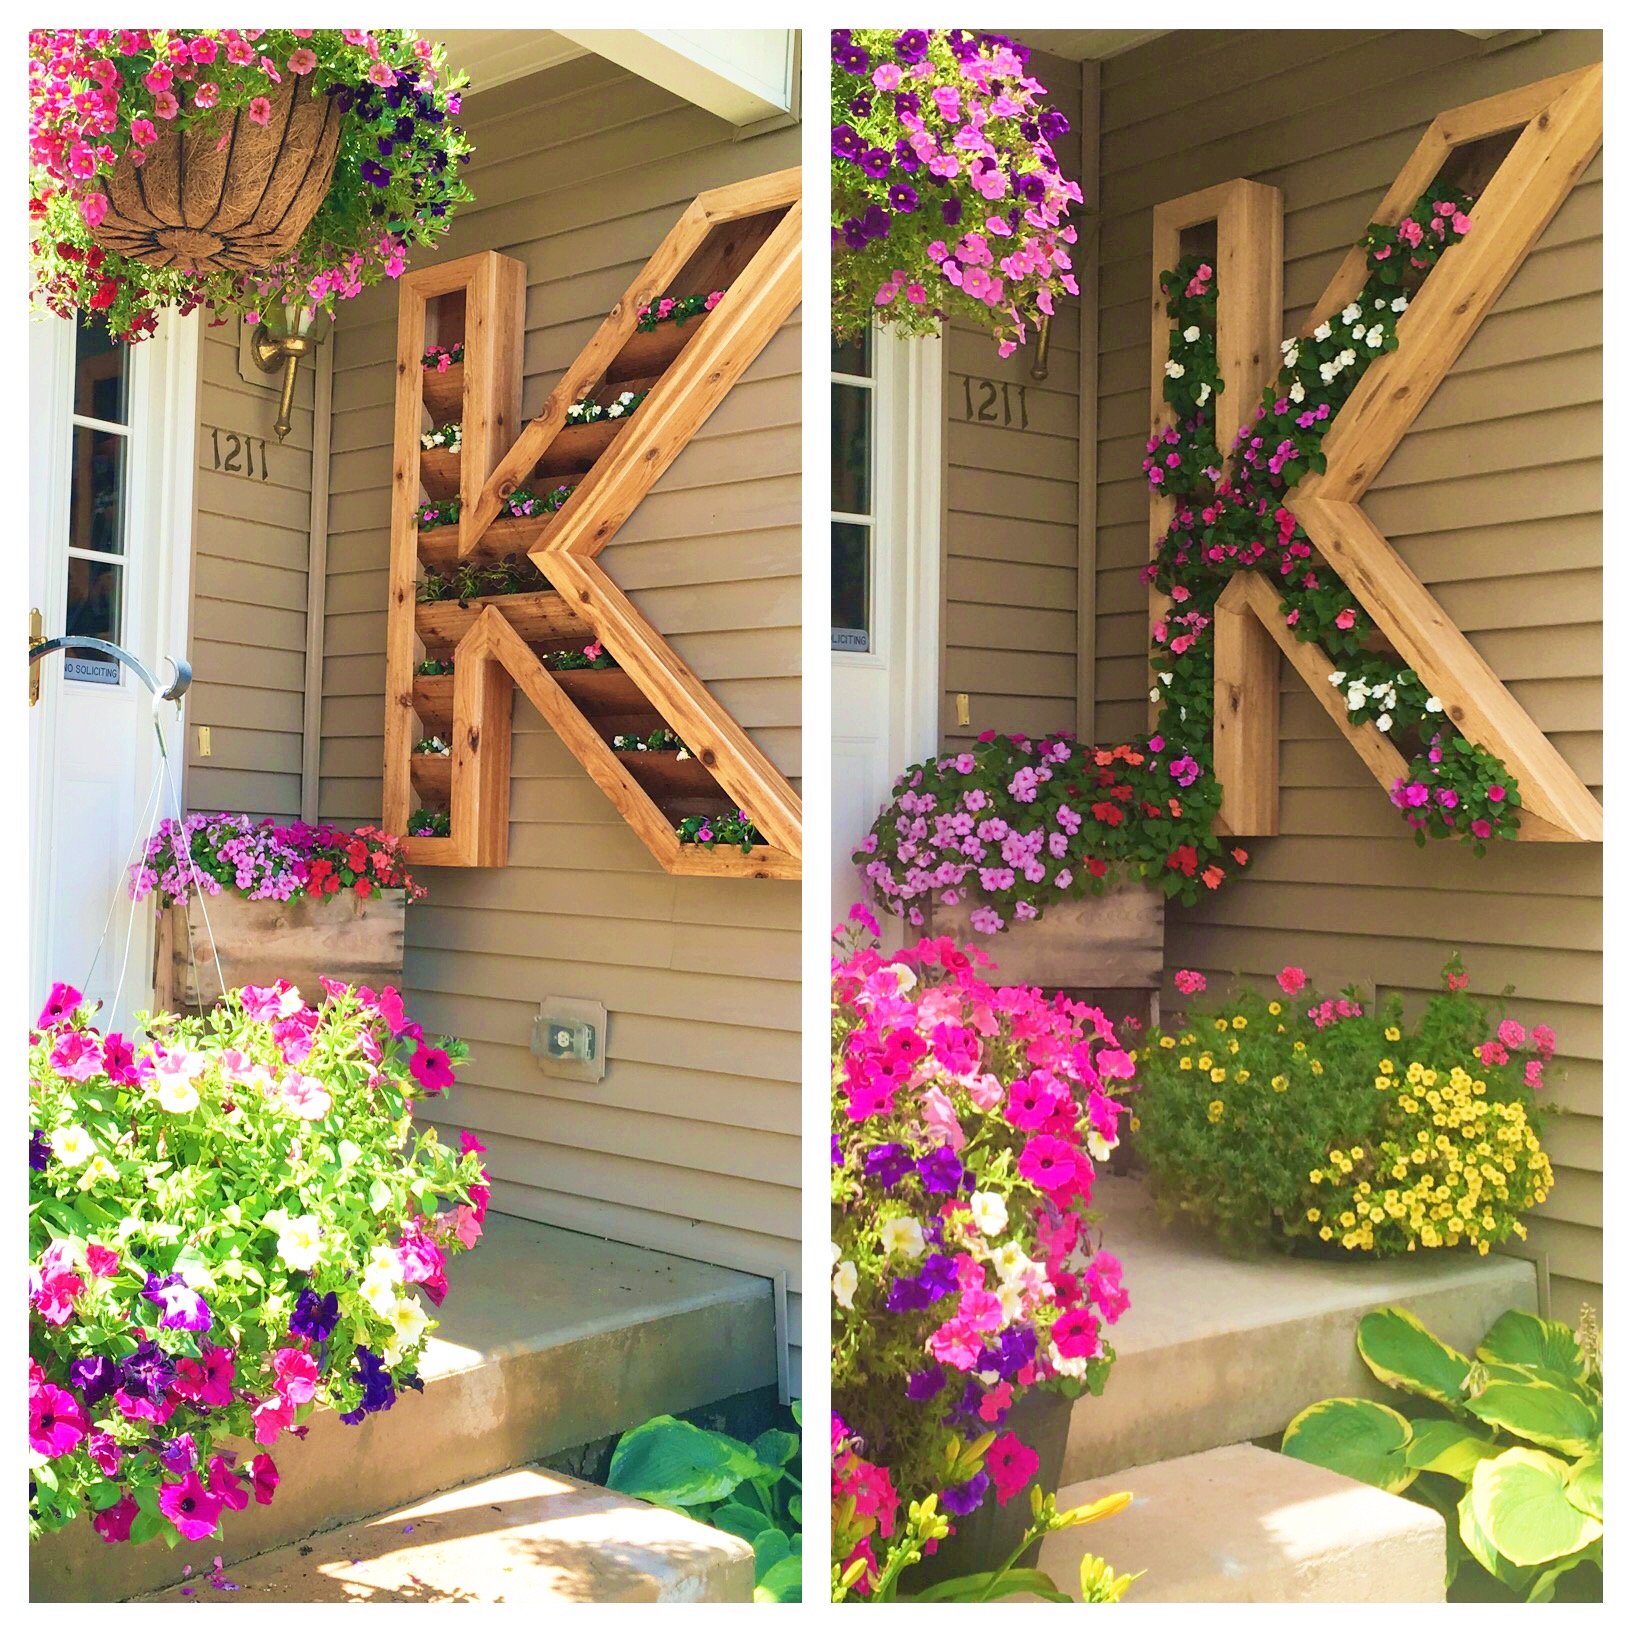
Next it was time to plant this baby! Since this is a fully shaded area, my options were limited as to which flowers would work in shade only. One thing I learned is don’t overpack with dirt – less is more. The first time you water them it was a bit of a mess with access dirt pouring out but they seem to be doing well so far! We only water about every three days or so since these flowers are very easy to keep alive.
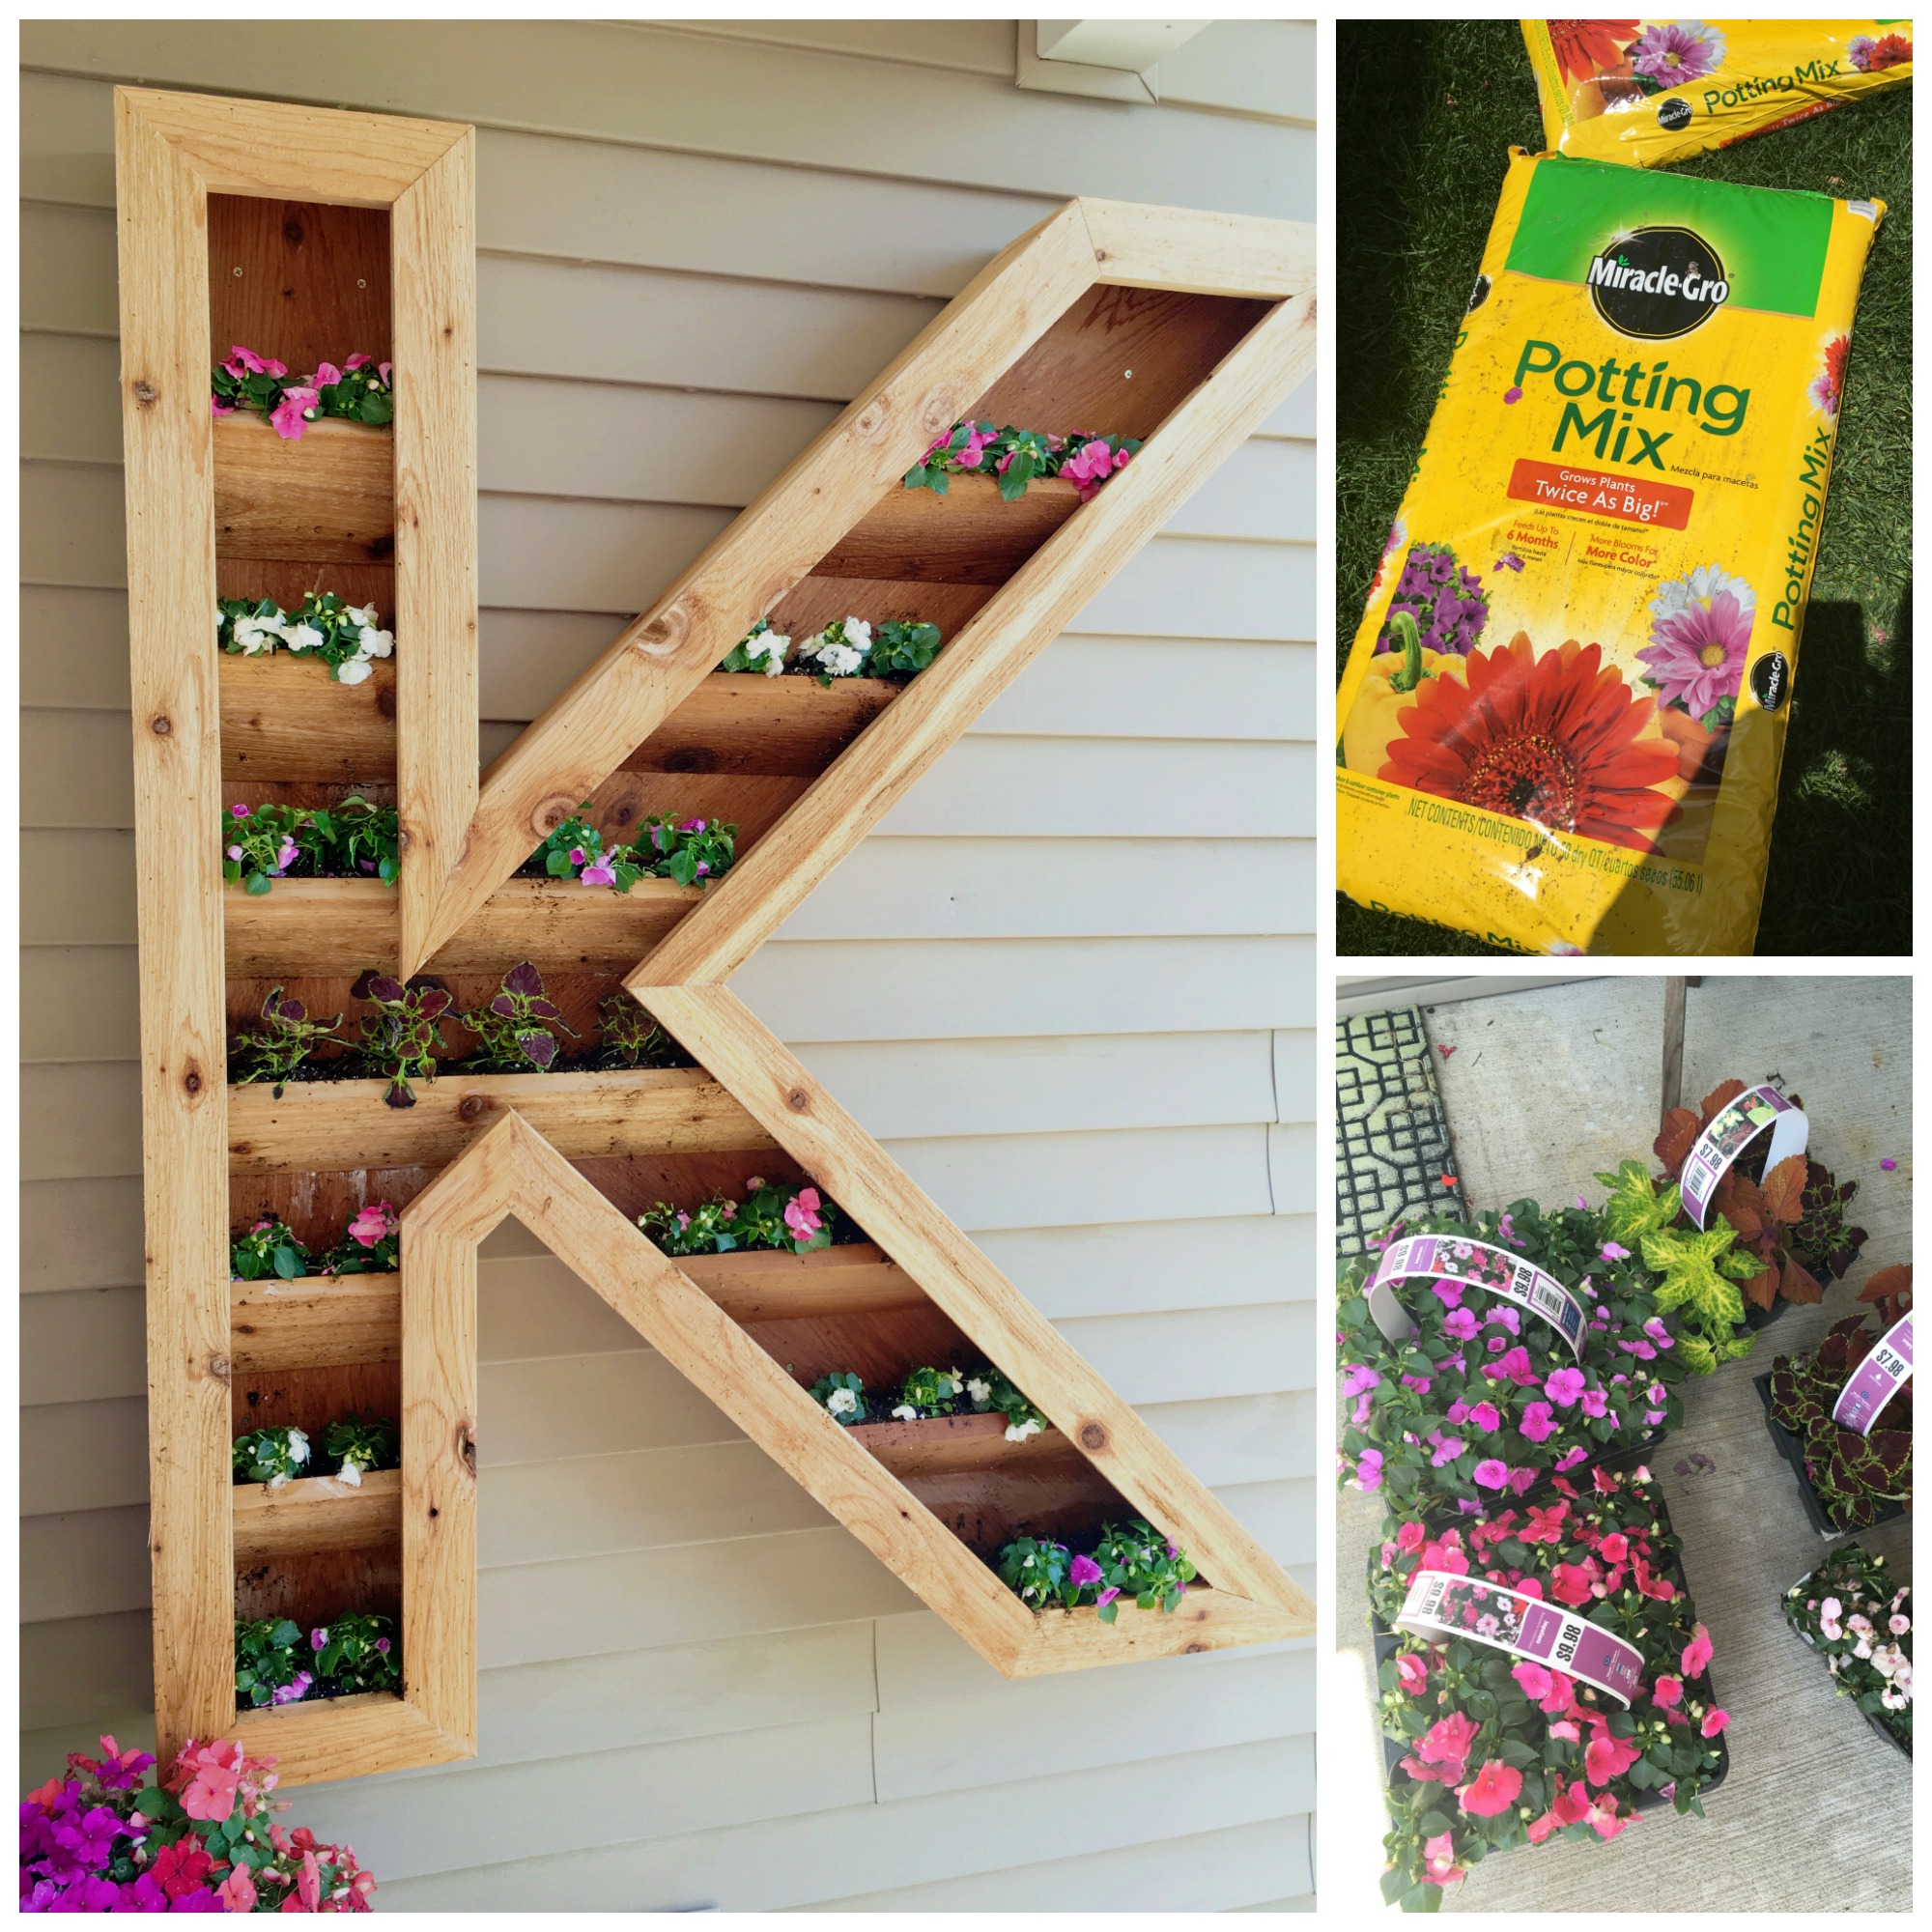
And that’s it!! I know, it’s a bit complicated if you’re not comfortable using saw’s and intricate cuts but I’m beyond happy with how this turned out! And it was 100% Ryan’s idea and the best part, a new and unique idea! Like I said, your options are endless! I have been brainstorming different ideas and how cool would this monogram be displayed at a wedding filled with real or fake flowers?! Also, since this is made of cedar and our siding is vinyl so we don’t need to worry about any damage.
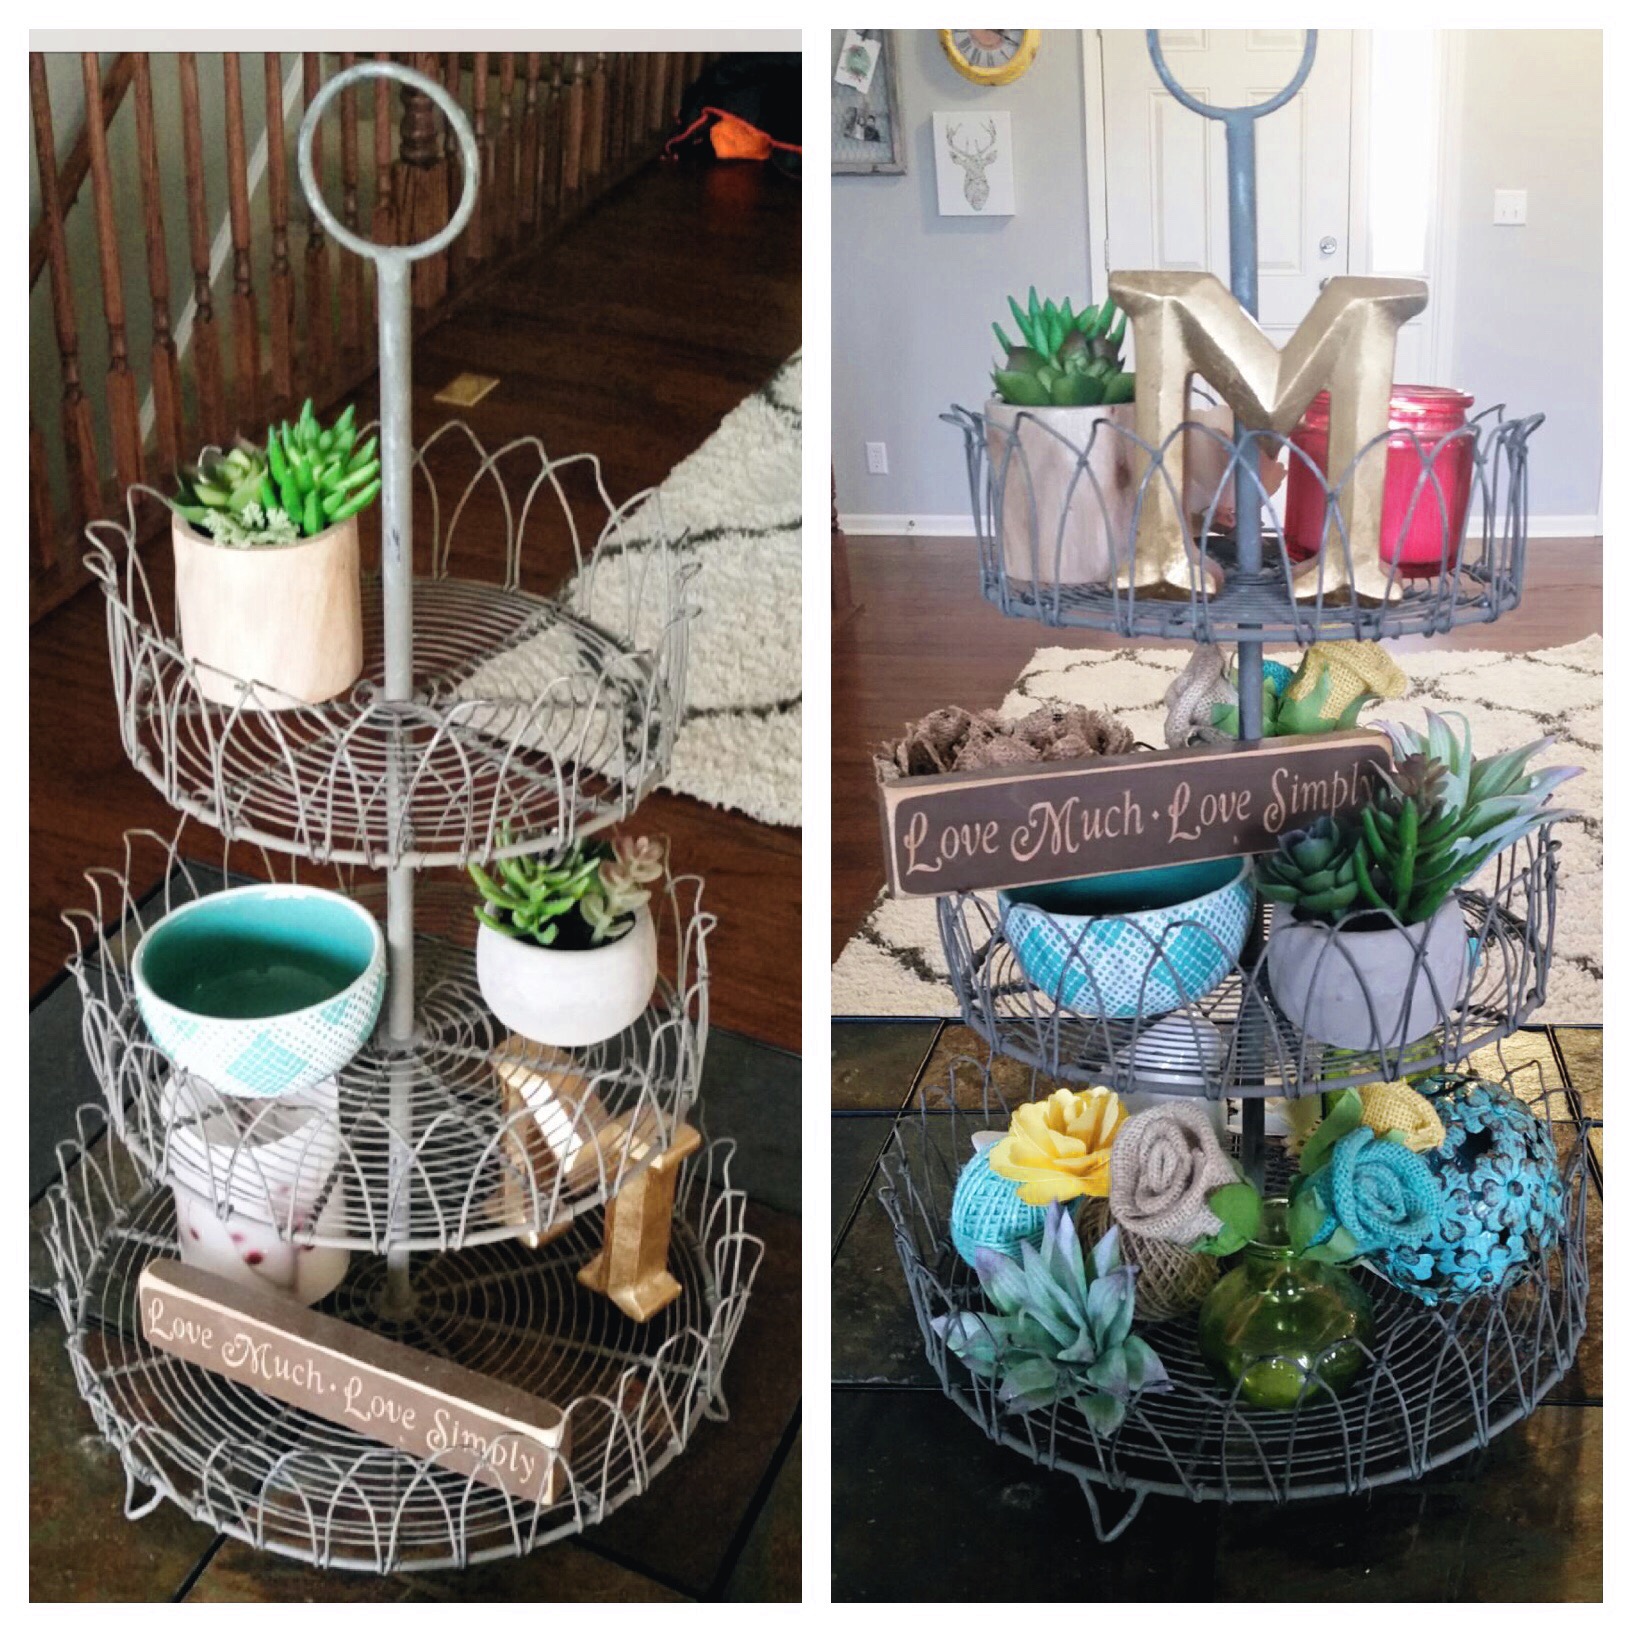
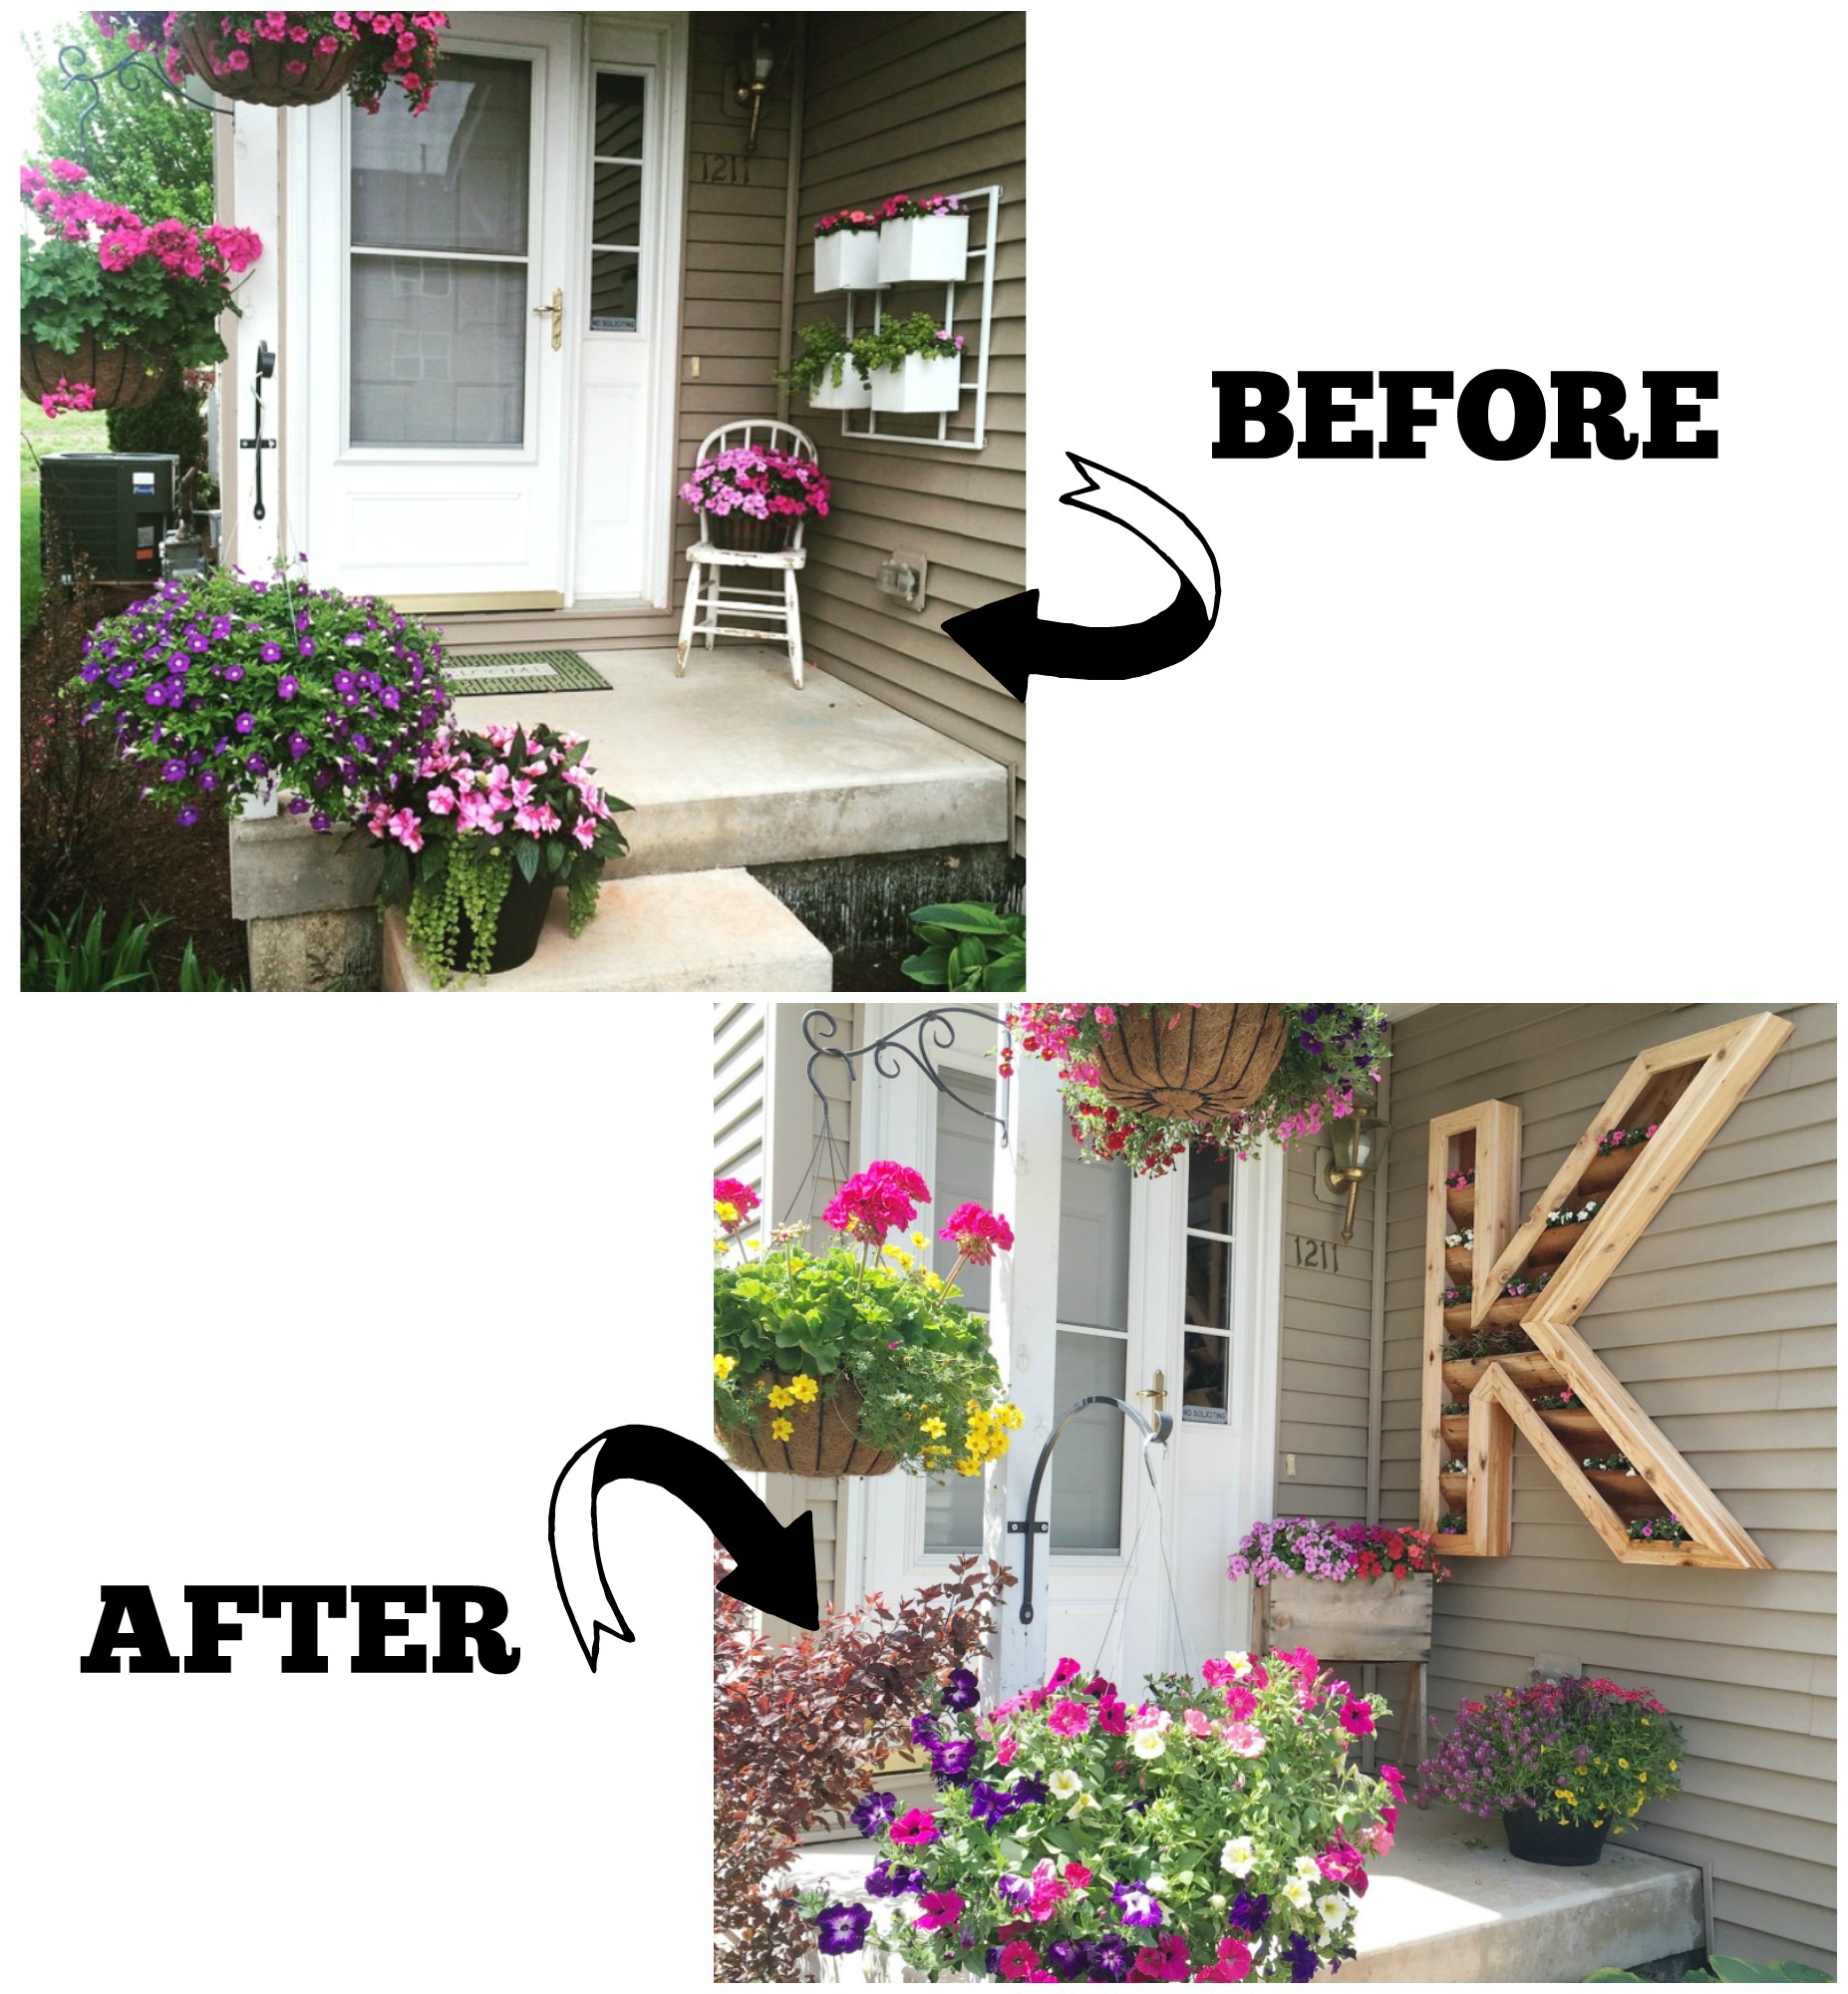
And here’s a little before and after….what a difference a DIY makes!
We hope you love it as much as we do! If you give it a try, be sure to share and tag me on Instagram so I can see! Username is @ellerydesigns. Happy planting!!
UPDATE JULY: This planter is growing even better than expected and here is an updated photo!
Linking up to: Tatertots & Jello, I Heart Nap Time, Lil’ Luna, Somewhat Simple, The 36th Avenue